
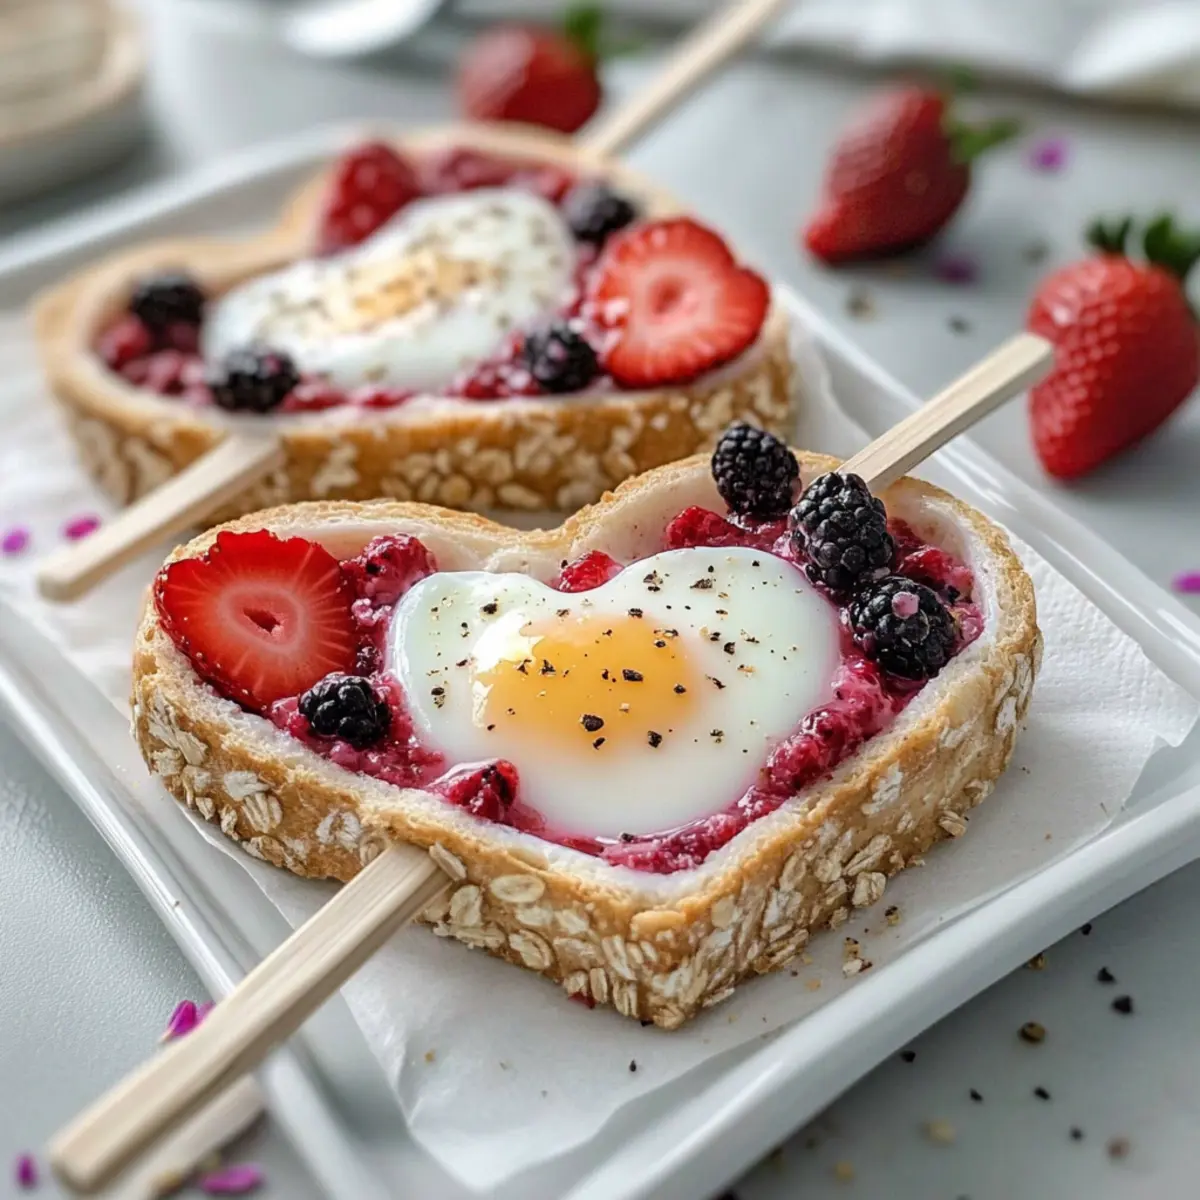
As I sifted through my kitchen trying to find inspiration for Mother’s Day, I stumbled upon a delightful idea: Frozen Yogurt Heart Pops. These charming treats are not only visually captivating but also a fun, healthy way to show mom just how much you care. With their vibrant colors and refreshing taste, these pops are easy to whip up and even more enjoyable to customize with your favorite flavors or fruits. Best of all, they’re a hit with kids, making them the perfect festive addition to your celebration. Ready to bring a touch of sweetness to your mom’s special day? Let’s dive in!

Why Are Frozen Yogurt Heart Pops Perfect?
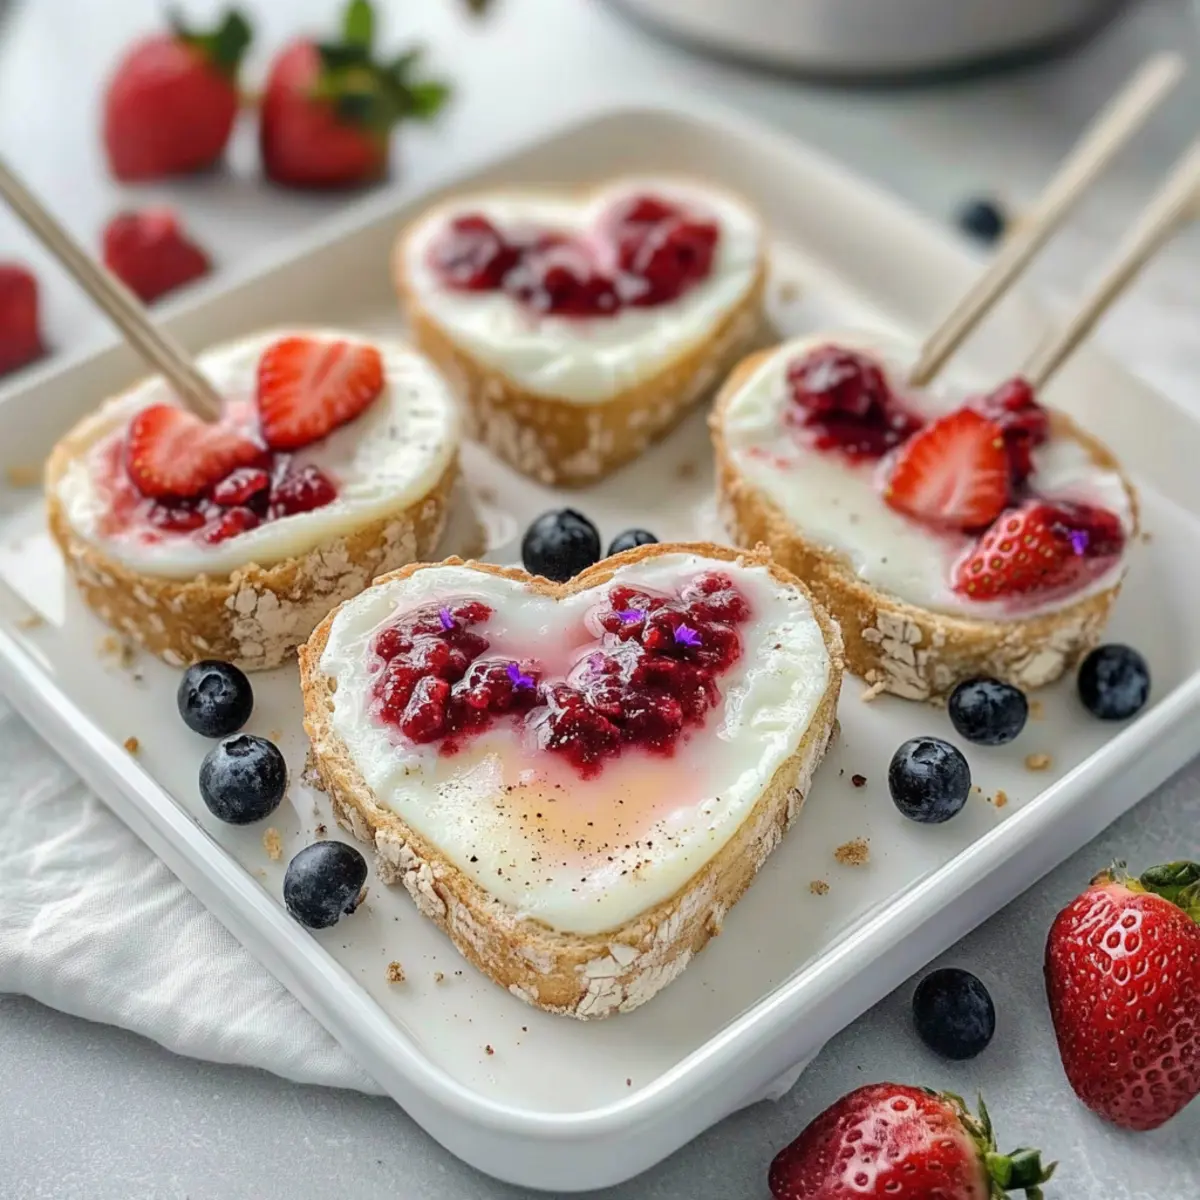
Refreshing, Fun Treat: These adorable heart pops are a delightful way to celebrate Mother’s Day with a healthy twist! Customizable Flavors: You can mix and match your favorite fruits or yogurt flavors, ensuring everyone finds a combination they love. Kid-Friendly Fun: Kids will enjoy helping to create these colorful treats, making it a fun family activity. Easy to Make: With simple ingredients and minimal prep time, you’ll have vibrant frozen yogurt pops ready to impress in no time. Chill and Serve: Just prepare, freeze, and serve—perfect for busy schedules! To make your day even more special, consider pairing them with other heart-themed dishes, such as heart-shaped sandwiches or mini pizzas!
Frozen Yogurt Heart Pops Ingredients
For the Pops
• Greek Yogurt – Use plain or flavored yogurt for a creamy base; vanilla adds a delightful twist.
• Fresh Fruit – Choose your favorite berries or sliced fruits to mix in or layer; strawberries and blueberries are especially festive.
• Honey or Maple Syrup – Sweeten to taste for added flavor; adjust based on the tartness of your fruit.
• Vanilla Extract – A splash enhances the overall flavor of the yogurt.
• Coconut Milk – Substitute part of the yogurt for a tropical twist; it adds creaminess.
For the Molds
• Silicone Molds – Choose heart-shaped molds for that perfect presentation; they make popping out the treats easier.
• Popsicle Sticks – Essential for easy holding and enjoying these frozen yogurt heart pops; add them after the first freeze.
These Frozen Yogurt Heart Pops are a charming and healthy way to celebrate Mother’s Day, bursting with vibrant flavors that everyone will adore!
Step‑by‑Step Instructions for Frozen Yogurt Heart Pops
Step 1: Prepare Your Ingredients
Start by gathering all the ingredients for your Frozen Yogurt Heart Pops. Use plain or flavored Greek yogurt as the base for creaminess. Chop fresh fruit like strawberries or blueberries into small pieces. If you prefer a sweeter taste, have honey or maple syrup at hand to mix in later. Aim for a vibrant, colorful palette when selecting fruits for a beautiful presentation.
Step 2: Mix the Yogurt Base
In a mixing bowl, combine your Greek yogurt with a splash of vanilla extract for added flavor. If you wish to sweeten your mix, drizzle in honey or maple syrup and stir until thoroughly incorporated. This mixture should be creamy and smooth, so take a moment to ensure everything is blended. A taste test here can help you adjust sweetness according to your preference!
Step 3: Layer in the Molds
Grab your heart-shaped silicone molds and start filling them with the yogurt mixture. For added texture, layer in chopped fruits between spoonfuls of yogurt, creating a playful design as you work. Make sure to leave some space at the top, as the yogurt may expand while freezing. Use a spoon to gently tap down the layers for a tight fit, ensuring a delightful mix in every bite.
Step 4: Insert the Popsicle Sticks
Once your molds are filled, carefully insert popsicle sticks into the center of each heart. If you’ve already layered fruit, ensure the stick reaches deep into the yogurt mixture for stability. This step is crucial for easy handling later on, so aim for the sticks to be upright and centered as you prepare them for freezing.
Step 5: Freeze the Pops
Transfer your filled molds to the freezer and let them chill for at least 4 to 6 hours. This duration allows the Frozen Yogurt Heart Pops to solidify completely. Keep an eye out for a firm texture; you’ll know they’re ready when they feel solid to the touch. If you’re planning ahead, these pops can also be made a day in advance for convenience.
Step 6: Unmold and Serve
When the pops are fully frozen, gently remove them from the silicone molds. If they feel a bit stuck, run warm water over the outside of the molds to loosen them up. Present the Frozen Yogurt Heart Pops on a vibrant plate or white platter to really make them stand out. Consider adding extra fruit as decoration for a refreshing touch that’s sure to impress!

Frozen Yogurt Heart Pops Variations
Unleash your creativity with these delightful variations and make your Frozen Yogurt Heart Pops even more exciting!
-
Fruit Fusion: Mix different fruits like mango, kiwi, or raspberries for a flavor explosion. This vibrant combination creates a colorful and refreshing treat.
-
Nutty Twist: Add chopped nuts like almonds or walnuts for crunch. A sprinkle of nuts brings a lovely texture while enhancing the nutritional value.
-
Chocolate Drizzle: After freezing, drizzle melted dark chocolate over the pops for a decadent finish. The rich chocolate adds a gourmet touch that elevates each pop.
-
Coconut Cream: Substitute all or part of the yogurt with coconut milk for a tropical vibe. This twist offers a creamy, dreamy flavor reminiscent of a beach getaway.
-
Berry Blast: Instead of layering, blend fruits like strawberries and blueberries directly into the yogurt. This creates a beautiful marbled effect and intensifies the fruity goodness.
-
Yogurt Swirls: Use two different yogurt flavors, like vanilla and strawberry, and swirl them together in the molds. This eye-catching presentation makes them irresistible!
-
Herbal Infusion: Add fresh mint or basil to the yogurt for a refreshing twist. A hint of herbs can enhance the overall flavor profile with a surprising kick.
-
Spicy Kick: For the adventurous, consider adding a pinch of cayenne pepper or chili powder to the yogurt mix. This unexpected heat adds excitement to your sweet treats, striking a fun contrast!
Feel free to blend these ideas into your recipe, and don’t forget to check out our heart-shaped mini pizzas or heart-shaped sandwiches to create a fully themed Mother’s Day feast!
What to Serve with Frozen Yogurt Heart Pops
These delightful heart-shaped pops make for a refreshing and playful addition to your Mother’s Day celebration.
- Heart-Shaped Sandwiches: Creamy spreads and colorful veggies create a fun twist, making these sandwiches a lovely complement to the fruity pops.
- Mini Heart Pizzas: Topped with vibrant veggies and melted cheese, these bite-sized pizzas bring a savory contrast against the sweet yogurt pops, creating a balanced meal.
- Fresh Fruit Salad: A medley of seasonal fruits adds a burst of color and flavor, enhancing the freshness of the yogurt treats while keeping your plate appealing.
- Fluffy Pancakes: These soft, warm pancakes topped with syrup and berries harmonize perfectly with the coolness of the yogurt pops, creating a delightful contrast in temperature and texture.
- Sparkling Lemonade: Refreshing and bubbly, this fizzy drink will uplift your gathering, pairing wonderfully with the sweet, creamy flavor of the Frozen Yogurt Heart Pops.
- Chocolate-Dipped Strawberries: An irresistible sweet treat to offer alongside your pops, these strawberries add an elegant touch that echoes the heart theme beautifully.
Each of these pairings showcases flavors and textures that will elevate your Mother’s Day meal, ensuring a memorable and delicious celebration!
Storage Tips for Frozen Yogurt Heart Pops
Fridge: Store leftover pops in an airtight container for up to 3 days to maintain freshness and flavor.
Freezer: These Frozen Yogurt Heart Pops can be kept in the freezer for up to 2 months. Ensure they’re wrapped tightly to prevent freezer burn.
Serving: When ready to enjoy, let the pops sit at room temperature for a few minutes to soften slightly before serving.
Reheating: These treats are best served frozen; do not attempt to reheat them, as they will lose their delightful texture.
Expert Tips for Frozen Yogurt Heart Pops
-
Choose Yogurt Wisely: Use thicker Greek yogurt for creamier pops; regulation yogurt may result in a less satisfying texture.
-
Fruit Placement: Layer fruits evenly to avoid settling; ensure a beautiful display of colors when unmolded.
-
Sweetness Balance: Start with less honey or maple syrup; you can always add more to suit your taste in these Frozen Yogurt Heart Pops.
-
Stability Check: Insert popsicle sticks straight and deep enough for steady handling; a crooked stick can lead to a messy pop experience.
-
Freezing Time: Don’t rush the freezing process—allow at least 4 to 6 hours for firm treats; longer is fine if you make them a day ahead.
Make Ahead Options
These Frozen Yogurt Heart Pops are perfect for meal prep enthusiasts! You can prepare the yogurt base and layer the fresh fruit up to 24 hours in advance to streamline your Mother’s Day festivities. Simply mix your Greek yogurt with vanilla and sweetener, then layer it with chopped fruits in the silicone molds. After filling them, cover the molds with plastic wrap and refrigerate until you’re ready to freeze. This keeps your ingredients fresh and flavorful. When you’re set to serve them, just pop them in the freezer for at least 4-6 hours. You’ll have delightful frozen treats that are just as delicious and vibrant, allowing you to enjoy more quality time with your loved ones!
Frozen Yogurt Heart Pops Recipe FAQs
What kind of yogurt should I use for Frozen Yogurt Heart Pops?
I recommend using Greek yogurt for its thicker consistency, which creates creamier pops. You can choose plain or flavored yogurt based on your preference; vanilla adds a lovely taste!
How long can I store Frozen Yogurt Heart Pops?
These delightful pops can be kept in the freezer for up to 2 months. Just make sure they’re wrapped tightly in plastic wrap or placed in an airtight container to prevent freezer burn.
Can I use different fruits in my heart pops?
Absolutely! You can customize your Frozen Yogurt Heart Pops with any seasonal fruits you love. Berries, mangoes, and kiwis not only taste great but also add vibrant colors to your pops.
What if my pops are difficult to remove from the molds?
If your pops are sticking to the molds, don’t worry! Simply run warm water over the outside of the silicone molds to help loosen them. It’s a quick and easy fix to get your pops out smoothly.
How do I adjust the sweetness of the yogurt mixture?
Start by adding a small amount of honey or maple syrup and mix well. Taste the yogurt base and gradually add more sweetener until you reach your desired level of sweetness. Remember, the fruit will add natural sweetness too!
Can I make these heart pops vegan?
Definitely! You can use a dairy-free yogurt alternative, such as almond or coconut yogurt, and sweeten it with agave syrup instead of honey. This ensures you still get the delicious heart-shaped treat while catering to a vegan diet.
Frozen Yogurt Heart Pops That Will Melt Your Heart
Ingredients
Equipment
Method
- Start by gathering all the ingredients for your Frozen Yogurt Heart Pops.
- In a mixing bowl, combine your Greek yogurt with a splash of vanilla extract.
- Grab your heart-shaped silicone molds and start filling them with the yogurt mixture.
- Once your molds are filled, carefully insert popsicle sticks into the center of each heart.
- Transfer your filled molds to the freezer and let them chill for at least 4 to 6 hours.
- When the pops are fully frozen, gently remove them from the silicone molds.
Leave a Reply