
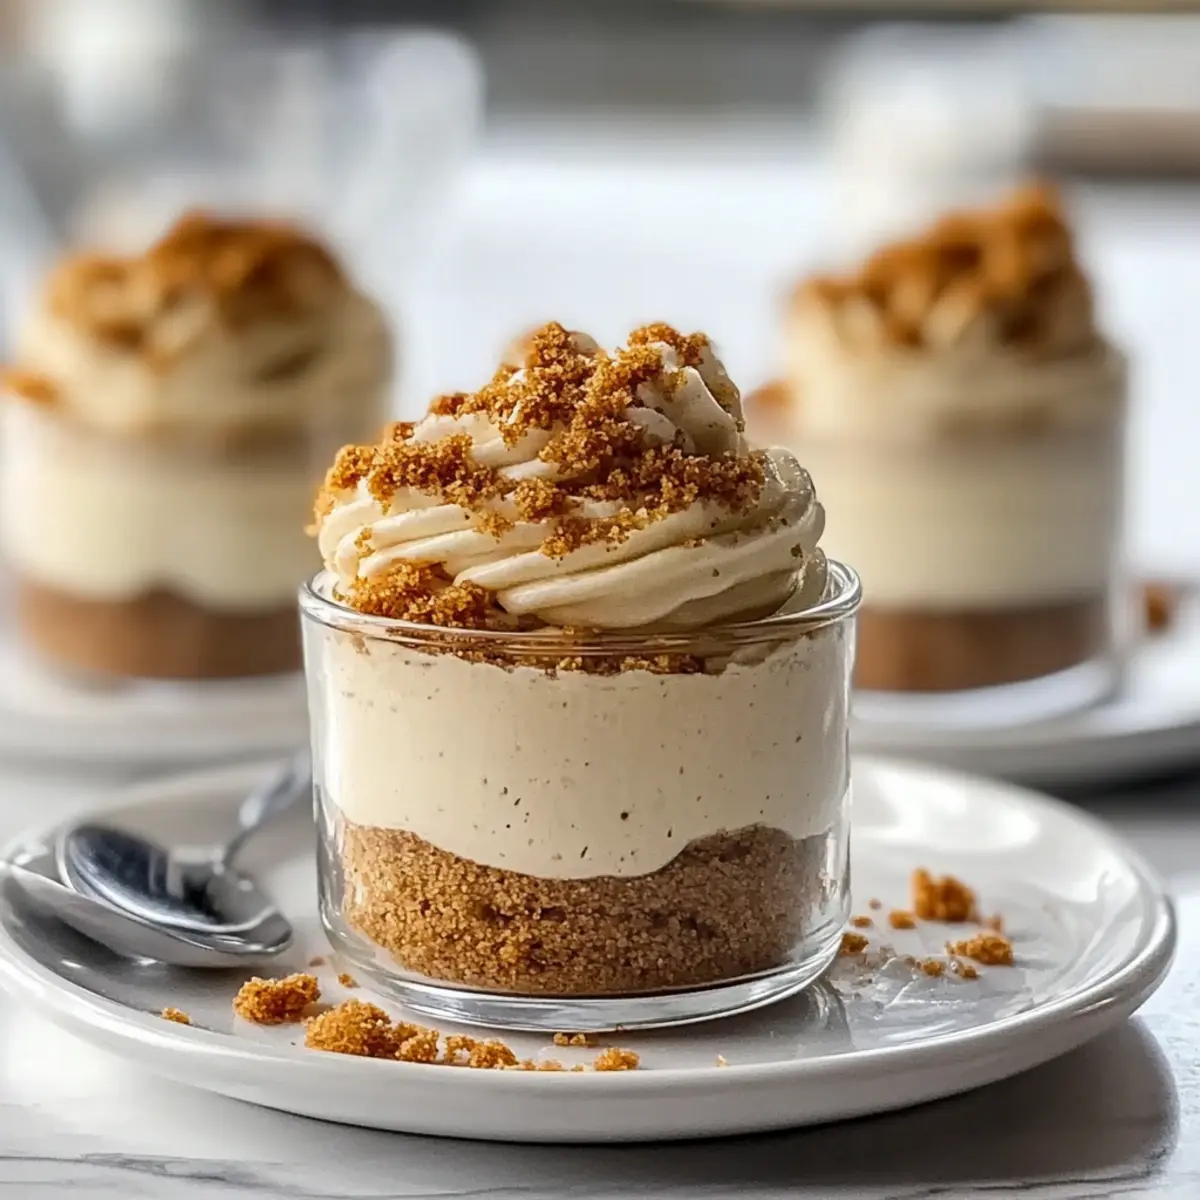
As I stood in my kitchen, the sweet aroma of caramelized Biscoff filled the air, transporting me back to cozy cafés where desserts are artfully displayed. It struck me how a simple combination of crushed Biscoff cookies and a creamy cheesecake filling could transform into something truly special: No-Bake Biscoff Cheesecake Dessert Cups! This easy dessert requires no baking, making it perfect for those spontaneous celebrations or when you just crave a bite-sized indulgence. Not only are these luscious cups a crowd-pleaser, but they also come together with minimal effort—ideal for even the busiest bakers. Curious about how to make these delightful treats that balance richness with lightness? Let’s dive into the recipe!
Why Are Biscoff Cheesecake Dessert Cups Irresistible?
Creamy Layers: Each cup features a luscious blend of cream cheese and whipped cream, delivering a light yet rich cheesecake experience.
No-Bake Convenience: With no oven required, these dessert cups come together quickly—ideal for busy days or last-minute gatherings.
Versatile Delight: Customize your treat! Swap Biscoff cookies for Oreos or add chocolate for extra indulgence, catering to every palate.
Perfect Portions: Bite-sized and beautifully presented, they’re perfect for sharing or enjoying solo. Who could resist that?
Crowd-Pleaser: Serve chilled, paired with coffee or tea, and watch your guests indulge with joy. These cups definitely win hearts! For more delightful twists, check out our Pumpkin Cheesecake Truffles or explore other delectable treats like Caramel Brownie Cheesecake.
Biscoff Cheesecake Dessert Cups Ingredients
For the Base
• Biscoff cookies – Crushed for a crumbly texture that holds together.
• Butter – Melted to combine with the cookie crumbs for a cohesive base.
For the Filling
• Cream cheese – Softened for easy mixing; foundational for the cheesecake layer.
• Powdered sugar – Adjustable based on taste, enhances the cream cheese filling.
• Vanilla extract – Provides depth to the cheesecake’s flavor profile.
• Heavy cream – Whipped and folded for a fluffy texture in the filling.
• Biscoff spread – Mixed into the filling for an intensified Biscoff taste.
Step‑by‑Step Instructions for Biscoff Cheesecake Dessert Cups
Step 1: Prepare the Cookie Base
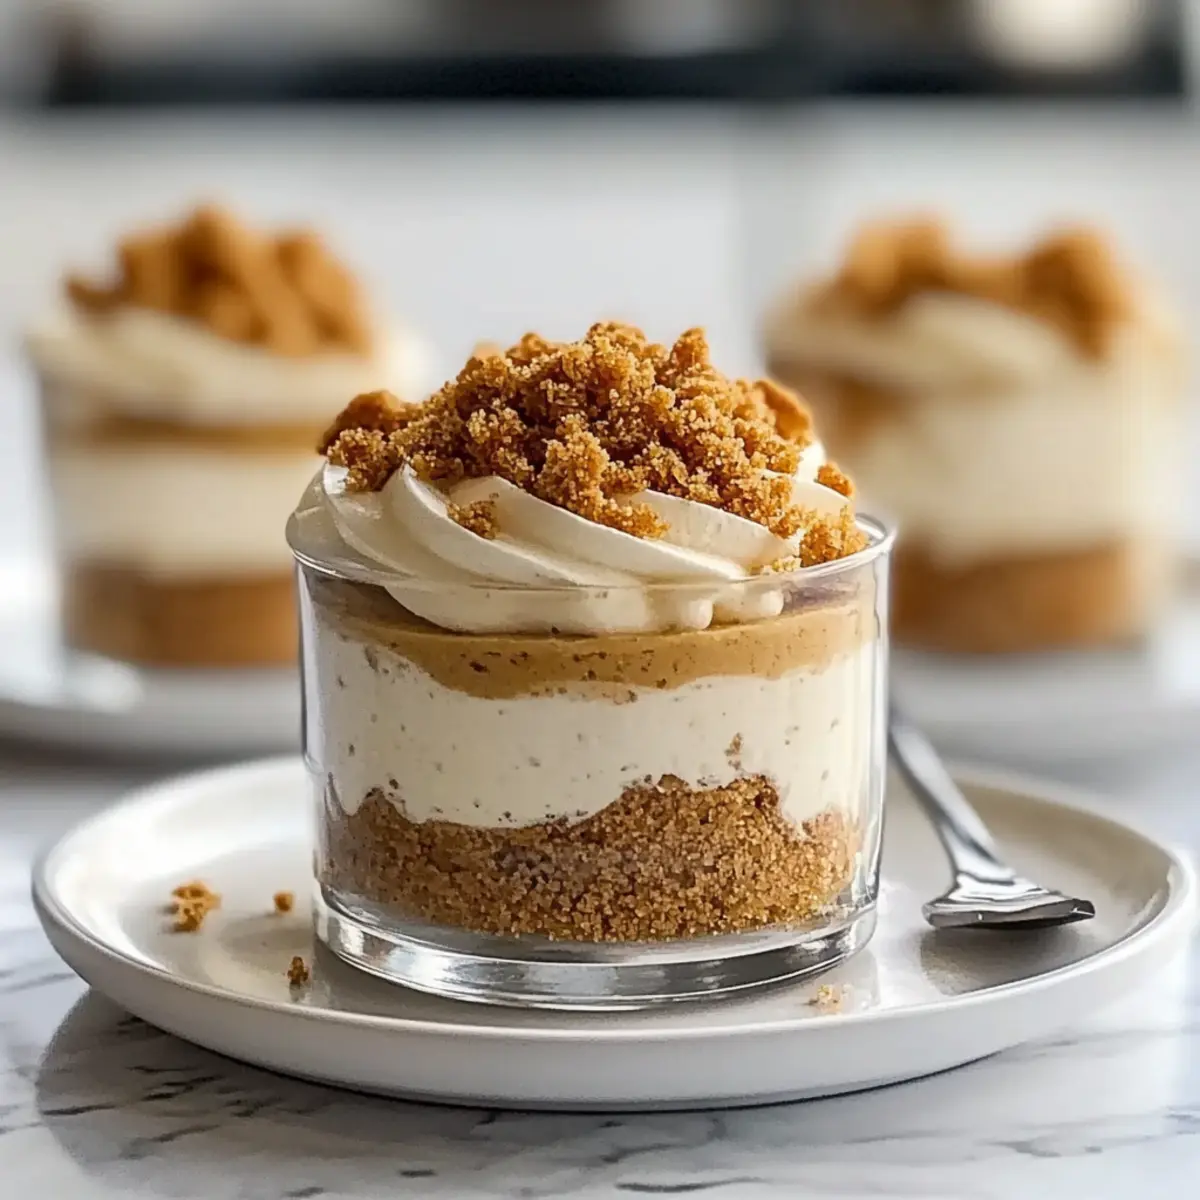
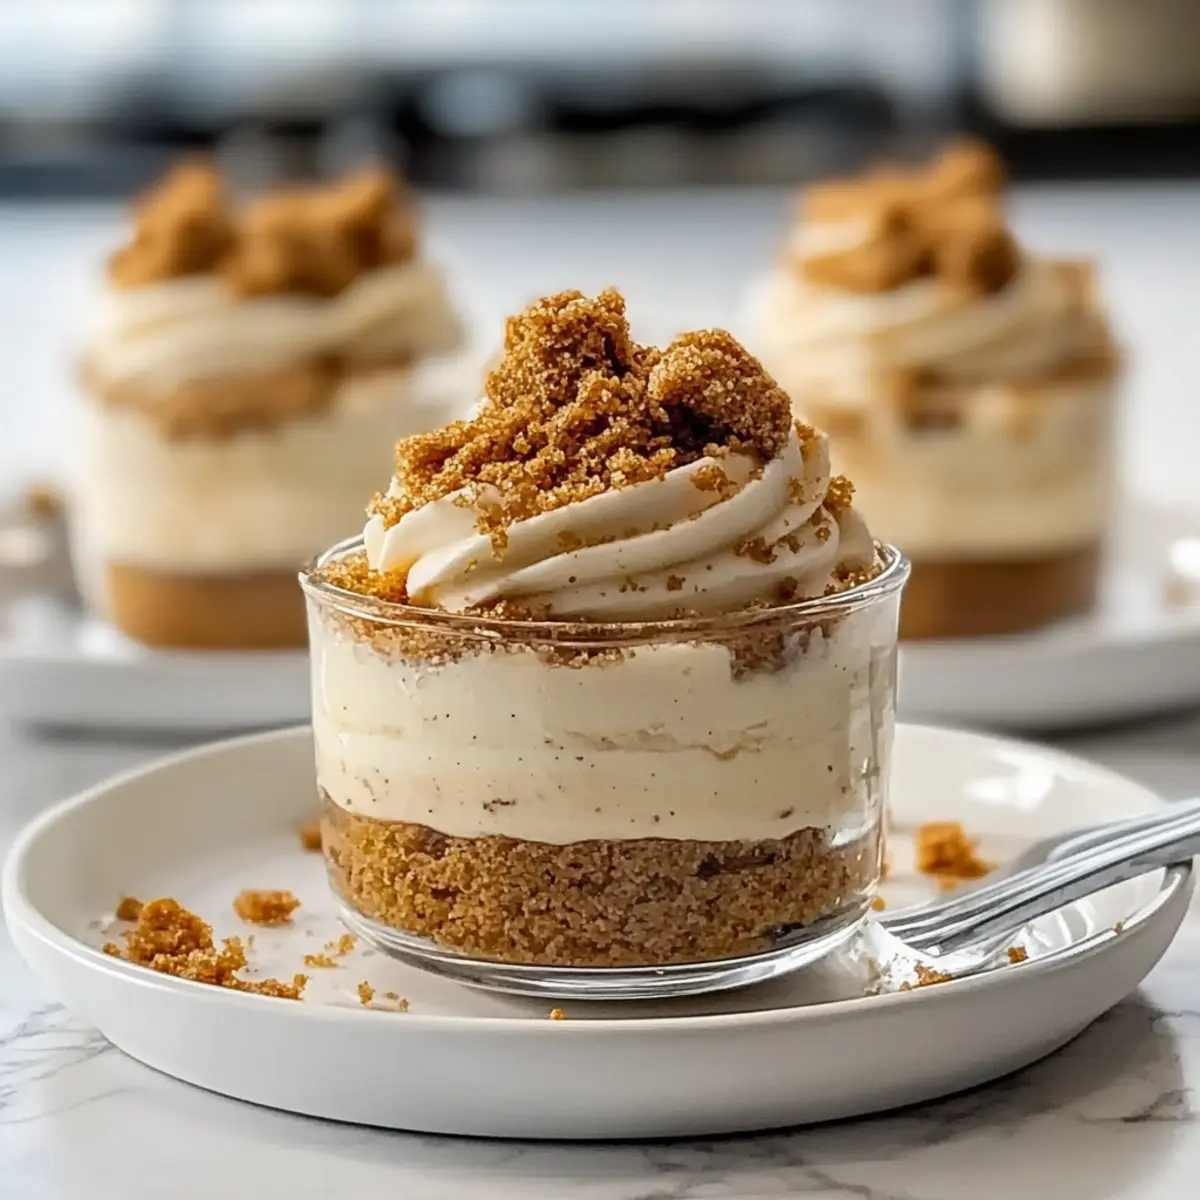
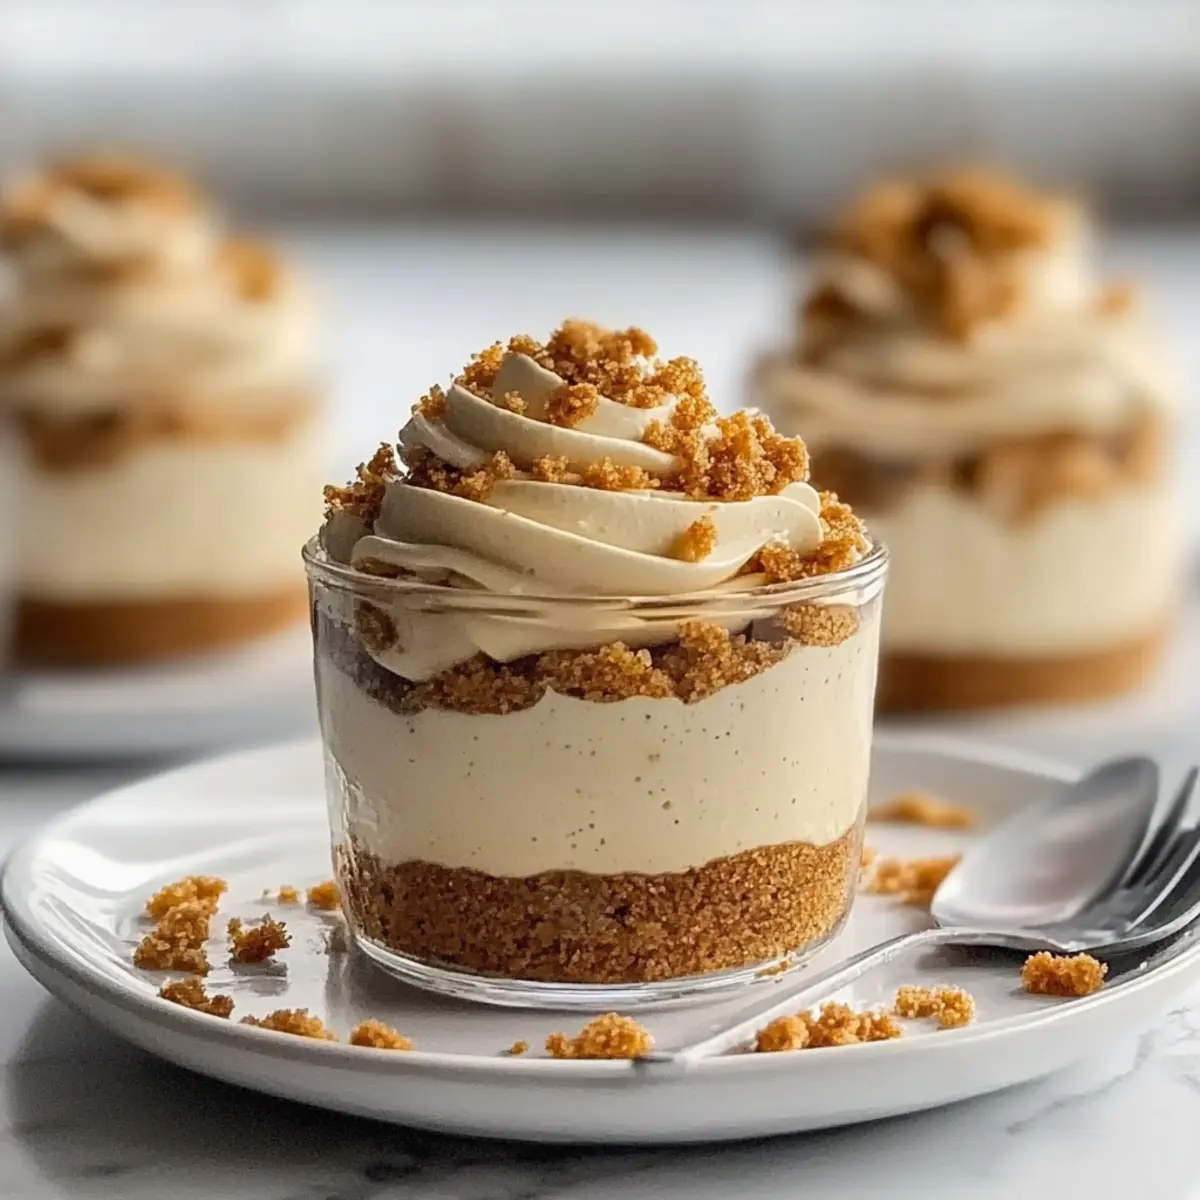
Start by crushing the Biscoff cookies into fine crumbs using a food processor or a ziplock bag and rolling pin until you have about 1 cup of crumbs. Melt 4 tablespoons of butter and mix it with the cookie crumbs in a bowl until it resembles damp sand. Press this mixture firmly into the bottom of each serving cup, ensuring an even layer for a sturdy base.
Step 2: Make the Cream Cheese Filling
In a medium mixing bowl, beat 8 ounces of softened cream cheese with ½ cup of powdered sugar and 1 teaspoon of vanilla extract using an electric mixer until smooth and creamy, about 2-3 minutes. You want the mixture to be free of lumps and perfectly blended to create that luscious cheesecake filling that defines your Biscoff Cheesecake Dessert Cups.
Step 3: Whip the Heavy Cream
In a separate, chilled bowl, pour 1 cup of heavy cream and whip it using a hand mixer or a stand mixer until you achieve stiff peaks, which should take about 4-5 minutes. This whipped cream is the secret to a light texture in your cheesecake filling. Gently fold the whipped cream into the cream cheese mixture using a spatula, being careful not to deflate the air you’ve incorporated.
Step 4: Add Biscoff Spread
Next, take ½ cup of Biscoff spread and gently mix it into the cream cheese-whipped cream mixture until fully blended. Keep an eye out for the consistent caramel-like color throughout the filling—this means it’s ready. This step infuses the Biscoff Cheesecake Dessert Cups with that irresistible flavor you love, enhancing the dessert’s richness.
Step 5: Layer the Cups
Spoon or pipe a generous layer of the cheesecake filling over the prepared cookie base in each cup, leaving some room at the top for an appealing presentation. Tap the cups lightly on the counter to settle the filling and eliminate air bubbles. Creating these layers will not only look impressive but also add to the delightful texture in every bite.
Step 6: Chill Thoroughly
Cover the cups with plastic wrap or lids and place them in the refrigerator to chill for at least 2 hours. This chilling time is crucial as it allows the cheesecake filling to set and develop flavors, giving you that creamy, melt-in-your-mouth experience you desire in your Biscoff Cheesecake Dessert Cups.
Step 7: Serve and Enjoy
When you’re ready to serve, take the dessert cups out of the fridge and optionally garnish with a drizzle of extra Biscoff spread or a sprinkle of crushed cookies on top. Enjoy these delightful Biscoff Cheesecake Dessert Cups with family and friends, and watch their faces light up with joy as they savor each bite!
What to Serve with Biscoff Cheesecake Dessert Cups
Elevate your dessert experience with delightful pairings that enhance every creamy, dreamy bite.
-
Fresh Berries: A mix of strawberries and blueberries adds a burst of freshness that contrasts beautifully with the rich cheesecake.
-
Coffee or Espresso: The deep, roasted flavors in coffee balance the sweetness of the dessert, making for a perfect afternoon treat.
-
Chocolate Shavings: Sprinkle some dark chocolate shavings on top for a touch of elegance and an indulgent flavor layer.
-
Whipped Cream: A dollop of fresh whipped cream softens the rich creaminess and invites guests to indulge even more.
-
Caramel Sauce: Drizzling warm caramel over each cup adds a luscious, gooey sweetness that enhances the Biscoff flavors.
-
Mint Leaves: Fresh mint leaves not only add a pop of color but also provide a refreshing contrast that lifts the dessert.
-
Tea Selection: Pair the dessert with a light herbal tea for a calming conclusion to any meal; the flavors will beautifully complement the Biscoff Cups.
-
Ginger Cookies: Offer crunchy ginger cookies alongside for a spicy kick that enhances the overall flavor experience.
-
Ice Cream: A scoop of vanilla or caramel ice cream can turn this treat into a sundae delight for any sweet tooth!
-
Cheese Platter: Serve a selection of cheeses to balance the dessert’s sweetness, creating a lovely contrast for your guests.
Make Ahead Options
These Biscoff Cheesecake Dessert Cups are a fantastic choice for meal prep, saving you time when you’re busy. You can prepare the cookie base up to 24 hours in advance; simply crush the Biscoff cookies and mix them with melted butter, pressing the mixture into the serving cups. For the cheesecake filling, you can also mix it ahead of time and keep it chilled for up to 3 days. Just remember to layer it over the cookie base just before serving to maintain that delightful texture. This way, your dessert will be just as delicious and fresh, ready to impress your guests with minimal last-minute effort!
Expert Tips for Biscoff Cheesecake Dessert Cups
Soft Cream Cheese: Allow cream cheese to reach room temperature to ensure a smooth filling and avoid lumps during mixing.
Whipping Technique: Whip heavy cream until stiff peaks form to achieve a fluffy texture; under-whipping can lead to a dense filling.
Chill Time Matters: Avoid rushing the chilling process; adequate time in the fridge sets the layers beautifully and enhances flavors in your Biscoff Cheesecake Dessert Cups.
Piping for Precision: Use a piping bag for layering the cheesecake filling to create professional-looking dessert cups that impress.
Endless Variations: Feel free to experiment! Swapping Biscoff cookies for your favorite varieties or adding fresh fruit can elevate your dessert experience.
Storage Tips for Biscoff Cheesecake Dessert Cups
Fridge: Keep your Biscoff Cheesecake Dessert Cups refrigerated for up to 3 days in an airtight container to maintain freshness and flavor.
Freezer: For longer storage, these dessert cups can be frozen for up to 2 months. Make sure to wrap them tightly to prevent freezer burn.
Reheating: If served chilled, there’s no need to reheat, but if frozen, allow them to thaw in the fridge overnight before serving for optimal texture.
Biscoff Cheesecake Dessert Cups Variations
Feel free to get creative with these delightful dessert cups—they’re your canvas for culinary creativity!
-
Oreo Base: Substitute Biscoff cookies with crushed Oreos for a classic twist that chocolate lovers will adore. You can layer chocolate ganache for an even richer surprise!
-
Chocolate Bliss: Drizzle melted chocolate into the cheesecake layer to amplify the indulgence, creating a heavenly chocolate Biscoff cheesecake combo perfect for dessert lovers.
-
Fruity Layers: Add slices of strawberries or raspberries between layers for a refreshing fruit burst. The sweetness of the fruit complements the creamy cheesecake beautifully.
-
Nutty Crunch: Incorporate chopped nuts, such as pecans or walnuts, into the cookie base for an added crunch and a nutty flavor that elevates the texture of your dessert.
-
Spiced Delight: Add a hint of cinnamon or nutmeg to the cheesecake filling for a warm, spiced note that perfectly balances the sweetness of the Biscoff flavor.
-
Caramel Drizzle: Top with a luscious caramel sauce before serving for an extra layer of sweetness that pairs divinely with the Biscoff theme, making each bite even more satisfying.
-
Frozen Treats: Freeze the dessert cups and serve them as a creamy, ice cream-like treat during hot weather. Just give them a few minutes to soften before indulging, and enjoy the cold comfort!
These variations not only add an exciting twist but also help you explore new flavor landscapes. If you’re looking for more creative dessert ideas, feel free to check out our delightful Cute Cauldron Cookie Cups or indulge in some Spooktacular Halloween Desserts.
Biscoff Cheesecake Dessert Cups Recipe FAQs
How do I choose the right Biscoff cookies for the base?
Absolutely! Look for Biscoff cookies that are fresh—typically, they will have a long shelf life. Ensure there are no broken or crushed cookies in the package, as whole cookies yield a better texture when making crumbs.
What is the best way to store leftover Biscoff Cheesecake Dessert Cups?
Very good question! Store your cups in an airtight container in the refrigerator for up to 3 days. This helps keep them fresh and creamy while preserving their delicious Biscoff flavor.
Can I freeze Biscoff Cheesecake Dessert Cups?
Yes! Freezing these dessert cups is totally possible. First, cover them tightly with plastic wrap and then foil. They can be stored in the freezer for up to 2 months. When you’re ready to enjoy them, let them thaw in the fridge overnight for the best texture!
Why did my cheesecake filling turn out lumpy?
A common issue! This can happen if the cream cheese isn’t softened enough before mixing. Always ensure cream cheese is at room temperature—this creates a smooth filling. If lumps occur, simply beat the mixture a bit longer until smooth and creamy.
Are there alternatives for someone with allergies?
Definitely! To adapt to dietary needs, consider using gluten-free alternatives for Biscoff cookies, such as gluten-free graham crackers. Additionally, for a dairy-free option, use vegan cream cheese and coconut whipped cream. Always check labels to confirm allergen-free status.
Can I add toppings to the Biscoff Cheesecake Dessert Cups?
The more the merrier! You can sprinkle crushed Biscoff cookies or drizzle extra Biscoff spread on top just before serving. Fresh fruits, like berries or bananas, also add a lovely touch of freshness and flavor. Enjoy getting creative with your presentation!
Creamy Biscoff Cheesecake Dessert Cups for Sweet Indulgence
Ingredients
Equipment
Method
- Start by crushing the Biscoff cookies into fine crumbs using a food processor or a ziplock bag and rolling pin until you have about 1 cup of crumbs. Melt 4 tablespoons of butter and mix it with the cookie crumbs in a bowl until it resembles damp sand. Press this mixture firmly into the bottom of each serving cup, ensuring an even layer for a sturdy base.
- In a medium mixing bowl, beat 8 ounces of softened cream cheese with ½ cup of powdered sugar and 1 teaspoon of vanilla extract using an electric mixer until smooth and creamy, about 2-3 minutes. You want the mixture to be free of lumps and perfectly blended.
- In a separate, chilled bowl, pour 1 cup of heavy cream and whip it using a hand mixer or a stand mixer until you achieve stiff peaks, which should take about 4-5 minutes. Gently fold the whipped cream into the cream cheese mixture using a spatula.
- Next, take ½ cup of Biscoff spread and gently mix it into the cream cheese-whipped cream mixture until fully blended. Keep an eye out for the consistent caramel-like color throughout the filling.
- Spoon or pipe a generous layer of the cheesecake filling over the prepared cookie base in each cup, leaving some room at the top for an appealing presentation. Tap the cups lightly on the counter.
- Cover the cups with plastic wrap or lids and place them in the refrigerator to chill for at least 2 hours.
- When you're ready to serve, take the dessert cups out of the fridge and optionally garnish with a drizzle of extra Biscoff spread or a sprinkle of crushed cookies on top.
Leave a Reply