
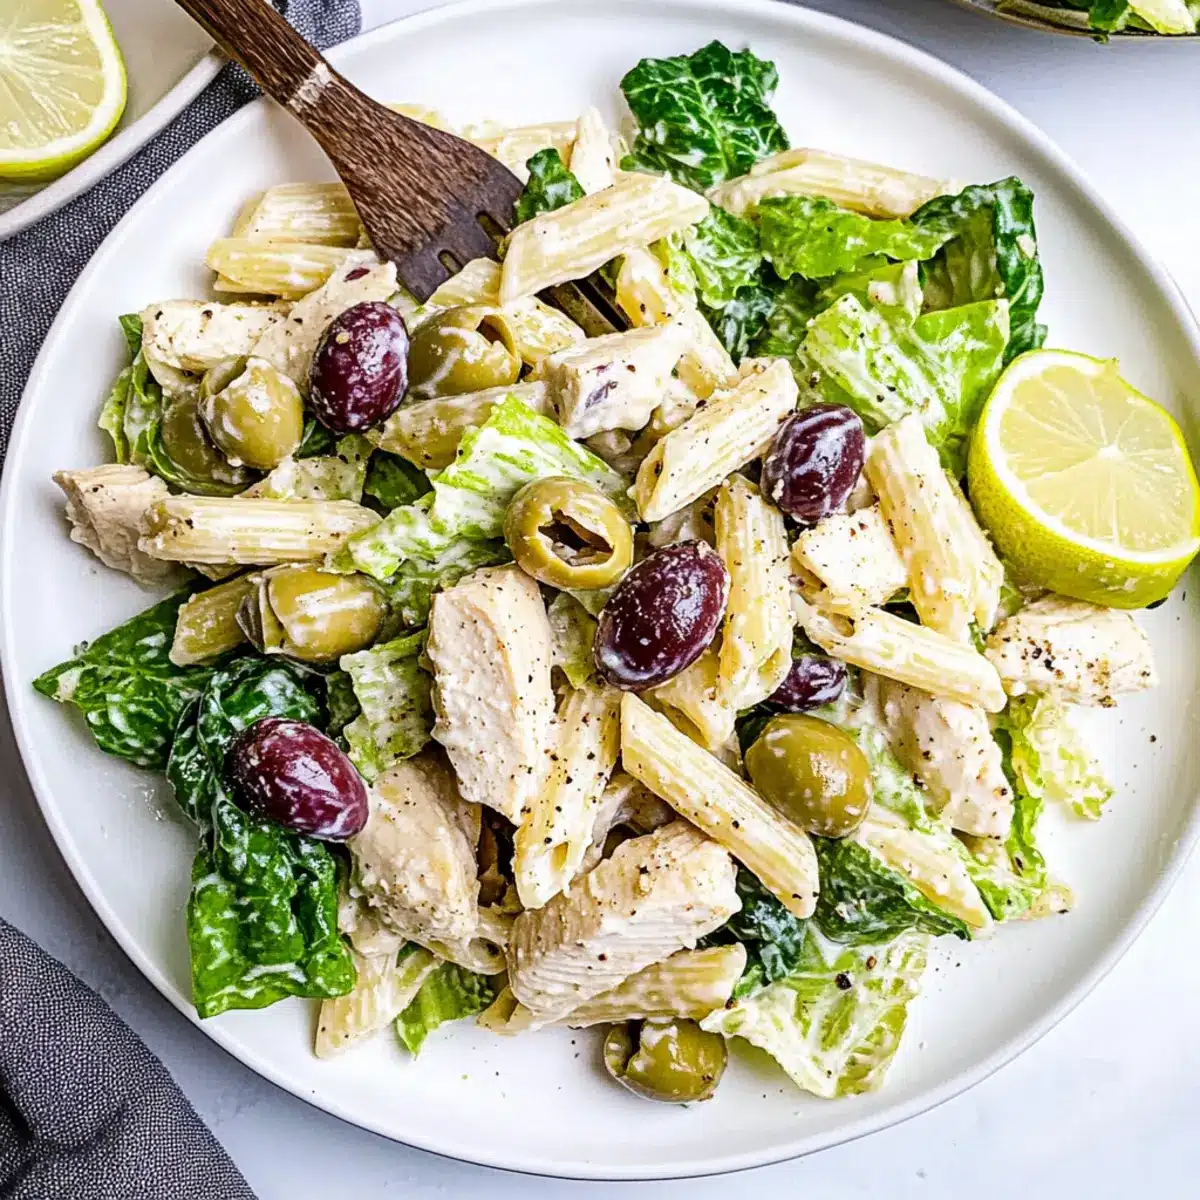
As I tossed the last layer of romaine into my mixing bowl, a delightful aroma wafted through the kitchen—this Caesar Pasta Salad with Chicken was about to make its debut. Combining the classic elements of Caesar salad with tender pasta creates a dish that’s not just delicious but also gluten-free and healthy. Perfect for those hectic weeknights or lazy summer days, this salad boasts a creamy Greek yogurt dressing that keeps it light yet flavorful. Not only does it elevate your mealtime with a nutritious twist, but it’s also a crowd-pleaser that’s simple enough for anyone to whip up. Curious about how to bring this fresh take to your next dinner table? Let’s dive into the details!
Why is Caesar Pasta Salad a Must-Try?
Simplicity at Its Best: This recipe combines quick prep with minimal steps, making it ideal for busy weeknights or last-minute gatherings.
Nutritious Twist: The use of Greek yogurt instead of traditional dressing not only lightens the meal but also packs in extra protein.
Versatile Options: Want to switch it up? Feel free to replace chicken with shrimp or add vibrant veggies like cherry tomatoes for color.
Crowd-Pleaser: Whip up this salad, and watch it disappear! Perfect as a main dish or a side, it’s sure to impress friends and family alike.
Gluten-Free Friendly: With easy substitutions, like using Banza chickpea pasta, everyone can enjoy this refreshing dish, regardless of dietary needs.
Caesar Pasta Salad with Chicken Ingredients
For the Pasta
• Gluten-free pasta – Banza chickpea pasta is a great option for a gluten-free Caesar Pasta Salad.
• Water – Enough for boiling the pasta until al dente.
For the Chicken
• Rotisserie chicken – A convenient choice; simply shred for quick preparation.
• Cooked chicken breasts – Freshly cooked or leftover works wonderfully if you prefer.
For the Salad
• Romaine lettuce – Provides a crisp, fresh texture essential to a traditional Caesar experience.
• Kalamata olives – Adds a briny flavor that enhances the overall taste of the salad.
• Parmesan cheese – Use to your liking; it enriches the dish with creamy goodness.
For the Dressing
• Greek yogurt – The star of the dressing, adding creaminess with fewer calories than traditional recipes.
• Olive oil – Provides richness and flavor to both the dressing and optional croutons.
For Optional Croutons
• Gluten-free bread – Cube and bake for a crunchy texture to complement your salad, if desired.
This delightful mix of ingredients ensures your Caesar Pasta Salad with Chicken is not only healthy and quick but bursting with flavor!
Step‑by‑Step Instructions for Caesar Pasta Salad with Chicken
Step 1: Cook the Pasta
Begin by bringing a large pot of salted water to a boil. Add your gluten-free pasta and cook according to package instructions, typically around 8-10 minutes, until al dente. Once cooked, drain the pasta in a colander and rinse it under cold water to stop the cooking process. Allow it to cool completely before moving to the next step, ensuring a perfect texture for your Caesar Pasta Salad with Chicken.
Step 2: Prepare the Chicken
While the pasta cools, shred your rotisserie chicken into bite-sized pieces, or dice freshly cooked chicken breasts. Aim for about 2 cups of chicken to keep your salad hearty. Set aside the chicken in a bowl, letting it cool if it was freshly cooked. This tender chicken will add protein and flavor to your Caesar Pasta Salad, perfectly complementing the creamy dressing.
Step 3: Mix the Dressing
In a medium bowl, combine 1 cup of Greek yogurt with 2 tablespoons of olive oil, whisking together until smooth and creamy. For extra flavor, add a squeeze of lemon juice, a pinch of salt, and a teaspoon of garlic powder. Whisk until well blended—this creamy dressing adds a light yet rich taste to your Caesar Pasta Salad with Chicken, enhancing all the wonderful ingredients.
Step 4: Combine the Salad
In a large mixing bowl, combine the cooled gluten-free pasta, shredded chicken, 4 cups of chopped romaine lettuce, and a handful of pitted Kalamata olives. Pour the prepared dressing over the top and gently toss everything together until all ingredients are evenly coated. This ensures every bite of your Caesar Pasta Salad is bursting with flavor and freshness.
Step 5: Serve and Enjoy
Transfer the beautifully mixed salad to a serving bowl or individual plates. For a delightful touch, sprinkle some grated Parmesan cheese on top. Ideally, serve your Caesar Pasta Salad with Chicken immediately for the best texture, but if needed, you can chill it for up to 30 minutes to let the flavors meld.
What to Serve with Caesar Pasta Salad with Chicken
Pairing this vibrant salad with complementary dishes ensures a delightful dining experience, filled with contrasting flavors and textures.
-
Crusty Gluten-Free Bread: Warm, freshly baked gluten-free bread enhances the meal, perfect for dipping into extra dressing or savoring alongside the salad.
-
Grilled Veggies: The smoky flavor of grilled vegetables like zucchini or bell peppers adds depth, creating a colorful and nutritious addition to your spread.
-
Fruit Salad: A light fruit salad with berries or citrus provides a refreshing contrast to the creamy pasta, uplifting and balancing the meal perfectly.
-
Sparkling Lemonade: A chilled glass of sparkling lemonade adds a zesty pop that complements the salad’s flavors and enlivens your dining experience.
-
Roasted Chickpeas: Crunchy roasted chickpeas seasoned with spices offer an extra bite and protein boost, making them a great snacking option alongside your salad.
-
Tzatziki Dip: This refreshing yogurt-based dip mixed with cucumbers and garlic pairs beautifully, inviting guests to enjoy a touch of Mediterranean flair.
-
Chocolate Mousse: For a sweet finish, serve a light chocolate mousse; its rich yet airy texture contrasts nicely with the creamy Caesar Pasta Salad with Chicken.
Expert Tips for Caesar Pasta Salad with Chicken
- Avoiding Sogginess: Store the pasta, chicken, and veggies separately until ready to serve. This keeps your Caesar Pasta Salad fresh and crunchy.
- Perfectly Cooked Pasta: Be sure to cook the gluten-free pasta until just al dente; overcooking can lead to mushiness in the salad.
- Dressing Adjustments: Adjust the Greek yogurt in the dressing based on your prefered creaminess and tanginess. Taste as you go!
- Customizable Ingredients: Feel free to swap out the chicken for cooked shrimp or add extra fresh veggies like bell peppers or cucumbers to enhance your salad.
- Make-Ahead Tip: Prep the components ahead of time, but combine everything just before serving for optimal freshness and flavor in your Caesar Pasta Salad with Chicken.
Make Ahead Options
These Caesar Pasta Salad with Chicken are perfect for meal prep enthusiasts! You can prepare the pasta and chicken up to 3 days in advance. Simply cook the gluten-free pasta and let it cool completely before refrigerating it in an airtight container. For the chicken, shred or dice it and store it separately to maintain freshness. The dressing can be mixed ahead of time and stored in the fridge for up to 24 hours. Just remember to keep the romaine and olives separate until you’re ready to serve to prevent sogginess. When it’s time to enjoy your salad, simply combine all ingredients in a bowl, give it a good toss, and you’ll have a refreshing meal ready in minutes!
How to Store and Freeze Caesar Pasta Salad with Chicken
Fridge: Store leftover Caesar Pasta Salad with Chicken in an airtight container for up to 3 days to maintain freshness.
Prep Ahead: If making ahead, keep the pasta, chicken, and dressing separate. Mix only when ready to serve for the best texture and flavor.
Freezer: Freezing is not recommended, as it may alter the texture of the pasta and romaine lettuce. It’s best enjoyed fresh!
Reheating: If you have leftover pasta without the dressing, reheat it gently on the stove or in the microwave, but serving the salad cold is ideal for flavor.
Caesar Pasta Salad with Chicken Variations
Feel free to get creative and customize this delightful salad to fit your taste and dietary needs!
- Seafood Swap: Replace chicken with cooked, cooled shrimp for a refreshing seafood twist that pairs beautifully with the creamy dressing.
- Veggie Boost: Add chopped cherry tomatoes or diced cucumbers for an extra burst of color and flavor while enhancing the salad’s nutrition.
- Dairy-Free: Use a plant-based yogurt instead of Greek yogurt in the dressing to make this salad suitable for a dairy-free lifestyle.
- Herb Infusion: Toss in fresh herbs like basil or parsley to the dressing for an aromatic touch that elevates the overall flavor profile of the dish.
- Extra Crunch: Consider adding toasted pine nuts or sunflower seeds for a delightful crunch that complements the creamy textures beautifully.
- Spicy Kick: Add a pinch of red pepper flakes to the dressing to give your salad a zesty heat that sparks the taste buds.
- Flavorful Croutons: Make your own croutons using seasoned gluten-free bread—cube, toss with olive oil, and bake for a crunchy topping.
- Pasta Variation: Experiment with other gluten-free pasta shapes like penne or rotini to change up the look and texture of your Caesar Pasta Salad with Chicken.
For more delicious recipes, you might want to check out Parmesan Chicken Pasta or try a delightful Chicken Mozzarella Pasta. Happy cooking!
Caesar Pasta Salad with Chicken Recipe FAQs
Can I use any type of pasta for this Caesar Pasta Salad with Chicken?
Absolutely! While I recommend gluten-free pasta like Banza chickpea pasta for a gluten-free dish, you can use any pasta you enjoy. Just be sure to cook it according to the package instructions and let it cool before mixing it into the salad.
How should I store leftovers of the Caesar Pasta Salad with Chicken?
To keep your Caesar Pasta Salad fresh, store any leftovers in an airtight container in the fridge. It will stay good for up to 3 days. If the ingredients are mixed, the lettuce may wilt, so if you plan to save some for later, I often suggest storing the components separately and combining them only when you’re ready to enjoy them.
Can I freeze Caesar Pasta Salad with Chicken?
Freezing isn’t recommended for this salad, as it could lead to a mushy texture when thawed. The pasta and romaine lettuce don’t fare well in the freezer, but if you’ve cooked pasta leftover without the dressing or chicken, you could freeze it for up to 3 months. Just reheat it gently before using, but remember—it’s best enjoyed fresh!
What can I do if my dressing is too thick or tangy?
If you find your dressing is too thick for your taste, you can easily adjust it! Start by adding a bit more olive oil or a splash of water, whisking until you achieve the desired consistency. If it’s too tangy from the Greek yogurt or lemon juice, adding a pinch of honey can balance out the flavor beautifully. Taste as you go to find that perfect blend!
Are there any dietary considerations I should keep in mind?
Certainly! This Caesar Pasta Salad with Chicken is already gluten-free if you use a gluten-free pasta, and if you’re catering to dairy-free needs, you can skip the Parmesan cheese or use a dairy-free alternative. Always check for allergies with Kalamata olives and dressing ingredients, especially if you’re serving guests. Enjoying a meal should be worry-free!
Creamy Caesar Pasta Salad with Chicken for Quick Freshness
Ingredients
Equipment
Method
- Begin by bringing a large pot of salted water to a boil. Add your gluten-free pasta and cook according to package instructions, around 8-10 minutes, until al dente. Drain and rinse under cold water to stop the cooking process.
- While the pasta cools, shred your rotisserie chicken into bite-sized pieces, or dice freshly cooked chicken breasts. Set aside to cool.
- In a medium bowl, combine 1 cup of Greek yogurt with 2 tablespoons of olive oil, whisking until smooth. For extra flavor, add lemon juice, salt, and garlic powder to taste.
- In a large mixing bowl, combine the cooled gluten-free pasta, shredded chicken, chopped romaine lettuce, and Kalamata olives. Pour dressing over and toss gently until coated.
- Transfer the salad to serving dishes and sprinkle grated Parmesan cheese on top. Serve immediately, or chill up to 30 minutes to allow flavors to meld.
Leave a Reply