
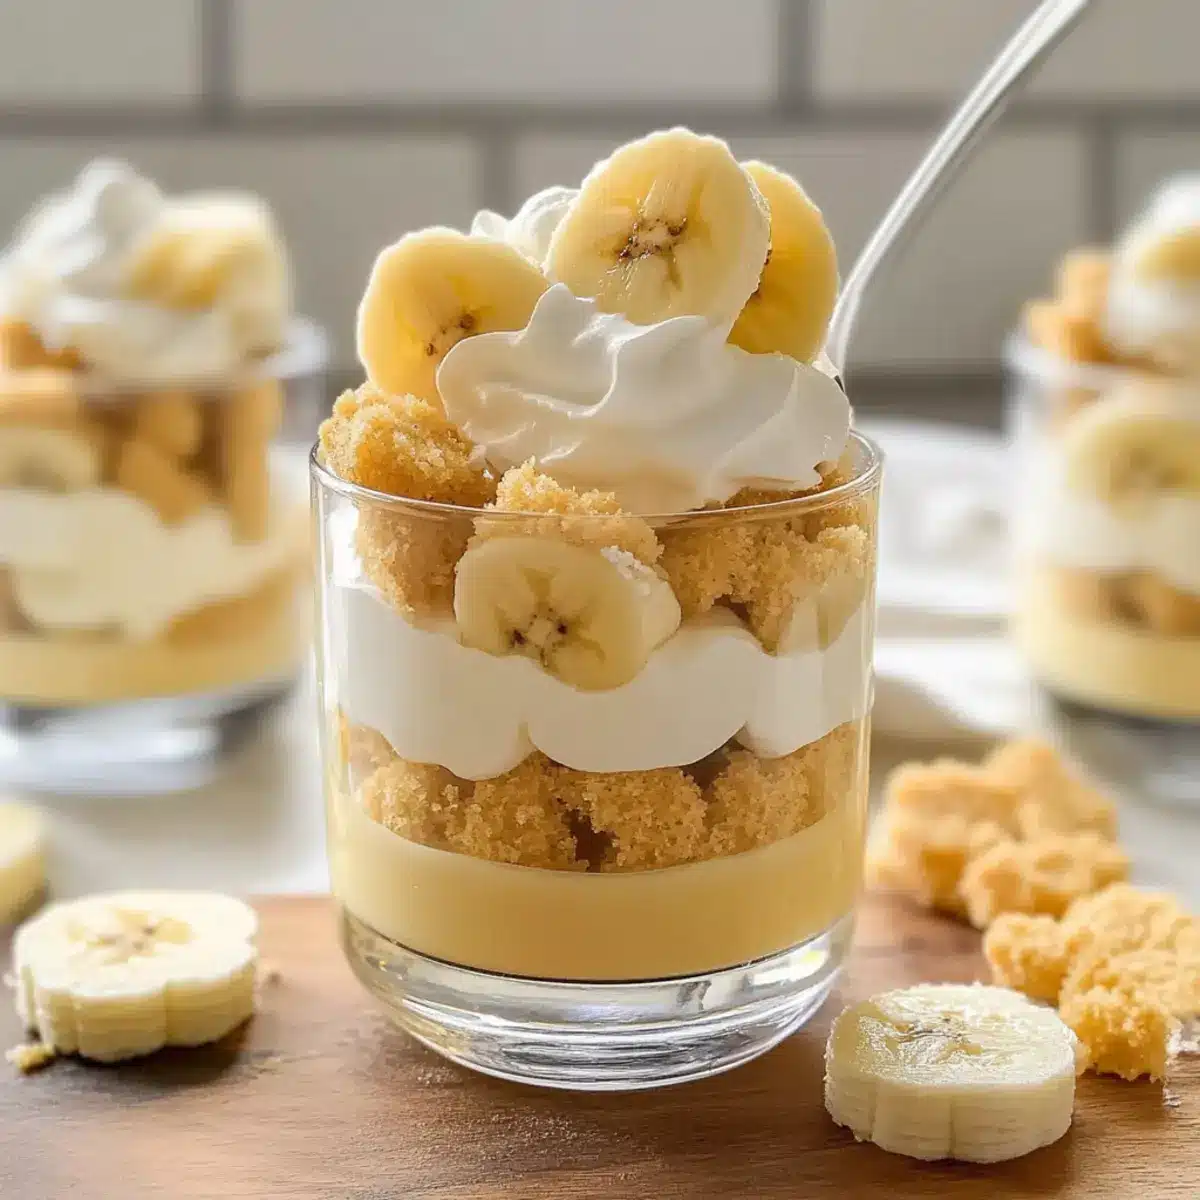
As I sorted through my pantry yesterday, I stumbled upon a forgotten box of vanilla wafers, immediately sparking a craving for something sweet and nostalgic. That’s when I decided to whip up my favorite No-Bake Banana Pudding Cups. Not only are these cups incredibly easy to make, but they are also a true crowd-pleaser that brings a taste of home and warmth to any gathering. Just imagine layers of creamy pudding, ripe bananas, and soft cookies coming together in one delightful dessert. Whether you’re planning a summer barbecue or a cozy family dinner, these banana pudding cups are the perfect sweet treat that requires minimal effort and delivers maximum satisfaction. Ready to indulge in a slice of nostalgia? Let’s dive into this simple and satisfying recipe!
Why Are These Banana Pudding Cups Irresistible?
Effortless Preparation: You’ll love how this no-bake recipe requires minimal time and skill, making it perfect for even novice bakers.
Creamy Delight: Each cup features a luscious blend of pudding and whipped cream, with the freshness of ripe bananas elevating every bite.
Crowd-Pleasing: Ideal for gatherings, these cups can easily satisfy a group, ensuring everyone leaves with a smile, just like my other favorite dessert, the Cauldron Cookie Cups.
Versatile Options: Feel free to get creative! Substitute the vanilla wafers with your favorite cookies, or spice things up with a drizzle of caramel or a sprinkle of cinnamon.
Perfect for Any Occasion: Whether it’s a summer picnic or a cozy family dinner, these pudding cups are your go-to dessert. Enjoy them chilled, and you’ll savor the delightful layers of sweet nostalgia!
Banana Pudding Cups Ingredients
For the Pudding
• Cold Milk – This forms the base for your delicious pudding mix and is essential for creaminess.
• Instant Vanilla Pudding Mix – Thickens your mixture for that classic pudding texture; consider homemade pudding for an extra boost of flavor.
• Heavy Whipping Cream or Whipped Topping – Provides richness and an indulgent creaminess to your dessert.
For the Layers
• Ripe Bananas – Adds natural sweetness and a delightful texture; choose firm bananas to keep them from becoming mushy.
• Vanilla Wafers or Similar Cookies – Gives a soft, sweet layer that enhances the overall experience; alternatives include graham crackers or shortbread for variety.
Optional Enhancements
• Vanilla Extract – A little can amplify the vanilla flavor in your pudding for a well-rounded taste.
Step‑by‑Step Instructions for No-Bake Banana Pudding Cups
Step 1: Whisk the Pudding
In a medium bowl, pour 2 cups of cold milk and add the instant vanilla pudding mix. Using a whisk, blend them together for about 2 minutes until the mixture becomes smooth and thick. You’ll know it’s ready when it holds a soft peak when lifted. Set the pudding aside while you prepare the whipped cream.
Step 2: Whip the Cream
In a separate large bowl, use an electric mixer to whip 1 cup of heavy cream until soft peaks form, which usually takes about 3-5 minutes. If you prefer using whipped topping, this step can be skipped. The whipped cream should be light and fluffy, creating a lovely contrast in texture for your Banana Pudding Cups.
Step 3: Combine the Mixtures
Gently fold the whipped cream into the pudding mixture using a rubber spatula. Start folding from the edges and work your way to the center, being careful not to deflate the whipped cream. This step ensures that your pudding is ultra-creamy and light, making your banana pudding cups so delightful.
Step 4: Layer the Ingredients
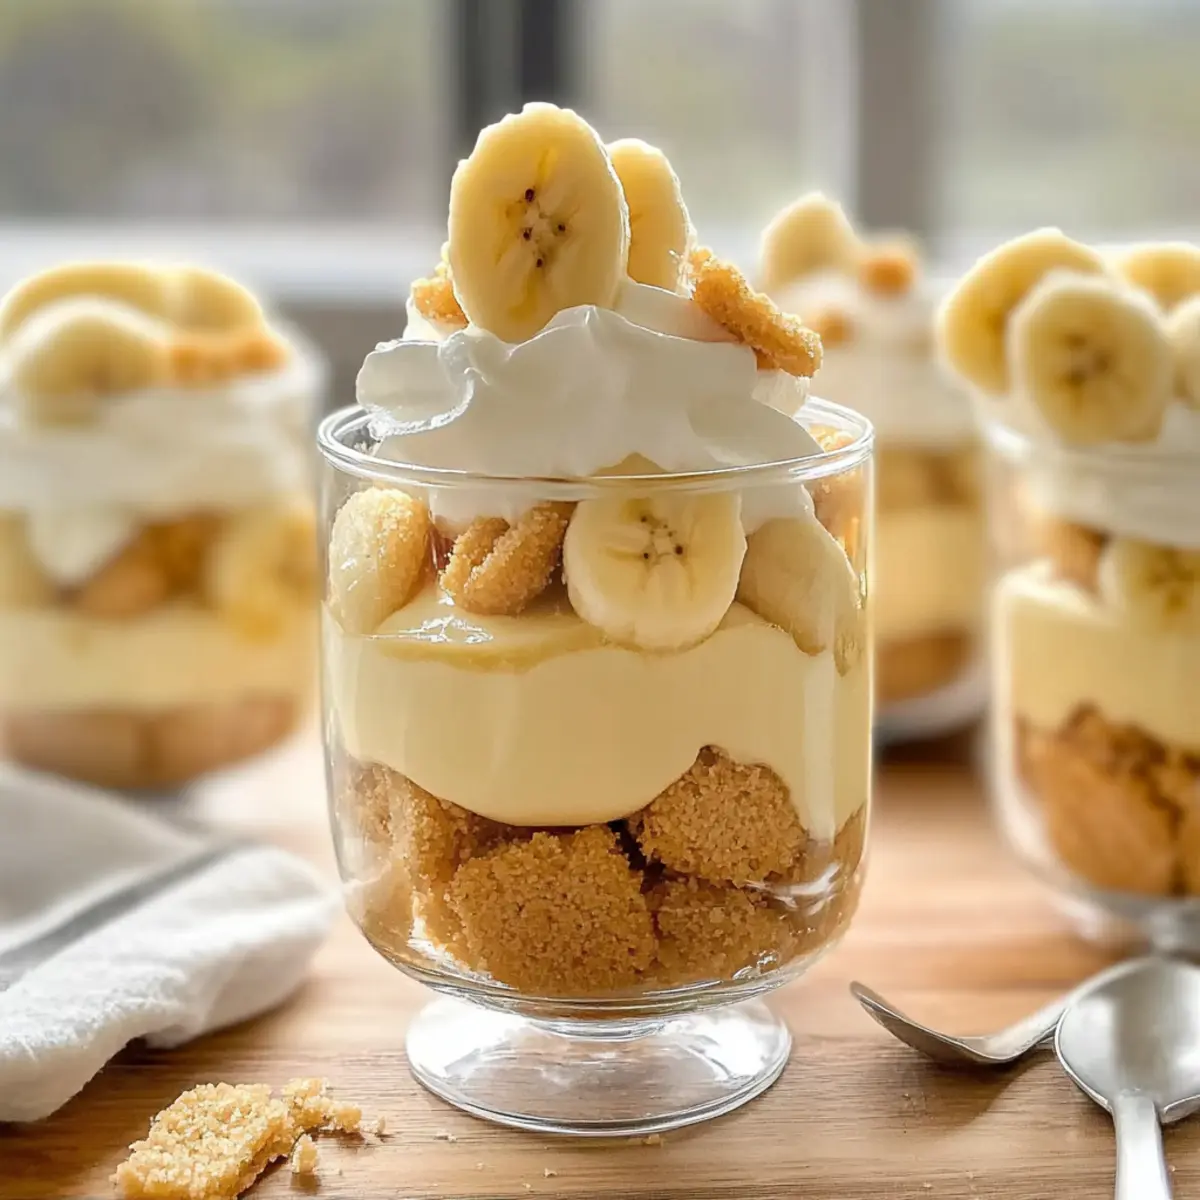
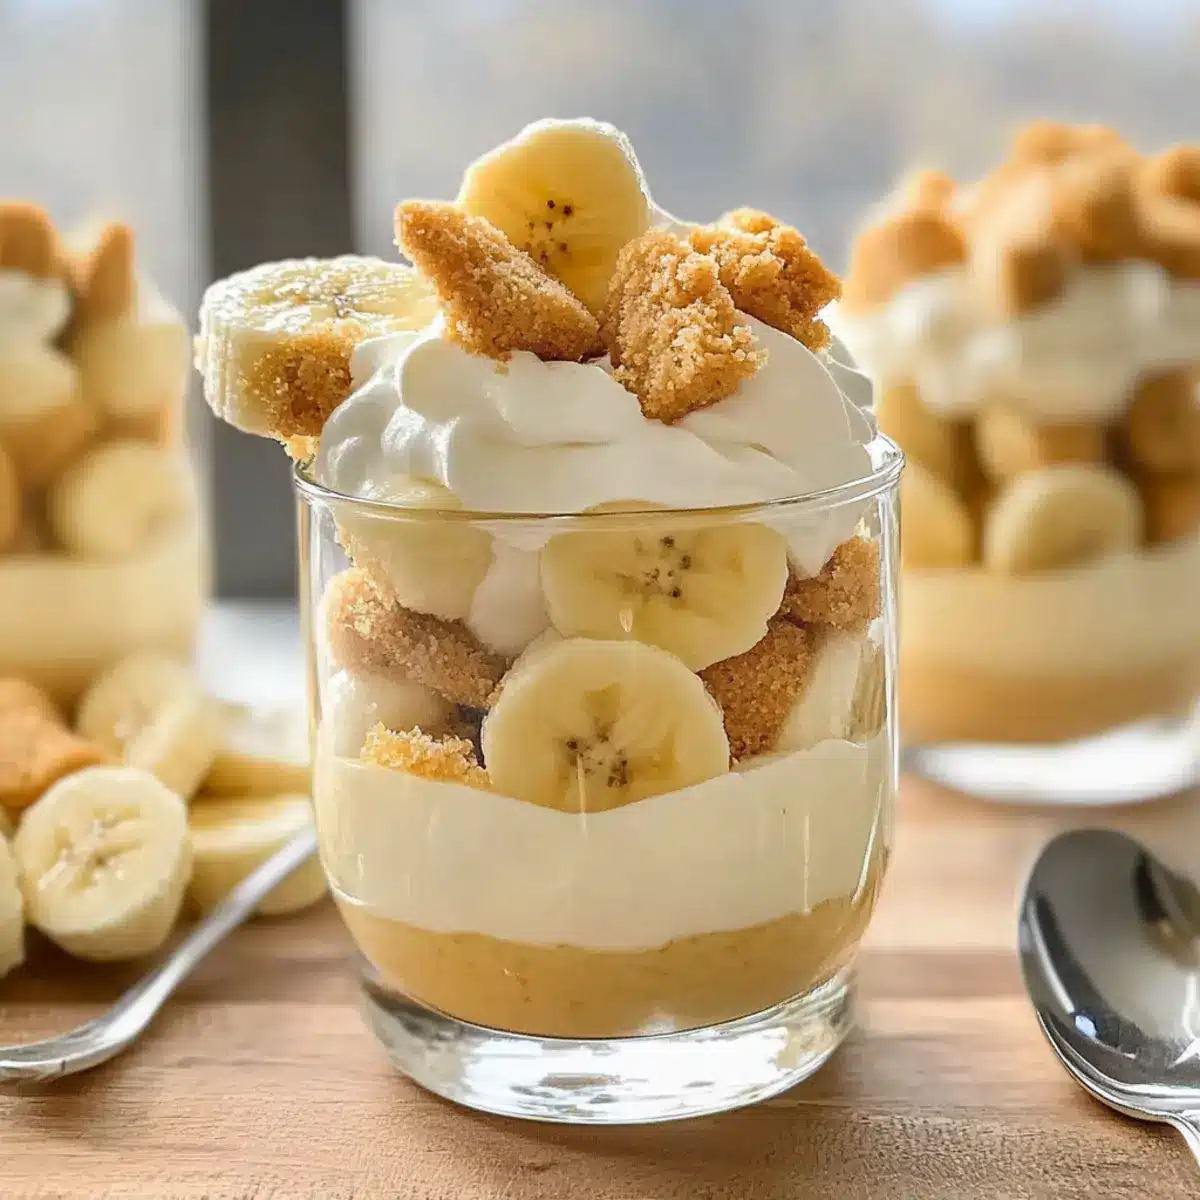
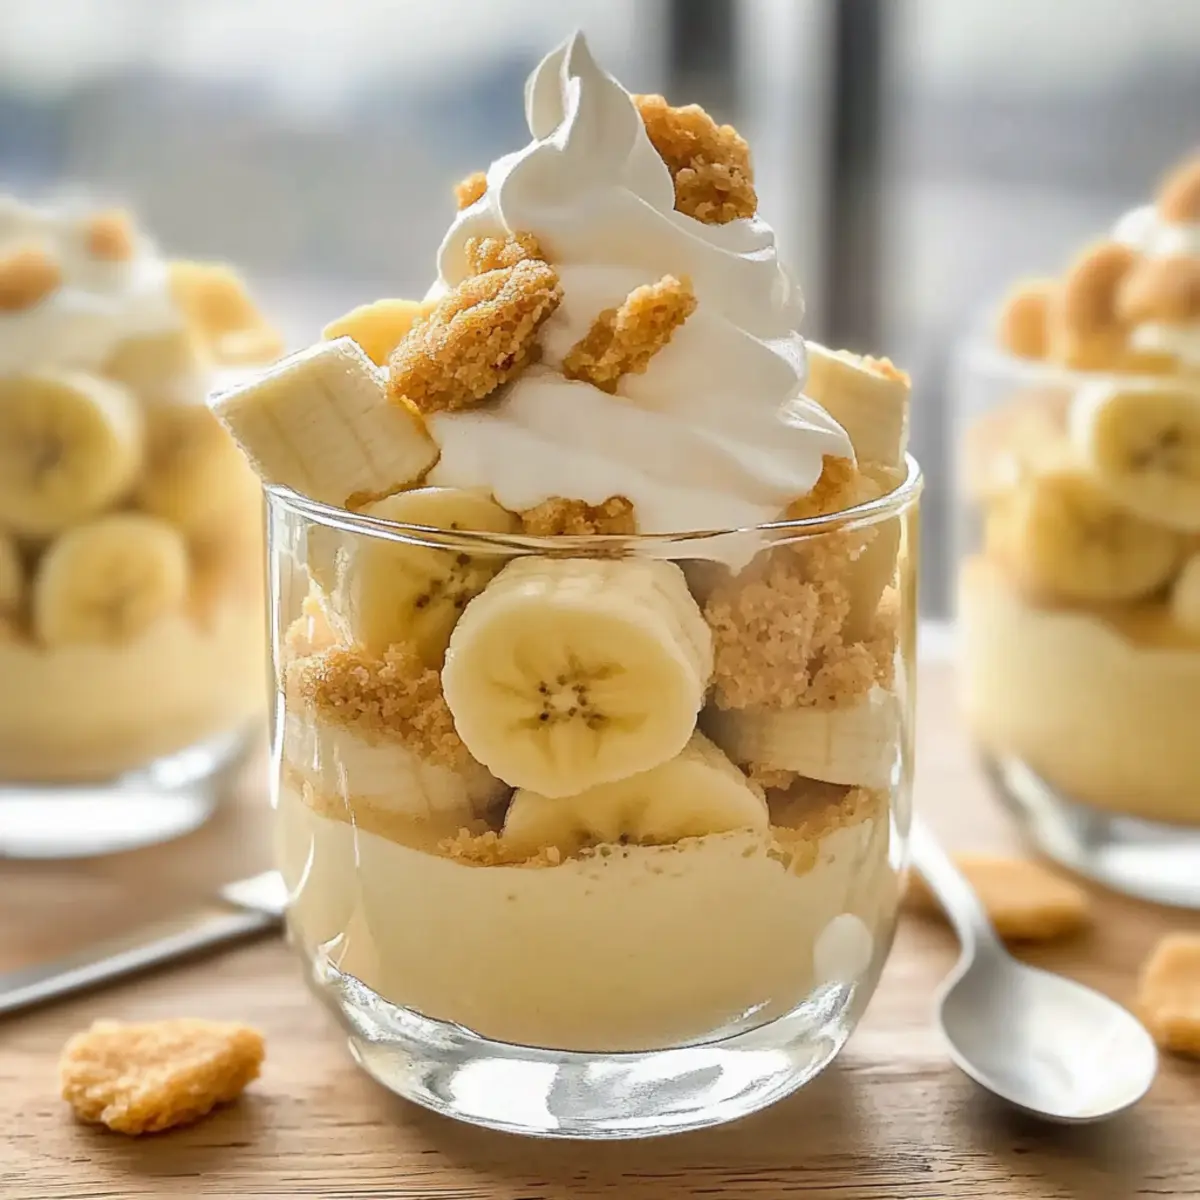
Begin layering by placing a few vanilla wafers or your choice of cookies at the bottom of clear cups or bowls, forming a base layer. Next, add a layer of sliced ripe bananas, followed by a generous spoonful of the creamy pudding mixture. Repeat the layering process until the cups are nearly full, finishing with pudding at the top.
Step 5: Add Final Touches
For an elegant finish, you can dollop some extra whipped cream on top of your Banana Pudding Cups. You might also sprinkle crushed cookies or drizzle caramel over the top for added flavor and texture. These finishing touches will not only appeal to the eye but also enhance the delightful experience.
Step 6: Chill Before Serving
Cover each cup with plastic wrap or a lid and place them in the refrigerator. Allow the cups to chill for at least 1-2 hours; this waiting period lets the flavors meld beautifully. When ready to serve, the pudding will be set, and the cookies will have softened just enough to provide a delightful bite.
Step 7: Serve and Enjoy
Once chilled, remove the Banana Pudding Cups from the refrigerator. If desired, add a final twist by dusting with a pinch of cinnamon or garnishing with a banana slice. These cups are best enjoyed cold, so gather your friends and family to share this creamy, nostalgic dessert that is sure to please everyone.
Banana Pudding Cups Variations & Substitutions
Feel free to mix things up and make these delicious banana pudding cups your own with these fun variations!
-
Dairy-Free: Use almond or coconut milk instead of regular milk, and substitute dairy-free whipped topping for an indulgent treat.
-
Sugar-Free: Opt for sugar-free pudding mix and a natural sweetener in place of vanilla wafers to keep the calorie count down while keeping it sweet.
-
Chocolate Twist: Incorporate chocolate pudding mix in place of vanilla for a decadent chocolate-banana treat that’s sure to impress.
-
Nutty Delight: Add a layer of crushed nuts, such as almonds or pecans, for a crunchy texture that complements the creaminess beautifully.
-
Spiced Up: Sprinkle a pinch of nutmeg or ginger for a warm spice twist that enriches the overall flavor profile, making each bite more comforting.
-
Fruit Variations: Experiment with other fruits, like strawberries or blueberries, layered between the bananas for a colorful and delightful fruity surprise.
-
Gourmet Drizzle: Drizzle with salted caramel or chocolate sauce just before serving for an upscale touch. It adds an extra layer of flavor that makes it truly indulgent.
-
Banana Baked Oatmeal: If you’re looking for a breakfast option instead, try this delicious Banana Baked Oatmeal that runs on the same nostalgic flavors, so you can enjoy that comforting banana taste in the morning!
Each variation adds a unique touch, ensuring your banana pudding cups remain as delightful as they are versatile!
How to Store and Freeze Banana Pudding Cups
Fridge: Store leftover banana pudding cups covered in the refrigerator for up to 2 days. The flavors continue to meld, but be aware that cookies may soften over time.
Freezer: It’s best not to freeze these cups as the cream and bananas may change texture. If needed, freeze only the pudding mixture for up to a month, then layer with fresh ingredients upon thawing.
Preparation Tip: If making ahead, prepare the pudding and cream mixture but layer in the cookies and bananas just before serving to maintain optimal texture.
Serving Reminder: Always serve these banana pudding cups chilled for the best experience, so keep them in the fridge until ready to indulge!
What to Serve with No-Bake Banana Pudding Cups
Complement these delightful cups with tasty sides and drinks, perfect for a cozy gathering or summer barbecue.
-
Creamy Whipped Topping: A dollop on top adds an extra layer of indulgence, enhancing the pudding’s creaminess with fluffy texture.
-
Freshly Baked Cookies: Serve classic chocolate chip or oatmeal raisin cookies alongside for a sweet treat pairing that everyone will love.
-
Fruit Salad: A vibrant mix of seasonal fruits brings freshness and brightness, balancing the rich flavors of the pudding cups beautifully.
-
Sweet Tea or Lemonade: Refreshing drinks like iced sweet tea or homemade lemonade offer a thirst-quenching contrast to the creamy dessert.
-
Chocolate Drizzle: Finish with a drizzle of chocolate sauce for those chocolate lovers, creating a delightful sweet contrast to the banana flavor.
-
Ice Cream: A scoop of vanilla or caramel ice cream on the side elevates your dessert experience, providing a delightful creaminess that tastes heavenly.
-
Coconut Flakes: Top with toasted coconut for a tropical twist, adding texture and a hint of sweetness that complements the bananas.
-
Mini Mint Leaves: A sprinkle of fresh mint not only brightens the presentation but also adds a refreshing touch that pairs well with the creaminess of the cups.
Expert Tips for Perfect Banana Pudding Cups
- Banana Selection: Choose ripe yet firm bananas to prevent them from turning mushy. This ensures a great texture in your banana pudding cups.
- Prevent Browning: Lightly toss sliced bananas in lemon juice before layering. This not only preserves their color but adds a subtle zing.
- Layering Technique: For the best texture, layer ingredients just before serving. This keeps the cookies from getting too soft too quickly.
- Storage Tips: Store leftover banana pudding cups covered in the refrigerator for up to 2 days. The flavors will deepen, but cookies may lose some crunch.
- Customization Ideas: Don’t hesitate to experiment! Swap vanilla wafers with ginger snaps or add a drizzle of chocolate for a unique twist on this classic dessert.
Make Ahead Options
These No-Bake Banana Pudding Cups are perfect for busy cooks looking to prep in advance and save time! You can prepare the pudding and whipped cream mixture up to 24 hours ahead, storing it covered in the refrigerator to maintain its creamy texture. Slice the bananas just before assembling the cups to prevent browning; lightly tossing them in lemon juice works wonders. Assemble the cups a few hours before serving for the cookies to soften slightly while keeping their delightful crunch. This way, you can enjoy a delicious dessert with minimal effort and maximum taste, perfect for any gathering or family dinner!
Banana Pudding Cups Recipe FAQs
How do I know if my bananas are ripe enough?
Absolutely! The best bananas for your pudding cups should be ripe but firm. Look for bananas that are bright yellow with minimal dark spots. Dark spots all over indicate overripeness, leading to mushiness in the cups. If you prefer firmer slices, avoid overly ripe bananas.
What’s the best way to store leftovers?
Great question! Store leftover banana pudding cups in the refrigerator covered with plastic wrap or a lid for up to 2 days. While the flavors will deepen during storage, be aware that the cookies may soften slightly. For the best experience, consume them sooner rather than later!
Can I freeze my banana pudding cups?
I recommend against freezing the assembled banana pudding cups, as the bananas and cream may not maintain their desirable textures when thawed. If you wish to prepare in advance, you can freeze the pudding mixture without the bananas and cookies for up to a month. When ready, thaw it in the fridge overnight and layer with fresh bananas and cookies just before serving for an optimal taste and texture.
What if my pudding isn’t thickening properly?
Very! If your pudding is not thickening as expected, ensure you’re using cold milk (typically around 40°F is ideal). Whisk for at least 2 minutes to activate the thickening agents fully. If it’s still runny, letting it sit for a few additional minutes will often help, or adding a touch more pudding mix can work wonders.
Are these pudding cups suitable for guests with allergies?
Absolutely! To cater to those with specific dietary needs, consider using lactose-free milk and dairy-free whipped topping to create a version free of dairy. Always check the ingredient labels on your pudding mix and cookies for potential allergens. If anyone is gluten-sensitive, gluten-free cookies can also be utilized to make these delightful banana pudding cups safe for all to enjoy!
Decadent Banana Pudding Cups That Everyone Will Love
Ingredients
Equipment
Method
- In a medium bowl, whisk together cold milk and instant vanilla pudding mix for about 2 minutes until smooth and thick. Set aside.
- In a large bowl, whip the heavy cream using an electric mixer until soft peaks form, about 3-5 minutes.
- Gently fold the whipped cream into the pudding mixture, being careful not to deflate the whipped cream.
- Layer vanilla wafers or cookies at the bottom of clear cups, followed by sliced bananas, and a spoonful of pudding. Repeat until cups are full.
- Top with extra whipped cream and optional toppings like crushed cookies or caramel.
- Cover with plastic wrap and refrigerate for at least 1-2 hours to chill and meld flavors before serving.
- Garnish with cinnamon or banana slice if desired and serve chilled.
Leave a Reply