
The moment I laid eyes on that vibrant platter brimming with layers of color and texture, I knew this No Bake Taco Dip was a showstopper waiting to happen. The best part? It comes together in just 15 minutes, making it the perfect solution for busy weeknights or last-minute gatherings. This delightful dip not only captures the essence of taco night but also offers a gluten-free, customizable experience that everyone can enjoy. With creamy refried beans, zesty salsa, and fresh veggies, it’s a fun, crowd-pleasing dish that pairs beautifully with sturdy tortilla chips. Who wouldn’t want to dive into such a treat? Ready to discover the secrets to making this irresistible No Bake Taco Dip? Let’s get started!
Why is No Bake Taco Dip a Must-Try?
Flavorful Layers: This No Bake Taco Dip is a stunning fusion of creamy, zesty, and crunchy elements that deliver a flavor explosion in every bite.
Quick Prep Time: With just 15 minutes needed, you can whip this up on busy weeknights, keeping family dinners stress-free.
Customizable Options: Whether you’re gluten-free, vegetarian, or looking for a keto-friendly choice, this recipe adapts easily to fit your dietary needs.
Crowd-Pleasing Appeal: Perfect for parties and gatherings, it sparkles on the table and invites guests to dig in, much like my Banana Baked Oatmeal!
Endless Variations: Tailor it to your taste—add protein for a heartier dip, or swap out ingredients to suit preferences. Your guests will be raving about this treat for days!
No Bake Taco Dip Ingredients
For the Creamy Base
- Cream Cheese – Adds a smooth and creamy base; substitute with vegan cream cheese for a dairy-free option.
- Sour Cream – Provides tanginess and creaminess; Greek yogurt can be used as a healthier alternative.
- Taco Seasoning Mix – Delivers the essential taco spices; adjust amount for desired spiciness.
- Lime Juice – Enhances flavors with acidity; use lemon juice as an alternative.
- Salt – Balances flavors; consider using kosher or sea salt, adjusting according to dietary needs.
For the Hearty Layer
- Refried Beans – Creates a hearty layer; canned vegetarian refried beans are a convenient choice.
- Salsa or Pico de Gallo – Provides freshness and moisture; choose a well-drained product to avoid sogginess.
For the Toppings
- Shredded Cheese (Mexican blend, Colby Jack, or Cheddar) – Adds richness and flavor; nutritional yeast can be used for a vegan version.
- Shredded Lettuce – Offers a crunchy texture; use iceberg or romaine, or skip for a low-carb version.
- Diced Tomatoes – Gives color and freshness; remove seeds to reduce moisture.
- Sliced Black Olives – Adds salty, briny flavor; omit if not preferred.
- Green Onions or Red Onion – Provides a sharp bite and color; use chives or shallots as alternatives.
- Avocado – Contributes creaminess and healthy fats; substitute with mashed beans for a lower-calorie option.
- Pickled Jalapeño Slices – Adds heat; omit for a milder dip.
- Hot Sauce – For those who enjoy spiciness; serve on the side for guest preference.
- Fresh Cilantro – Offers herbal brightness; omit for a non-cilantro fan.
This No Bake Taco Dip is a delightful blend of ingredients that can be tailored to fit your taste and dietary needs—making it a showstopper at any gathering!
Step‑by‑Step Instructions for No Bake Taco Dip
Step 1: Prepare the Creamy Base
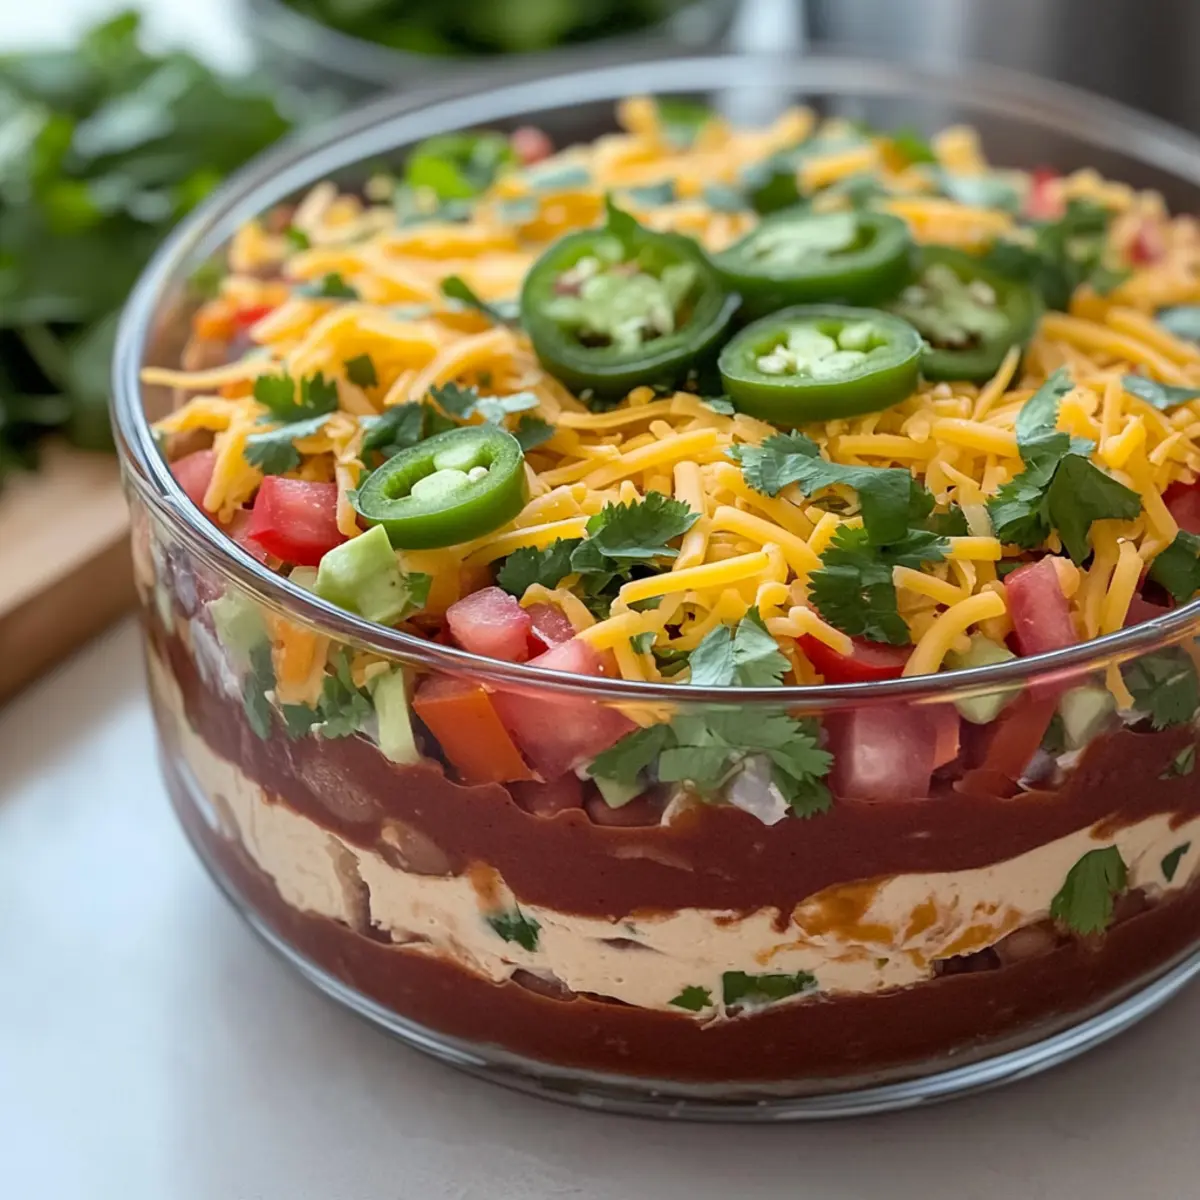
In a medium mixing bowl, combine softened cream cheese and sour cream with taco seasoning and lime juice. Using an electric mixer or a sturdy whisk, blend until the mixture is completely smooth and creamy, about 2–3 minutes. The mixture should have a uniform texture with no lumps, giving a vibrant and delicious foundation for your No Bake Taco Dip.
Step 2: Spread the Creamy Mixture
Take a serving dish or a shallow platter and spoon the creamy mixture onto the center. Using a spatula, gently spread the mixture outwards, creating an even layer that reaches the edges of the dish. This layer should be thick enough to hold the subsequent toppings, ensuring every bite of your No Bake Taco Dip is rich and flavorful.
Step 3: Layer the Refried Beans
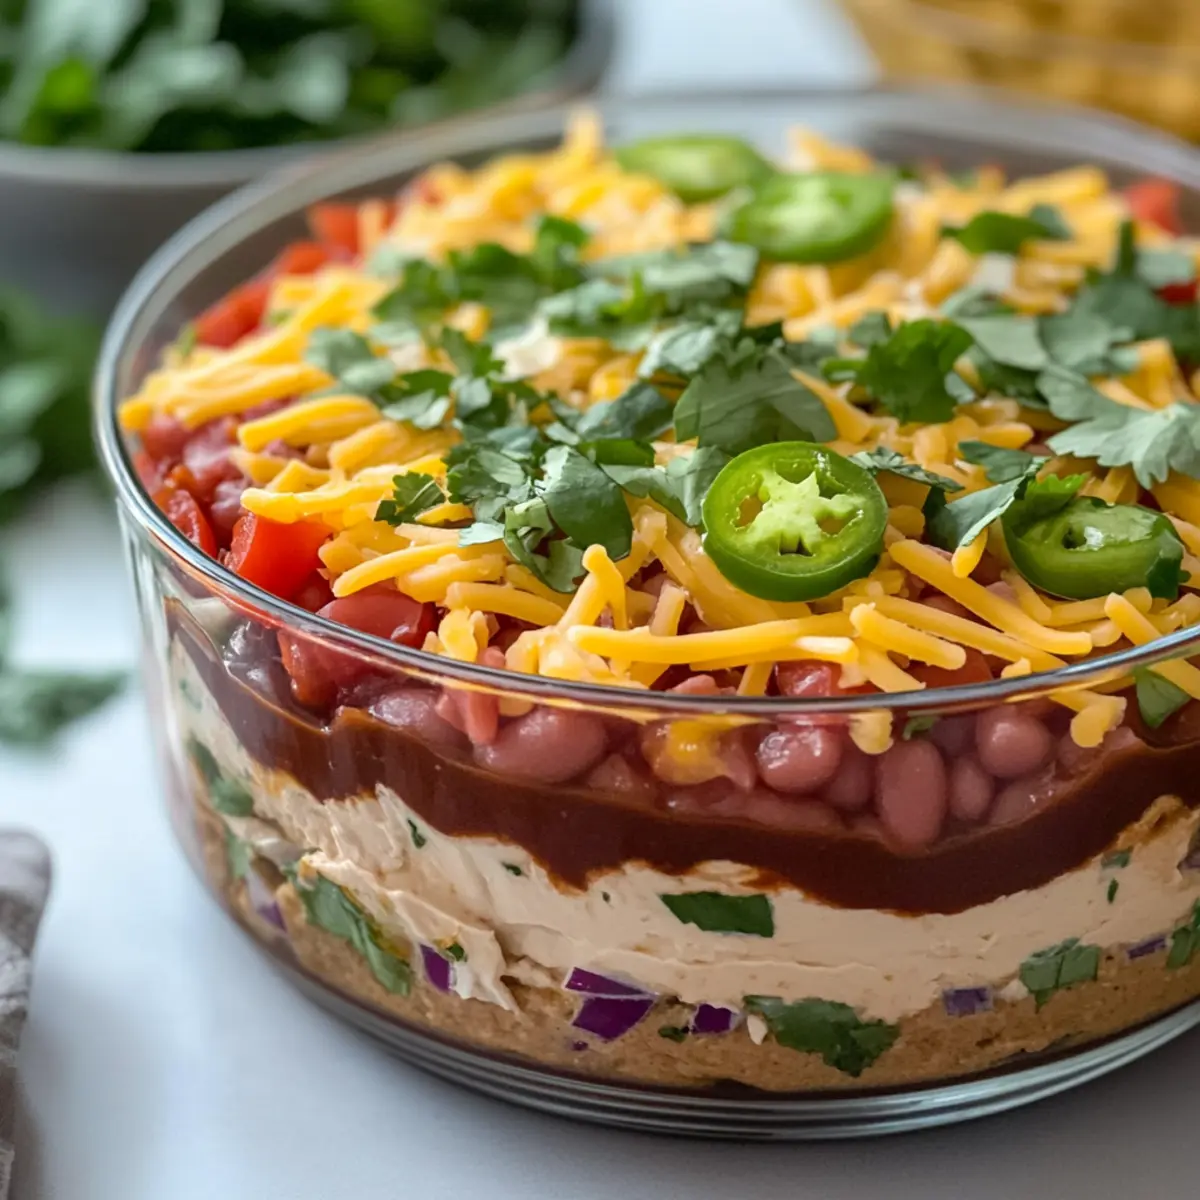
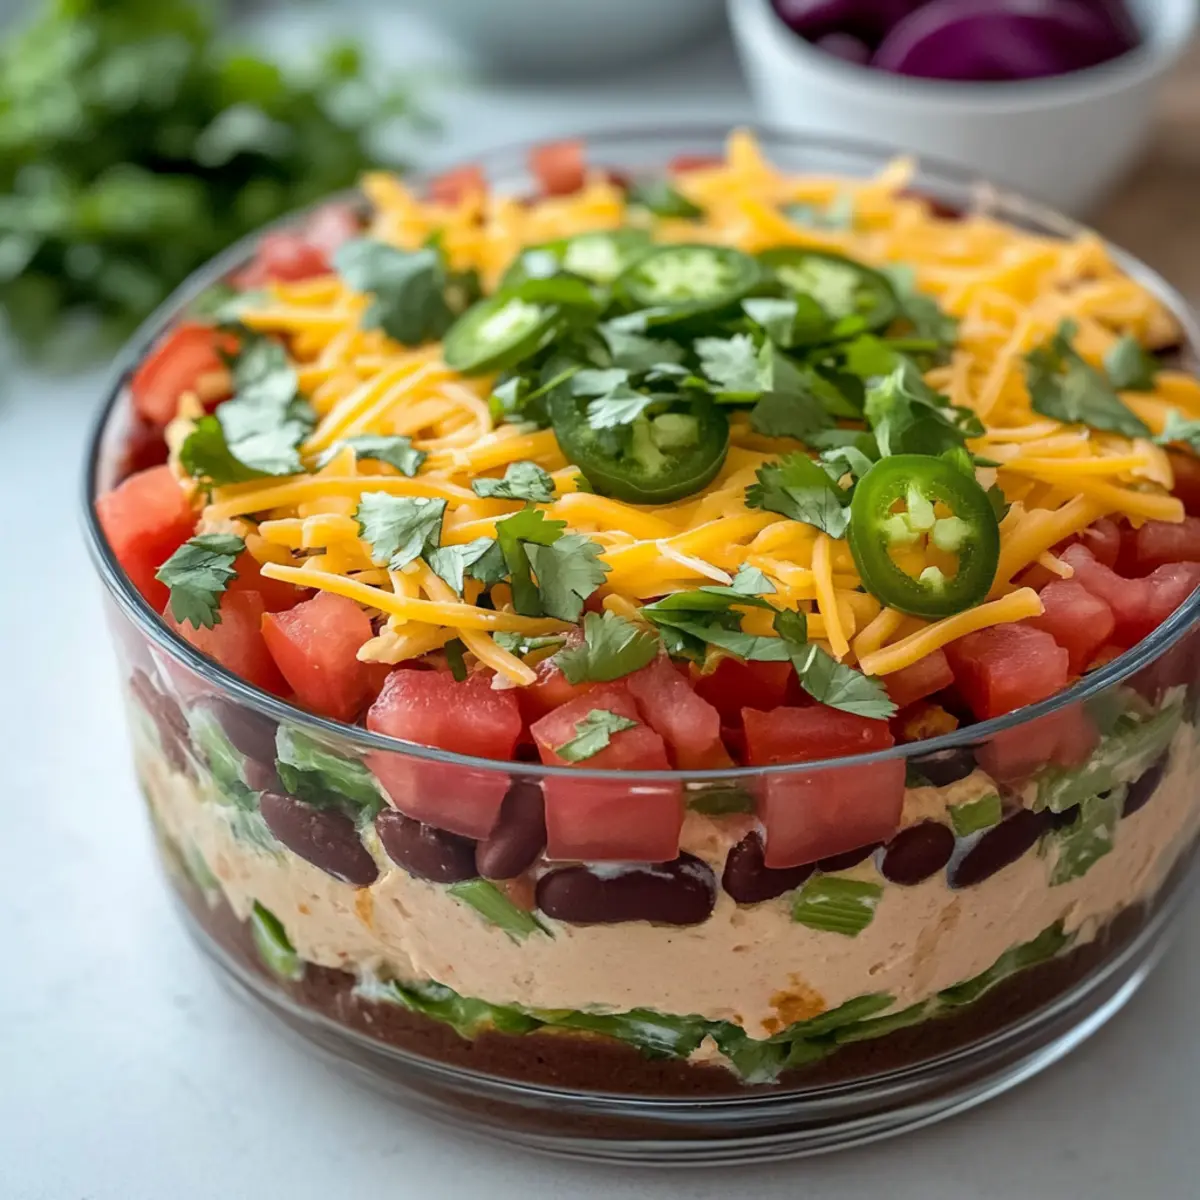
Open a can of refried beans and scoop it into a small bowl; use the back of a spoon to loosen them for easier spreading. Layer the refried beans evenly over the creamy base, making sure to cover the entire surface. The beans add a hearty texture, which combines perfectly with the creamy layer, enhancing the taste and richness of the No Bake Taco Dip.
Step 4: Add Salsa or Pico de Gallo
Next, carefully spoon a well-drained salsa or pico de gallo layer over the refried beans. Use a spatula to even out this layer, making sure it covers the beans entirely. The juices from the salsa should not pool, as this may make the dip soggy; you want a cohesive layer that adds both flavor and freshness to your No Bake Taco Dip.
Step 5: Sprinkle the Cheese
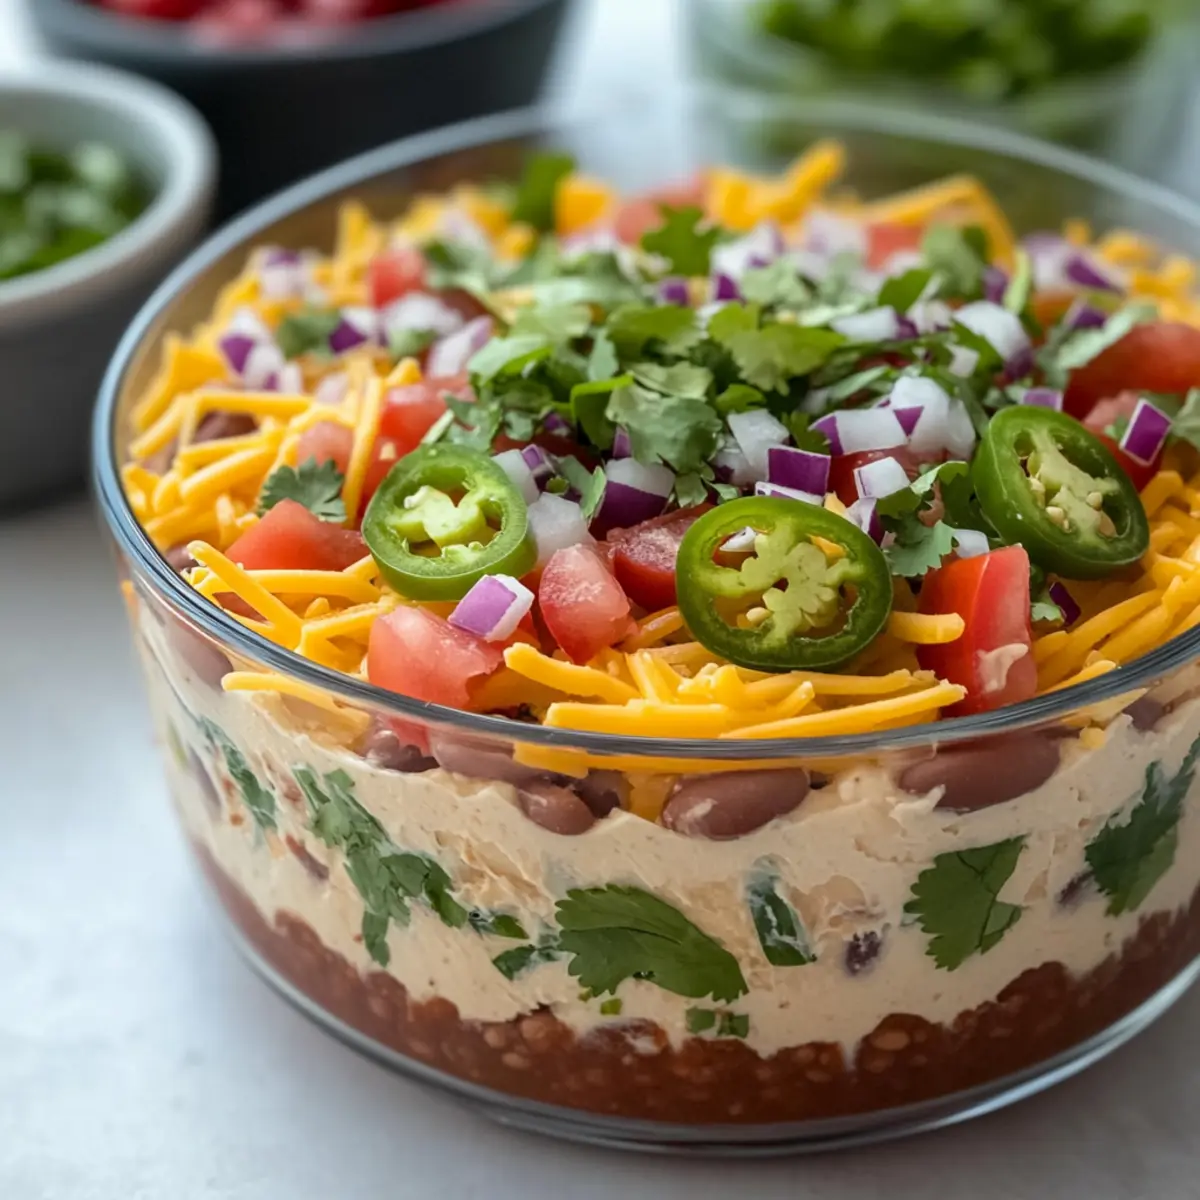
Generously sprinkle an even layer of shredded cheese over the salsa. Choose your favorite cheese blend, like Mexican, Colby Jack, or Cheddar. Make sure it’s spread uniformly so that each scoop of No Bake Taco Dip delivers that cheesy goodness. This layer brings a delightful richness and melty texture that complements the other ingredients beautifully.
Step 6: Add Fresh Vegetables
Next, layer shredded lettuce, followed by diced tomatoes, black olives, and chopped green onions on top of the cheese. Each of these toppings should be evenly distributed to give your No Bake Taco Dip a colorful and crunchy profile. This step brings a refreshing bite that contrasts with the creaminess of the base and the richness of the cheese.
Step 7: Finish with Avocado and Toppings
For the final touch, add diced avocado on top of the vegetables, ensuring it is well-distributed. If you like a bit of spice, sprinkle sliced pickled jalapeños and finish with a drizzle of hot sauce across the top. The vibrant colors of the toppings create an inviting appearance for your No Bake Taco Dip, enticing everyone to dive in.
Step 8: Chill and Serve
Cover the assembled No Bake Taco Dip with plastic wrap and refrigerate for at least 30 minutes. This chilling period allows the flavors to meld together and the layers to firm up. When ready to serve, pair the dip with sturdy tortilla chips for dipping, or let your guests scoop directly with their favorites—it’s sure to be a crowd-pleaser!
What to Serve with No Bake Taco Dip
The perfect dish deserves a full spread—let your creativity shine and delight your guests with these delectable pairings.
- Sturdy Tortilla Chips: These classic dippers complement the creamy layers, providing the perfect crunch for scooping.
- Nacho Fries: Crispy and savory, the fries add an exciting twist to your taco experience. Plus, they make for a fun sharing platter.
- Fresh Veggie Platter: Crisp bell peppers, cucumbers, and carrot sticks add a refreshing crunch that balances the richness of the dip beautifully.
- Guacamole: Creamy and zesty, this avocado delight enhances the flavors while introducing a new creamy dimension to your spread.
- Side Salad: A light, zesty salad with lime dressing can cleanse the palate and elevate the meal to a full dining experience.
- Sangria or Margaritas: Refreshing and fruity beverages like these will perfectly complement the taco dip, making your gathering feel extra festive.
- Pineapple Salsa: This sweet and tangy salsa adds a tropical twist that pairs wonderfully with the savory flavors of the taco dip.
- Cheesy Nachos: Elevate the fun with loaded nachos topped with extra cheese, jalapeños, and maybe even a drizzle of sour cream.
- Mexican Street Corn: Charred corn garnished with lime, cheese, and spices brings bold flavors that harmonize fantastically with your no bake taco dip.
How to Store and Freeze No Bake Taco Dip
Fridge: Store leftovers in an airtight container for up to 2-3 days to maintain freshness. To keep toppings crisp, separate vegetables like lettuce and tomatoes.
Freezer: Freezing is not recommended for this No Bake Taco Dip, as the texture of the cream cheese and fresh veggies will change upon thawing.
Reheating: For best taste, enjoy the dip cold. If you’ve added protein that was originally warm, gently reheat that separately and assemble just before serving.
Expert Tips for No Bake Taco Dip
-
Salsa Savvy: Ensure your salsa is well-drained; excess moisture can lead to a soggy No Bake Taco Dip. Use a fine mesh strainer if necessary.
-
Layering Logic: Spread each layer evenly and pack them gently; this creates a balanced texture and presentation that’s visually appealing.
-
Cooling Time: Chill your dip for at least 30 minutes before serving. This allows the flavors to meld beautifully and ensures that every scoop is packed with taste.
-
Fresh Toppings: Consider adding fresh ingredients like diced avocado and cilantro right before serving to maintain their vibrant color and crispness.
-
Customization Caution: If adding extra protein or different toppings, be mindful of moisture levels. Balance the flavors without overpowering the classic taco essence.
No Bake Taco Dip Variations
Feel free to play around and personalize your No Bake Taco Dip—exploring flavors and textures offers a delicious adventure.
-
Vegan Version: Substitute cream cheese and sour cream with plant-based alternatives for a delightful dairy-free dip. Your guests will hardly notice the difference!
-
Low-Carb Twist: Use low-carb tortillas or skip the beans altogether to suit your keto-friendly lifestyle while still enjoying great taste.
-
Protein-Packed: Add shredded chicken or seasoned ground beef for a heartier dip that will satisfy everyone at the table. This twist makes it a complete meal option!
-
Heat Lovers: Spice things up with diced fresh jalapeños or a splash of your favorite hot sauce. Consider serving the hot sauce on the side for those who want to control their heat levels.
-
Crunchy Dippers: Instead of tortilla chips, try serving with crunchy veggies like carrot sticks, bell pepper slices, or even pita chips for an exciting, healthful alternative.
-
Cheesy Variation: Swap the shredded cheese for a cheesy vegan option, or go bold with pepper jack cheese for an extra kick that will surprise your taste buds!
-
Fruit Fusion: Add a tropical twist by layering diced mango or pineapple on top of the dip. This unexpected addition will give your dip a fresh and sweet contrast.
-
Herb Enchantment: Enhance flavor with a variety of fresh herbs, such as parsley or dill, apart from cilantro, for a completely new taste experience.
Whichever variations you choose, this No Bake Taco Dip will steal the show, reminding me of gatherings where everyone digs into delicious dishes, much like my Cheesy Hamburger Casserole Bake or savoring my creamy Whipped Pumpkin Dip! Enjoy experimenting!
Make Ahead Options
This No Bake Taco Dip is a fantastic option for meal prep, saving you time and stress when entertaining or on busy weeknights! You can prepare the creamy base and layer of refried beans up to 24 hours in advance, storing them covered in the refrigerator for maximum freshness. For best results, keep the shredded lettuce, diced tomatoes, and avocado separate until just before serving to maintain their crunch and color. When you’re ready to enjoy, simply layer on the salsa, cheese, and fresh toppings, then allow the dip to chill for 30 minutes to meld those delicious flavors. This way, you’ll have a scrumptious No Bake Taco Dip that’s just as delightful as when made fresh!
No Bake Taco Dip Recipe FAQs
What type of cream cheese should I use for the No Bake Taco Dip?
Absolutely! Regular cream cheese provides a rich base, but if you’re dairy-free, I recommend vegan cream cheese as a perfect substitute. It will deliver the same creamy texture without compromising flavor.
How long can I store leftover No Bake Taco Dip?
Very good question! Store any leftovers in an airtight container in the fridge for up to 2-3 days. To keep the lettuce and tomatoes fresh, I suggest keeping those toppings separate until you’re ready to enjoy it again!
Can I freeze No Bake Taco Dip?
Unfortunately, freezing this No Bake Taco Dip isn’t the best option, as the texture can change upon thawing. The creaminess of the cheese and the crunch of fresh vegetables won’t hold up well. It’s best enjoyed fresh!
What should I do if my No Bake Taco Dip becomes too soggy?
I completely understand the frustration! If you find your dip too soggy due to excess moisture from the salsa, try using a fine mesh strainer beforehand to drain the liquid. If you have leftovers that are soggy, you can still serve them with crispy tortilla chips or add more crunchy toppings like additional lettuce to balance the texture.
How can I customize the No Bake Taco Dip to be kid-friendly?
The more the merrier! You can easily customize this dip for kids by going light on the spice. Use mild salsa instead of spicy, and skip the jalapeño slices. You might even consider adding sweet corn or diced bell peppers for a pop of color and sweetness!
Are there any dietary considerations for No Bake Taco Dip?
Definitely! This No Bake Taco Dip is gluten-free as long as you choose gluten-free tortilla chips for dipping. It’s also vegetarian-friendly, and for those following a vegan diet, simply substitute the cream cheese and sour cream with plant-based alternatives. Don’t forget to check for allergens when selecting your ingredients, especially for guests with allergies to dairy or certain vegetables!
No Bake Taco Dip: Quick, Creamy, and Totally Irresistible
Ingredients
Equipment
Method
- In a medium mixing bowl, combine softened cream cheese and sour cream with taco seasoning and lime juice. Blend until completely smooth, about 2–3 minutes.
- Spoon the creamy mixture onto the center of a serving dish and spread it evenly to reach the edges.
- Scoop refried beans into a small bowl and loosen them for spreading; layer refried beans evenly over the creamy base.
- Spoon well-drained salsa or pico de gallo layer over the refried beans, ensuring it doesn't pool.
- Sprinkle an even layer of shredded cheese over the salsa, ensuring uniform coverage.
- Layer shredded lettuce, diced tomatoes, black olives, and chopped green onions on top of the cheese.
- Add diced avocado on top of the vegetables, followed by sliced pickled jalapeños and hot sauce if desired.
- Cover with plastic wrap and refrigerate for at least 30 minutes before serving.
Leave a Reply