
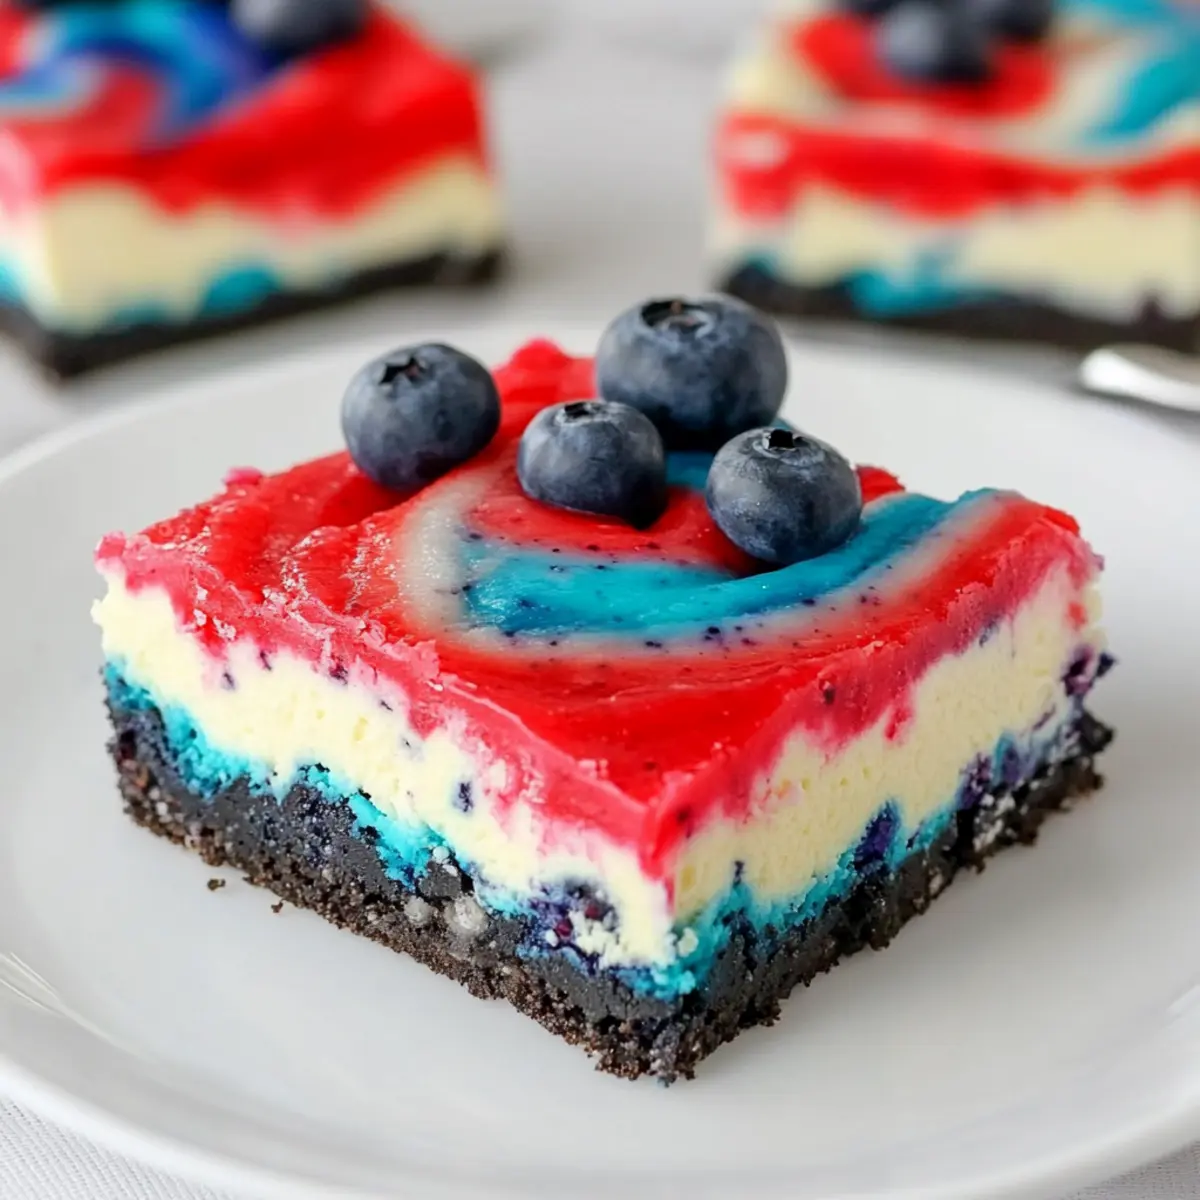
As I stood in my kitchen, the aroma of melting cream cheese mingled with the sweet anticipation of summer celebrations, I knew it was time to whip up my favorite festive treat: Easy No-Bake Red, White, and Blue Blueberry Cheesecake Bars. Perfectly creamy and rich, this dessert not only dazzles with its vibrant colors but is also a breeze to prepare, even for beginners. The crunchy Oreo crust adds just the right amount of texture to those luscious layers of cheesecake, making it a crowd-pleaser at any summertime gathering. Whether you’re celebrating the 4th of July or simply enjoying a sunny day with loved ones, these bars are bound to steal the spotlight. Curious how to create this eye-catching delight? Let’s dive into the recipe!
Why make Red, White, and Blue Bars?
Easy Preparation: These bars are a breeze to make, even for beginner bakers. With no baking required, you can whip them up in no time!
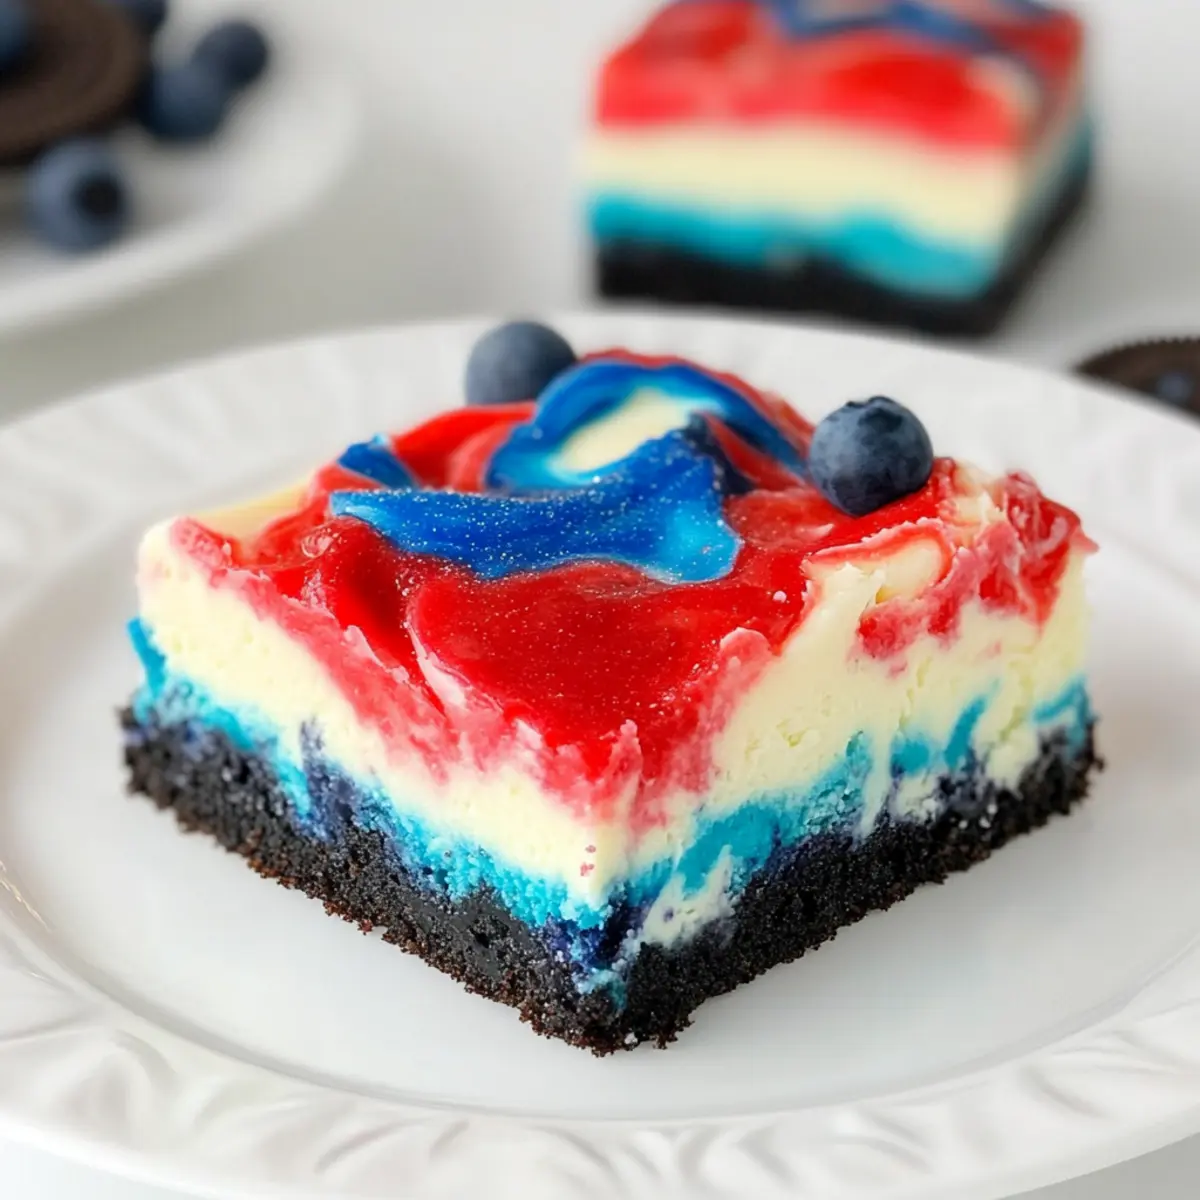
Patriotic Appeal: The stunning layers of red, white, and blue not only look festive but also taste amazing—a perfect way to celebrate summer.
Crowd-Pleasing Delight: Whether it’s a family reunion or a casual backyard BBQ, these bars are sure to impress your guests and satisfy their sweet cravings.
Versatile Ingredients: Feel free to switch up the toppings with fresh fruit or whip cream for added flair. You can even create a more patriotic look using strawberries and blueberries as toppings!
Storage Friendly: Make them ahead of time and keep them in the fridge for a week. They actually taste even better after chilling overnight—perfect for planning summer festivities!
Red, White, and Blue Cheesecake Bar Ingredients
• The essential components for your stunning dessert!
For the Crust
- Oreo cookies – A classic base for these bars; swap with chocolate graham crackers for a unique twist.
- Melted butter – Helps bind the crust together; consider using coconut oil for a dairy-free version.
For the Cheesecake Filling
- Cream cheese (3 blocks, 8 oz. each) – The star of the filling for that rich and creamy texture. Neufchâtel cheese can lighten it up a bit.
- Granulated sugar (1 ½ cups) – Sweetens the cheesecake beautifully; substitute with maple syrup if you prefer a natural option.
- Sour cream (1 cup) – Adds a delightful tanginess; Greek yogurt works as an excellent substitute.
- Large eggs (4) – Essential for setting the cheesecake; for a vegan twist, consider using flax eggs or silken tofu, but keep in mind the texture may differ.
For the Color
- Red and blue gel food coloring – Creates that festive look; natural food colorings can achieve similar results if preferred.
Optional Toppings
- Cool Whip – A light and fluffy topping that complements the bars perfectly.
- Sprinkles – Fun additions for decoration on special occasions.
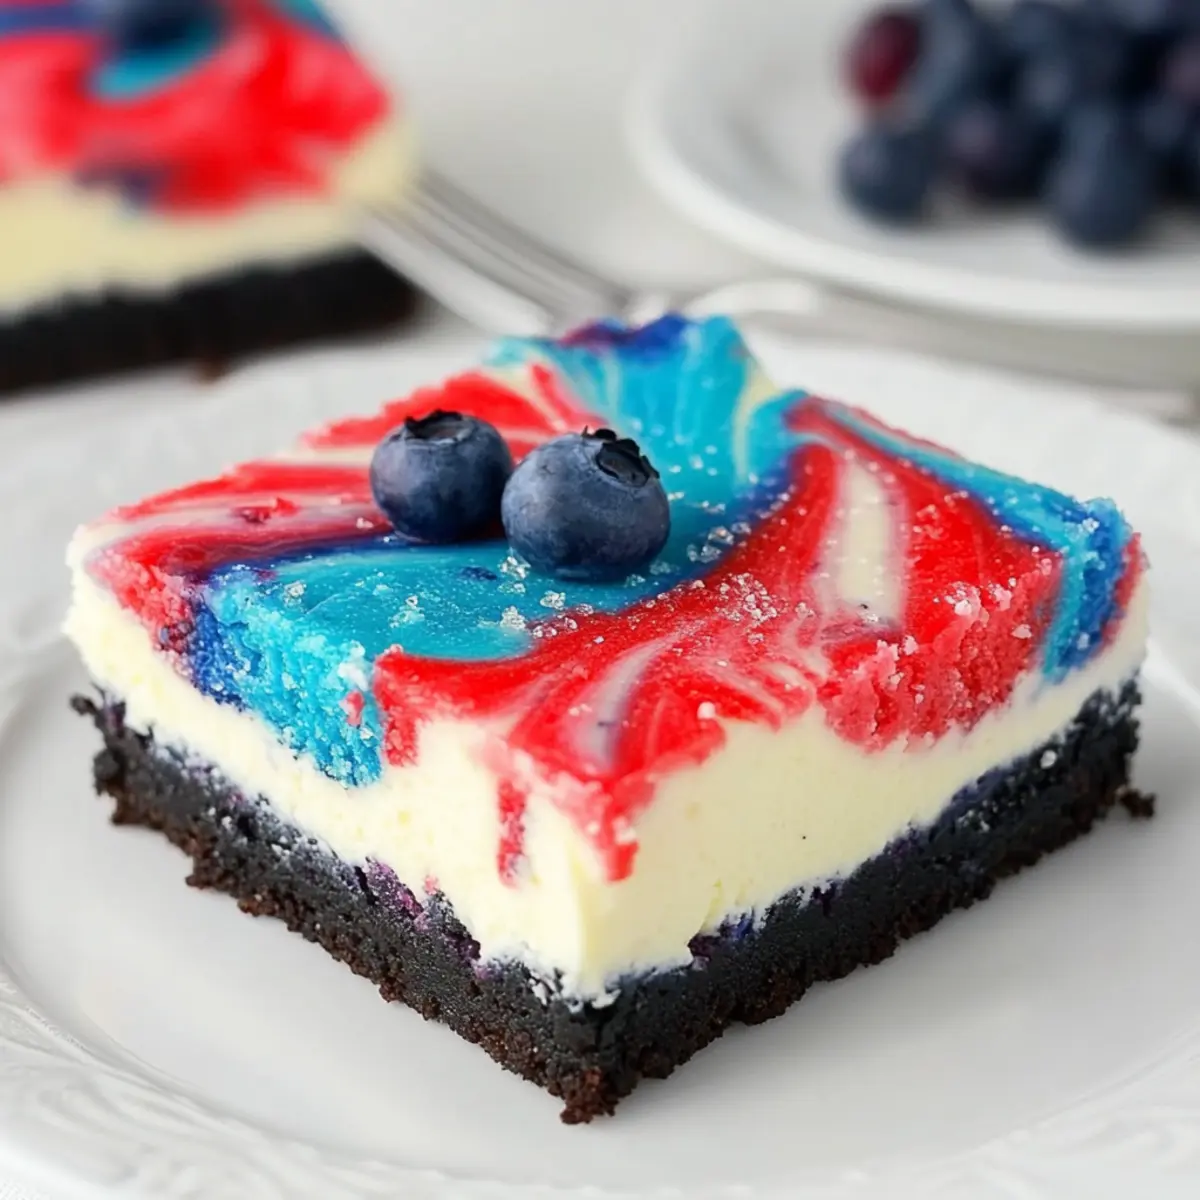
- Fresh fruit – Strawberries and blueberries can enhance the patriotic flair while adding a fresh twist.
Dive into this easy no-bake recipe for Red, White, and Blue Oreo Cheesecake Bars that’ll make your celebrations memorable!
Step‑by‑Step Instructions for Red, White, and Blue Oreo Cheesecake Bars
Step 1: Preheat and Prepare
Begin by preheating your oven to 325°F (163°C). While the oven warms, line a 9×13-inch baking dish with parchment paper to prevent sticking. This will set the foundation for your Red, White, and Blue Oreo Cheesecake Bars and ensure easy removal once they are ready to be sliced and served.
Step 2: Make the Crust
In a food processor, blend enough Oreo cookies to make fine crumbs. Once crumbled, pour in melted butter and pulse until the mixture resembles wet sand. Firmly press this Oreo mixture into the base of your prepared pan using a flat-bottomed measuring cup or your hands. Bake the crust for 10 minutes to set it, then allow it to cool completely before adding the filling.
Step 3: Prepare the Cheesecake Filling
In a large mixing bowl, beat together softened cream cheese and granulated sugar using an electric mixer, blending until the mixture is smooth and creamy. This will create a luscious filling for your cheesecake bars. Gradually add in the sour cream, mixing until fully incorporated. Make sure there are no lumps for the best results.
Step 4: Incorporate the Eggs
Add the large eggs to the cream cheese mixture one at a time, mixing well after each addition. This will help achieve a rich and velvety texture for your Red, White, and Blue Oreo Cheesecake Bars. Scrape down the sides of the bowl as needed to ensure everything is well mixed, creating a uniform batter.
Step 5: Divide and Color the Batter
Now, divide the creamy cheesecake batter evenly into three separate bowls. Leave one bowl white to maintain the original color, then add red gel food coloring to one bowl and blue to the other. Stir gently until the colors are vibrant and well mixed, ensuring your festive colors pop in the final presentation of the cheesecake bars.
Step 6: Layer and Swirl the Batters
Carefully spoon the color batters over the cooled Oreo crust in a random pattern, creating dollops of red and blue alongside the white batter. Use a knife or skewer to gently swirl the colors together, creating a beautiful tie-dye effect without fully blending them. This playful design will make your Red, White, and Blue Oreo Cheesecake Bars visually impressive.
Step 7: Bake the Bars
Place your pan in the preheated oven and bake for 45 to 50 minutes. Keep an eye on the bars as they bake; they are done when the center is set but still has a slight jiggle. After baking, remove the pan from the oven and let the bars cool to room temperature before transferring them to the refrigerator.
Step 8: Chill and Serve
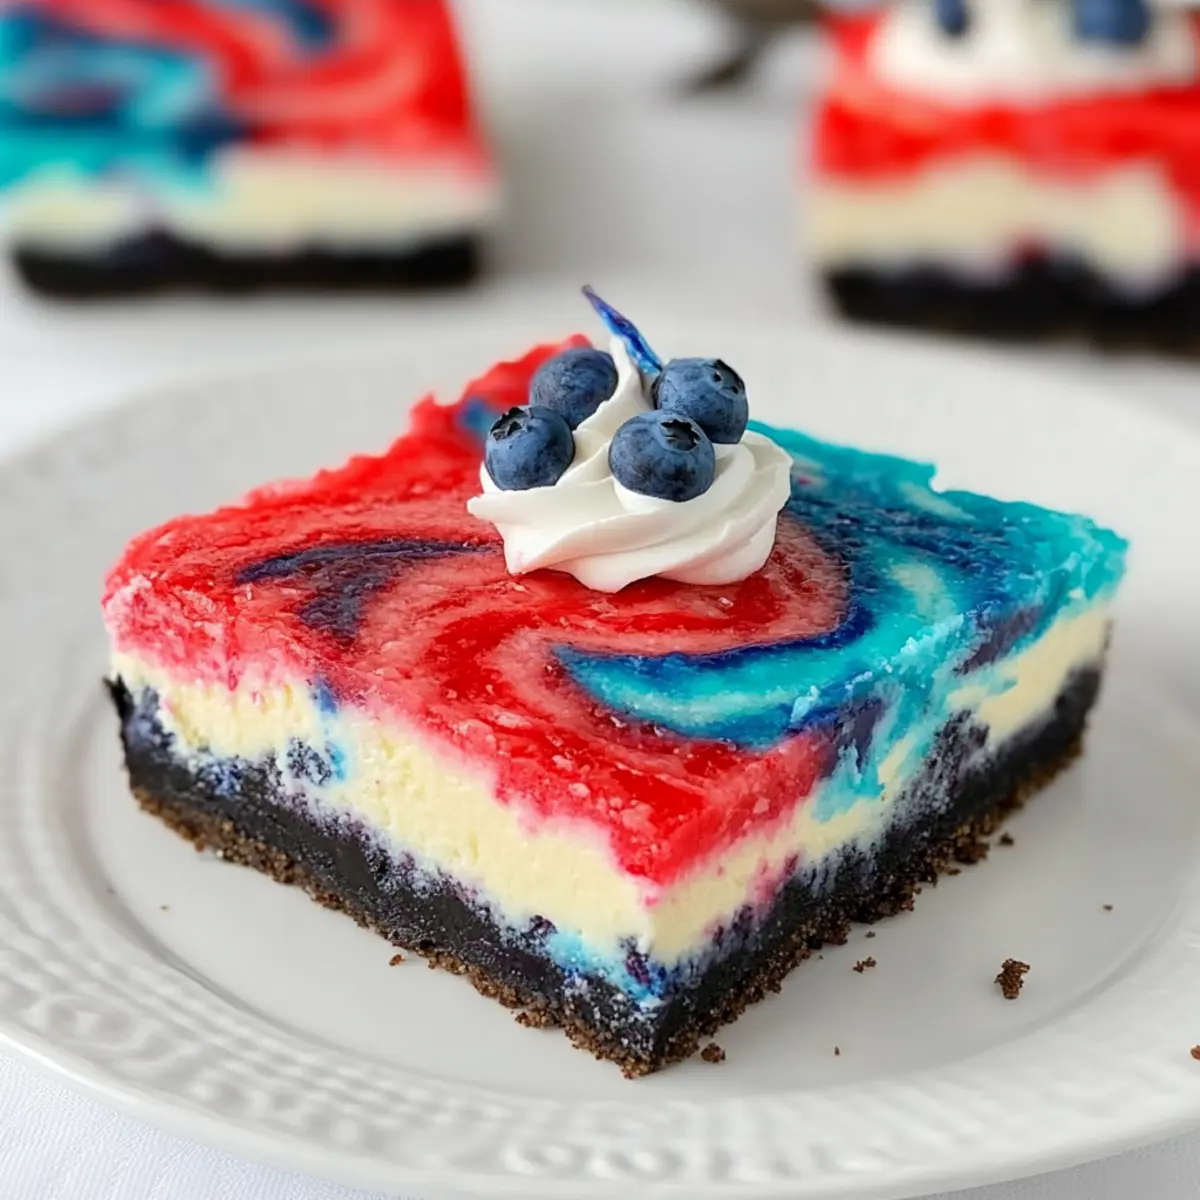
To enhance the flavors and texture of your cheesecake bars, refrigerate for at least 6 hours or ideally overnight. This will firm them up and improve the sliceability when you cut them. Slice into squares and serve chilled, garnishing with Cool Whip, fresh fruit, or sprinkles if desired, to celebrate with every patriotic bite!
Tips for the Best Red, White, and Blue Bars
-
Softened Cream Cheese: Make sure your cream cheese is softened to room temperature before mixing. This will help achieve a smooth, lump-free filling for your Red, White, and Blue Oreo Cheesecake Bars.
-
Chill Overnight: Allow the cheesecake bars to chill overnight for the best flavor and texture. It helps them set properly, making slicing easier and keeping edges neat.
-
Swirling Technique: When adding color to the batter, spoon it gently to avoid overmixing. Swirling too much can muddy the colors, losing that festive look you want!
-
Warm Knife: For clean cuts, use a warm knife when slicing the chilled bars. Simply dip it in hot water, wipe it dry, and then cut—this helps maintain beautiful layers.
-
Storage Tips: Keep leftover bars in an airtight container in the fridge for up to a week. They taste even better after a day or two, as flavors meld beautifully!
What to Serve with Easy No-Bake Red, White, and Blue Cheesecake Bars
Picture a sun-soaked gathering where sweet flavors dance on the palate, crafting moments to cherish with loved ones.
- Fresh Fruit Salad: A medley of seasonal fruits adds a refreshing contrast to the rich cheesecake bars, enhancing the overall flavor harmony.
- Ice Cream: Creamy vanilla or a berry swirl not only complements the vibrant bars but also gives a delightful temperature contrast with each bite.
- Grilled Peaches: Juicy, caramelized peaches bring a warm, fruity touch that perfectly balances sweetness and creaminess.
- Lemonade or Iced Tea: The zesty and bright flavors of these drinks provide a refreshing palate cleanse, making every bite of cheesecake even more delightful.
- Chocolate-Covered Strawberries: These indulgent treats give an additional sweet burst that pairs well with the cheesecake’s creamy texture and fruity colors.
- Almond Cookies: Crisp, nutty cookies offer a textural contrast while their mild flavor won’t overpower the cheesecake’s spotlight.
- Patriotic Fruit Skewers: Threading strawberries, blueberries, and marshmallows creates a colorful snack that beautifully echoes the cheesecake bars’ colors.
- Whipped Cream: A dollop on top adds lightness and creaminess, enhancing the luscious experience, especially if flavored with a hint of vanilla!
- Sparkling Water with Citrus: Infused with slices of lemon or lime, this bubbly drink refreshes without overshadowing the dessert.
- Mini Cupcakes: Bright, festive cupcakes bring additional sweetness and variety to the dessert table, inviting guests to indulge even more.
Storage Tips for Red, White, and Blue Oreo Cheesecake Bars
Fridge: Store these cheesecake bars in an airtight container in the fridge for up to 1 week. The flavors will deepen and improve after chilling.
Freezer: If you want to enjoy them later, freeze the bars for up to 3 months. Wrap each piece tightly in plastic wrap, then place them in a freezer bag for added protection.
Thawing: To enjoy frozen bars, transfer them to the fridge and allow them to thaw overnight before serving. This ensures they maintain their creamy consistency.
Reheating: These cheesecake bars are best enjoyed cold. If you prefer them a bit softer, let them sit at room temperature for about 15 minutes before serving.
Red, White, and Blue Cheesecake Bars Variations
Feel free to switch things up and make these bars your own with these delightful twists!
- Vegan-Friendly: For a plant-based treat, substitute cream cheese with vegan cream cheese and use flax eggs for binding.
- Gluten-Free: Opt for gluten-free Oreos or nut-based crust for a wholesome alternative that everyone can enjoy.
- Flavor Boost: Experiment by adding a splash of vanilla extract or a hint of almond extract for an exciting flavor twist.
- Fruit-Infused: Mix in fresh blueberries or strawberries into the cheesecake filling for a burst of fresh fruit flavor.
- Colorful Swirls: Replace the red and blue food coloring with natural beet juice and spirulina for a healthier, vibrant alternative.
- Decadent Topping: Drizzle with chocolate ganache or caramel sauce for an indulgent finish that complements the creamy cheesecake.
- Festive Sprinkles: Add festive-themed sprinkles on top for birthdays or special occasions to make these bars even more cheerful.
- No-Bake Delight: Turn these into no-bake bars by using a refrigerator instead of an oven to set; just chill until firm.
Each variation offers a chance to personalize your dessert, perfect for summer celebrations—your guests will be asking for your secret recipe! Don’t forget to serve them alongside some Pumpkin Cheesecake Truffles for a seasonal touch or enjoy them with a side of Creamy Beef and Garlic Butter Pasta to balance out the sweetness.
Make Ahead Options
These Easy No-Bake Red, White, and Blue Blueberry Cheesecake Bars are perfect for meal prep, allowing you to create a delightful dessert ahead of time! You can prepare the Oreo crust and filling up to 24 hours in advance. To do this, follow the recipe instructions through Step 6 and then cover the cheesecake batter tightly with plastic wrap, refrigerating it until you’re ready to bake. Baking can be done the day before your event, and once cooled, let the bars chill in the fridge for at least 6 hours or overnight for the best flavor and texture. Just remember, chilling not only enhances the taste but also helps to keep the bars firm and sliceable—so they remain just as delicious when it’s time to serve!
Red, White, and Blue Oreo Cheesecake Bars Recipe FAQs
What type of Oreo cookies should I use for the crust?
For the crust, I highly recommend using classic Oreo cookies for that rich chocolate flavor. However, if you wish for a different twist, chocolate graham crackers can be an excellent substitute, providing a similar texture with a hint of sweetness.
How should I store leftover cheesecake bars?
These cheesecake bars can be stored in an airtight container in the refrigerator for up to 1 week. I often keep them chilled as they taste even more delightful after a day or two, allowing the flavors to meld beautifully!
Can I freeze the Red, White, and Blue Oreo Cheesecake Bars?
Absolutely! If you’d like to enjoy them later, you can freeze the cheesecake bars for up to 3 months. To do this, wrap each piece tightly in plastic wrap and place them in a freezer bag. This way, they stay fresh and delicious until you’re ready to indulge.
What’s the best way to prevent the cheesecake from cracking?
To prevent cracks in your creamy cheesecake bars, ensure your ingredients are at room temperature before mixing. Additionally, avoid overbaking; they should have a slight jiggle in the center when you take them out of the oven. Cooling them slowly by letting them sit at room temperature before refrigerating can also help.
Are there any allergy considerations for this recipe?
Yes, this recipe contains dairy and eggs, which are common allergens. For dairy-free options, consider using coconut oil instead of butter, and opt for vegan cream cheese and a suitable egg substitute like flax eggs. Always read labels carefully if serving those with allergies to ensure safety.
How can I make the bars more visually appealing?
To enhance the presentation of your Red, White, and Blue Oreo Cheesecake Bars, you can garnish them with a dollop of Cool Whip, fresh fruit like strawberries and blueberries, or even colorful sprinkles. This adds not only a festive touch but also a fresh flavor dimension to each bite!
Celebrate Summer with Red, White, and Blue Oreo Cheesecake Bars
Ingredients
Equipment
Method
- Preheat your oven to 325°F (163°C) and line a 9x13-inch baking dish with parchment paper.
- Blend Oreo cookies in a food processor until fine crumbs, mix with melted butter and press into the base of the prepared pan. Bake for 10 minutes and let cool.
- In a mixing bowl, beat together cream cheese and sugar until smooth. Gradually blend in sour cream until fully incorporated.
- Add eggs one at a time, mixing well after each addition and scrape down the sides of the bowl.
- Divide the filling into three bowls, leaving one plain. Add red coloring to one bowl and blue to another; mix until vibrant.
- Spoon the colored batters onto the cooled crust in dollops and swirl gently with a knife to create a tie-dye effect.
- Bake for 45 to 50 minutes until the center is set but still jiggles slightly. Let cool to room temperature before refrigerating.
- Chill for at least 6 hours or overnight, then slice into squares and serve with garnishes.
Leave a Reply