
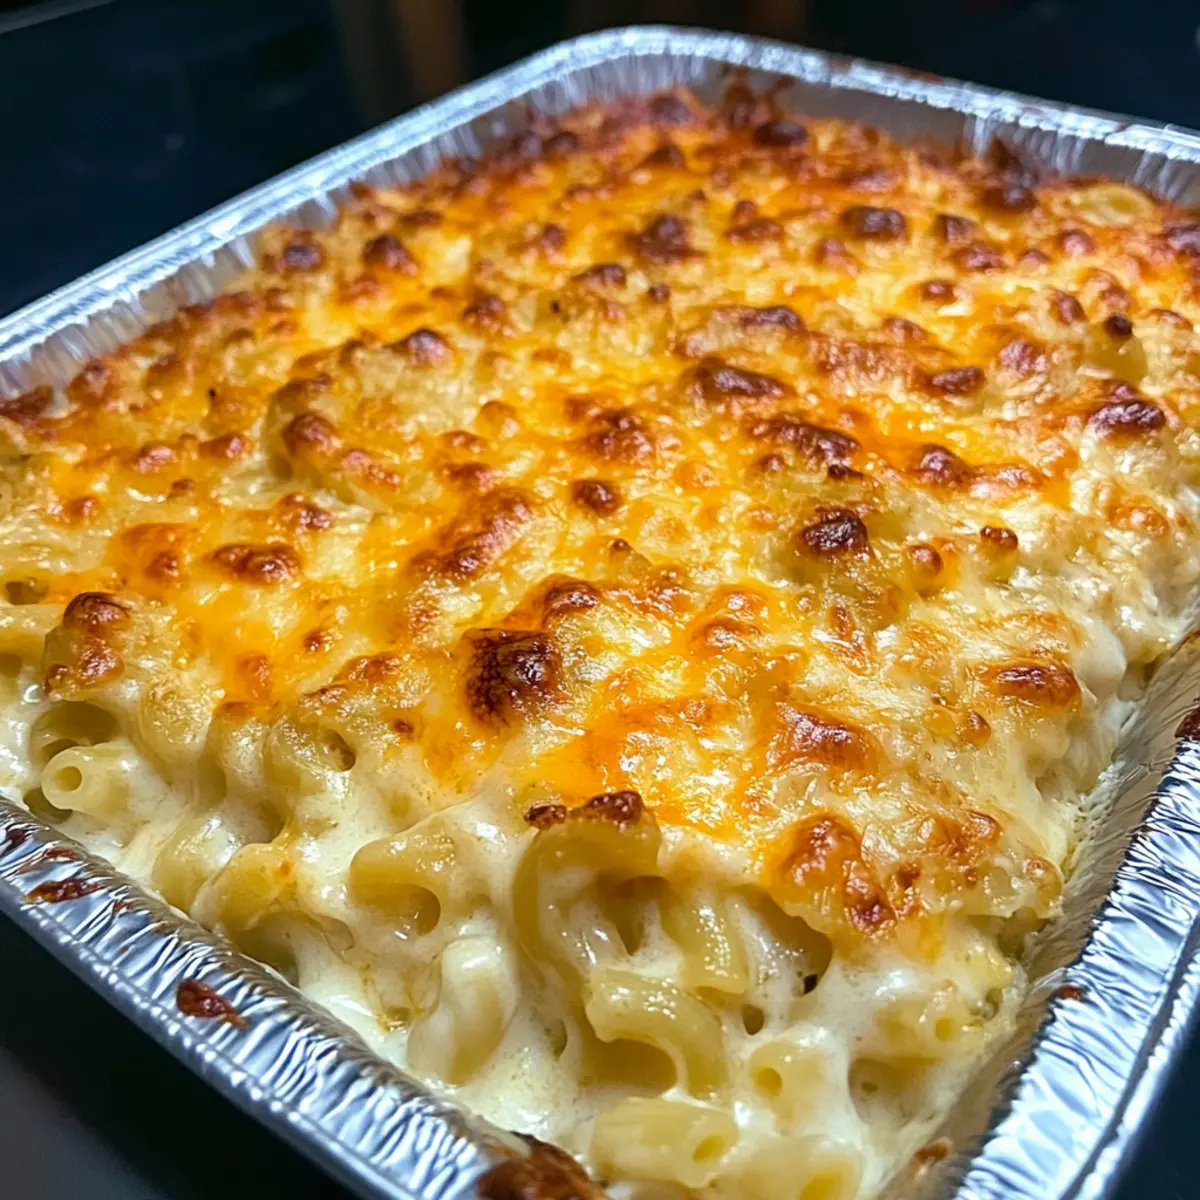
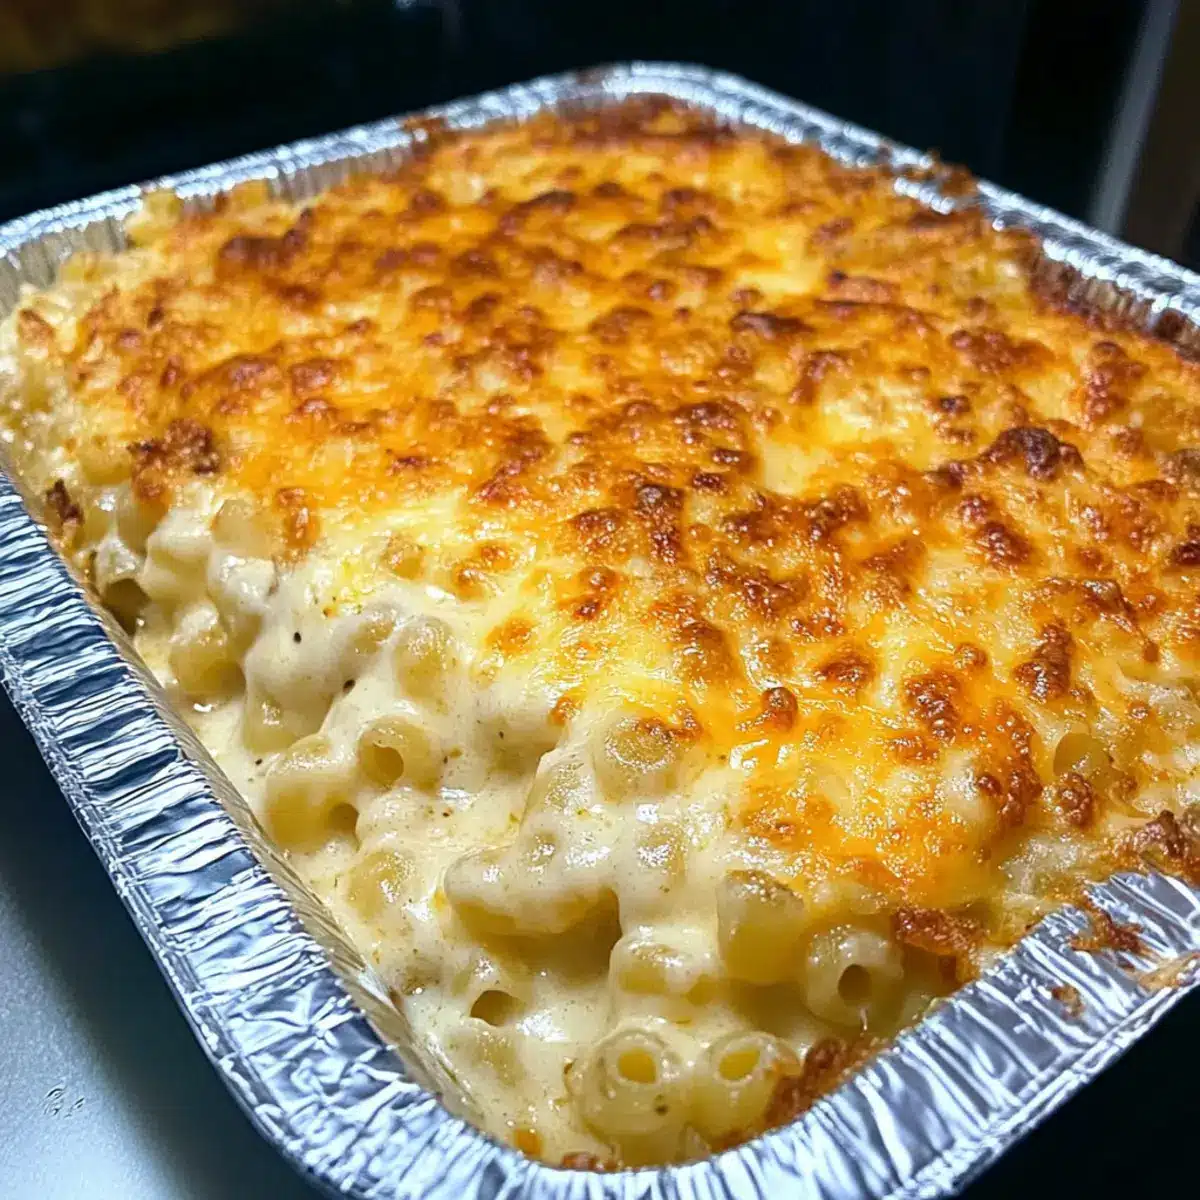
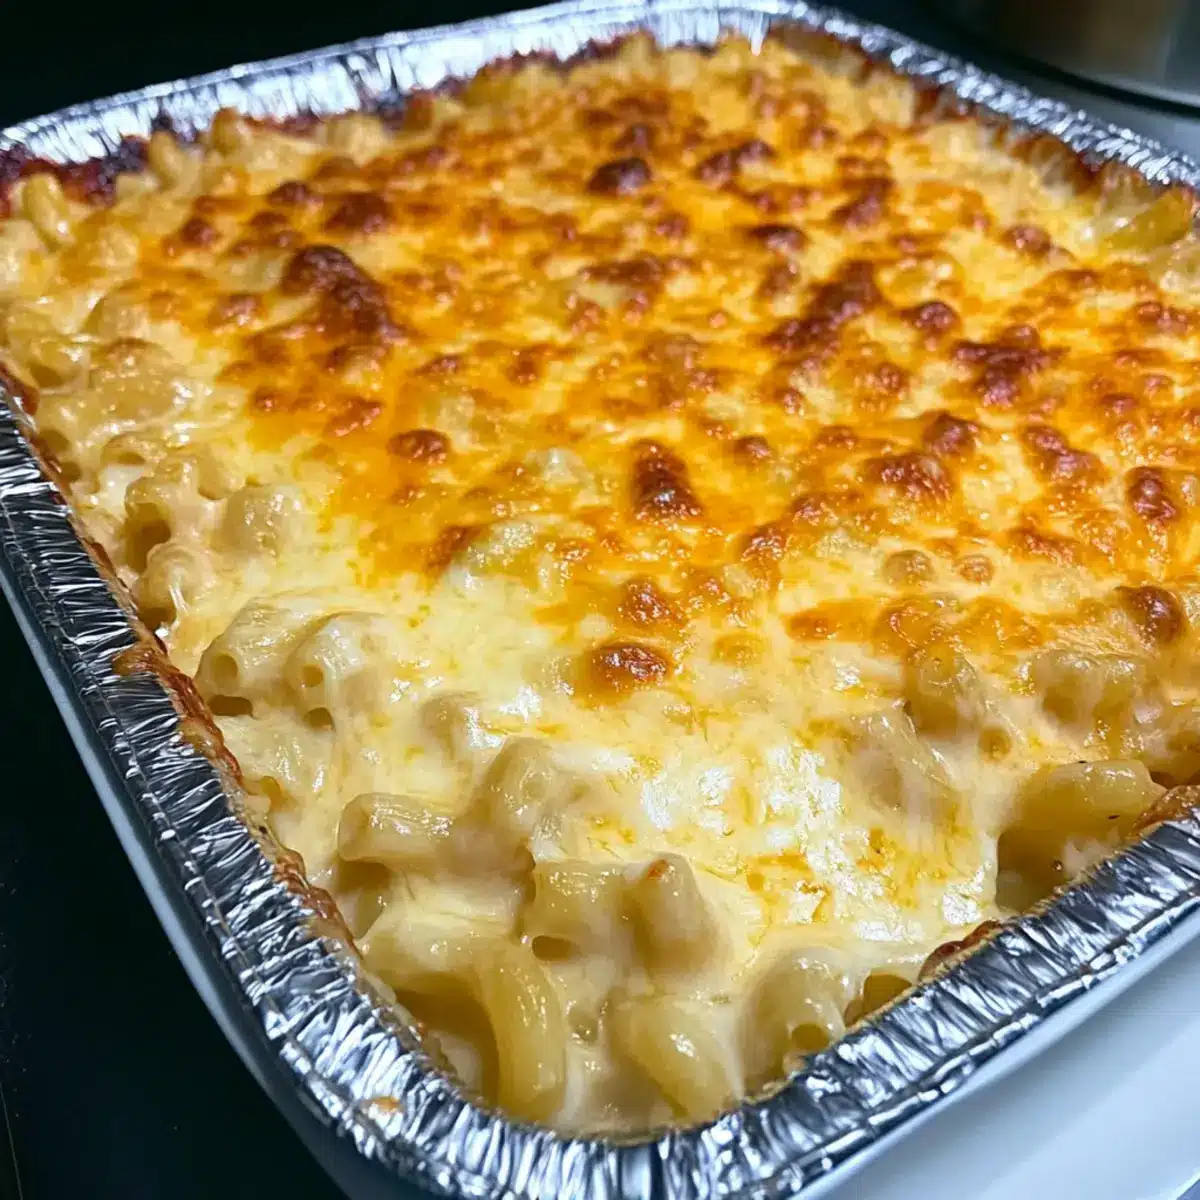
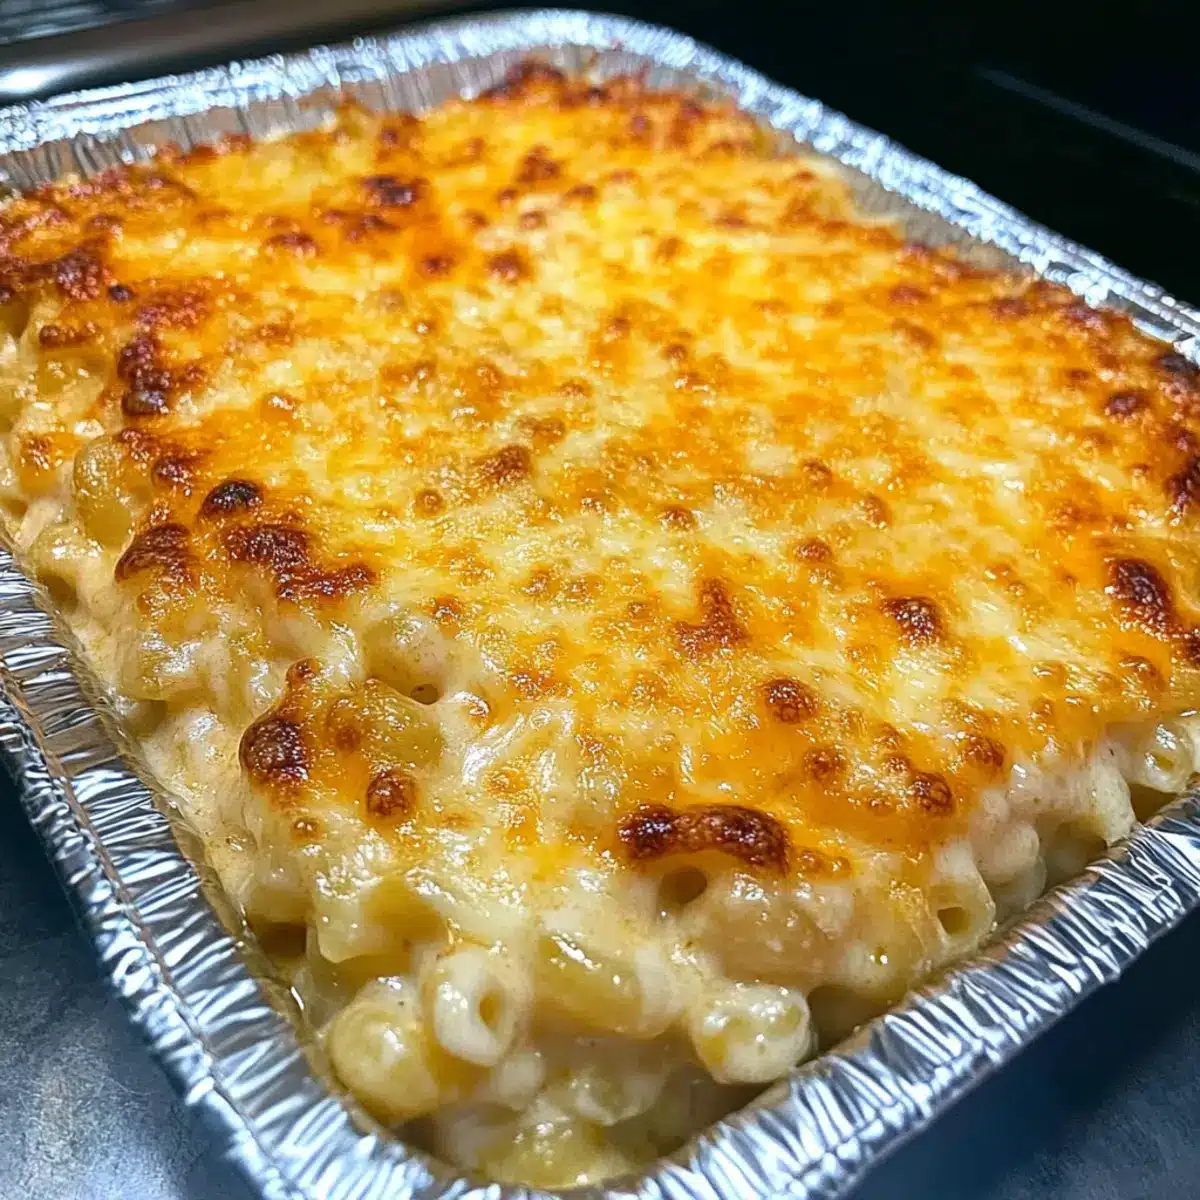
As I opened my fridge searching for comfort, a golden package of elbow pasta caught my eye, sparking the inspiration for my Creamy Baked Mac and Cheese. This dish is more than just a recipe; it’s a celebration of nostalgia, bringing warmth to chilly evenings and smiles to tired faces after long days. What makes this creamy creation irresistible is its quick prep time and delightful twist that turns a classic into a family favorite. With layers of gooey cheese and a crispy topping, every bite feels like a warm hug that wraps you in happiness. Are you ready to bring some comforting joy to your dinner table? Let’s dive in!
Why is this mac and cheese special?
Creamy Comfort: This baked mac and cheese is a hug in a bowl, blending layers of gooey cheese with perfectly cooked pasta to craft a memorable dish.
Quick and Easy: With just a few simple ingredients, you’ll have a delightful meal that’s ready to go in no time, making it perfect for busy weeknights.
Customizable: Want to get creative? You can swap cheeses or add your favorite veggies, just like in my Pumpkin Mac Cheese for a fun twist or toss in some bacon for a savory surprise.
Crowd-Pleaser: Whether it’s a family dinner or a gathering with friends, this creamy delight has everyone asking for seconds!
Satisfying Texture: Picture that crispy topping and warm creamy interior melded with rich flavors; it’s the peak of comfort food enjoyment!
Creamy Baked Mac and Cheese Ingredients
For the Pasta
• Elbow Pasta – The perfect base for this dish; it holds that creamy cheese sauce beautifully.
For the Cheese Sauce
• Unsalted Butter – Richness in flavor; unsalted helps you control the saltiness of the dish.
• All-Purpose Flour – Used to thicken the cheese sauce; a gluten-free flour blend works well too.
• Whole Milk – Adds creaminess; feel free to use low-fat milk based on your preference.
• Half and Half – Boosts creaminess and depth; you can substitute with cream if needed.
• Medium Sharp Cheddar Cheese – The star of the show for that classic cheesy flavor; shred it fresh for the best melt.
• Gruyere Cheese – Provides a nutty richness; can be substituted with Swiss cheese or mozzarella if preferred.
• Salt – Elevates flavor; kosher or sea salt works best for seasoning.
• Black Pepper – Adds a hint of spice; adjust to taste for your preferred heat level.
• Paprika – Brings color and a subtle smoky note; optional if you desire a hint of heat instead.
For the Topping
• Additional Cheese – More of that medium sharp cheddar or gouda, ensuring every bite is deliciously cheesy!
• Breadcrumbs (optional) – For an extra crunchy topping, mix with melted butter before adding on top of the cheese.
With these ingredients, you’re set to create your own comforting masterpiece of creamy baked mac and cheese, guaranteed to bring joy and warmth to your table!
Step‑by‑Step Instructions for CREAMY BAKED MAC AND CHEESE
Step 1: Preheat and Prepare
Begin by preheating your oven to 325°F (163°C). While it’s heating up, grab a 9×13-inch baking dish and lightly grease it with butter or cooking spray. This will ensure easy removal of your creamy baked mac and cheese after it bakes. Set the dish aside and let’s get cooking!
Step 2: Cook the Pasta
In a large pot, bring salted water to a rolling boil. Once boiling, add your elbow pasta and cook it for one minute less than the package instructions for al dente texture, which ensures it won’t become mushy during baking. Drain the pasta and toss it with a drizzle of olive oil to prevent sticking, then set aside.
Step 3: Shred the Cheeses
Now, it’s time to shred your cheeses! Grate medium sharp cheddar and Gruyere, dividing them into three separate portions: 3 cups for the sauce, 1½ cups for layering, and 1½ cups to sprinkle on top. Having freshly shredded cheeses is crucial for that beautifully melty effect in your creamy baked mac and cheese.
Step 4: Make the Roux
In a medium saucepan over medium heat, melt 4 tablespoons of unsalted butter. Once melted, whisk in 4 tablespoons of all-purpose flour and cook for about 1 minute until it forms a smooth roux, turning a lovely golden hue. This roux will serve as the thickening base for your delicious cheese sauce.
Step 5: Create the Cheese Sauce
Gradually whisk in 2 cups of half and half until the mixture is smooth and bubbling. Then add in 1 cup of whole milk and continue whisking until the sauce thickens, about 3 to 5 minutes. Visualize a velvety consistency that easily coats the back of a spoon, signaling it’s ready for the next step.
Step 6: Blend in the Cheeses and Spices
Remove the saucepan from heat and stir in your spices—salt, black pepper, and paprika—followed by 1½ cups each of the shredded cheddar and Gruyere. Stir until everything is perfectly incorporated, creating an indulgently gooey cheese sauce that will envelop your pasta in creamy goodness.
Step 7: Combine Pasta and Cheese Sauce
In a large mixing bowl, gently fold the cooked pasta into the cheese sauce until every piece is luxuriously coated. Then, pour half of this delicious mixture into your greased baking dish and smooth it out evenly, preparing for that incredible layering of cheese.
Step 8: Layer with Additional Cheese
Sprinkle 1½ cups of the reserved cheese evenly over the first layer of pasta, allowing that cheesy goodness to melt into every nook and cranny. Then, carefully pour the remaining pasta and cheese sauce mixture on top, spreading it to create an even surface that’s just begging to be topped off.
Step 9: Add the Final Topping and Bake
Now, finish with the remaining shredded cheese, ensuring a generous layer on top for that beautiful golden finish. If you like a crunch, you can mix in some breadcrumbs before sprinkling. Bake your creamy baked mac and cheese in the preheated oven for about 15 minutes, or until it’s bubbly and the top is golden and irresistible.
Step 10: Let It Rest
Once baked, remove the dish from the oven and allow it to rest for 5 to 10 minutes. This waiting period lets the cheesy layers set, making it easier to serve. As the aroma fills your kitchen, you’ll know you’ve created a comforting dish that will delight your family and friends!
Make Ahead Options
These Creamy Baked Mac and Cheese are perfect for busy weeknights! You can assemble the dish up to 24 hours in advance by preparing everything up to the baking step. Simply cover the unbaked mac and cheese with foil and refrigerate to keep it fresh, preventing the pasta from absorbing too much moisture. If you plan to prepare it 3 days ahead, the flavors actually deepen, making each bite even more delicious. When you’re ready to enjoy, preheat your oven to 325°F (163°C) and bake for about 20-25 minutes, or until bubbly and golden on top. Just know that baking from refrigerator cold may require a few extra minutes. This way, you’ll have a comforting, homemade meal waiting for you with minimal effort!
How to Store and Freeze Creamy Baked Mac and Cheese
Fridge: Store leftovers in an airtight container in the refrigerator for up to 3-4 days. This keeps the creamy baked mac and cheese fresh and ready for a quick meal.
Freezer: To freeze, portion the mac and cheese into freezer-safe containers. It can be kept for up to 2-3 months. Just remember to thaw it overnight in the fridge before reheating!
Reheating: When you’re ready to enjoy your creamy baked mac and cheese, reheat in the oven at 350°F (175°C) for about 20-25 minutes. Adding a splash of milk can help restore its creamy texture!
Make-Ahead Tip: Assemble the dish up to the baking stage, and then cover it tightly. You can refrigerate it for a quick bake when you’re ready to serve!
Expert Tips for Creamy Baked Mac and Cheese
-
Freshly Shredded Cheese: Always opt for freshly shredded cheese rather than pre-packaged to ensure better meltability and texture in your creamy baked mac and cheese.
-
Avoid Overcooking Pasta: Cook pasta just one minute less than al dente; it will finish cooking in the oven without becoming mushy.
-
Resting Time: After baking, allow your mac and cheese to rest for at least 5-10 minutes before serving, helping it set and making it easier to slice.
-
Experiment with Cheeses: Get creative with different cheeses like fontina or pepper jack to enhance the flavor profile of your creamy baked mac and cheese.
-
Crunchy Topping Option: For an extra crunch, combine breadcrumbs with melted butter before sprinkling on top prior to baking.
Creamy Baked Mac and Cheese Variations
Feel free to make this dish uniquely yours by swapping out ingredients and adding delightful twists that will surprise your taste buds!
-
Gluten-Free Pasta: Substitute elbow macaroni with gluten-free pasta to enjoy a tasty, gluten-free version of this beloved classic.
-
Veggie-Loaded: Stir in cooked spinach, broccoli, or sautéed mushrooms for a wholesome boost of flavor and nutrition. It’s a tasty way to sneak in those greens!
-
Spicy Kick: Add a pinch of cayenne pepper or diced jalapeños for a zesty heat that elevates the cheesy goodness. This twist adds excitement to every forkful!
-
Creamy Goat Cheese: Replace some cheddar with crumbled goat cheese for a tangy richness that brings a gourmet twist to your comforting dish.
-
Bacon Lovers: Mix in crispy, crumbled bacon or pancetta for a savory crunch. This memorable addition will have everyone asking for your secret ingredient!
-
Herbed Romance: Toss in some fresh herbs like thyme or rosemary to infuse lovely aromatic notes, creating an irresistible blend of flavors reminiscent of a cozy bistro.
-
Pulled Pork Mac: Top your baked mac and cheese with tender, pulled pork for a hearty, flavorful variation that transforms comfort food into a satisfying meal.
-
Pasta Alla Caprese: Mix in diced fresh tomatoes and basil to create a refreshing Italian-inspired twist. This version is perfect for summer gatherings and brings a burst of brightness!
With these ideas, your creamy baked mac and cheese can be a canvas for your culinary creativity. And if you’re in the mood for more cheesy delights, check out my Spooky Spaghetti Cheese or Mini Pumpkin Cheese for some exciting alternatives!
What to Serve with Creamy Baked Mac and Cheese
Elevate your dining experience with delightful sides and flavors that balance the richness of this homestyle dish.
- Garlic Roasted Broccoli: The slight bitterness of roasted broccoli cuts the creaminess, adding a vibrant green touch to your plate.
- Caesar Salad: Crisp romaine drizzled with a zesty dressing offers a refreshing crunch, perfectly complementing the pasta’s richness.
- Braised Greens: Swiss chard or kale sautéed with garlic brings a hearty, earthy taste, making each bite a new adventure in flavor.
- Homemade Biscuits: Fluffy, buttery biscuits are perfect for soaking up extra cheese sauce, delivering an irresistible combination of textures.
- Grilled Chicken or Sausage: Savory grilled meats add protein and smokiness, enhancing the comfort food experience with each satisfying bite.
- Soft Dinner Rolls: Fluffy rolls provide a wonderful contrast, ideal for mopping up creamy cheese sauce and balancing out the richness.
- Sweet Potato Fries: Crispy, golden sweet potato fries lend a hint of sweetness, creating a delightful contrast to the cheesy depths of your mac and cheese.
- Lemonade or Iced Tea: Refreshing drinks with a citrus or herbaceous note cleanse the palate, making your meal feel light and enjoyable.
With these pairings, your creamy baked mac and cheese transforms into a full meal that nurtures both body and soul!
Creamy Baked Mac and Cheese Recipe FAQs
How do I choose the right ripeness of cheese?
Absolutely! When selecting cheese for your creamy baked mac and cheese, it’s best to opt for freshly shredded cheese rather than pre-packaged. Blocks of cheese are often firmer and will melt better, creating that perfect gooey texture. If you’re using cheddar, look for medium sharp cheddar for a balance of flavor and creaminess.
How should I store leftover baked mac and cheese?
To keep your creamy baked mac and cheese fresh, store it in an airtight container in the refrigerator for up to 3-4 days. This will help prevent it from drying out and losing its yummy creaminess. When you’re ready to dig in, simply reheat it with a splash of milk to rejuvenate its silky texture.
Can I freeze creamy baked mac and cheese?
Absolutely! To freeze your mac and cheese, portion it into freezer-safe containers. Make sure to cover them tightly to avoid freezer burn. It will stay delicious for up to 2-3 months. When you’re ready to enjoy it, thaw overnight in the fridge and then reheat at 350°F (175°C) for about 20-25 minutes for a warm, comforting dish.
What if my mac and cheese is too dry after baking?
If you find your creamy baked mac and cheese turns out a bit dry, don’t worry! Next time, you can incorporate a splash of milk or cream into the cheese sauce before mixing in the pasta. Also, be sure not to overbake it; keep an eye on the timer and remove it from the oven as soon as it’s bubbly and golden. Letting it rest for a few minutes after baking helps the creamy layers meld better.
Are there any dietary considerations for creamy baked mac and cheese?
When preparing creamy baked mac and cheese, consider using gluten-free pasta and a gluten-free flour blend to accommodate dietary restrictions. Also, if you’re catering to lactose intolerance, opting for lactose-free milk and cheese can make this dish more accessible for everyone. Always check the cheese product labels to avoid any allergens.
Can I make this dish ahead of time?
Very! To get a head start, assemble the creamy baked mac and cheese up to the baking stage, then cover it tightly with plastic wrap or aluminum foil. Pop it in the refrigerator and bake when you’re ready to serve, ensuring that the dish is warm and bubbly, perfect for family gatherings or weeknight dinners.
Creamy Baked Mac and Cheese That Feels Like Home
Ingredients
Equipment
Method
- Preheat your oven to 325°F (163°C) and lightly grease a 9×13-inch baking dish with butter or cooking spray.
- In a large pot, bring salted water to a rolling boil, add elbow pasta, and cook for one minute less than the package instructions.
- Shred medium sharp cheddar and Gruyere, dividing them into portions for the sauce, layering, and topping.
- In a medium saucepan, melt 4 tablespoons of unsalted butter, whisk in flour, and cook for 1 minute to form a roux.
- Gradually whisk in half and half until bubbling, then add milk and continue whisking for 3 to 5 minutes.
- Remove from heat and stir in salt, black pepper, and paprika, then mix in the shredded cheeses.
- In a mixing bowl, fold the cooked pasta into the cheese sauce until coated.
- Pour half the mixture into the baking dish, smooth out, then layer with 1½ cups of reserved cheese.
- Pour the remaining pasta and cheese sauce mixture over the layers and spread evenly.
- Top with remaining cheese and breadcrumbs, then bake for about 15 minutes until bubbly and golden.
- Let it rest for 5 to 10 minutes before serving.
Leave a Reply