
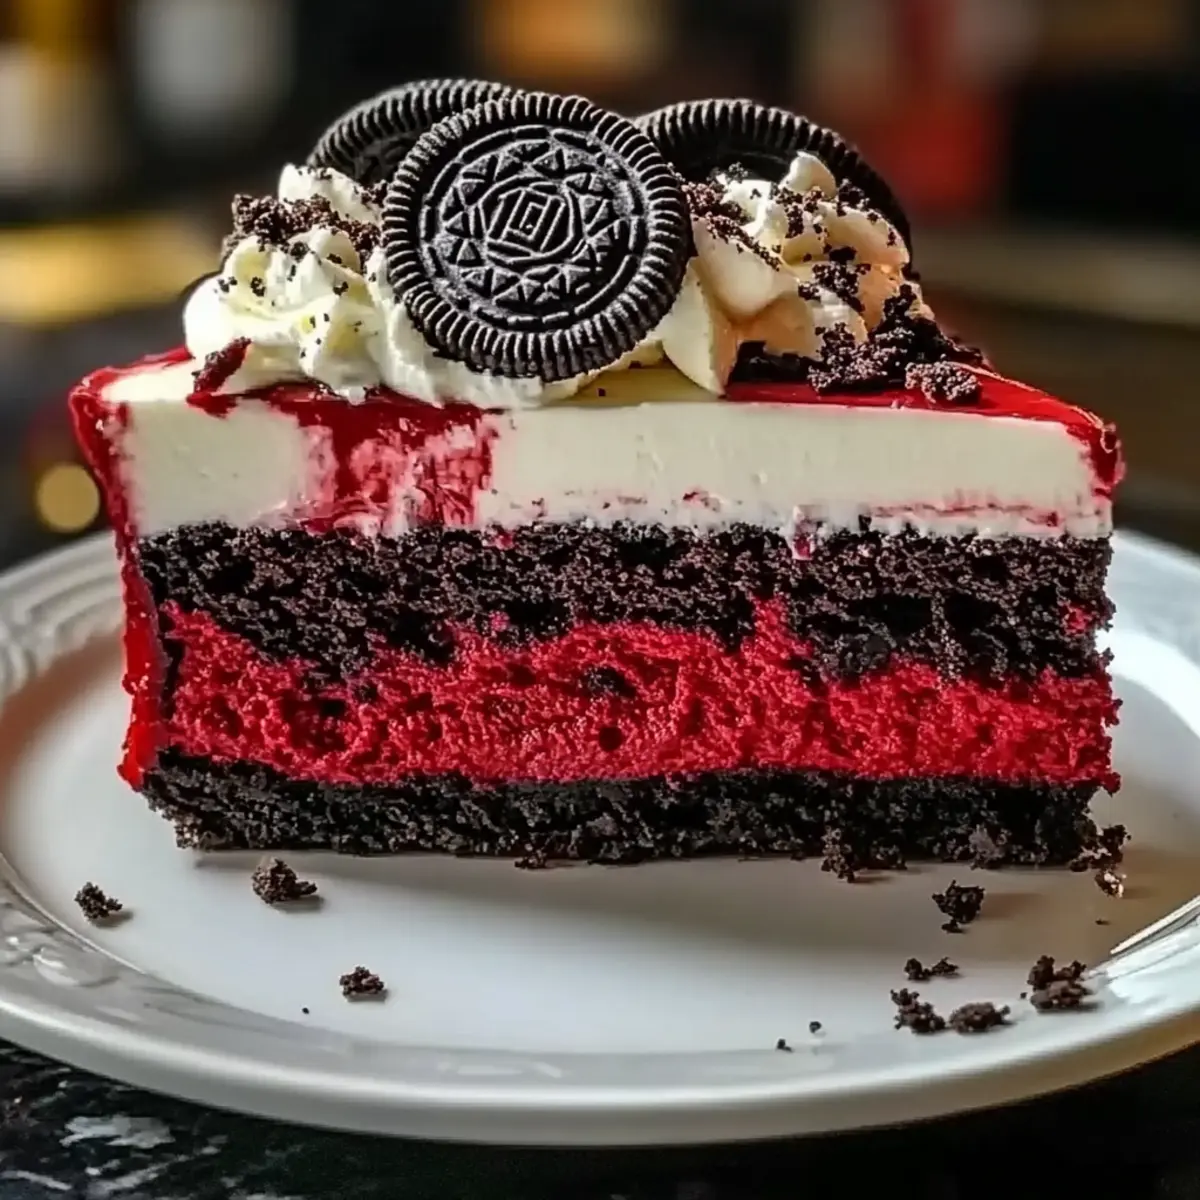
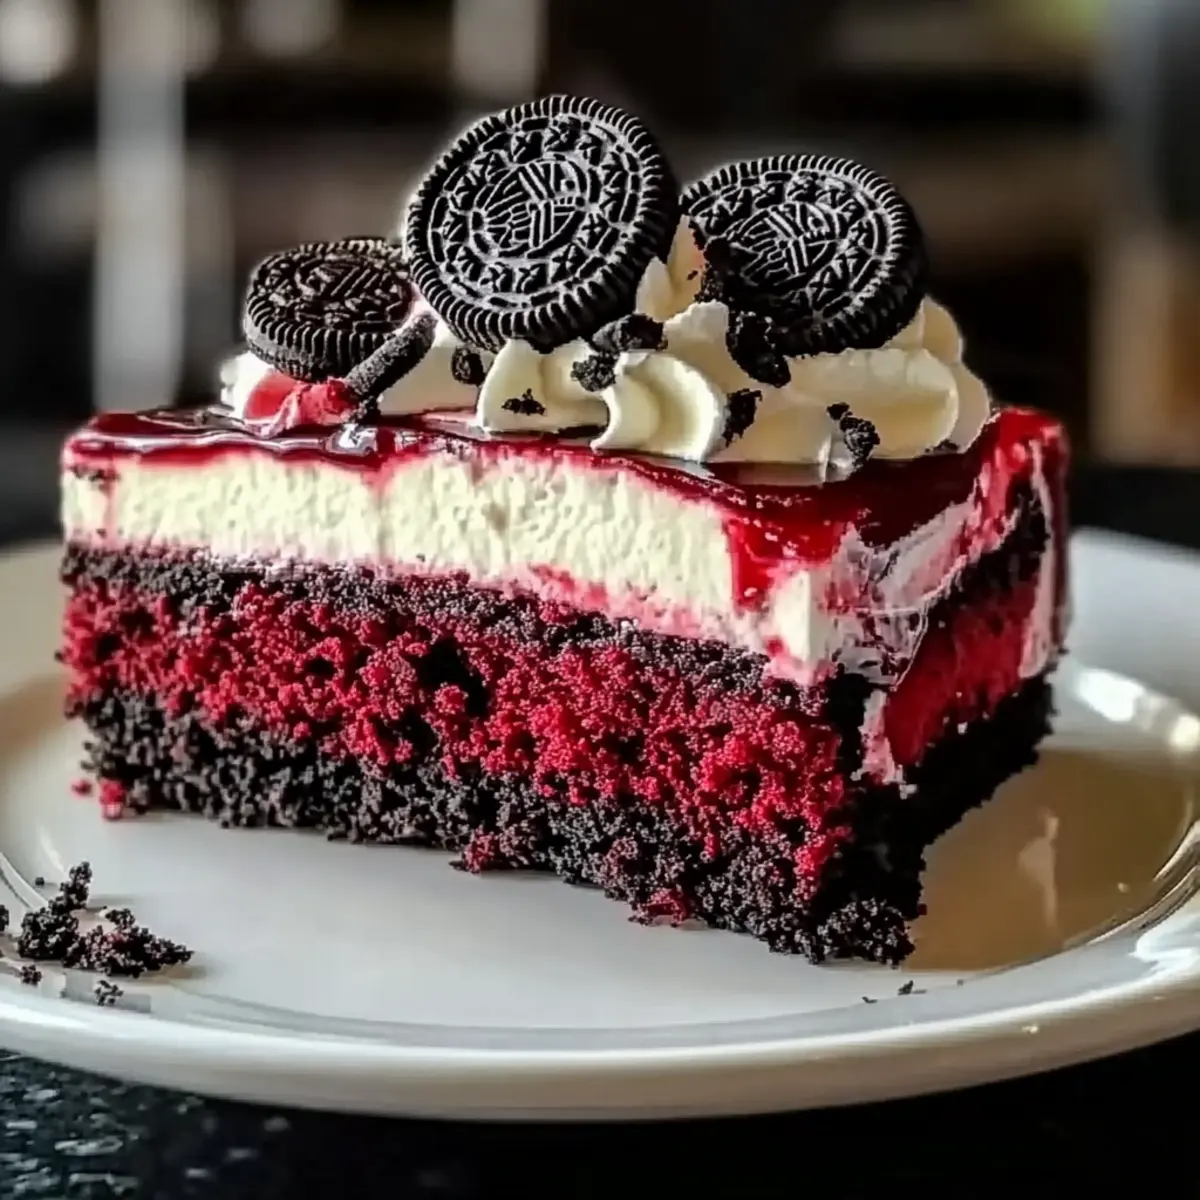
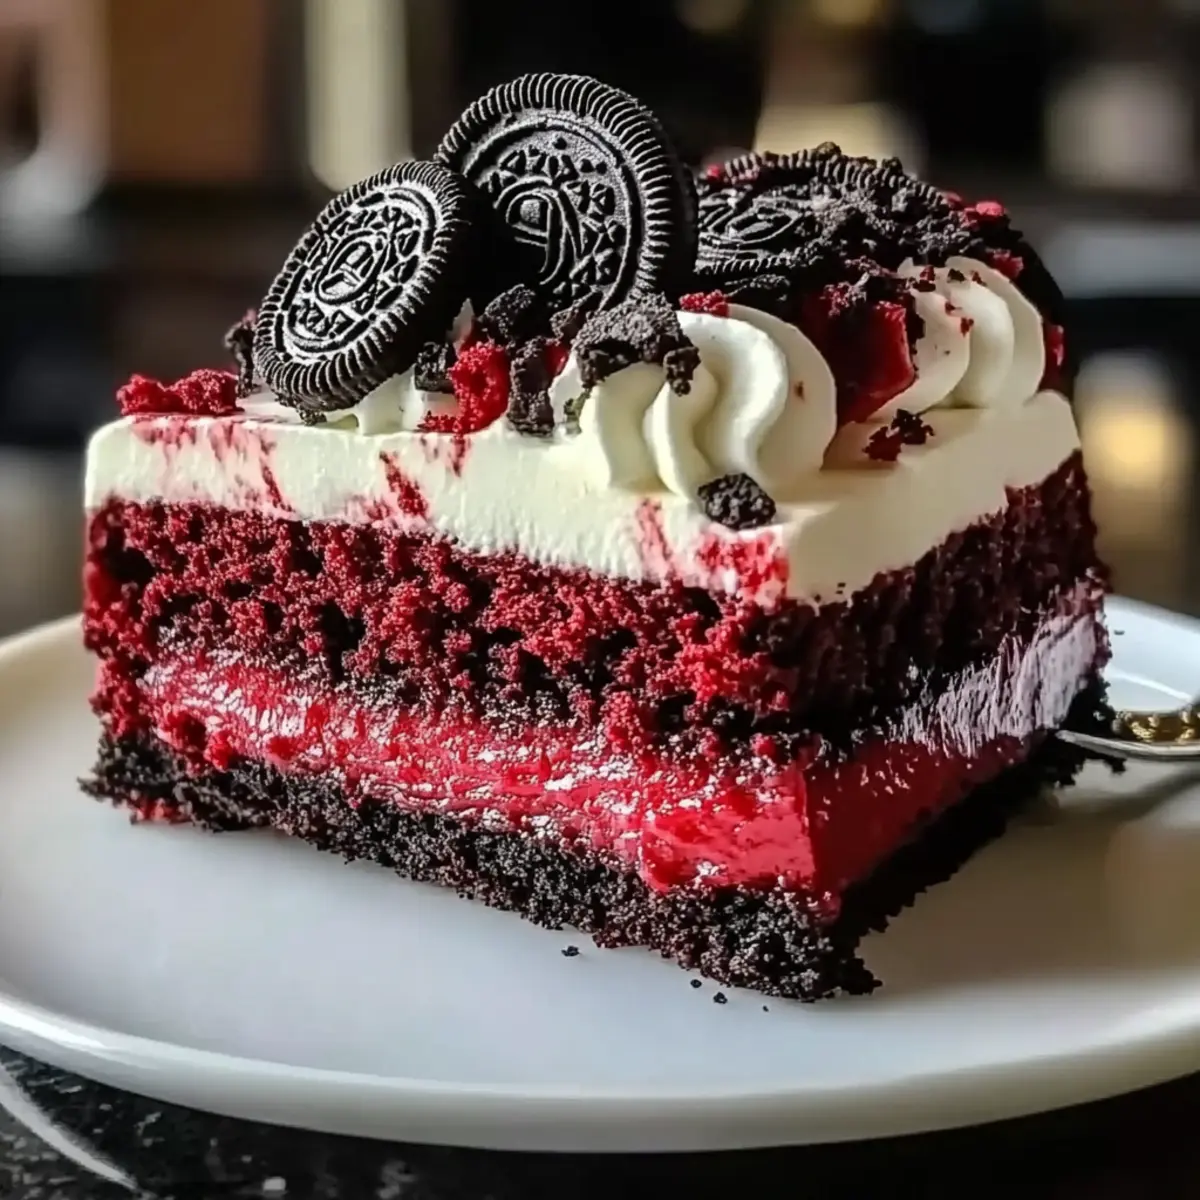
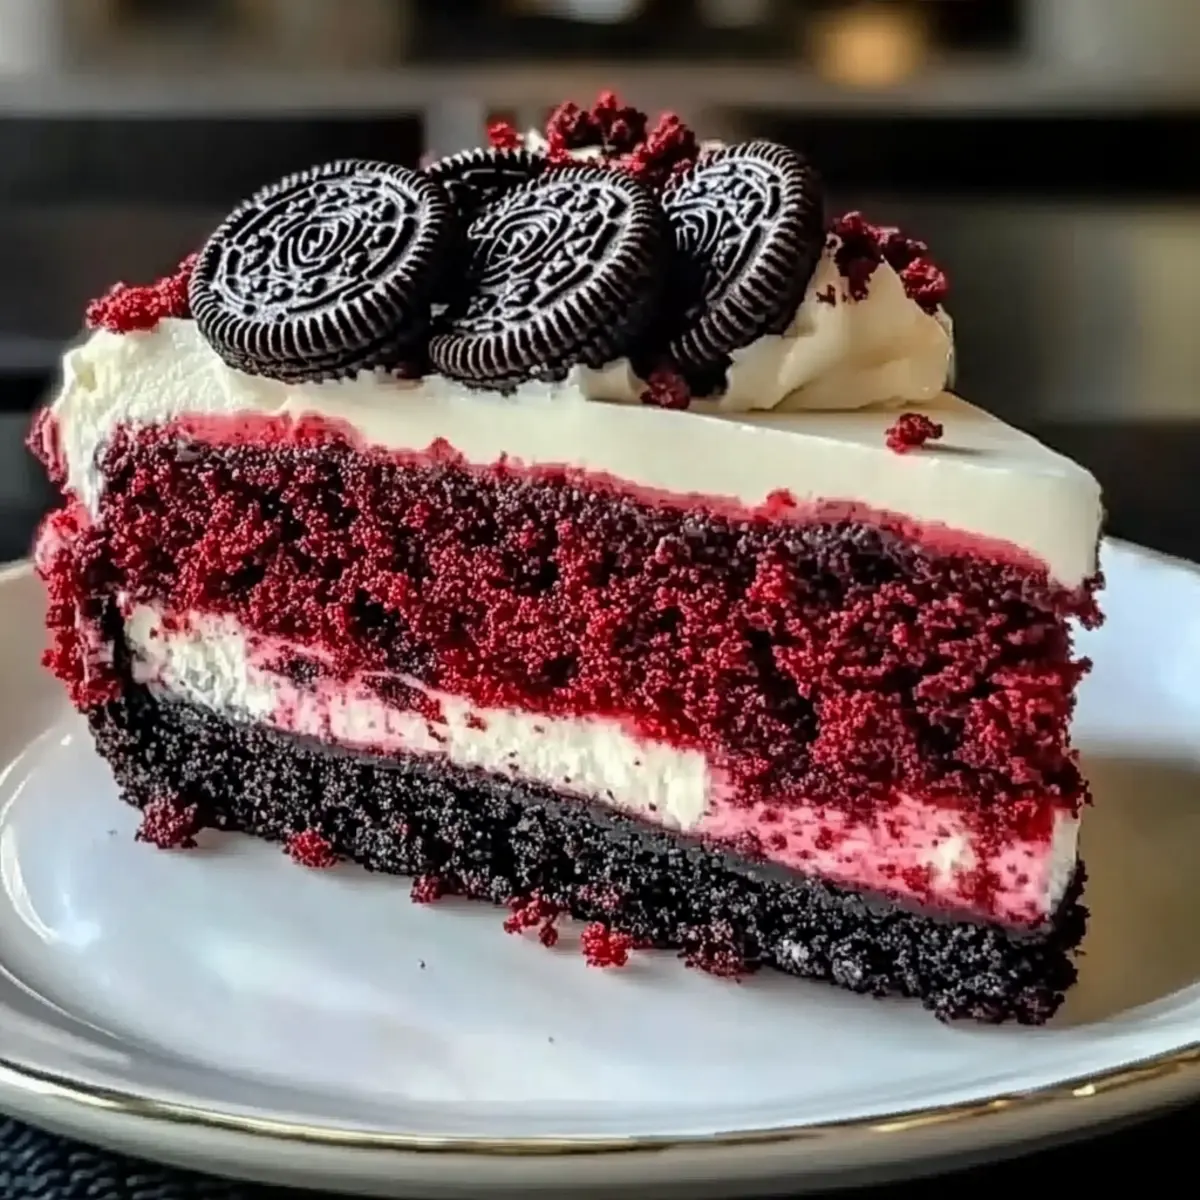
I once stumbled upon a coffee shop that claimed to have the “best dessert in the world,” and lo and behold, they were serving a Red Velvet Oreo Cheesecake that had me questioning all my past dessert loyalties. This luscious creation is not just a treat but an experience—a perfect marriage of rich, velvety red velvet and a creamy, dreamy cheesecake, all tucked into a crunchy Oreo crust. Whether you’re celebrating a birthday or just satisfying that sweet tooth, this cheesecake serves as a stunning centerpiece that leaves a lasting impression. Plus, it comes with the added perk of being gluten-free friendly, making it accessible for everyone at your table. Ready to turn your kitchen into a dessert haven? Let’s dive into this simple yet spectacular recipe that’s sure to impress!
Why is this cheesecake a must-try?
Decadent Indulgence: Your taste buds are in for a treat with the luscious blend of creamy cheesecake and vibrant red velvet. Crowd-Pleasing Delight: Perfect for celebrations, this showstopper will have everyone at the table asking for seconds! Easy Substitutions: Need gluten-free options? Simply swap in gluten-free Oreos for an inclusive dessert. Time-Saving: This cheesecake can be made ahead of time, allowing you to enjoy your event stress-free. Stunning Visual Appeal: With its eye-catching layers and garnishes, it’s a dessert that not only tastes amazing but looks incredible too—check out Caramel Brownie Cheesecake for more crowd-pleasing ideas!
Red Velvet Oreo Cheesecake Ingredients
For the Cake Layer
• Red Velvet Cake Mix – The foundation for that iconic flavor and vibrant hue; homemade red velvet cake can make it extra special.
• Eggs – Essential for binding the cake mix together; be careful not to overbeat for a smooth texture.
For the Cheesecake Filling
• Cream Cheese – The star ingredient for a rich and creamy filling; consider Greek yogurt for a lighter twist.
• Sour Cream – Adds a delightful tang; yogurt works as a substitute if you’re in a pinch.
• Granulated Sugar – Sweetens the filling perfectly; using brown sugar can deepen the flavor profile.
• Vanilla Extract – Enhances the overall flavor; almond extract can provide a unique twist if desired.
• Milk – Aids in achieving the desired creaminess; feel free to use any variety, dairy or non-dairy.
For the Crust
• Oreo Cookies – Gives the cheesecake a wonderful chocolatey crunch; opt for gluten-free Oreos to make this a gluten-free option.
• Butter – Binds the crust together; coconut oil can be a tasty dairy-free substitute.
For the Topping
• Food Coloring – Provides the signature red hue; adjust the quantity based on the intensity you prefer.
• Crushed Oreos – Perfect for garnishing the top, adding a delicious touch and visual appeal.
Prepare to impress with this Red Velvet Oreo Cheesecake—a show-stopping dessert that’s as delightful to eat as it is to look at!
Step‑by‑Step Instructions for Red Velvet Oreo Cheesecake
Step 1: Prepare the Crust
Begin by crushing about 24 Oreo cookies into fine crumbs using a food processor or by placing them in a zip-top bag and rolling with a rolling pin. In a mixing bowl, combine the cookie crumbs with 5 tablespoons of melted butter until well combined. Press the mixture firmly into the bottom of a 9-inch springform pan, making sure it’s even. Bake in a preheated oven at 350°F (175°C) for 10 minutes, then let it cool completely.
Step 2: Make the Red Velvet Cake Layer
Prepare the red velvet cake mix according to package instructions, or use your favorite homemade recipe. Pour the batter into a prepared 9-inch round cake pan and bake for approximately 25-30 minutes, or until a toothpick inserted into the center comes out clean. Once baked, allow it to cool in the pan for about 10 minutes before transferring it to a wire rack to cool completely.
Step 3: Prepare Cheesecake Filling
In a large mixing bowl, beat 16 ounces of softened cream cheese using an electric mixer until it’s creamy and smooth, about 2 minutes. Gradually add in 1 cup of granulated sugar and continue to mix until well incorporated. Next, blend in 1 cup of sour cream, 3 large eggs (one at a time), and 1 teaspoon of vanilla extract, mixing until the filling is smooth and creamy, taking care not to overmix.
Step 4: Assemble the Cheesecake
Once the red velvet cake layer has cooled completely, carefully place it back in the springform pan. Pour the creamy cheesecake filling evenly over the top of the red velvet cake. Gently smooth the top with a spatula to ensure an even layer. At this stage, you can also fold in some crushed Oreos into the cheesecake filling for added texture.
Step 5: Bake the Cheesecake
Prepare a water bath by placing a larger baking dish filled with warm water on the lower rack of your oven. Place the springform pan with the assembled Red Velvet Oreo Cheesecake on the middle rack. Bake at 325°F (160°C) for 55-65 minutes, or until the center of the cheesecake is slightly jiggly but set. Avoid opening the oven door during baking to ensure even cooking.
Step 6: Cool the Cheesecake
Once baked, turn off the oven and let the cheesecake cool inside with the door ajar for about 1 hour. This gradual cooling process helps to prevent cracks. Afterward, remove the cheesecake from the oven and refrigerate it for at least 4 hours, preferably overnight, to allow it to firm up and develop its flavors.
Step 7: Serve and Garnish
Before serving your stunning Red Velvet Oreo Cheesecake, sprinkle the top with crushed Oreo cookies for added texture and visual appeal. Optionally, drizzle with chocolate sauce or serve with fresh berries. Slice with a warm knife for clean cuts, and enjoy the delectable layers of flavor at your next celebration!
Red Velvet Oreo Cheesecake Variations
Feel free to get creative with your Red Velvet Oreo Cheesecake—each twist adds a special touch that might surprise your taste buds!
-
Gluten-Free Swap: Use gluten-free Oreos for the crust to make this delightful dessert accessible for everyone.
-
Homemade Cake Layer: Trade the mix for a homemade red velvet cake for a personal touch that elevates the flavor and texture.
-
Healthier Filling: Substitute Greek yogurt for cream cheese to lighten up the filling while keeping it creamy and delicious.
-
Flavor Burst: Mix in crushed Oreos directly into the cheesecake filling for a delightful surprise in every slice.
-
Alternative Crust: Try a graham cracker or chocolate chip cookie crust for a new flavor profile that complements the cheesecake beautifully.
-
Nutty Addition: Fold in chopped pecans or walnuts into the crust for added crunch and a nutty flavor that pairs well with the cheesecake.
-
Seasonal Sprinkles: Add a festive twist with seasonal food coloring or themed toppings for birthdays or holidays—just like a treat from the pastry case!
If you’re interested in more decadent dessert ideas, don’t miss out on trying these personal favorites: the Cheesecake Stuffed Chocolate cookies or the delightful Pumpkin Cheesecake Truffles. Each offers unique flavors sure to impress your family and friends!
What to Serve with Red Velvet Oreo Cheesecake
Elevate your dessert experience by pairing this heavenly creation with delightful accompaniments that enhance its richness and flavor.
-
Fresh Berries: The tartness of strawberries or raspberries cuts through the sweetness, adding a refreshing contrast.
-
Whipped Cream: A dollop of lightly sweetened whipped cream creates a creamy layer that compliments the cheesecake’s texture beautifully.
-
Coffee: A rich, bold brew provides the perfect balance to the cheesecake’s sweetness and enhances its lavish flavors.
-
Chocolate Sauce: Drizzle over the cheesecake for an extra decadent touch; its richness pairs perfectly with the creamy layers.
-
Mint Leaves: Fresh mint adds a pop of color and a zing that brightens each bite of the cheesecake, making it feel light.
-
Ice Cream: A scoop of vanilla or mint chocolate chip ice cream alongside can provide a delightful creaminess and serve as a cool contrast.
-
Milkshake: Try a thick milkshake made with chocolate or vanilla; it offers a nostalgic pairing that children and adults will love.
-
Nutty Granola: A sprinkle of crunchy nut granola adds texture and a wholesome element that balances the dessert’s creaminess.
Whether you lean towards fresh and fruity or indulgently rich, these pairings will beautifully complement your Red Velvet Oreo Cheesecake!
Expert Tips for Red Velvet Oreo Cheesecake
-
Mix with Care: Avoid overmixing the cheesecake filling to prevent cracks. Be gentle when incorporating your ingredients for a smooth, rich texture.
-
Chill Thoroughly: Refrigerate the cheesecake for at least 4 hours, or even better, overnight. This helps enhance the flavor and firmness of your Red Velvet Oreo Cheesecake.
-
Water Bath Wisdom: Using a water bath during baking minimizes the risk of cracks by keeping the temperature consistent. This step is crucial for a creamy cheesecake.
-
Bake Evenly: Be mindful not to open the oven door while baking. Fluctuations in temperature can negatively impact the cheesecake’s texture and structure.
-
Garnish Creatively: Top your cheesecake with crushed Oreos or fresh berries to add a touch of color and texture, making it even more visually appealing for your guests.
How to Store and Freeze Red Velvet Oreo Cheesecake
Fridge: Store the cheesecake in an airtight container for up to 5 days. This keeps it fresh and ready to indulge in at any moment.
Freezer: For longer storage, wrap the cheesecake tightly in plastic wrap and then in aluminum foil. Freeze for up to 2 months. Thaw overnight in the refrigerator before serving.
Reheating: While best enjoyed chilled, if you’d like to warm up a slice, use the microwave in 10-second intervals until just warmed through. Avoid overheating to maintain the delightful texture.
Make Ahead Options
These Red Velvet Oreo Cheesecakes are perfect for busy home cooks looking to save time while still delivering an impressive dessert! You can prepare the crust and cheesecake filling up to 24 hours in advance, storing them separately in the refrigerator. For the crust, simply crush the Oreo cookies and mix them with melted butter, pressing into the pan, then refrigerate. Make the cheesecake filling by mixing the cream cheese, sugar, and other ingredients, and store it in an airtight container. When you’re ready to bake, just assemble the layers as directed and pop it in the oven. This way, you can enjoy restaurant-quality results with minimal effort while ensuring every bite remains just as delicious!
Red Velvet Oreo Cheesecake Recipe FAQs
How can I select the best red velvet cake mix?
When choosing a red velvet cake mix, look for mixes that have a rich, vibrant color and a reliable flavor profile. Check the ingredients to ensure there are no dry or outdated elements. For a fresher taste, I recommend opting for brands that include natural flavors and high-quality cocoa powder. If you prefer homemade, select a recipe that uses buttermilk for added moisture and authenticity.
What is the best way to store leftover Red Velvet Oreo Cheesecake?
Store your cheesecake in an airtight container in the refrigerator for up to 5 days. This helps maintain its creaminess and flavor. Be sure to slice it carefully to minimize exposure to air, and keep it covered until you’re ready to enjoy another decadent bite.
Can I freeze Red Velvet Oreo Cheesecake? How?
Absolutely! To freeze, wrap the cheesecake tightly in plastic wrap, followed by aluminum foil to protect it from freezer burn. Freeze for up to 2 months. When you’re ready to enjoy, thaw it overnight in the refrigerator. This gradual process ensures the cheesecake retains its delicious texture and flavor.
What should I do if my cheesecake cracks while baking?
Cracks often occur due to overmixing, high temperatures, or sudden temperature changes. To avoid this, mix your ingredients gently until just combined. Also, using a water bath keeps the temperature steady and prevents cracks. If your cheesecake does crack, a drizzle of chocolate sauce or a sprinkle of crushed Oreos over the surface can disguise imperfections beautifully.
Are there any allergies I should be aware of with this recipe?
If you’re serving guests with allergies, be sure to check the ingredients of your cookie crust, as Oreos contain wheat and dairy. For a gluten-free option, use certified gluten-free Oreos. Additionally, note that this recipe contains eggs and dairy (cream cheese and sour cream). Substitute with non-dairy yogurt and egg alternatives if necessary, keeping in mind that texture and flavor may vary slightly.
Can I make this cheesecake ahead of time?
Yes! In fact, making the Red Velvet Oreo Cheesecake a day in advance is a great idea. It allows the flavors to meld beautifully, and you’ll save yourself some stress on the day of your celebration. Once assembled, refrigerate it for at least 4 hours or overnight for optimum texture and taste.
Irresistible Red Velvet Oreo Cheesecake for Any Celebration
Ingredients
Equipment
Method
- Crush 24 Oreo cookies into fine crumbs. Combine with 5 tablespoons melted butter; press into a 9-inch springform pan. Bake at 350°F (175°C) for 10 minutes. Let cool completely.
- Prepare the red velvet cake mix according to package instructions. Pour batter into a 9-inch round cake pan and bake for 25-30 minutes. Cool in the pan for 10 minutes before transferring to a wire rack.
- Beat 16 ounces cream cheese until creamy. Gradually add 1 cup sugar, then blend in 1 cup sour cream, 3 eggs one at a time, and 1 teaspoon vanilla extract until smooth.
- Once cooled, place the red velvet cake back in the springform pan. Pour cheesecake filling over the top and smooth it out. You may fold in crushed Oreos at this point.
- Prepare a water bath and bake cheesecake at 325°F (160°C) for 55-65 minutes until the center is slightly jiggly. Do not open the oven door during baking.
- Turn off the oven, leaving the cheesecake inside with the door ajar for about 1 hour to cool. Refrigerate for at least 4 hours or overnight before serving.
- Before serving, sprinkle crushed Oreos on top and optionally drizzle with chocolate sauce. Slice with a warm knife for clean cuts.
Leave a Reply