
The aroma of freshly fried French fries can transport me straight to my favorite diner, where the golden, crispy goodness leaves everyone wanting more. With my recipe for Pressure Canned French Fries, you can capture that experience right in your own kitchen, offering a delightful homemade snacking option any time of day. This innovative canning method not only simplifies your meal prep but also ensures that your fries will emerge crispy on the outside and tender inside—just like at your favorite restaurant. Imagine having jars of delicious fries ready to pop into your fryer or oven, cutting down on prep time and eliminating the hassle of fast food cravings. Don’t you want to see how easy it is to keep your fridge stocked with homemade goodness?
Why are Pressure Canned Fries a Must-Try?
Convenient Meal Prep: These fries are perfect for busy weeknights!
Crispy Perfection: Experience that restaurant-style crunch every time.
Flavor Versatility: Customize with your favorite seasonings before canning!
Space Saver: Canning allows you to store indulgent snacks without cluttering your freezer.
Quick Cooking: With fries ready to go, delightful snacking is just moments away! Try pairing them with your favorite dipping sauce for an unforgettable experience, or explore similar recipes like French Dip Squares to keep your homemade snack game strong!
Canning French Fries Ingredients
For the Fries
• Potatoes – Large baking russets create the perfect texture; avoid waxy varieties for canning French fries.
• Water – Essential for soaking, this helps remove excess starch and keeps your fries crispy.
• Salt – Use 1 tsp per quart or ½ tsp per pint; it enhances flavor and maintains fry texture during canning.
For Packing
• Boiling Water – Ensures fries are fully submerged; this step is crucial for even cooking when you’re ready to fry them.
By gathering these simple ingredients, you’ll soon be on your way to creating jars of delightful French fries that are always just a fry away!
Step‑by‑Step Instructions for Canning French Fries
Step 1: Prepare the Potatoes
Begin by peeling the large baking russet potatoes and slice them into fry-shaped strips, about ½ to ¾ inch wide. This size ensures they cook evenly during canning. Use a sharp knife for clean edges, and keep the freshly cut fries in a bowl of water to prevent browning while you prepare the rest.
Step 2: Soak the Potatoes
Submerge the cut potatoes in a large bowl of cold water for at least 3 hours. To effectively remove excess starch, change the soaking water three times during this period. This step is crucial for achieving that crispy texture when frying later; you’ll know they are ready when the water is no longer cloudy.
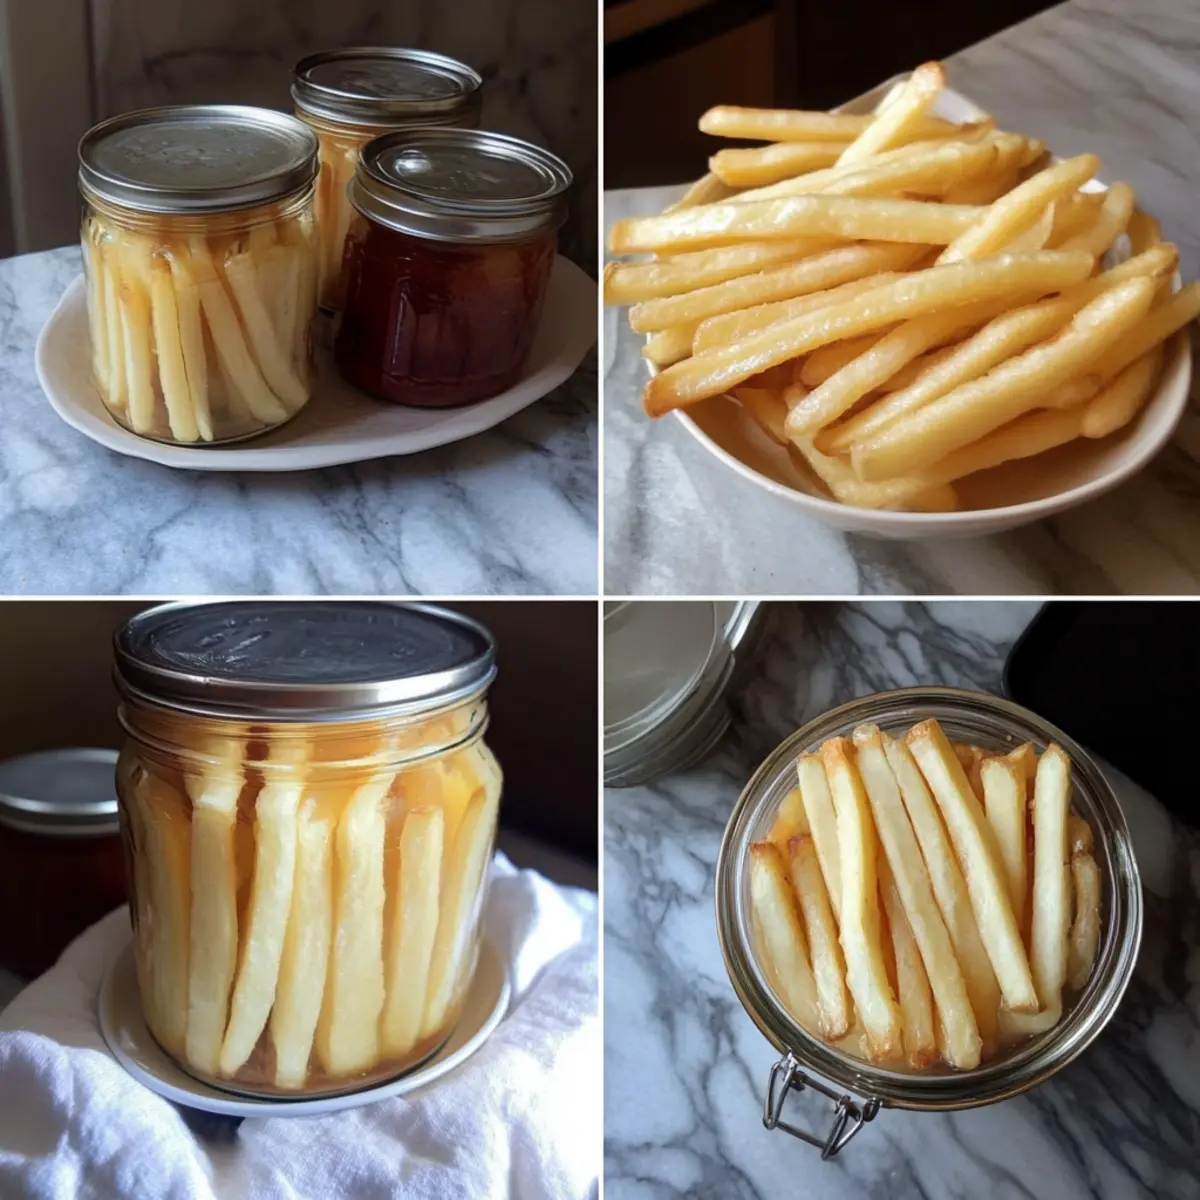
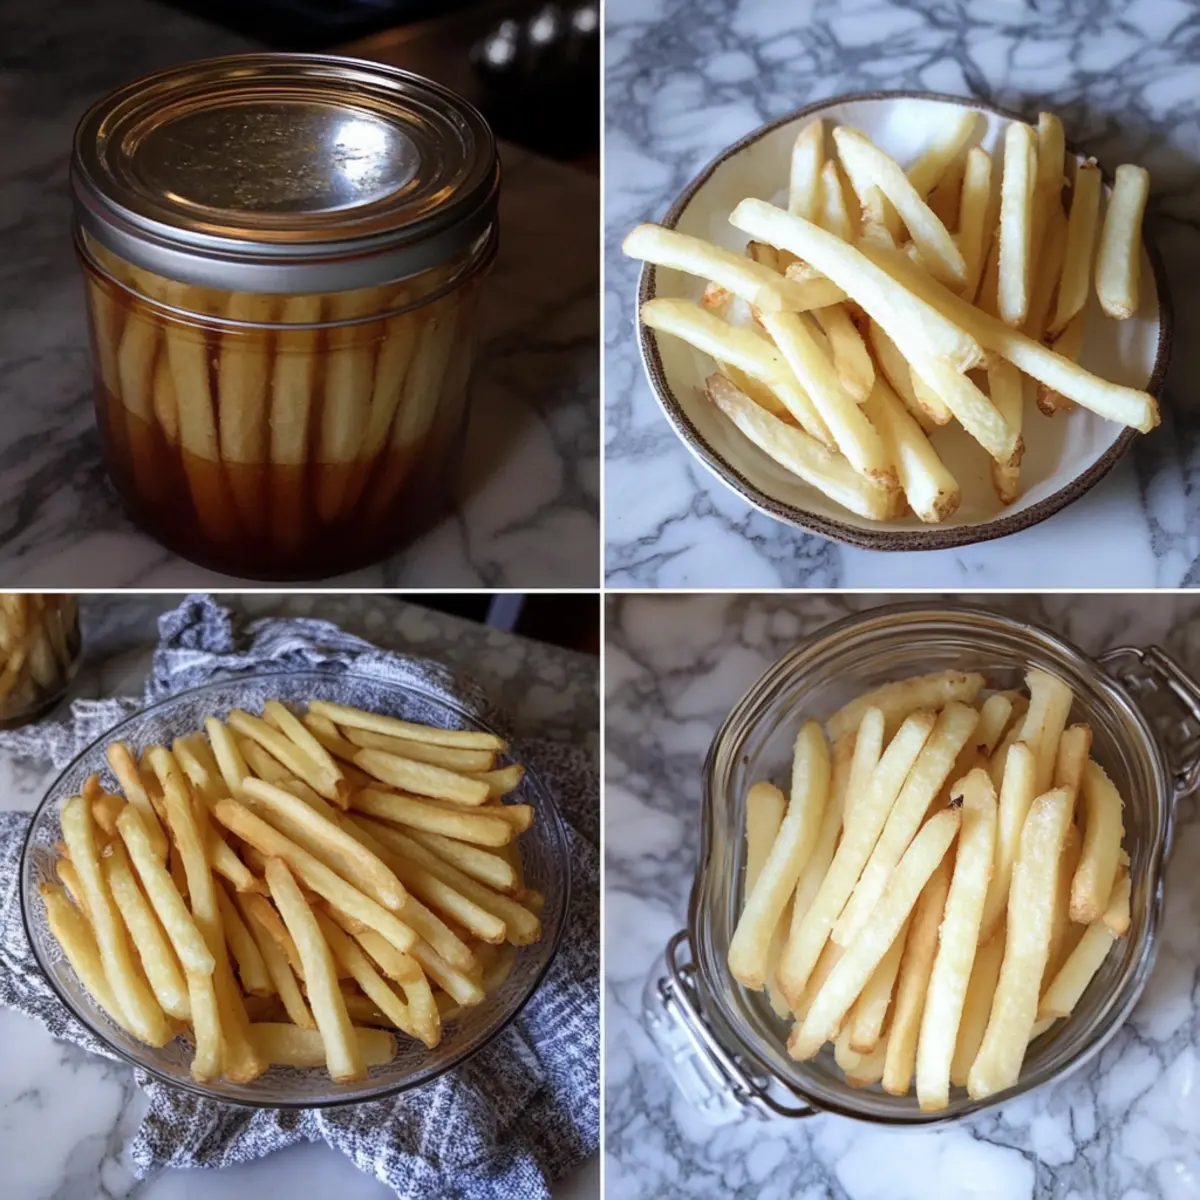
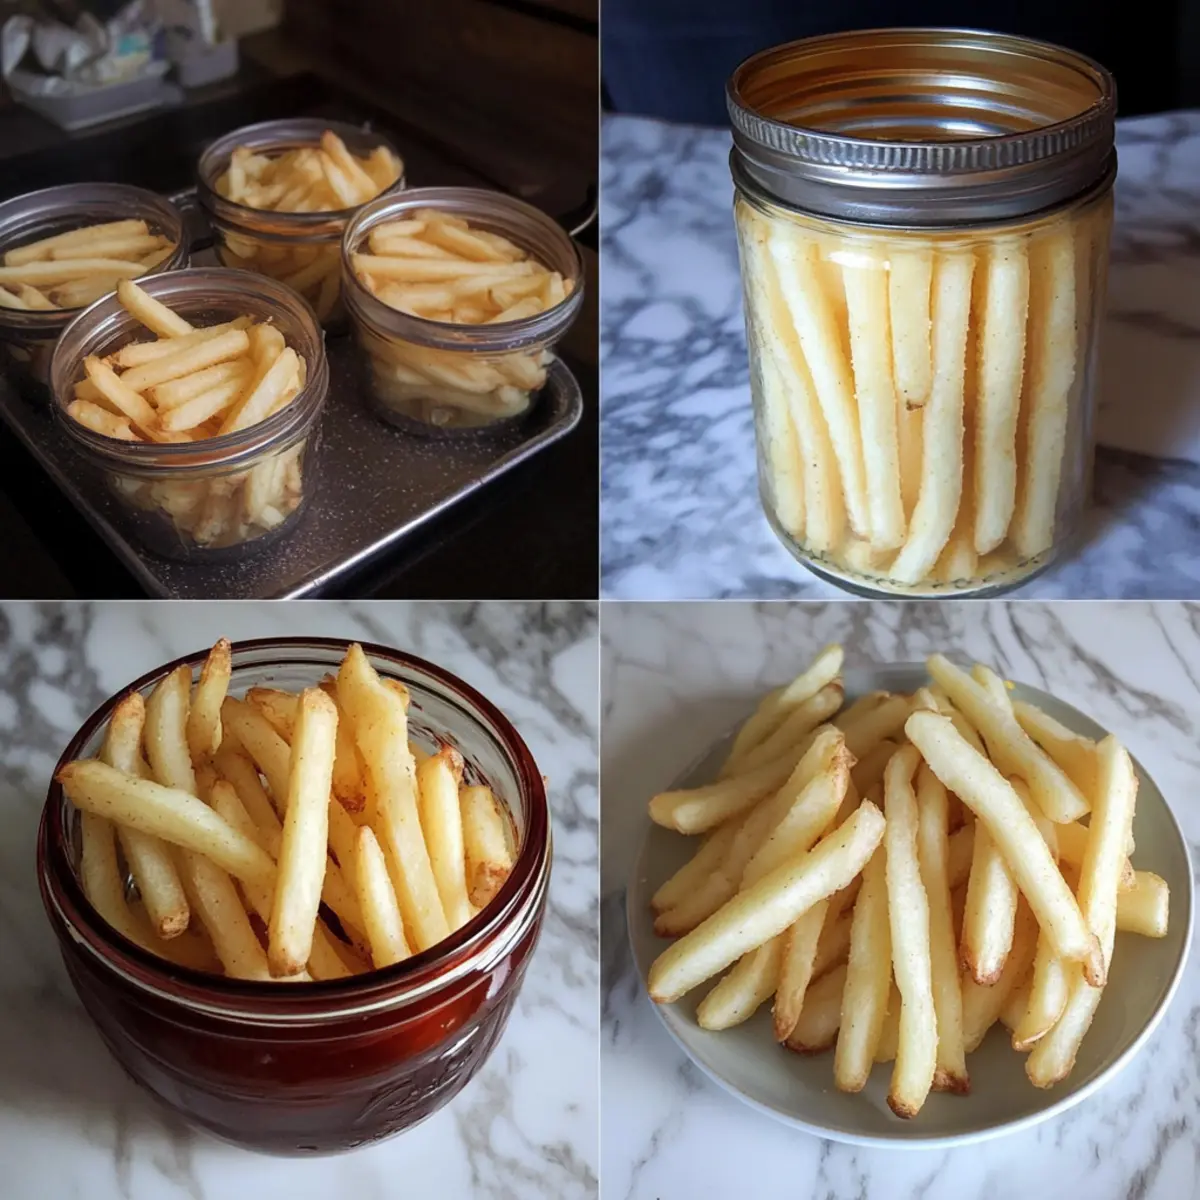
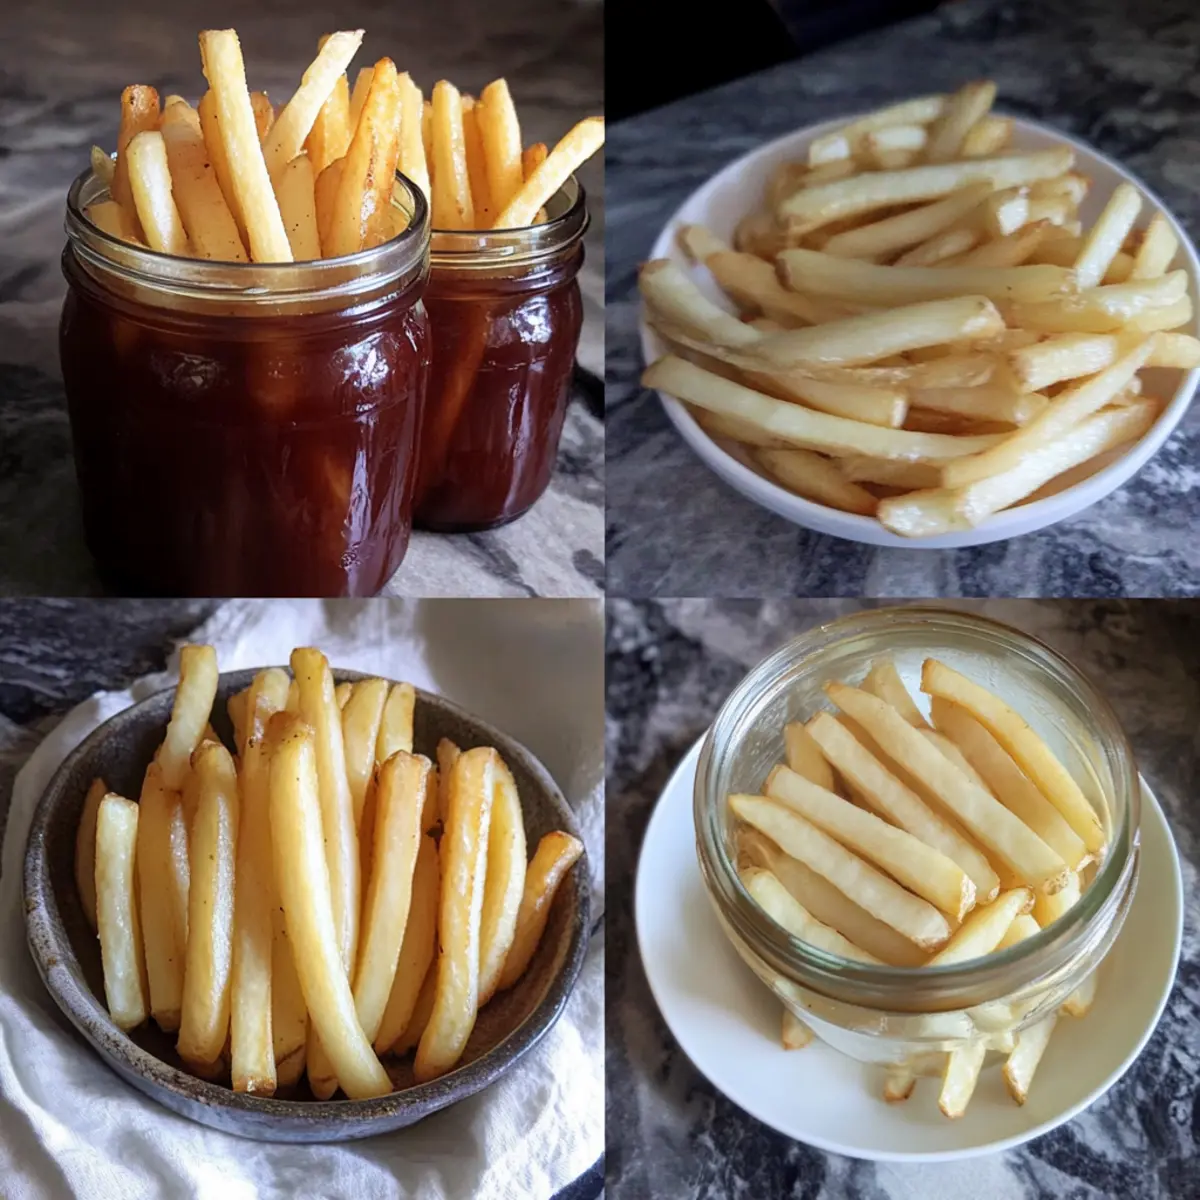
Step 3: Pack the Jars
After soaking, drain the potatoes and start packing the fry strips vertically into wide-mouth canning jars. Leave a 1-inch headspace at the top of each jar. Sprinkle the appropriate amount of salt—1 tsp per quart or ½ tsp per pint—over the fries. This will enhance flavor and help maintain their texture during the canning process.
Step 4: Fill with Boiling Water
Boil a kettle of water and carefully pour it over the packed fries until they are fully submerged, maintaining that crucial 1-inch headspace. This boiling water helps to cook the fries slightly and eliminates air pockets. Ensure all fries are nestled in the water, ready for the next step in canning French fries.
Step 5: Remove Air Bubbles
Using a non-metallic utensil, gently press around the sides of the jars to remove any trapped air bubbles. This is an important step to ensure even processing and to create a good seal. Once completed, wipe the rims of the jars with a clean cloth to prevent any residue from interfering with the sealing process.
Step 6: Pressure Can
Place the jars securely in the pressure canner and process at 10 pounds of pressure for 35 minutes for pint jars and 40 minutes for quart jars. The canner will need time to reach pressure, so keep an eye on the gauge. You’ll know they’re ready when the jars are properly sealed and the lids are pulled down.
Step 7: Cool and Store
Once the processing time is complete, carefully remove the jars from the canner and place them on a clean towel or cooling rack. Allow the jars to cool completely—this may take several hours. Check that each lid has sealed properly by pressing down in the center; it should not flex. Store your perfectly canned French fries in a cool, dark place, ready for your next snack time!
Make Ahead Options
These Pressure Canned French Fries are a game changer for your meal prep routine! You can prepare the potatoes (soaking and cutting them into fry-shaped strips) up to 24 hours in advance. Just store the cut fries in cold water in the refrigerator to prevent browning. Once you’re ready to can, simply pack the soaked fries into jars, add salt, and fill them with boiling water before proceeding to pressure can them. This method not only saves precious time on busy weeknights but also ensures that your fries will be just as delightful and crispy when you’re ready to fry them up. Keep those jars stored in a cool, dark place, and you’ll always have a quick, homemade snack on hand!
Canning French Fries Variations to Try
Feel free to get creative with your pressure canned fries and discover new flavors together!
- Oil Swap: Use different frying oils like olive oil or coconut oil for unique flavor profiles. Each oil adds its distinct touch that can elevate your fries.
- Herbed Fries: Add dried herbs such as rosemary or thyme to the salt before packing. This infusion creates a tantalizing aroma and a delicious twist.
- Spicy Kick: Mix in some cayenne pepper or paprika for a delightful heat you can control. Get adventurous! Adjust the spice to match your family’s preference.
- Garlic Infusion: Toss minced garlic into the jars or use garlic powder for a savory punch. You’ll enjoy a wonderfully aromatic flavor that pairs perfectly with dips.
- Seasoned Salt: Try using flavored salts like garlic salt or smoked salt instead of regular salt. The combination could become your new favorite go-to for snacking!
- Sweet Potatoes: Substitute half of the russets with sweet potatoes for a sweeter, more colorful twist. These vibrant variations are visually appealing on your plate.
- Cheesy Touch: Incorporate grated Parmesan or nutritional yeast before sealing for a cheesy flavor upgrade. It can transform a simple fry into a gourmet experience.
- Onion Flavored: Adding onion powder to the mix while canning can bring a savory depth of flavor that’s hard to resist. This dynamizes your snacking potential!
With these variations, your next batch of French Dip Squares or other snacks can be paired with customized fries that leave everyone craving more!
Expert Tips for Canning French Fries
• Choose the Right Potatoes: Use large baking russets for the best texture; avoid waxy potatoes to ensure crispy fries after canning.
• Don’t Skip Soaking: Removing excess starch is key! Soak your fries for at least 3 hours, changing the water to achieve optimal crunch.
• Pack Tightly, but Not Too Tightly: Pack the jars vertically, ensuring fries are snug yet have room to expand during the canning process for even cooking.
• Check for Air Bubbles: Removing air bubbles is crucial for a good seal; press gently around the jar sides to eliminate bubbles before sealing.
• Cool Completely Before Storing: Let the jars cool fully to ensure proper sealing; a sealed lid shouldn’t flex when pressed, indicating your canning French fries are ready for storage!
What to Serve with Pressure Canned French Fries
Elevate your homemade snacking experience with delightful pairings that complement the deliciousness of these crispy, golden fries.
- Garlic Aioli: This creamy, garlicky dip adds a burst of flavor, perfect for slathering on each fry.
- Classic Ketchup: A timeless pairing, this sweet and tangy sauce enhances the fry’s crispy texture and flavor.
- Spicy Remoulade: A zesty, mayonnaise-based dip with a kick that brings bold flavors to every fry you dip.
- Ranch Dressing: Creamy and herby, this fan-favorite dip pairs effortlessly with crispy fries for a refreshing twist.
- Coleslaw: A crunchy, tangy side dish that balances the richness of the fries perfectly; it’s crunchy and satisfying.
- Grilled Burgers: Serve alongside juicy, grilled burgers to create a satisfying meal that everyone will love.
- Onion Rings: Add extra crunch with these crispy companions; their sweetness complements the fries beautifully.
- Fresh Garden Salad: A light, refreshing salad adds a balance of textures and flavors that enhances the fry experience.
- Soda or Craft Beer: Enjoy with a cold drink that cuts through the richness, elevating your snacking experience.
- Chocolate Milkshake: For a heavenly end to your meal, this sweet treat offers a delightful contrast to savory fries.
How to Store and Freeze Canning French Fries
Fridge: Store unopened jars of canned fries in a cool, dark place for up to 12 months for optimal flavor and quality.
Freezer: For longer-term storage, freeze cooked fries in airtight containers or freezer bags for up to 3 months, ensuring they are well-cooled before sealing.
Reheating: When ready to enjoy your canned fries, simply remove them from the jar and fry or bake until golden brown and crispy. Enjoy the delightful flavors of your homemade fries!
Room Temperature: After opening a jar, refrigerate any leftovers within 2 hours, consuming them within 3 days for best texture and taste.
Canning French Fries Recipe FAQs
What type of potatoes are best for canning French fries?
Absolutely, large baking russets are the go-to for canning French fries! Their sturdy texture ensures that you end up with fries that are crispy on the outside and tender on the inside. Avoid waxy potatoes since they can caramelize during the canning process, leading to a less desirable texture.
How should I store my canned fries?
Store your unopened jars of canned fries in a cool, dark place. They can maintain their best quality for about 8 to 12 months. However, they are safe to eat as long as the seals remain intact, even past that timeframe. Enjoying them within the first year will ensure maximum flavor!
Can I freeze cooked French fries after canning?
Definitely! For a longer-term option, freeze the cooked fries. First, allow the fries to cool completely, then place them in airtight containers or freezer bags. They can last up to 3 months in the freezer. When you are ready to indulge, fry or bake them until they’re golden and crispy!
What should I do if my canned fries come out mushy?
If your fries turn out mushy, it could be due to not soaking them long enough or using the wrong type of potatoes. To troubleshoot, always soak your fry strips for at least 3 hours and change the water several times to get rid of excess starch. If they still don’t meet your expectations, ensure you are using only large baking russets for the best texture.
How can I make my fries healthier?
Absolutely! A fun way to make your fries healthier is to opt for baking instead of frying when you want to cook your canned fries. You can also sprinkle different spices before packing, such as garlic powder, paprika, or even nutritional yeast for added flavor without extra calories. It’s all about keeping the delicious experience while being mindful of health!
Canning French Fries for Crispy Homemade Snack Bliss
Ingredients
Equipment
Method
- Peel and slice the potatoes into fry-shaped strips, about ½ to ¾ inch wide. Keep in water to prevent browning.
- Submerge cut potatoes in cold water for at least 3 hours, changing the water three times to remove excess starch.
- Drain potatoes and pack fry strips vertically into jars, leaving a 1-inch headspace. Sprinkle salt over fries.
- Pour boiling water over fries until fully submerged, maintaining the headspace.
- Press around the jar sides with a non-metallic utensil to remove air bubbles and wipe the rims of the jars.
- Process jars in pressure canner at 10 pounds of pressure for 35 minutes for pint jars and 40 minutes for quart jars.
- Remove jars and cool on a clean towel or rack. Check that lids have sealed properly.
Leave a Reply