
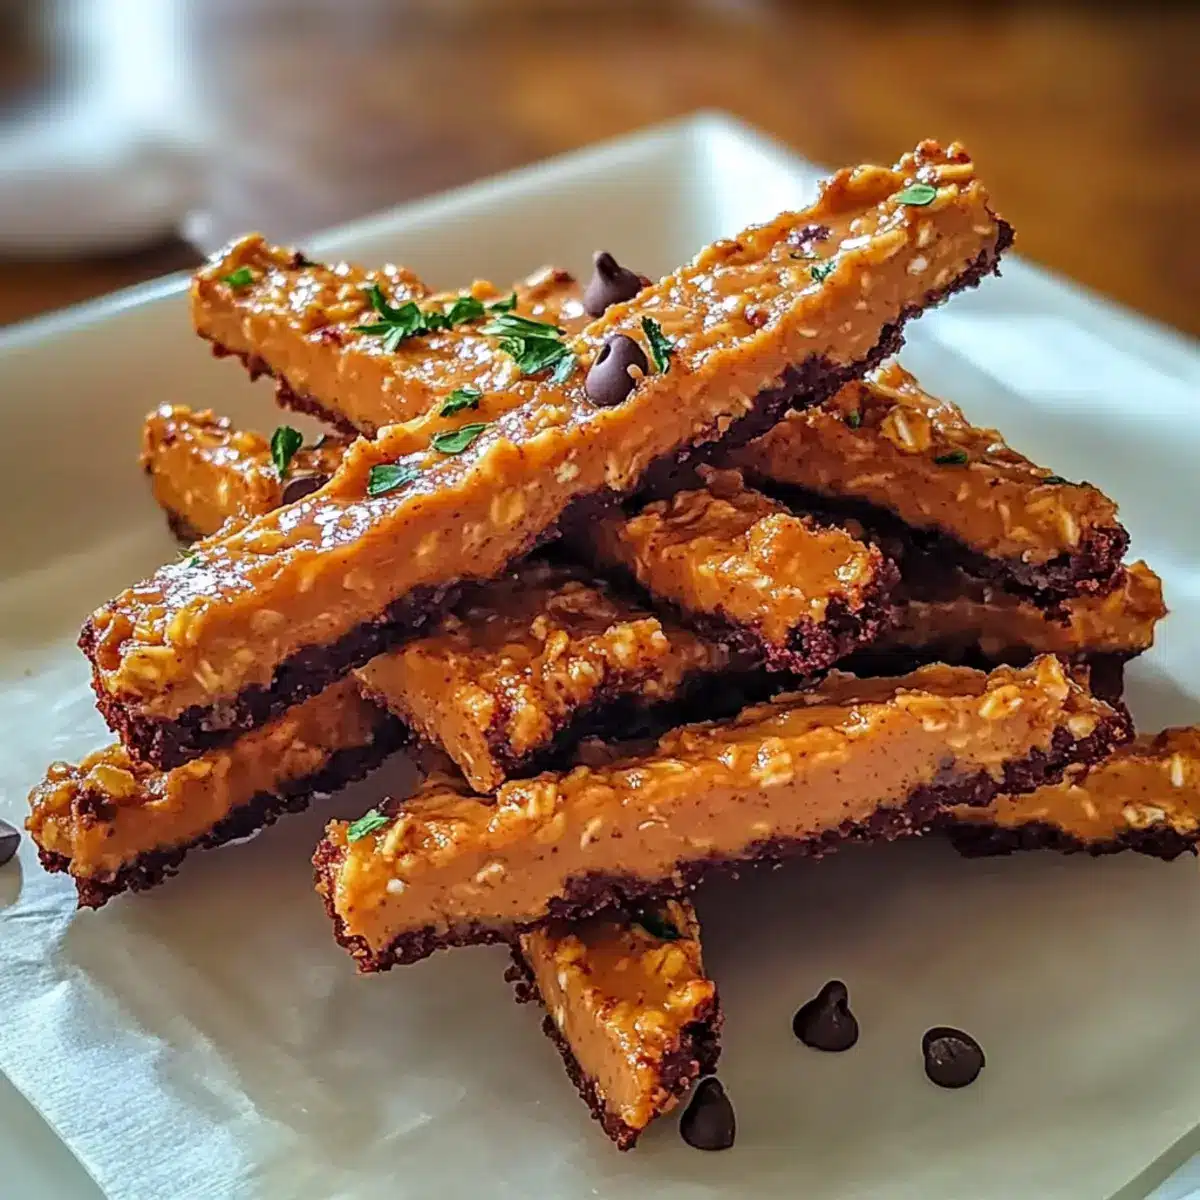
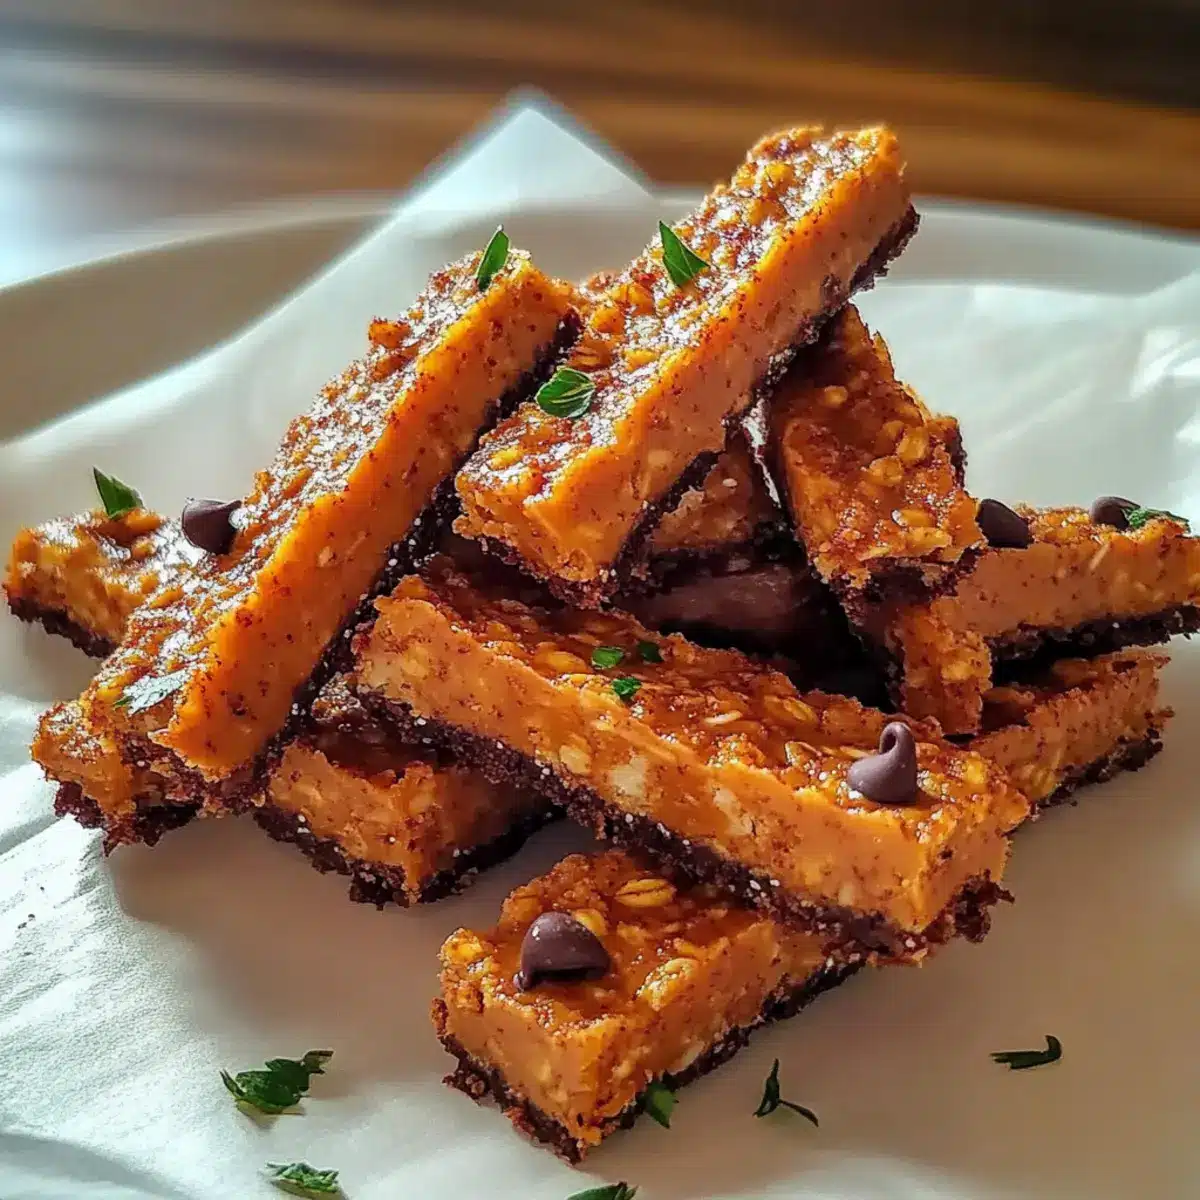
As the aroma of warm peanut butter and rich chocolate drifts through my kitchen, I can’t help but feel a wave of nostalgia. These No-Bake Chocolate Peanut Butter Oat Bars have become my go-to treat for satisfying those sweet cravings without the fuss of turning on the oven. They’re packed with hearty oats and a hint of cocoa, making them a gluten-free snack you can whip up in no time. With just a few simple ingredients, I’ve turned these bars into a delightful quick treat that not only satisfies my sweet tooth but also provides the energy boost I need throughout the day. Plus, they’re customizable with your favorite add-ins, ensuring every batch is as unique as my family’s taste buds. Curious about how to create these irresistible bars? Let’s dive into making a batch that will leave everyone asking for seconds!
Why are These Oat Bars a Must-Try?
No-Bake Ease: Forget the oven—these bars come together in just a few minutes, making them a fantastic option for busy schedules.
Customizable Delights: With endless variations, you can add your favorite nuts or dried fruits, turning each batch into a personal masterpiece.
Nutritious Goodness: Packed with fiber and healthy fats, they’re not just a sweet treat but also a satisfying snack that keeps you energized throughout the day.
Family-Friendly: Everyone loves them! The combination of chocolate and peanut butter appeals to both kids and adults alike, making them perfect for sharing.
Sweet Cravings Solved: Whether paired with a glass of milk or enjoyed on their own, these oat bars will quickly become your go-to fix for all things sweet, much like my beloved Banana Baked Oatmeal recipe!
No-Bake Chocolate Peanut Butter Oat Bars Ingredients
For the Bars
• Oats – Rolled oats provide that chewy structure, so stick with those for the best texture.
• Peanut Butter – This silky spread serves as the binding agent, but feel free to swap it for almond butter for a nut-free twist.
• Honey or Maple Syrup – These sweeteners add just the right touch of sweetness and help hold everything together; agave syrup works for a vegan option.
• Cocoa Powder – For deep chocolatey flavor, you can also experiment with carob powder for a unique spin.
For the Topping
• Chocolate Chips – Melt these over the bars for an extra kick of sweetness; dark or dairy-free chocolate chips are fantastic alternatives.
Curious about making these delightful no-bake chocolate peanut butter oat bars? You’ll love their irresistible blend of flavors and satisfying texture!
Step‑by‑Step Instructions for No-Bake Chocolate Peanut Butter Oat Bars
Step 1: Combine the Base Ingredients
In a large mixing bowl, combine 2 cups of rolled oats, 1 cup of peanut butter, 1/2 cup of honey or maple syrup, and 1/4 cup of cocoa powder. Stir vigorously for about 2–3 minutes or until everything is well mixed and has a sticky, cohesive texture. This mixture will form the base of your no-bake chocolate peanut butter oat bars.
Step 2: Press into the Baking Dish
Line an 8×8 inch baking dish with parchment paper for easy removal. Pour the oat mixture into the lined dish and use a spatula or your hands to press it down firmly and evenly across the bottom. Aim for a slightly compacted layer—it should be about 1 inch thick. This step is crucial for ensuring your oat bars hold together once chilled.
Step 3: Melt the Chocolate Topping
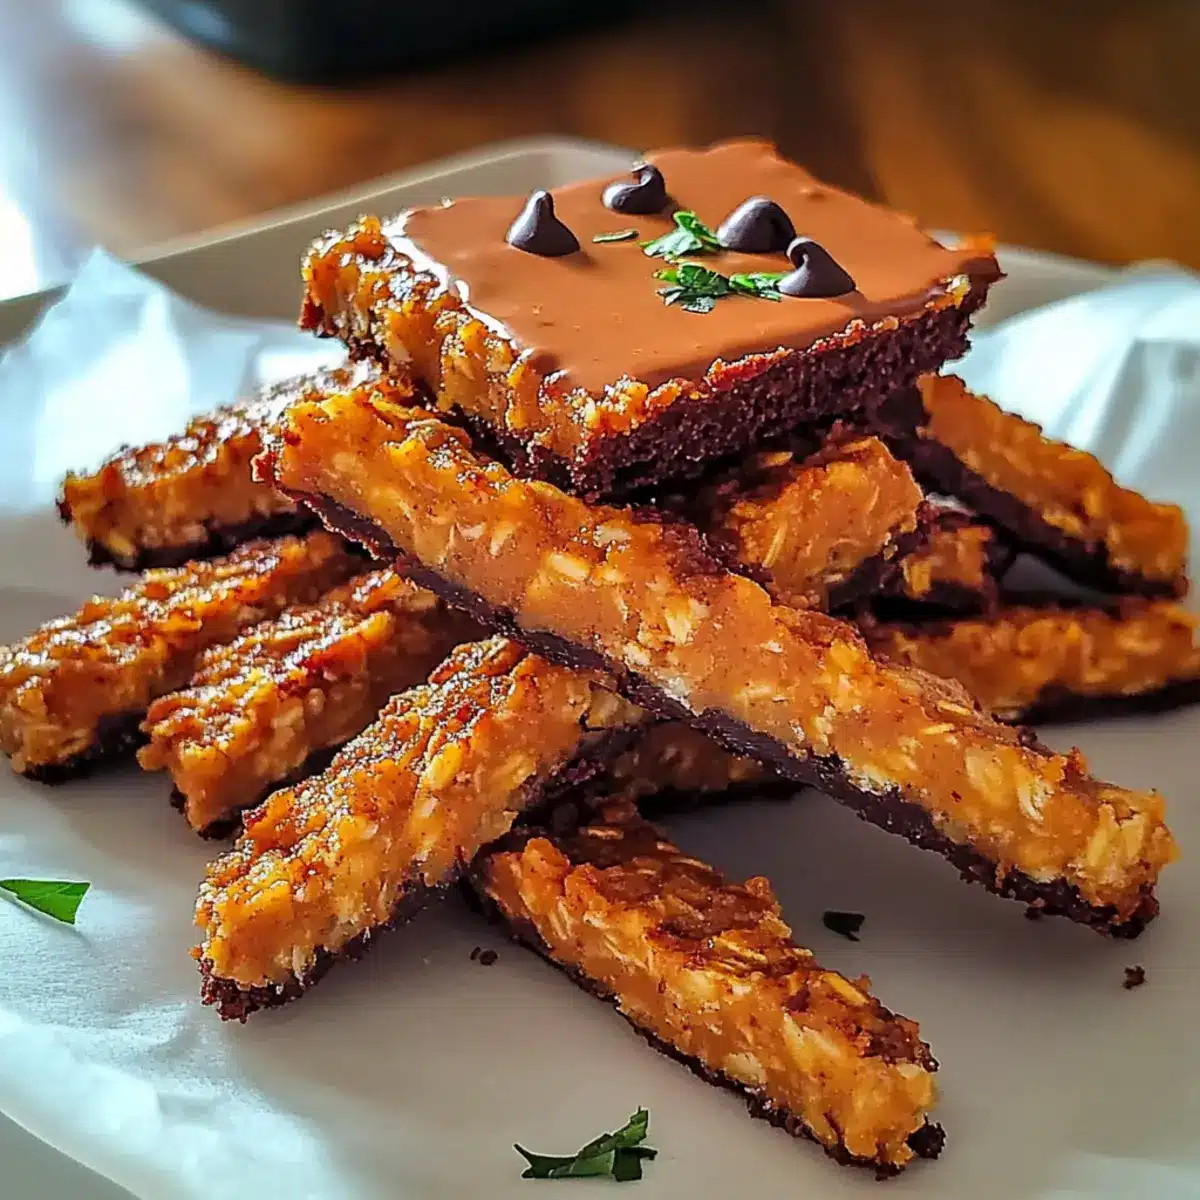
In a microwave-safe bowl, add 1 cup of chocolate chips. Heat in the microwave in 30-second intervals, stirring between each, until completely melted and smooth—this should take about 1–2 minutes total. Be careful not to overheat. Pour the melted chocolate evenly over the pressed oat mixture and spread it out with a spatula for an even layer.
Step 4: Chill and Set
Place the baking dish in the refrigerator and let it chill for at least 1 hour, or until the chocolate is firm and set. This cooling time allows the no-bake chocolate peanut butter oat bars to solidify and makes slicing them much easier later on.
Step 5: Slice and Serve
Once chilled and set, carefully lift the bars out of the baking dish using the parchment paper overhang. Place on a cutting board and let them sit at room temperature for about 5 minutes to soften slightly. Using a sharp knife, cut into squares or rectangles, and serve chilled for a deliciously chewy treat.
Make Ahead Options
These No-Bake Chocolate Peanut Butter Oat Bars are a fantastic choice for meal prep, allowing you to save time on busy days. You can prepare the oat mixture up to 24 hours in advance, pressing it into the baking dish and refrigerating it without the chocolate topping. This ensures the bars are ready to finish when you need them. Just melt the chocolate chips and pour them over the set oat base before serving. For best quality, store the prepared bars in an airtight container in the fridge for up to 5 days. These simple steps mean you’ll always have a deliciously satisfying treat ready at your fingertips!
Variations & Substitutions for No-Bake Oat Bars
Feel free to explore these delightful tweaks to make the recipe your own!
-
Nut-Free Alternative: Swap peanut butter for sunflower seed butter for a similar creamy texture without allergens.
This swap retains that rich stickiness while adding a unique, nutty flavor that everyone can enjoy. -
Sweetness Adjustments: Use dates or pure maple syrup to sweeten naturally and give a caramel-like twist.
Blending pitted dates into a paste can create an irresistible sweetness that complements the chocolate beautifully. -
Cocoa Twist: Replace cocoa powder with carob powder for a naturally sweeter and caffeine-free alternative.
Its mild flavor pairs wonderfully, offering a new and intriguing taste experience! -
Crunch Factor: Toss in chopped nuts or seeds for delightful crunch and added nutrition.
Almonds or pumpkin seeds can bring a satisfying crunch, elevating the texture of these bars significantly. -
Fruit Addition: Mix in dried fruits like cranberries or apricots for a fruity burst of flavor.
Their natural sweetness contrasts nicely with the chocolate, making each bite even more exciting. -
Flavored Chocolate: Use flavored chocolate chips, such as mint or orange-infused, to create a more vibrant flavor profile.
These infusions can transform your oat bars into a show-stopping treat that surprises the palate! -
Protein Boost: Add protein powder to enhance the nutritional value and keep you energized throughout the day.
Just a scoop can pack these bars with extra protein, making them a great post-workout snack! -
Chili Heat: For those who love a kick, sprinkle in a dash of cayenne pepper or chili powder.
The heat contrasts delightfully with the chocolate, making for a thrilling taste sensation that’s unforgettable!
Why not also check out my recipe for Sweet Spicy Ground for more flavorful inspiration?
Storage Tips for No-Bake Chocolate Peanut Butter Oat Bars
Room Temperature: These bars can be kept at room temperature for up to 2 days. Be sure to store them in an airtight container to maintain freshness.
Fridge: Store in the refrigerator in an airtight container for up to 1 week. This helps preserve the chewy texture and rich flavor of the no-bake chocolate peanut butter oat bars.
Freezer: For longer storage, freeze the bars in a single layer, separated by parchment paper, for up to 3 months. Thaw in the fridge before serving for the best taste.
Reheating: These bars are best served chilled, but you can pop them in the microwave for a few seconds if you prefer them warm and gooey.
Expert Tips for No-Bake Oat Bars
-
Mix Thoroughly: Ensure all ingredients are well combined to prevent crumbly bars. A sticky, cohesive mixture is key for this no-bake treat.
-
Firm Pressure: Press the oat mixture firmly into the pan. This step helps the bars hold together and prevents them from falling apart once cut.
-
Chill Time Matters: Don’t rush the refrigeration. Letting the bars set for at least an hour allows them to firm up, creating that perfect chewy texture.
-
Warm the Knife: For easier slicing, dip your knife in hot water before cutting. This will give you clean, even pieces without crumbling.
-
Watch Substitutions: If using nut butter alternatives, ensure they have a similar texture to peanut butter for best results. Enjoy your no-bake chocolate peanut butter oat bars!
What to Serve with No-Bake Chocolate Peanut Butter Oat Bars
Enjoy these delightful treats alongside complementary snacks and beverages that enhance their flavors.
-
Creamy Yogurt: A dollop of Greek yogurt adds a tangy contrast to the sweet bars, creating a balanced snack.
-
Fresh Berries: The tartness of raspberries or strawberries perfectly offsets the rich chocolate and peanut butter flavors.
-
Nutty Trail Mix: A handful of trail mix will bring crunch and a variety of flavors, making each bite an adventure.
-
Honeycrisp Apple Slices: Crisp apples offer a refreshing crunch and natural sweetness, pairing wonderfully with the chewy bars.
-
Smoothie Bowl: Blend your favorite fruits and top with granola; the creamy base and varied textures complement the bars beautifully.
-
Milk or Plant-Based Alternatives: A glass of cold milk, almond, or oat milk is the classic pairing, enlivening the flavors of this delicious treat.
Combine these serving suggestions and create a sweet experience, making your snack time irresistible!
No-Bake Chocolate Peanut Butter Oat Bars Recipe FAQs
What type of oats should I use for the bars?
For the best texture, I recommend using rolled oats as they provide the perfect chewiness and help the bars hold together. Avoid instant oats as they may result in a softer, less structured bar.
How should I store the no-bake chocolate peanut butter oat bars?
These bars can be stored in an airtight container in the fridge for up to 1 week, preserving their delightful chewiness and rich flavor. If you need longer storage, you can freeze them for up to 3 months. Just layer them with parchment paper to prevent sticking.
Can I freeze these oat bars?
Absolutely! To freeze your no-bake chocolate peanut butter oat bars, place them in a single layer on a baking sheet and freeze for about 1 hour until firm. Then transfer them to an airtight container or freezer bag, separating layers with parchment paper. When you’re ready to enjoy, just thaw them in the refrigerator overnight.
What if my bars are too crumbly?
If your no-bake chocolate peanut butter oat bars turn out crumbly, it might be due to not mixing the ingredients thoroughly or not pressing the mixture firmly enough into the pan. Make sure you mix until everything is sticky and well combined. Also, when pressing, really compact the mixture into the baking dish to create a solid hold.
Are these bars safe for people with nut allergies?
While the original recipe contains peanut butter, you can easily make these bars nut-free by substituting peanut butter with sun butter or a seed butter alternative. Just ensure that your chocolate chips are also nut-free if you’re concerned about cross-contamination.
How can I enhance the flavor of my no-bake bars?
Feel free to experiment with different add-ins to customize your oat bars! You can mix in dried fruits like cranberries or apricots for a chewy contrast, or add nuts and seeds for additional crunch. A pinch of salt can elevate the flavors, balancing the sweetness beautifully!

Crispy Oven Baked Sweet Potato Fries You'll Crave Daily
Ingredients
Equipment
Method
- Preheat the oven to 425°F (220°C).
- In a mixing bowl, combine sweet potatoes with olive oil, salt, paprika, and garlic powder.
- Spread the seasoned sweet potatoes evenly on a baking sheet lined with parchment paper.
- Bake for 25-30 minutes, flipping halfway through, until crispy and golden.
- Remove from oven and let cool slightly before serving.
Leave a Reply