
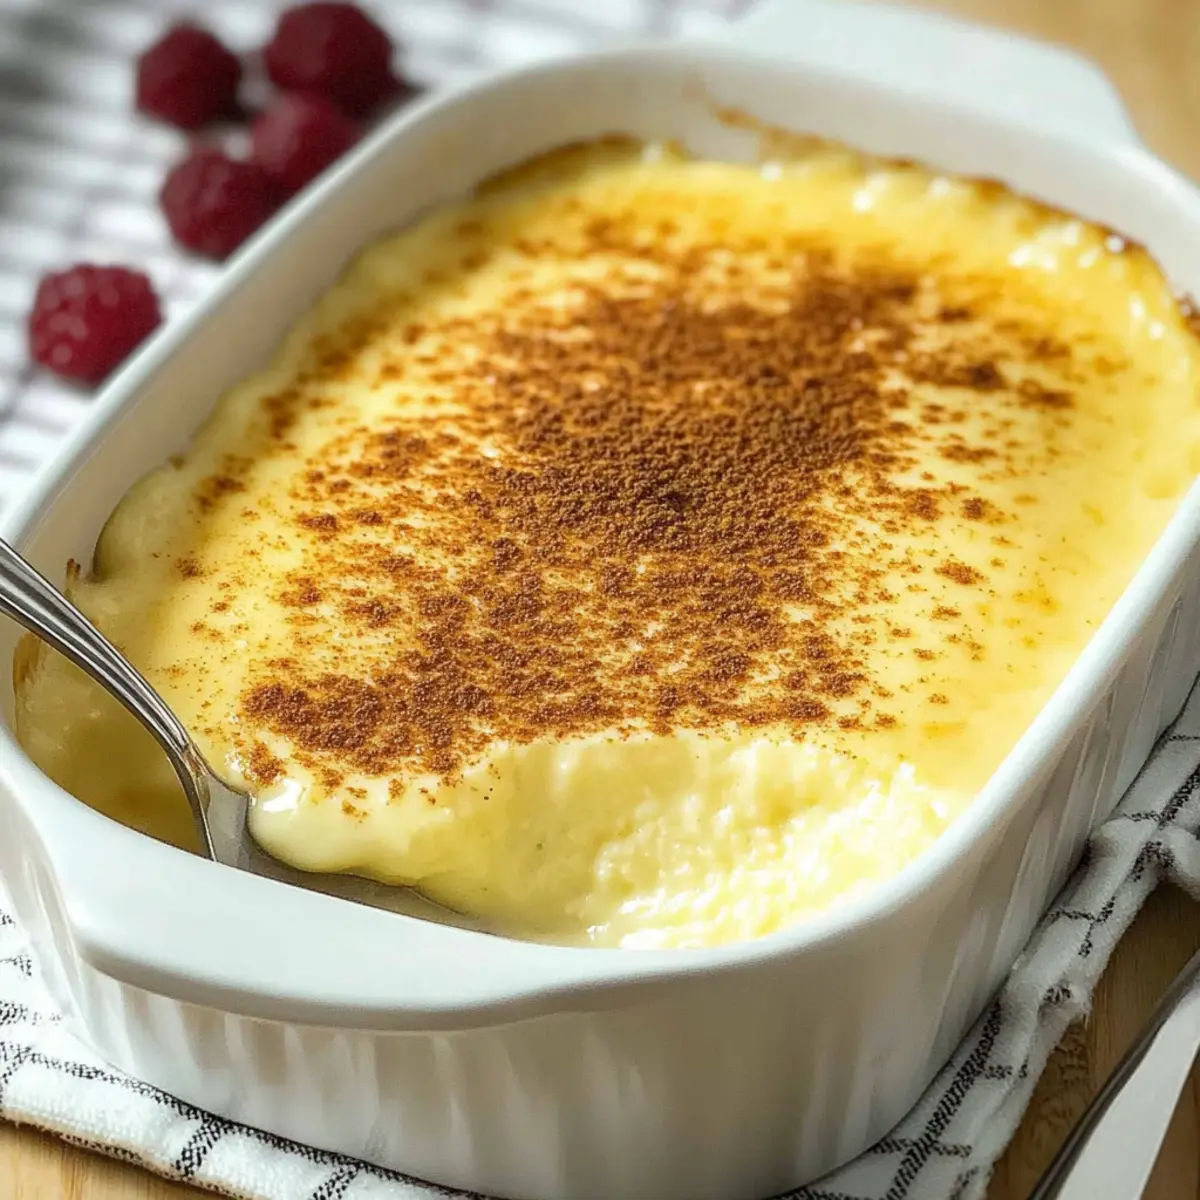
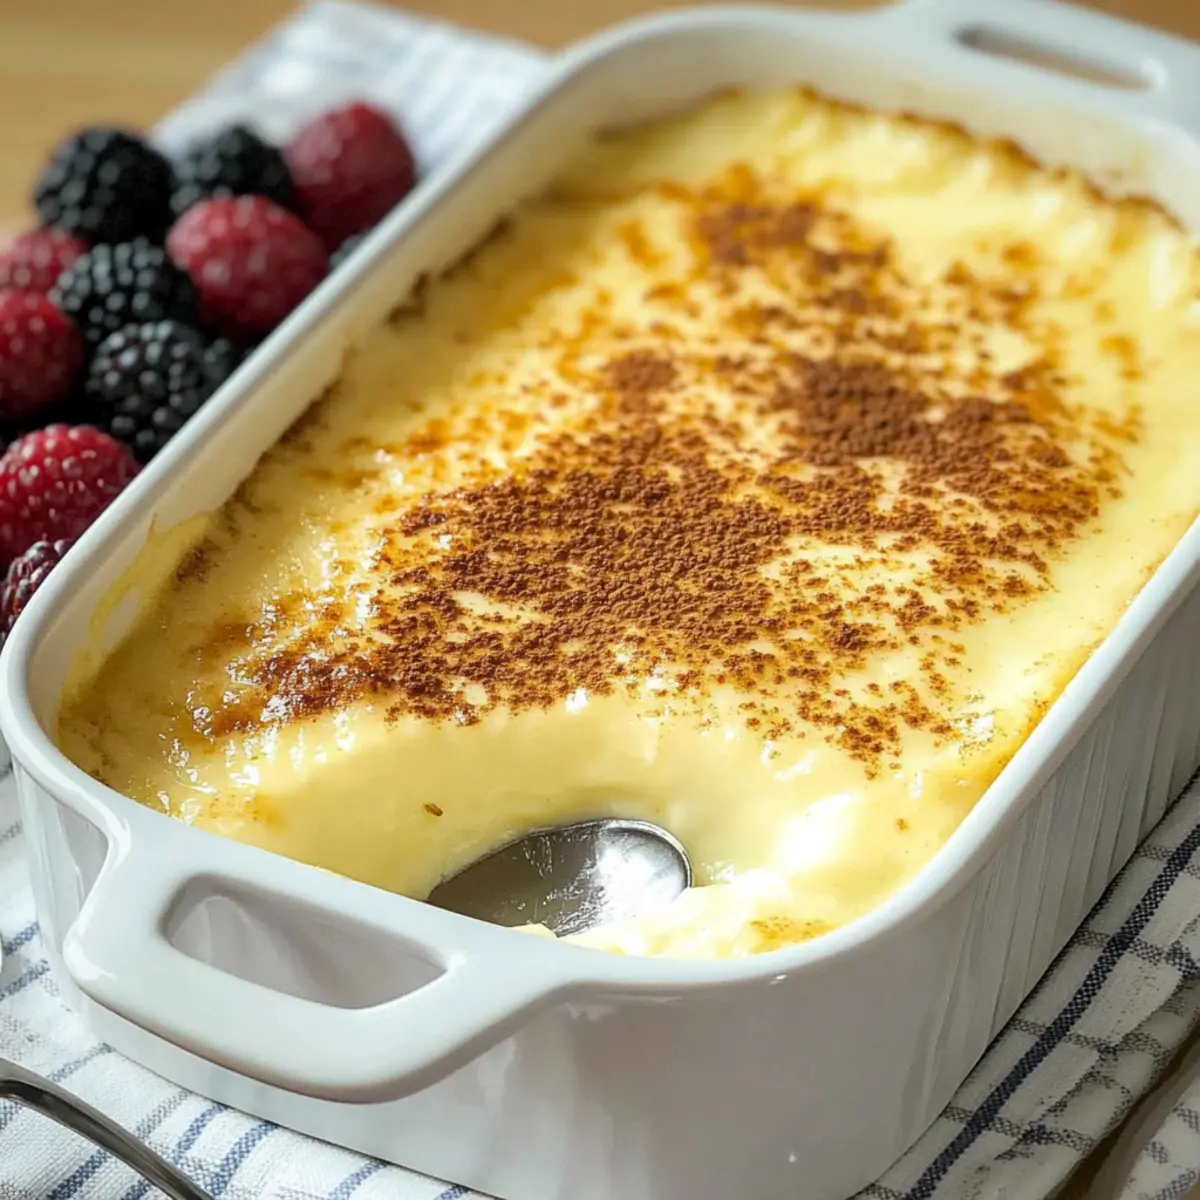
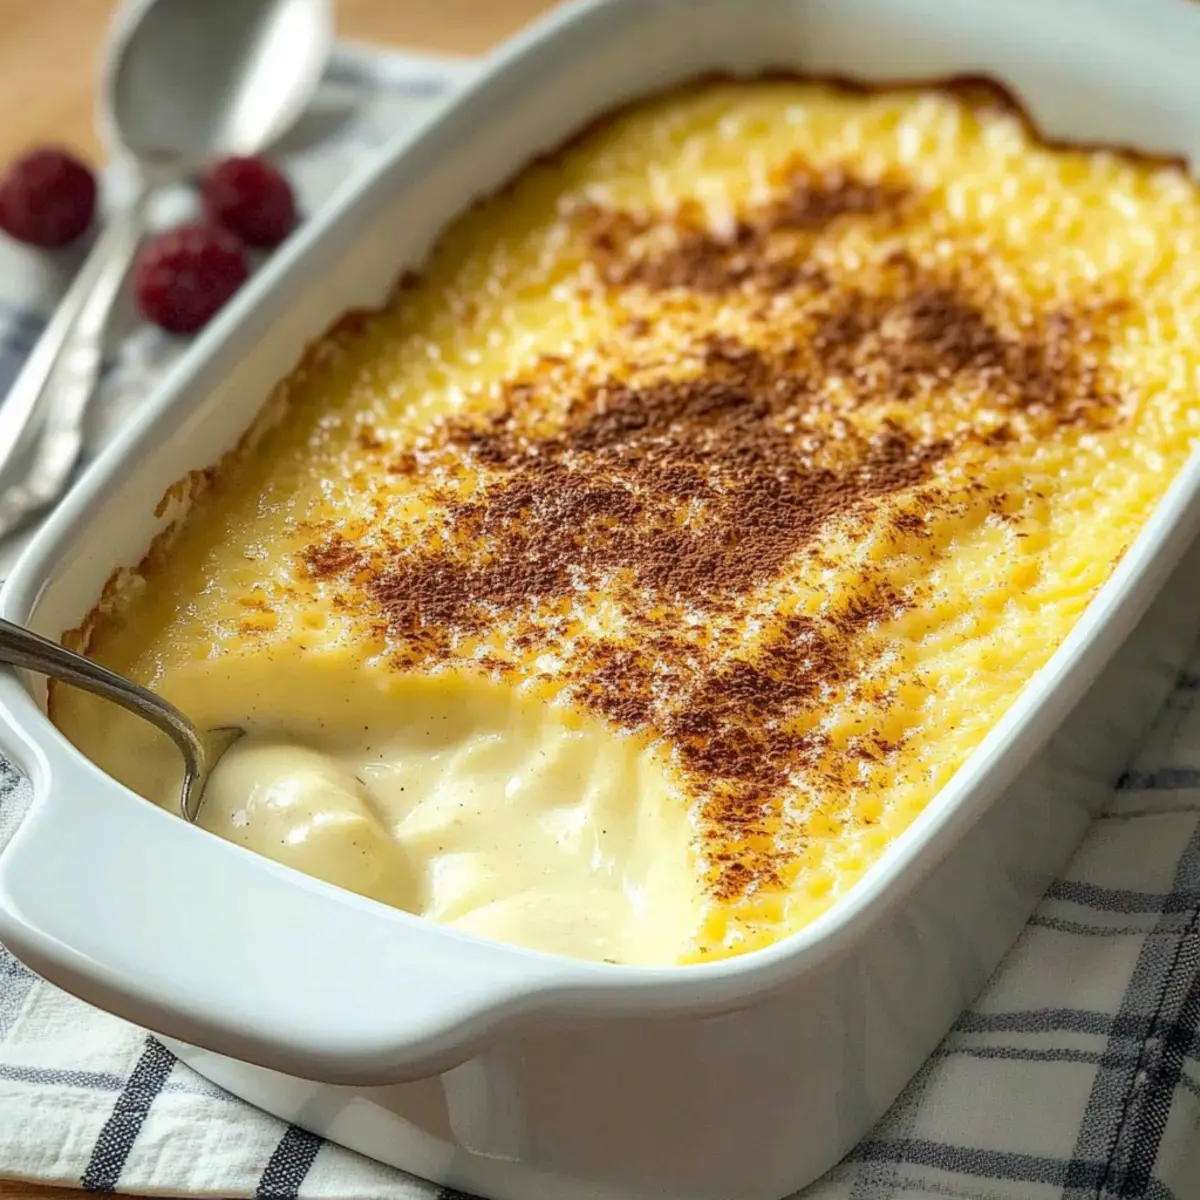
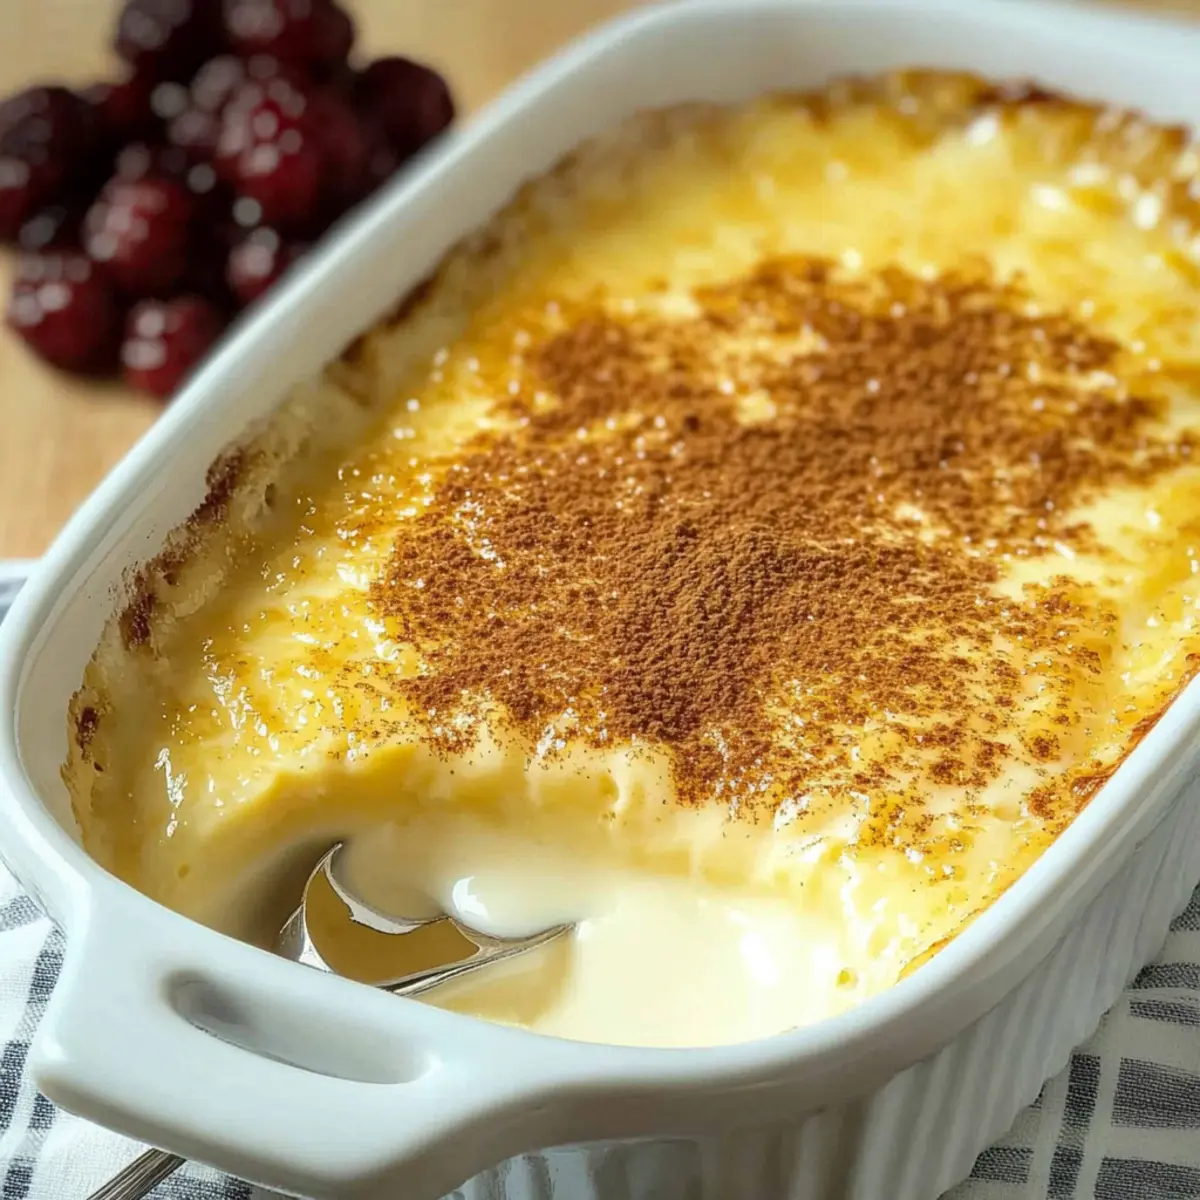
As the cool breeze of autumn sweeps in, I can’t help but crave something cozy and warm. Enter my Dreamy Warm Baked Custard with Nutmeg, a charming dessert that perfectly balances nostalgia and simplicity. This exquisite treat is not only gluten-free but also an effortless way to impress friends and family with a homemade delight. The silky texture, combined with the comforting notes of vanilla and nutmeg, makes it the ultimate finish to any meal. You can even prepare it ahead of time, allowing the flavors to meld beautifully in the fridge. So, are you ready to evoke that cherished feeling of home and warmth with each creamy spoonful? Let’s dive into making this delightful custard!
Why Will You Love This Custard Recipe?
Comforting, this Dreamy Warm Baked Custard is the perfect treat for cozy evenings, transporting you to a world of nostalgic flavors. Simple to make, it requires minimal ingredients yet delivers maximum satisfaction. Versatile, it can be dressed up with fresh berries or spiced up with variations like almond extract or cinnamon. Crowd-pleaser, it’s a dessert that delights family and friends alike—everyone will be asking for seconds! Gluten-free and make-ahead friendly, this custard is an ideal choice for gatherings or a sweet escape on a quiet night. Don’t forget to check out my recipes for Banana Baked Oatmeal and Vegan Pumpkin Mac for more comforting options!
Dreamy Warm Baked Custard Ingredients
For the Custard
• Whole Milk – Provides creaminess and smooth texture; 2% milk works as a substitute.
• Eggs – Essential for structure and richness; use large eggs for the best results.
• Sugar – Adds sweetness, balancing the custard’s flavor; adjust to your preference.
• Vanilla Extract – Deeply flavors the custard; almond extract or citrus zest are great alternatives.
• Ground Nutmeg – Offers a warm, comforting aroma and flavor to the dreamy warm baked custard.
• Salt – Enhances all the flavors; a small pinch is sufficient.
For Serving (Optional)
• Fresh Berries – Adds freshness and visual appeal; ideal for topping off your indulgent dessert.
Step‑by‑Step Instructions for Dreamy Warm Baked Custard
Step 1: Prepare Milk Mixture
Begin by pouring whole milk into a medium saucepan and heating it over medium heat. Stir gently until you see small bubbles forming around the edges, then remove it from the heat. Allow the milk to cool slightly while you work on the next steps, as this warm base is crucial for a smooth custard.
Step 2: Mix Eggs and Sugar
In a mixing bowl, whisk together 4 large eggs, sugar, and a pinch of salt until the mixture is just combined and smooth without any bubbles. This process should take about 1-2 minutes. The eggs provide the creamy structure for your dreamy warm baked custard, setting the foundation for its silky texture.
Step 3: Incorporate Milk
Gradually pour the warm milk into the egg mixture while continuously whisking to prevent the eggs from cooking. This slow incorporation ensures a smooth custard without curdling. After thoroughly mixing, add a teaspoon of vanilla extract for that delightful flavor boost, making your custard feel truly decadent.
Step 4: Strain Mixture
Pour the custard mixture through a fine-mesh strainer into a baking dish (about 1.5 quarts). This step removes any curdled bits and ensures a silky-smooth consistency in your dreamy warm baked custard. You should see a smooth, creamy liquid collecting in the dish, ready for baking.
Step 5: Prep for Baking
Preheat your oven to 350°F (175°C). Place your baking dish inside a larger pan, then carefully fill the outer pan with hot water until it reaches halfway up the sides of the custard dish. This water bath creates a gentle cooking environment, which helps to prevent cracking and ensures an even bake.
Step 6: Bake
Slide the pan into your preheated oven and bake for 55 to 60 minutes. Start checking for doneness at the 55-minute mark; the edges should be set while the center slightly jiggles when you gently shake the pan. The custard should appear set around the edges, yet still softly wobbly in the middle.
Step 7: Cool
Once baked, carefully remove the custard dish from the water bath and allow it to cool on a wire rack for about 30 minutes. This cooling period helps the custard set further before you refrigerate it, which is essential for enhancing the texture and allowing the flavors to meld beautifully.
Step 8: Serve
After cooling, transfer the custard to the refrigerator and chill for several hours or overnight. When ready to serve, top with fresh berries for a pop of color and flavor. The creamy, dreamy warm baked custard awaits you, bringing warmth and comfort with every delightful spoonful!
Expert Tips for Dreamy Warm Baked Custard
- Even Mixing: Ensure even mixing of the egg and sugar to avoid clumps; whisk just until combined to keep it smooth.
- Water Bath Importance: Always use a water bath; it helps cook the custard gently, preventing cracks and ensuring creaminess in your dreamy warm baked custard.
- Check Doneness: When testing doneness, remember it should still jiggle slightly in the center—this indicates a perfect texture that sets beautifully as it cools.
- Cool Properly: After baking, let the custard cool thoroughly before refrigerating; this step allows the flavors to meld and enhances the overall taste.
- Chill Overnight: For the best results, chill the custard overnight; this gives it a rich, creamy consistency and enhances the flavor profile for a delightful experience.
How to Store and Freeze Dreamy Warm Baked Custard
Fridge: Keep the custard refrigerated in an airtight container for up to 3 days. This prevents it from absorbing other flavors and ensures optimal freshness.
Freezer: To freeze, cut the custard into individual portions and wrap each tightly in plastic wrap, then place in a freezer-safe container. It can be frozen for up to 2 months.
Thawing: When ready to enjoy, transfer the frozen custard to the fridge to thaw overnight. Gently reheat in the oven or microwave on low power until warmed through, but be careful not to overheat, which may alter its creamy texture.
Serving Tip: Dust with a little extra nutmeg or top with fresh berries after reheating for that fresh-from-the-oven delight!
Dreamy Warm Baked Custard Variations
Feel free to let your creativity shine as you customize this comforting custard to suit your taste and mood!
- Dairy-Free: Substitute coconut milk for a creamy, slightly tropical twist while keeping that dreamy texture.
- Fruit-Infused: Incorporate a swirl of pureed seasonal fruits, like strawberries or peaches, for a vibrant flavor burst that complements the custard beautifully.
- Spiced Up: Add a hint of cinnamon or ginger for a warm spice kick that dances on your palate. It’s the perfect way to embrace autumn!
- Nutty Delight: Fold in finely chopped nuts, such as pistachios or hazelnuts, for added texture and a delightful crunch that pairs perfectly with the silky custard.
- Lemon Zest Twist: A teaspoon of lemon zest brightens the flavor profile, giving each spoonful a refreshing zing that balances the sweetness.
- Chocolate Lovers: Mix in melted dark chocolate for an indulgent, rich variation that transforms your custard into a luscious dessert.
- Coffee Custard: For a mocha makeover, whisk in a tablespoon of coffee or espresso powder, creating an enchanting coffee flavor that pairs beautifully with the vanilla base.
- Tropical Bliss: Try adding a splash of rum extract along with shredded coconut for an exotic vibe reminiscent of a sunny paradise.
With these variations, you can easily elevate your Dreamy Warm Baked Custard experience! For more comforting recipes, don’t miss out on my Banana Baked Oatmeal and Vegan Pumpkin Mac options, perfect for cozy family moments.
What to Serve with Dreamy Warm Baked Custard?
Indulging in this creamy dessert opens the door to a delightful dining experience that brings warmth and comfort to every bite.
-
Fresh Berries: Topping your custard with strawberries or blueberries adds a fruity brightness that elevates every creamy spoonful.
-
Whipped Cream: A dollop of freshly whipped cream introduces a light and airy texture that complements the custard’s richness, making each bite even more luxurious.
-
Shortbread Cookies: The buttery crunch of shortbread creates a delightful contrast in texture, enhancing the overall experience with every creamy mouthful of custard.
-
Caramel Sauce: Drizzling warm caramel over the custard brings a sweet, luscious flavor that pairs perfectly with the comforting vanilla notes.
-
Nutmeg Sprinkle: A final sprinkle of freshly grated nutmeg highlights the warming spices within the custard, enhancing the nostalgic feeling as you enjoy this classic dessert.
-
Coffee or Tea: A steaming cup of coffee or herbal tea rounds out your dessert, cleansing the palate and inviting conversation around the table.
Make Ahead Options
These Dreamy Warm Baked Custards are perfect for busy home cooks looking to save time during hectic weeknights! You can prepare the custard mixture up to 24 hours in advance by whisking together the eggs, sugar, and vanilla before gradually adding the warm milk. Pour the mixture into the baking dish and cover tightly with plastic wrap to refrigerate, preventing it from absorbing any odors. When you’re ready to enjoy your custard, simply set up the water bath and bake it straight from the fridge. With this make-ahead approach, your custard will be just as delicious, offering the comforting flavors you crave without the last-minute rush!
Dreamy Warm Baked Custard Recipe FAQs
What kind of milk should I use for this custard?
Absolutely! Whole milk provides the creaminess and smooth texture that is essential for a delectable Dreamy Warm Baked Custard. While I recommend whole milk for the best results, you could substitute with 2% milk if you prefer a lighter option.
How long can I store the baked custard in the fridge?
You can keep your Dreamy Warm Baked Custard refrigerated in an airtight container for up to 3 days. Just be sure to tightly cover it to prevent it from absorbing any odors from your fridge.
Can I freeze the custard?
Yes, you can freeze your custard! First, cut it into individual portions, then wrap each piece tightly in plastic wrap. Place the wrapped portions in a freezer-safe container. The custard can be frozen for up to 2 months.
How do I thaw and reheat the frozen custard?
To thaw, simply transfer the frozen custard to the fridge and let it thaw overnight. When you’re ready to enjoy it again, take care to gently reheat it in an oven set to a low temperature or in the microwave on low power until just warmed through. Be careful not to overheat, as this can affect the dreamy texture you love!
What should I do if my custard has a grainy texture?
If you find that your custard turns out grainy, it’s likely due to overstirring the egg mixture or cooking it at too high a temperature. For a smooth texture, whisk the egg mixture only until combined without bubbles and be sure you’re baking at the right temperature while using a water bath to cook it gently.
Is this custard suitable for gluten-free diets?
Very! The Dreamy Warm Baked Custard is naturally gluten-free, making it a wonderful dessert option for anyone avoiding gluten. Just be cautious with any toppings or ingredients you might add, as they should also align with gluten-free guidelines!
Dreamy Warm Baked Custard That Melts in Your Mouth
Ingredients
Equipment
Method
- Begin by pouring whole milk into a medium saucepan and heating it over medium heat until small bubbles form around the edges, then remove from heat.
- In a mixing bowl, whisk together 4 large eggs, sugar, and a pinch of salt until just combined and smooth.
- Gradually pour the warm milk into the egg mixture while continuously whisking to prevent the eggs from cooking.
- Pour the custard mixture through a fine-mesh strainer into a baking dish to ensure a silky-smooth consistency.
- Preheat your oven to 350°F (175°C) and place the baking dish in a larger pan, filling the outer pan with hot water until it reaches halfway up the sides of the custard dish.
- Bake for 55 to 60 minutes, checking for doneness; edges should be set while the center slightly jiggles.
- Once baked, carefully remove the dish from the water bath and allow it to cool on a wire rack for about 30 minutes.
- Transfer the custard to the refrigerator and chill for several hours or overnight before serving.
Leave a Reply