
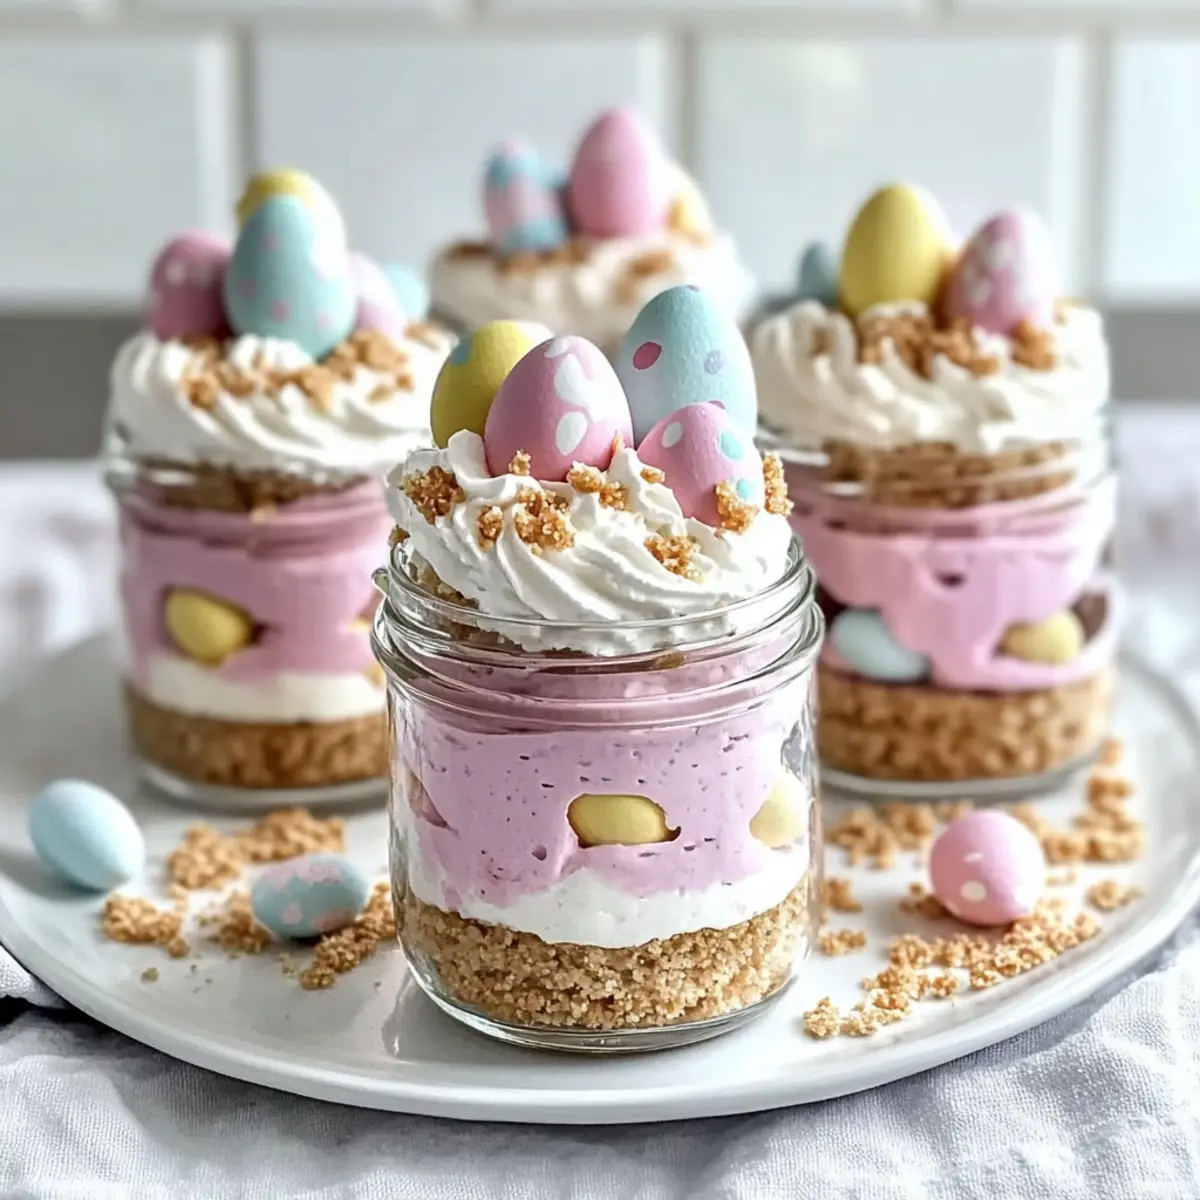
The morning sun peeked through my kitchen window, shining on the pastel colors of sprinkles and candy eggs scattered across the countertop. What better way to celebrate spring than with these delightful Easter Egg Cheesecake Jars? This no-bake dessert brings together creamy layers of cheesecake and a buttery graham cracker crust, making it a cinch to whip up for any gathering. Not only are they easy to prepare in advance, but the customizable aspect allows for creativity that sparks joy in everyone at your table. Whether you stick to traditional pastel themes or get adventurous with flavors, these jars are bound to be a showstopper. Are you ready to bring a touch of whimsy to your dessert table? Let’s dive into this delightful recipe together!

Why are Easter Egg Cheesecake Jars a Must?
Vibrant, Festive Appeal: These jars bring a splash of color to your dessert table, making them a delightful centerpiece for Easter gatherings.
No-Bake Convenience: Save time and hassle with a recipe that requires no baking, yet delivers rich, creamy layers.
Customizable Delights: Personalize flavors and decorations to suit any taste—think Oreo crusts or lemon zest for a twist!
Crowd-Pleasing Treats: Perfect for family gatherings or spring parties, these jars are sure to impress guests of all ages.
Make-Ahead Magic: Prepare these delicious treats a day in advance, allowing for more time to enjoy the festivities.
Imagine sharing these delightful treats alongside other favorites like Pumpkin Cheesecake Truffles or Witches Brew Jars at your next gathering!
Easter Egg Cheesecake Jars Ingredients
For the Crust
- Graham Cracker Crumbs – The base of the crust; substitute with crushed Oreos or shortbread for a different twist.
- Granulated Sugar – Adds sweetness for the crust; no direct substitutions required.
- Unsalted Butter (melted) – Binds the crust together perfectly; for a dairy-free option, use coconut oil.
For the Cheesecake Filling
- Cream Cheese (softened) – The main ingredient for the creamy cheesecake layer; for a lighter version, try using Neufchâtel cheese.
- Powdered Sugar – Sweetens the cheesecake filling; you can replace it with a sugar alternative like erythritol for a lower-sugar option.
- Vanilla Extract – Adds a lovely depth of flavor; use vanilla bean paste for an even richer taste.
- Heavy Cream – Creates that light and airy texture in the cheesecake; for a dairy-free alternative, use whipped coconut cream.
For Decoration
- Pink Gel Food Coloring/Freeze-Dried Strawberry Powder (optional) – Adds cheerful color to your layers; skip for a simpler look or make it natural.
- Whipped Cream – Essential for topping; whether you use store-bought or homemade, it’s a must!
- Pastel Candy Eggs – These are essential for the festive Easter theme; feel free to choose any small candies for customization.
- Rainbow or Pastel Sprinkles – Perfect for adding visuals; chocolate or nut toppings can be a delightful switch if desired.
As you gather your ingredients for these Easter Egg Cheesecake Jars, prepare for a delightful culinary adventure that will spark joy around your table this spring!
Step‑by‑Step Instructions for Easter Egg Cheesecake Jars
Step 1: Prepare the Crust
In a mixing bowl, combine graham cracker crumbs, granulated sugar, and melted unsalted butter until the mixture resembles wet sand. Using the back of a measuring cup or your fingers, press the mixture evenly into the bottom of your chosen jars, forming a firm crust. Set aside while you prepare the cheesecake filling.
Step 2: Make Cheesecake Filling
In a large mixing bowl, beat softened cream cheese with an electric mixer on medium speed until smooth and fluffy, about 2 minutes. Gradually add powdered sugar and vanilla extract, mixing until fully incorporated and airy, which will give the filling a light texture. This creamy mixture will be the base for your Easter Egg Cheesecake Jars.
Step 3: Whip Cream
In a separate chilled bowl, pour in the heavy cream. Using a hand mixer, whip the cream on high speed until stiff peaks form, which should take about 3-5 minutes. This step is crucial for achieving that light and airy cheesecake texture. Gently fold the whipped cream into the cream cheese mixture in two parts, ensuring you don’t deflate the airiness you’ve created.
Step 4: Color the Cheesecake
Divide the cheesecake filling equally into two bowls. If desired, add a few drops of pink gel food coloring or a sprinkle of freeze-dried strawberry powder to one bowl, mixing until well blended. This beautiful color will create visually appealing layers in your Easter Egg Cheesecake Jars, adding a festive touch to your dessert.
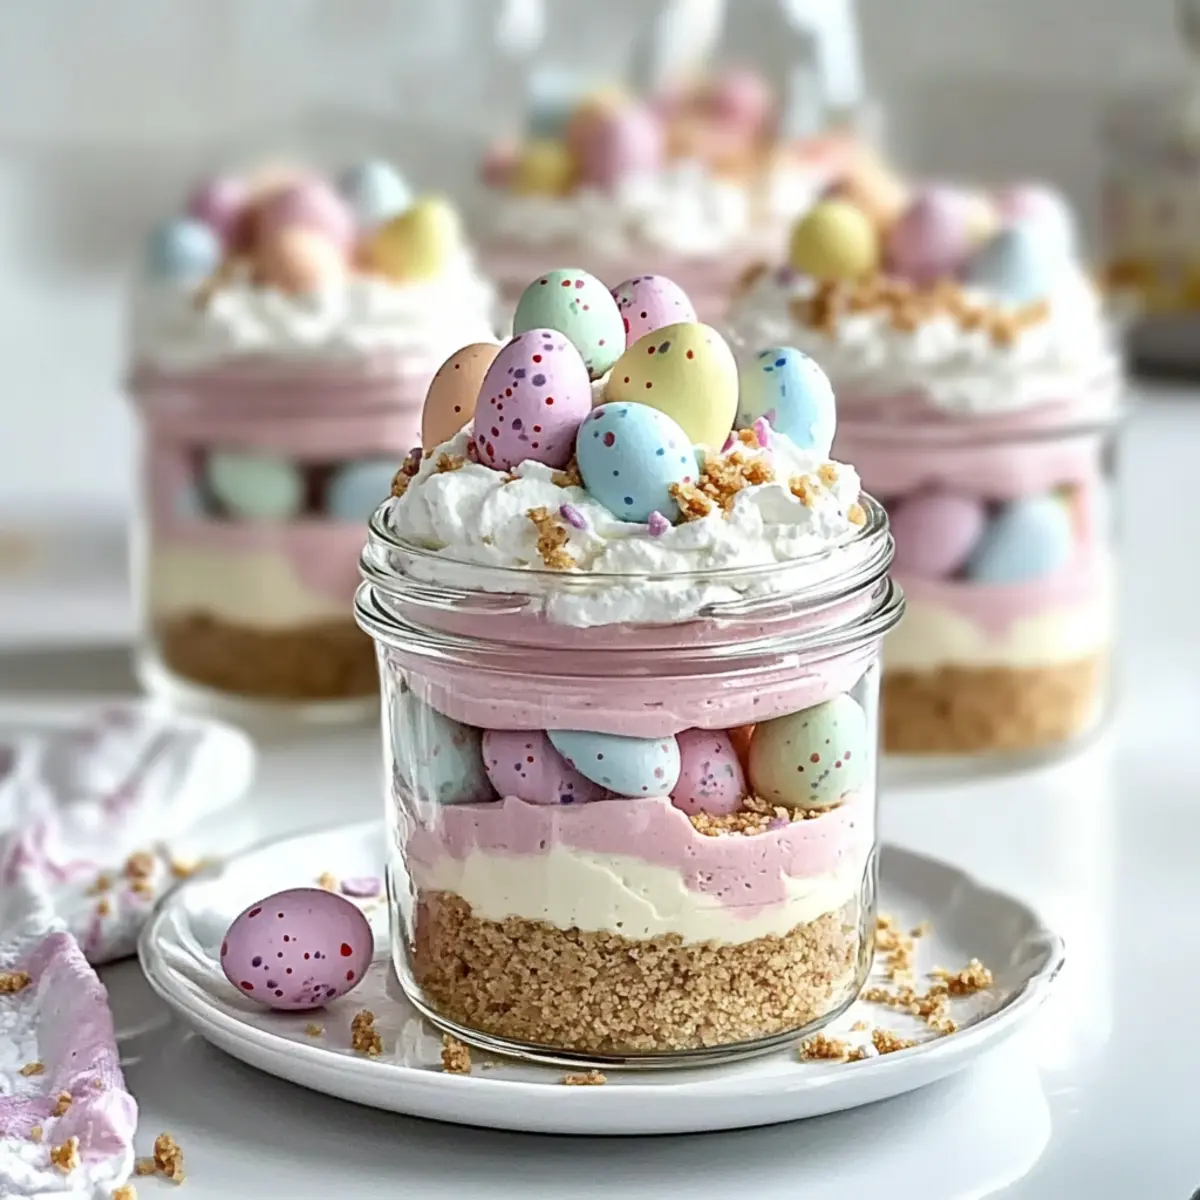
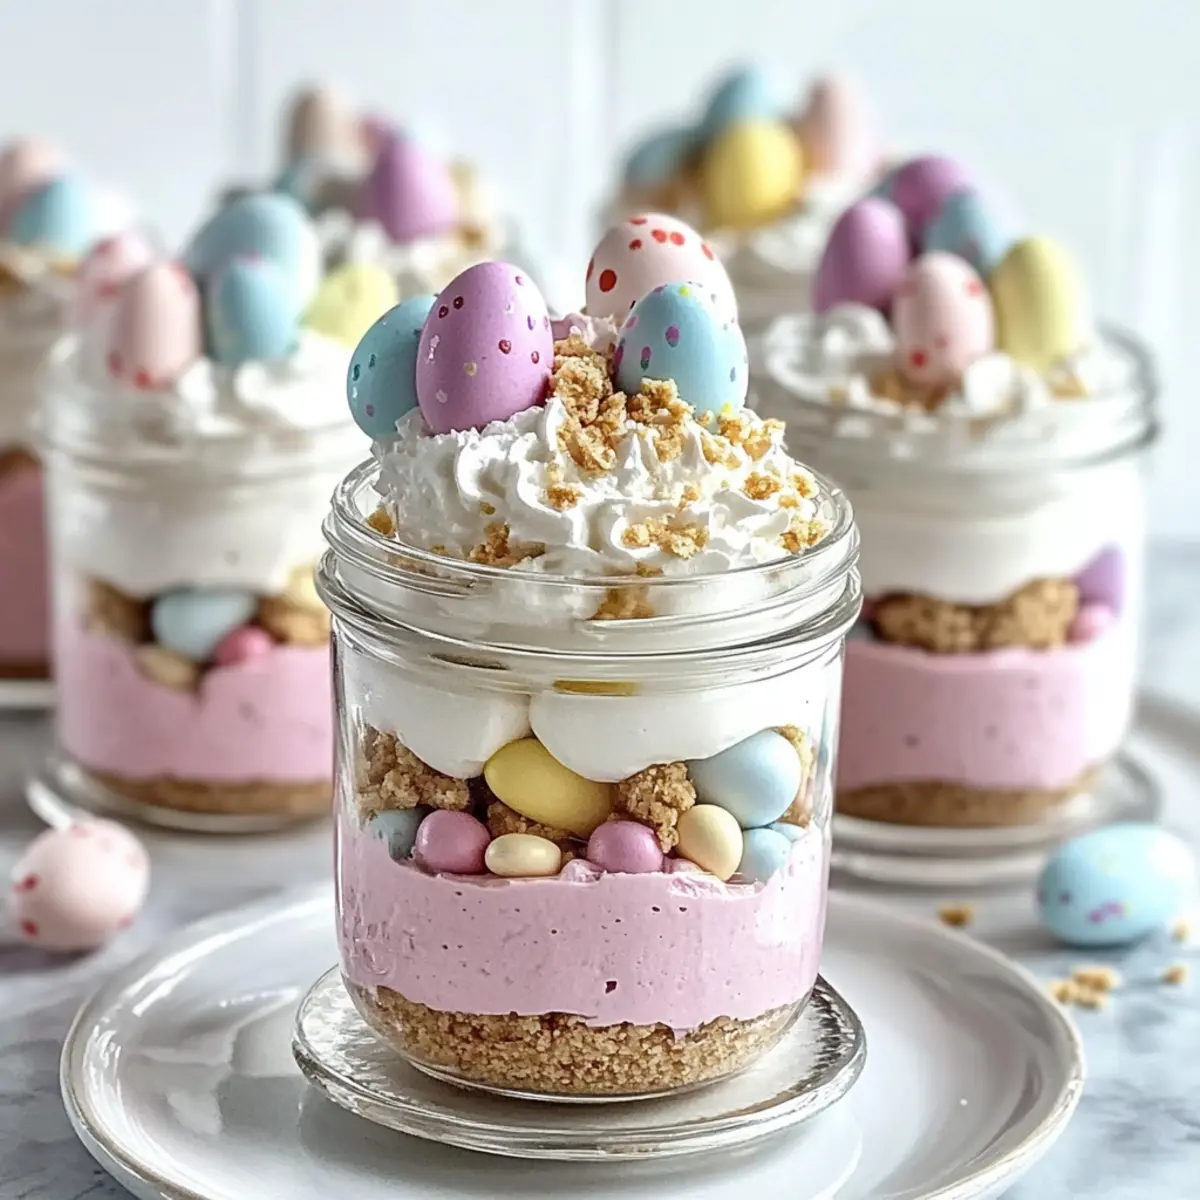
Step 5: Layer Cheesecake in Jars
Using a piping bag or a spoon, layer the pink cheesecake filling evenly over the graham cracker crust in each jar, making it about halfway full. Next, gently top this layer with the plain cheesecake filling, being careful not to mix the two. This fun layering will create a lovely contrast in your Easter Egg Cheesecake Jars.
Step 6: Chill
Cover the jars with lids or plastic wrap, then place them in the refrigerator for at least 2 hours, or until the cheesecake is fully set. This chilling time allows the flavors to meld perfectly and ensures that the cheesecake maintains its beautiful layers when served.
Step 7: Top & Serve
Just before serving, pipe a generous swirl of whipped cream on top of each jar. Decorate with pastel candy eggs and sprinkle with rainbow or pastel sprinkles for a festive finish. These Easter Egg Cheesecake Jars are now ready to delight your guests with their whimsical appearance and delicious taste!
What to Serve with Easter Egg Cheesecake Jars
Elevate your spring celebrations by pairing these delightful jars with complementary sides and treats that bring joy to your table.
-
Fresh Fruit Salad: A medley of berries and seasonal fruits adds a refreshing contrast to the creamy cheesecake, balancing the sweetness beautifully.
-
Minty Lemonade: This zesty drink provides a bright, citrusy flavor that cuts through the rich cheesecake layers, enhancing your dessert experience.
-
Honey Glazed Carrots: The natural sweetness of these tender veggies pairs wonderfully with the cheesecake, offering a deliciously unique combination of flavors.
-
Mini Easter Bread Rolls: Soft, fluffy rolls bring a comforting touch, perfect for soaking up any cheesecake remnants left on your plate.
-
Chocolate-Dipped Strawberries: The classic combination of rich chocolate and fresh strawberries brings an indulgent flair to your dessert table, impressing guests of all ages.
-
Light Spring Salad: Tossed greens with vinaigrette offer a crunchy contrast and vibrant freshness that enhances the overall meal experience.
Consider serving these delightful pairings with the Easter Egg Cheesecake Jars to turn your gathering into a joyful celebration!
Make Ahead Options
These Easter Egg Cheesecake Jars are a fantastic choice for busy cooks looking to save time! You can prepare the graham cracker crust and cheesecake filling up to 24 hours in advance. Simply combine the crust ingredients and press them into the jars, then prepare the filling and layer it as instructed. Cover the jars tightly and refrigerate them until you’re ready to serve. Just before serving, whip the cream and top the jars with it, along with pastel candy eggs and sprinkles to maintain freshness and crunchiness. With this make-ahead approach, your delightful Easter Egg Cheesecake Jars will be just as delicious and visually stunning for your spring celebrations!
How to Store and Freeze Easter Egg Cheesecake Jars
Fridge: Store your Easter Egg Cheesecake Jars in the refrigerator for up to 3 days. Cover them tightly with lids or plastic wrap to prevent drying out.
Freezer: If you’d like to enjoy these jars later, freeze them for up to 2 months. Before freezing, ensure they’re tightly sealed. Thaw in the fridge overnight before serving.
Reheating: These jars are best served chilled and shouldn’t be reheated, as it may alter the creamy texture of the cheesecake.
Serving Fresh: For the best taste and presentation, enjoy your Easter Egg Cheesecake Jars fresh, especially after preparing them.
Expert Tips for Easter Egg Cheesecake Jars
-
Chill Time Matters: Ensure you refrigerate the jars for at least 2 hours to allow the cheesecake layers to set properly, ensuring a perfect texture.
-
Layering Techniques: Use a piping bag for neat layer placement, making it easier to create stunning designs without mixing the colors in your Easter Egg Cheesecake Jars.
-
Customize with Care: When substituting ingredients, be mindful of moisture levels in your replacements, especially in crust options, to maintain consistency.
-
Whipping Tips: Start with very cold heavy cream for optimal results when whipping. Cold utensils also help achieve that desired lightness in textures.
-
Decorate Just Before Serving: To keep toppings fresh and impressive, wait until serving time to add whipped cream and decorative candies atop your jars.
Easter Egg Cheesecake Jars Variations
Feel free to explore these delightful variations to add even more charm to your Easter Egg Cheesecake Jars!
-
Chocolate Crust: Swap graham crackers for crushed Oreos for a delicious chocolatey base that enhances the overall flavor.
-
Citrus Surprise: Add lemon zest to the cheesecake for a refreshing, vibrant twist. Imagine brightening up your dessert with zesty flavor!
-
Layered Colors: For a pop of color without food dye, incorporate layers of pureed fruits like strawberries or blueberries. They’ll add both beauty and natural sweetness.
-
Nutty Crunch: Fold in finely chopped nuts like pecans or almonds into the cheesecake mix for a delightful texture contrast.
-
Dairy-Free Option: Use vegan cream cheese and whipped coconut cream for a creamy delight that everyone can enjoy—no one will miss the dairy!
-
Syrupy Sweetness: Drizzle some caramel sauce between the layers for an indulgent twist. This sweet surprise makes each spoonful heavenly.
-
Spicy Kick: Mix in a pinch of cinnamon or nutmeg to the filling for a warm undertone that perfectly complements the sweet creaminess.
-
Seasonal Sprinkles: Instead of pastel sprinkles, try using Easter-themed sprinkles or even mini chocolate eggs on top for a whimsical finish.
I hope these variations inspire your creativity and make your Easter celebration even more special. Enjoy the process of creating, just like when preparing other joyous treats such as Caramel Brownie Cheesecake or Cheesecake Stuffed Chocolate. Happy baking!
Easter Egg Cheesecake Jars Recipe FAQs
How do I choose ripe ingredients for my Easter Egg Cheesecake Jars?
Absolutely! When selecting ingredients, especially the cream cheese, make sure it’s softened but still fresh—look for a creamy texture without any discoloration or unpleasant odor. For the heavy cream, freshness is key; it should be cold and have a good shelf life remaining. If you decide to add freeze-dried strawberry powder for coloring, check that it’s vibrant and powdery, avoiding any clumps.
What’s the best way to store my Easter Egg Cheesecake Jars?
Very! Store your jars in the refrigerator for up to 3 days. Just be sure to cover them tightly with lids or plastic wrap to prevent them from drying out. I often recommend placing them in an airtight container if you have a lot to store, as this will keep them fresher longer.
Can I freeze my Easter Egg Cheesecake Jars for later?
Absolutely! You can freeze these jars for up to 2 months. Here’s how: first, ensure they’re tightly sealed. I like to use plastic wrap followed by a lid for extra protection. When you’re ready to enjoy them, thaw them in the fridge overnight for a delightful treat ready to serve. Just remember, avoid reheating—these jars are best served cold!
What should I do if my cheesecake layers aren’t setting?
Oh no! If your layers aren’t setting properly, double-check that you’re using the correct proportions of cream cheese and heavy cream, and ensure the heavy cream is whipped to stiff peaks before folding it into the cream cheese mixture. Cooling in the refrigerator for at least the minimum 2 hours is crucial to help the layers solidify. If time allows, longer chilling can improve the texture!
Are there any dietary considerations I should keep in mind?
Very! If you have dietary restrictions, you can personalize this recipe beautifully. For a dairy-free version, swap the cream cheese with a vegan alternative and use whipped coconut cream instead of heavy cream. Additionally, check the ingredients in your sprinkles and candies to avoid allergens, ensuring all your guests can enjoy these fun treats.
Can I customize my Easter Egg Cheesecake Jars?
Absolutely! The beauty of these Easter Egg Cheesecake Jars lies in their versatility. Swap out the graham cracker crust for Oreos or shortbread for an entirely new flavor profile. You could also play with flavors by adding lemon zest to the cheesecake or mixing up the color layers using natural powders instead of food coloring for a unique visual appeal. Get creative—this is your canvas!
Joyful Easter Egg Cheesecake Jars for a Fun Spring Treat
Ingredients
Equipment
Method
- In a mixing bowl, combine graham cracker crumbs, granulated sugar, and melted unsalted butter until it resembles wet sand. Press mixture into the bottom of jars.
- In a separate bowl, beat softened cream cheese until smooth. Gradually add powdered sugar and vanilla extract, mixing until fluffy.
- In a chilled bowl, whip the heavy cream until stiff peaks form. Gently fold it into the cream cheese mixture.
- Divide the filling into two bowls. Add pink food coloring to one and mix until blended.
- Layer the pink cheesecake filling over the crust in jars, then top with plain cheesecake filling.
- Cover jars and refrigerate for at least 2 hours.
- Top with whipped cream and decorate with pastel candy eggs and sprinkles before serving.
Leave a Reply