
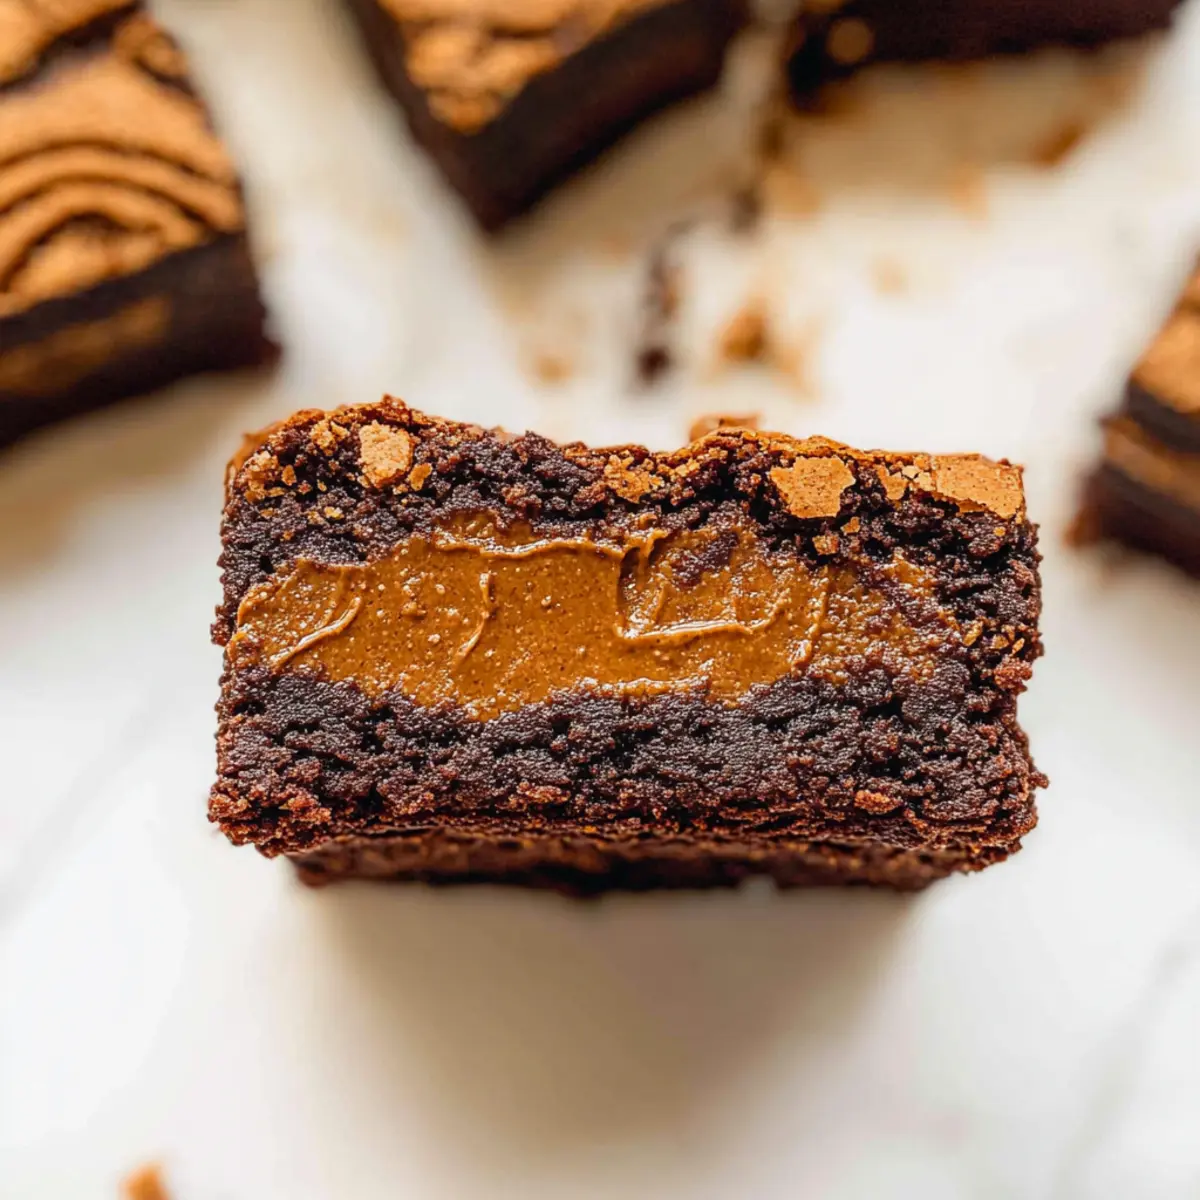
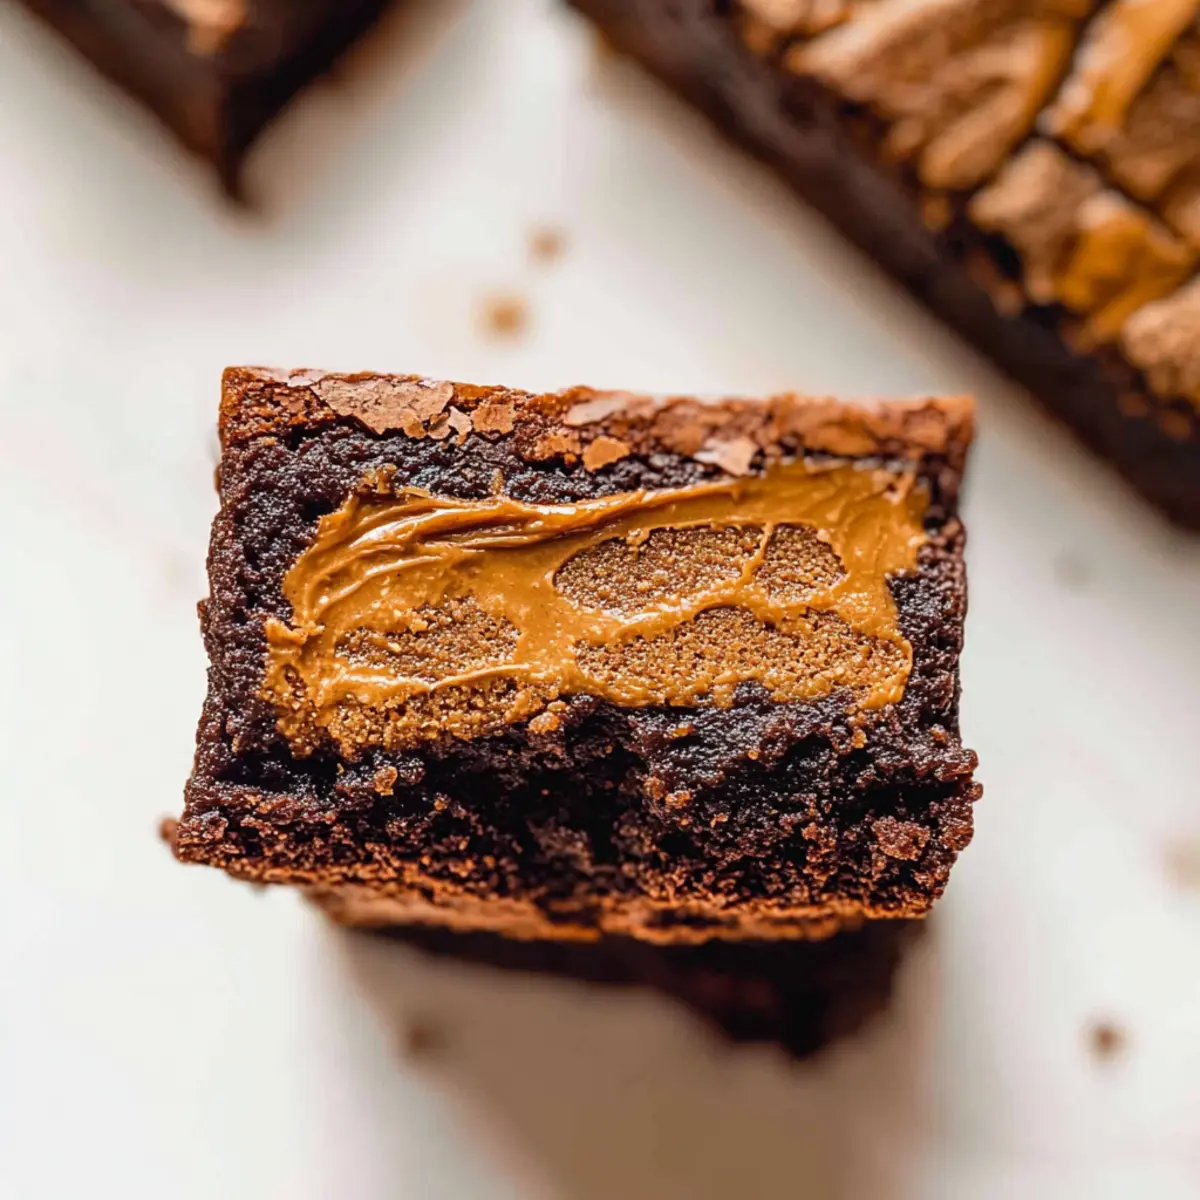
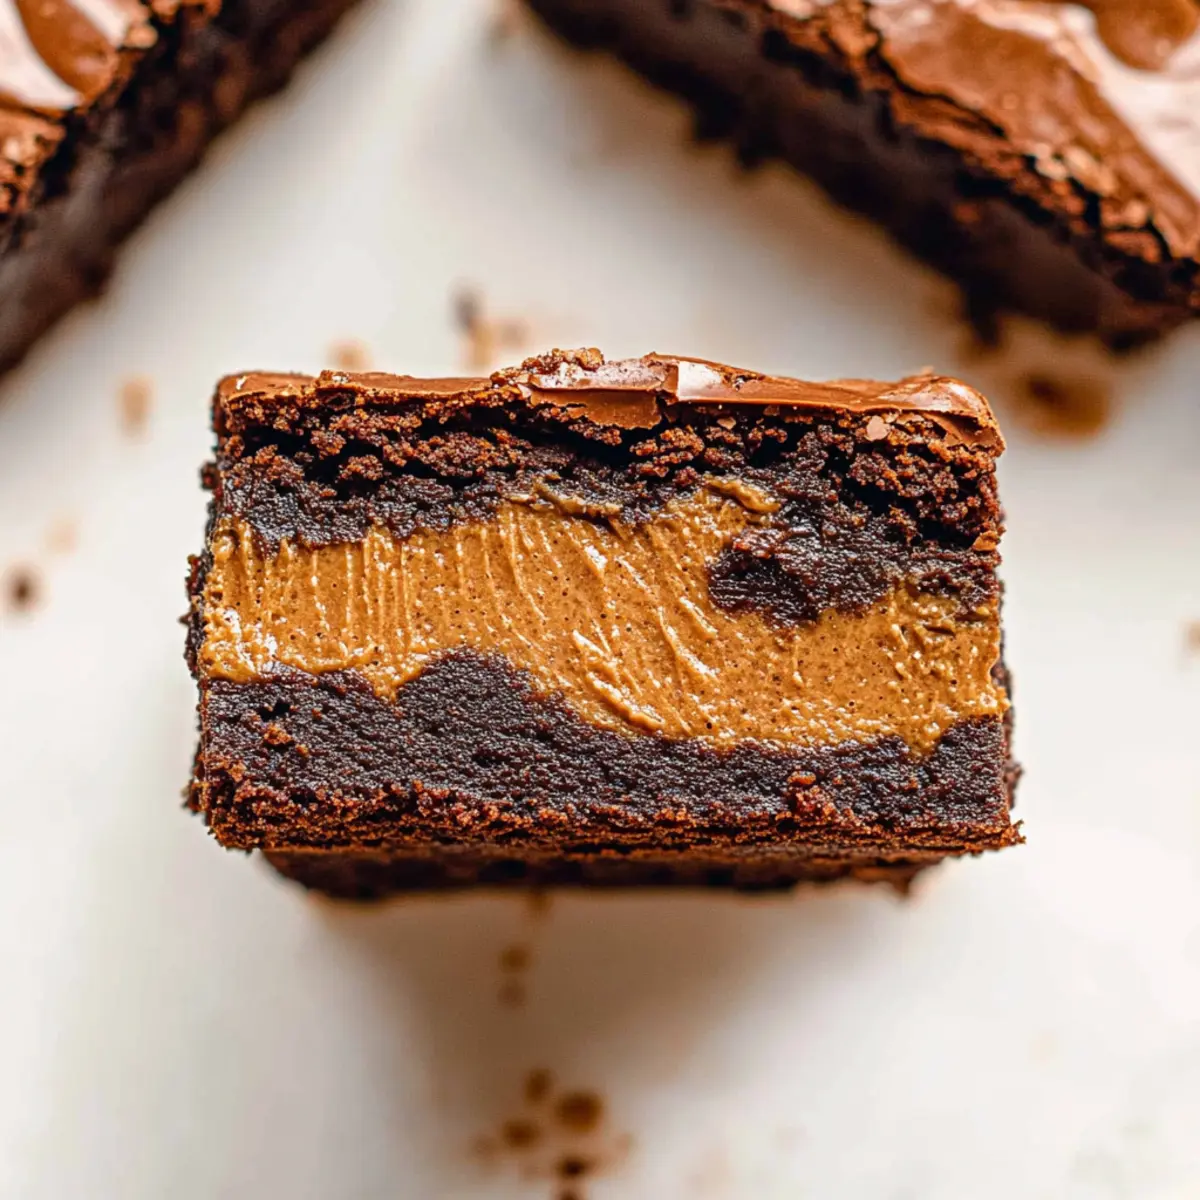
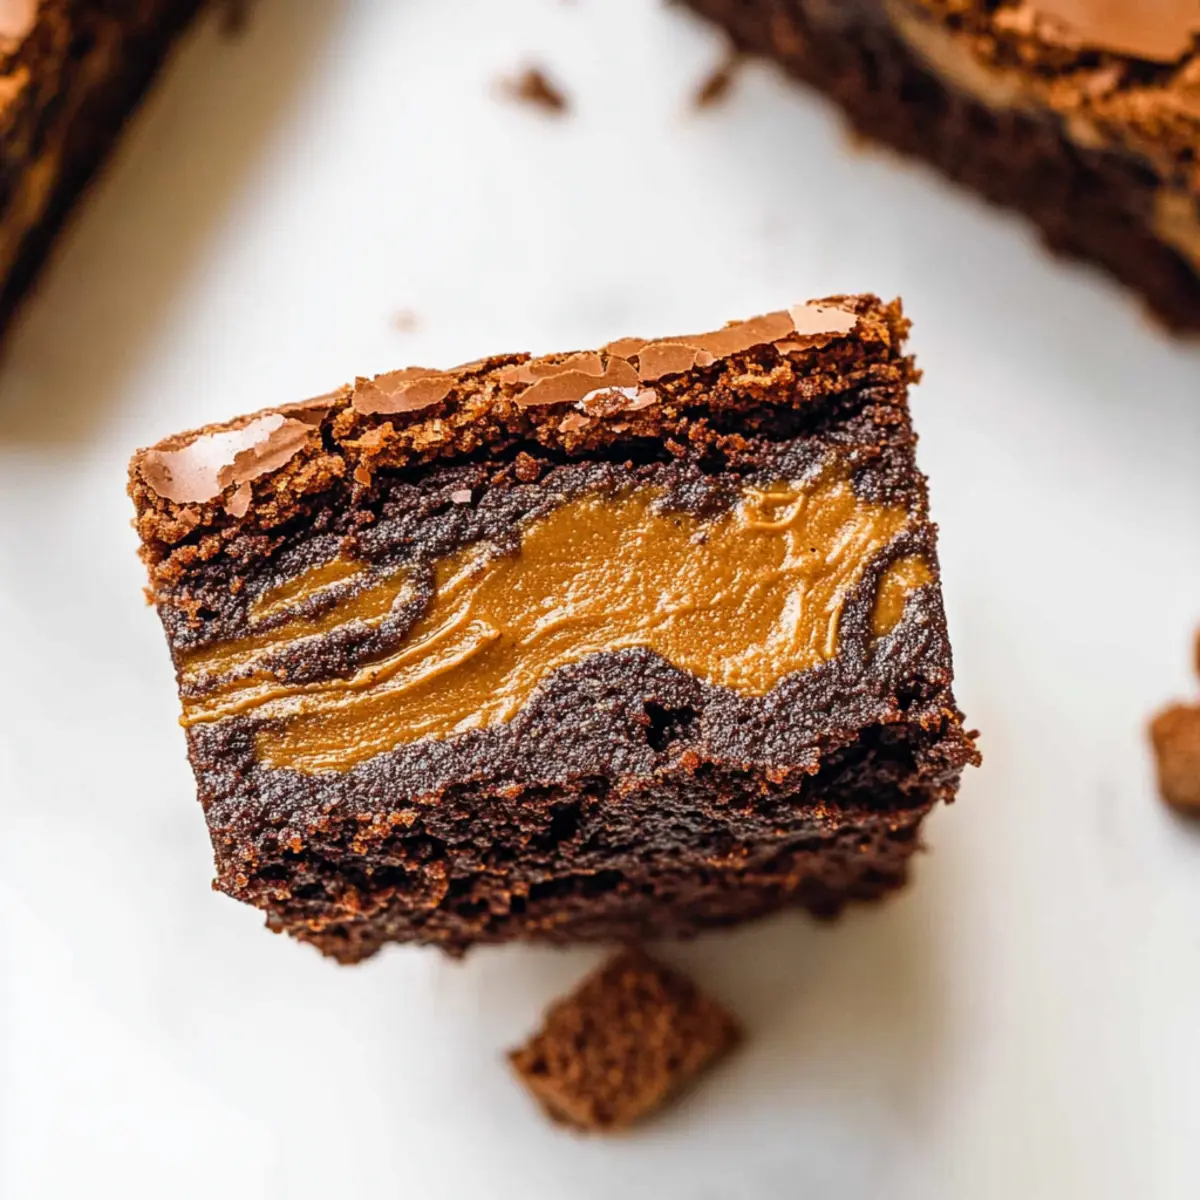
The aroma of warm chocolate fills the kitchen, drawing me in like a comforting hug on a chilly evening. Today, I’m excited to share my Fudgy Biscoff Brownies, a delightful fusion of rich chocolate and the unique, spiced flavors of Biscoff cookie butter. These sweet treats not only satisfy any chocolate craving but also offer a quick and easy way to impress your loved ones or treat yourself after a long day. The gooey cookie butter center adds an unexpected twist that makes every bite feel like a warm embrace. Perfectly fudgy, with chewy cookie pieces throughout, these brownies are an irresistible indulgence that you won’t want to miss. Who’s ready to create something special?
Why are Biscoff Brownies the ultimate treat?
Irresistible Flavor: The sweet and spiced notes of Biscoff cookie butter meld perfectly with rich chocolate, creating a deliciously unique brownie experience.
Fudgy Texture: Each bite is dense and gooey, with a delightful soft center that melts in your mouth.
Quick to Make: In just a few simple steps, you can whip up a batch of these brownies that are sure to impress anyone!
Versatile Treat: Customize them easily by adding nuts, or swap in your favorite chocolate for a new twist.
Perfect for Sharing: Whether it’s a cozy family night or a gathering with friends, these brownies are a hit every time!
For more delightful dessert ideas, check out my chocolate recipes and bring even more sweetness to your kitchen!
Biscoff Brownies Ingredients
Here’s everything you need to create the ultimate fudgy Biscoff brownies to impress yourself and your loved ones!
For the Brownie Base
- Biscoff Cookie Spread – Adds a rich, spiced flavor and moisture; can be substituted with any nut butter for a different taste.
- Unsalted Butter (5 TBSP) – Provides fat and richness; feel free to use salted butter, just reduce the added salt.
- Chopped Semi-Sweet Chocolate (4 oz) – Contributes to the fudgy texture and deep chocolate flavor; dark chocolate can be used for a more intense taste.
- White Granulated Sugar (1 1/3 cup) – Sweetens the brownies and enhances texture; you can substitute with brown sugar for a caramel hint.
- Large Eggs (2) + Egg Yolk (1) – Binds ingredients and aids in structure; can substitute with flax eggs for a vegan option.
- Pure Vanilla Extract (1 tsp) – Enhances the overall flavor; try almond extract for an unexpected twist.
- Canola or Vegetable Oil (3 1/2 TBSP) – Adds moisture; coconut oil can be used for a subtle coconut flavor.
- All-Purpose Flour (3/4 cup) – Gives structure; substitute with gluten-free flour blend if needed.
- Dutch Process Cocoa Powder (3/4 cup) – Provides rich chocolate flavor; use natural cocoa for a lighter taste.
- Cornstarch (1 TBSP) – Improves texture for a fudgy result; can be omitted if not available.
- Salt (1/2 tsp) – Enhances sweetness; no substitute needed.
For the Mix-Ins
- Biscoff Cookie Pieces (1/2 cup) – Adds texture and flavor; use chocolate chips as a substitute if desired.
- Mini Chocolate Chips (1/2 cup) – Adds extra chocolatey goodness; any chocolate chip can work, or omit for less sweetness.
For decoration (Optional)
- Biscoff Cookies – A delicious decoration that adds crunch; totally optional but highly recommended!
Now you’re all set to bring these delightful fudgy Biscoff brownies to life! Enjoy the wonderful process of baking.
Step‑by‑Step Instructions for Biscoff Brownies
Step 1: Prepare Pans
Start by preheating your oven to 325°F (163°C). Line an 8×8 inch baking pan with parchment paper, ensuring it hangs over the edges for easy removal later. Carefully spray the parchment with non-stick spray to prevent sticking. This simple step is crucial for achieving perfect Biscoff brownies.
Step 2: Freeze Cookie Butter
Take your Biscoff cookie spread and ensure it is slightly melted. Spread it evenly onto the prepared parchment-lined pan, creating a thin layer. Place it in the freezer for at least 2 hours, allowing the cookie butter to solidify. This will create a deliciously gooey center in your Biscoff brownies.
Step 3: Melt Chocolate Mixture
In a microwave-safe bowl, combine 5 tablespoons of unsalted butter and 4 ounces of chopped semi-sweet chocolate. Heat in the microwave in 30-second intervals, stirring between each until fully melted and smooth. Let the mixture cool for a few minutes; this helps prevent the eggs from scrambling in the next step.
Step 4: Mix Wet Ingredients
In a mixing bowl, whisk together 1 and 1/3 cups of white granulated sugar with 2 large eggs and 1 egg yolk. Use a whisk attachment and beat on high for about 5 minutes, or until the mixture becomes pale and fluffy. This creates a light base, crucial for your fudgy Biscoff brownies.
Step 5: Combine Ingredients
Gently pour the cooled chocolate mixture, 1 teaspoon of pure vanilla extract, and 3 and 1/2 tablespoons of canola oil into the egg mixture. Mix on low speed until just combined, being careful not to overmix. This luscious blend will infuse your Biscoff brownies with rich, chocolatey flavor.
Step 6: Incorporate Dry Ingredients
Sift in 3/4 cup of all-purpose flour, 3/4 cup of Dutch process cocoa powder, 1 tablespoon of cornstarch, and 1/2 teaspoon of salt into the wet mixture. Use a spatula to fold everything together gently until no dry streaks remain. Then, add in 1/2 cup of Biscoff cookie pieces and 1/2 cup of mini chocolate chips for extra indulgence.
Step 7: Layer in Pan
Pour half of your brownie batter into the prepared pan, smoothing it into an even layer. Carefully remove the solidified Biscoff cookie butter from the freezer and place it in the center, then spread the remaining brownie batter over the top. If desired, decorate with extra Biscoff cookies for a beautiful finish.
Step 8: Bake
Transfer your pan to the preheated oven and bake the Biscoff brownies for 40 to 50 minutes. Keep an eye on them; the edges should look set while the center remains slightly underbaked. A toothpick inserted into the middle should come out with a few moist crumbs, ensuring a fudgy texture.
Step 9: Cool and Serve
Once baked, allow the brownies to cool completely in the pan on a wire rack. This helps them set up nicely for cutting. Once cooled, lift them out using the parchment paper flaps and slice into squares. Now, your delicious Biscoff brownies are ready to be shared!
Storage Tips for Biscoff Brownies
-
Room Temperature: Keep your Biscoff brownies in an airtight container at room temperature for up to 4 days. This maintains their fudgy texture and delicious flavor.
-
Fridge: If you prefer a chilled treat, store brownies in the refrigerator, layered between parchment paper to prevent sticking. Consume within a week for the best taste.
-
Freezer: For longer storage, wrap the brownies tightly in plastic wrap and then in aluminum foil. They can be frozen for up to 30 days without compromising flavor.
-
Reheating: To enjoy a warm brownie, simply reheat individual squares in the microwave for about 10-15 seconds before serving. This softens the gooey Biscoff center beautifully!
Biscoff Brownies Variations & Substitutions
Feel free to get creative and tailor these delightful brownies to your taste preferences. The possibilities are endless, and each twist brings a new flavor experience!
-
Vegan Option: Replace eggs with flax eggs and swap in plant-based butter for a cruelty-free treat. Even without the eggs, these brownies will still be delectably fudgy.
-
Nutty Delight: Add 1/2 cup of chopped walnuts or pecans to the batter for a delightful crunch. The nuttiness complements the chocolate beautifully.
-
Chocolate Swirl: Is chocolate your passion? Add 1/2 cup of chocolate syrup to the batter before baking for an extra gooey chocolate experience that takes these brownies over the top.
-
Spicy Kick: For those who like a little heat, incorporate a pinch of cayenne pepper into the batter. The spice balances the sweetness perfectly, making each bite interesting.
-
Maxed-Out Cookie Flavor: Mix in crushed Biscoff cookies instead of just cookie pieces for an intensified flavor that makes these brownies even more addictive.
-
Biscoff Topping: Top your brownies with a drizzle of melted Biscoff cookie butter for an indulgent finish. This extra layer of flavor will leave your taste buds singing!
-
Gluten-Free Option: Substitute all-purpose flour with a gluten-free flour blend to make these brownies gluten-free without sacrificing taste!
For even more sweet ideas, check out my collection of dessert recipes that will surely delight your family and friends!
What to Serve with Fudgy Biscoff Brownies?
Indulging in fudgy brownies is a delight, but pairing them with the right accompaniments elevates the experience to new heights.
-
Vanilla Ice Cream: A scoop of creamy vanilla ice cream balances the rich chocolate and adds a refreshing touch. The contrast of warm brownies and cold ice cream is simply heavenly.
-
Whipped Cream: Light and airy whipped cream perfectly complements the fudgy texture of the brownies. Top your brownies generously for that classic dessert feel.
-
Fresh Berries: Juicy strawberries or raspberries bring a vibrant freshness to each bite, cutting through the richness with their natural sweetness and acidity. A handful of fresh berries transforms the plate into an elegant treat!
-
Chocolate Sauce: Drizzling warm chocolate sauce over the brownies enhances the chocolate flavor. It’s a decadent addition that every chocolate lover craves.
-
Caramel Drizzle: A touch of salted caramel adds sweetness and a hint of savory to your brownies. The gooey drizzle takes every slice to the next level of indulgence.
-
Coffee: A warm cup of coffee, especially with a hint of cocoa, is a lovely pairing. It not only complements the brownie flavors but also enhances that cozy atmosphere while you indulge.
-
Biscoff Spread Dip: For those who can’t get enough Biscoff, a small side of cookie butter for dipping offers a delightful way to savor your brownies even more.
-
Nutty Snack Mix: A crunchy nut mix on the side provides a delightful texture contrast. The savory notes of the nuts perfectly balance the sweet richness of the brownies.
-
Milk: A classic pairing, a glass of cold milk can be your best friend with fudgy brownies. It cools and complements the rich flavors, making each bite more enjoyable.
With these perfect pairings, your experience with the fudgy Biscoff brownies will be unforgettable!
Make Ahead Options
These fudgy Biscoff brownies are perfect for meal prep, allowing you to indulge with minimal last-minute effort! You can prepare the brownie batter up to 24 hours in advance; simply store it, covered, in the refrigerator. Additionally, the Biscoff cookie butter layer can be frozen for up to 3 days; just ensure it’s wrapped tightly to prevent freezer burn. When ready to bake, pour half the batter into your lined pan, add the frozen cookie butter layer, and top with the remaining batter. Bake as directed, and you’ll enjoy these decadent brownies that are just as delicious as if they were made fresh!
Expert Tips for Biscoff Brownies
-
Check for Doneness: Remember, these Biscoff brownies are best slightly underbaked. They will continue cooking as they cool, resulting in the perfect fudgy texture.
-
Sift Your Dry Ingredients: Sifting flour and cocoa powder is crucial. It helps combine everything evenly and prevents clumps, ensuring a smooth batter.
-
Avoid Overmixing: When combining the wet and dry ingredients, mix just until incorporated. Overmixing can lead to dense brownies, which you want to avoid!
-
Customize Cookie Crunch: Feel free to experiment with different nuts or chocolate chips in the mix-ins. Get creative to find your perfect flavor combination!
-
Use Quality Ingredients: The flavor of your brownies will reflect the quality of your ingredients. Choose high-quality chocolate and Biscoff cookie spread for an irresistible taste.
-
Cool Completely: Allow the brownies to cool entirely before cutting. This will help them set and prevent them from crumbling apart during slicing.
Biscoff Brownies Recipe FAQs
What is the best way to select ripe Biscoff cookies for my brownies?
Absolutely! While Biscoff cookies don’t spoil quickly, look for packages with no visible flaws; cookies should be crisp without dark spots or overly soft areas. This ensures they contribute a perfect crunch to your fudgy brownies.
How should I store leftover Biscoff brownies?
To keep your Biscoff brownies fresh, store them in an airtight container at room temperature for up to 4 days. If you want to extend their life, wrap them well in plastic wrap and store in the fridge for up to a week.
Can I freeze Biscoff brownies, and how?
Yes, you can freeze your brownies! For best results, first cut them into squares. Wrap each piece individually in plastic wrap, then place them in a freezer-safe bag. They’ll stay delicious for up to 30 days. When you’re ready, just thaw at room temperature or reheat briefly in the microwave.
What should I do if my brownies come out too dry?
If your brownies turn out too dry, it could be due to overbaking or incorrect flour measurements. To salvage, serve them warm with a scoop of vanilla ice cream or a drizzle of chocolate sauce to add moisture. For future bakes, ensure you’re softening the butter correctly and using the spoon-and-level method for measuring flour!
Are Biscoff brownies safe for nut allergies?
While Biscoff cookies don’t contain nuts, be cautious since cross-contamination can occur. If making for someone with a nut allergy, opt for a Biscoff spread that is nut-free and verify the labels of all other ingredients to ensure they are nut-free as well.
Decadent Biscoff Brownies: Fudgy Bliss with Cookie Crunch
Ingredients
Equipment
Method
- Preheat your oven to 325°F (163°C) and line an 8x8 inch baking pan with parchment paper.
- Spread the melted Biscoff cookie spread evenly onto the prepared pan and freeze for at least 2 hours.
- Melt the unsalted butter and chopped semi-sweet chocolate in a bowl in the microwave, stirring until smooth.
- In a mixing bowl, whisk together the sugar, eggs, and egg yolk until pale and fluffy.
- Combine the cooled chocolate mixture, vanilla extract, and oil with the egg mixture, mixing on low until just combined.
- Sift in the flour, cocoa powder, cornstarch, and salt, folding gently, then add cookie pieces and chocolate chips.
- Pour half of the brownie batter into the pan, add the solidified cookie butter, then top with the remaining batter.
- Bake for 40 to 50 minutes, checking for a toothpick to come out with moist crumbs.
- Cool the brownies completely in the pan before lifting out and slicing into squares.
Leave a Reply