
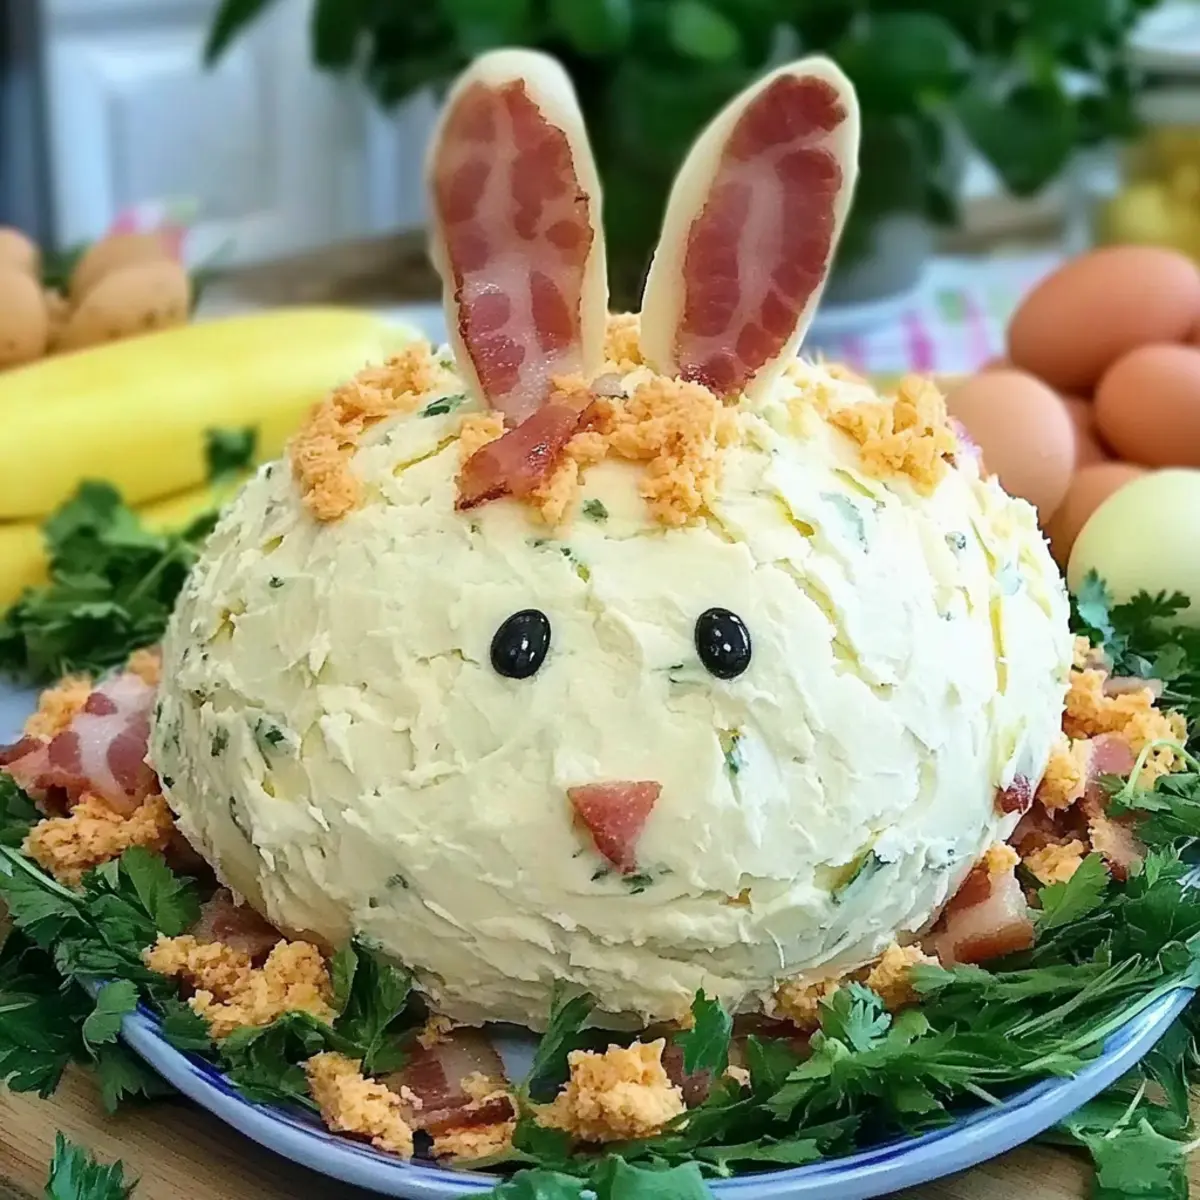
With a sprinkle of creativity and a dash of fun, the Easter Bunny Cheese Ball is a delightful centerpiece for your holiday table that’s sure to impress your guests. This no-bake appetizer combines rich cream cheese, savory ranch seasoning, and crunchy crumbled bacon into an adorable bunny shape that’s just as tasty as it is charming. Not only is it super easy to whip up, making it ideal for both seasoned chefs and kitchen novices alike, but you can also prepare it ahead of time, freeing up precious moments to spend with loved ones. Whether you’re hosting an Easter brunch or looking for a unique dish to bring to a gathering, this festive cheese ball will surely be a crowd-pleaser. Curious about how to create this charming treat while keeping the stress at bay? Let’s dive into the recipe!
Why is Easter Bunny Cheese Ball a Must-Try?
Festive Presentation: This adorable cheese ball not only tastes amazing but also looks delightful, becoming the star of your holiday table.
Easy Preparation: With just a few simple steps, you can create this charming appetizer, perfect for busy hosts or novice cooks.
Versatile Ingredients: Adapt the cheese ball by using different cheeses or adding your favorite mix-ins, making it uniquely yours.
Make-Ahead Convenience: Prepare it a few days in advance to ensure a stress-free gathering, allowing you to focus on enjoying time with family and friends.
Crowd-Pleasing Flavor: The combination of creamy cheese, savory ranch, and crispy bacon is sure to wow your guests, making every bite memorable—even if you pair it with other tasty snacks like Pumpkin Cheese Balls or a savory Pumpkin Mac Cheese.
Easter Bunny Cheese Ball Ingredients
• Prepare for a delightful feast with the following essentials!
For the Cheese Ball
- Cream Cheese – Ideal as the creamy base; ensure it’s softened to blend smoothly.
- Cheddar Cheese – Provides rich flavor and texture; use shredded cheese for better mixing.
- Ranch Seasoning Mix – Adds a savory kick; feel free to substitute with a homemade blend for a personal touch.
- Crumbled Bacon – Elevates the dish with a smoky essence; this optional ingredient is highly recommended for a burst of flavor.
For Assembly
- Plastic Wrap – Essential for shaping the cheese ball; choose a sturdy wrap to secure its form.
With these ingredients in hand, you’re on your way to creating the whimsical and delicious Easter Bunny Cheese Ball that will surely delight your holiday guests!
Step‑by‑Step Instructions for Easter Bunny Cheese Ball
Step 1: Prep the Cheese
Begin by placing 8 ounces of softened cream cheese in a mixing bowl. Using an electric mixer, beat the cream cheese on medium speed until smooth and creamy, about 2-3 minutes. Gradually add in 1 packet of ranch seasoning mix, continuing to blend until well combined. The mixture should be fluffy and uniform, setting a delightful foundation for your Easter Bunny Cheese Ball.
Step 2: Combine Ingredients
Next, fold in 1 cup of shredded cheddar cheese and ½ cup of crumbled bacon. Use a spatula to gently mix the ingredients together until the cheese and bacon are evenly distributed throughout the creamy base. You’ll know it’s ready when the mixture appears vibrant, with the cheesy and bacon bits visible within the creamy texture of your Easter Bunny Cheese Ball.
Step 3: Form the Ball
Transfer the creamy mixture onto a large piece of plastic wrap laid out on your work surface. Using the wrap, shape the mixture into a round ball by bringing the edges of the plastic together and twisting them to secure the form. Aim for a smooth exterior, and ensure the ball holds its shape tightly as you prepare it for chilling.
Step 4: Chill
Place the wrapped cheese ball in the refrigerator and allow it to chill for at least 2 hours, or preferably overnight. This chilling step is crucial—it helps the Easter Bunny Cheese Ball firm up, making it easier to slice and serve later. After chilling, the ball should feel solid and maintain its shape when you unwrap it.
Step 5: Serve
Once chilled and firm, carefully unwrap the Easter Bunny Cheese Ball and place it on a festive serving platter. You can decorate it further with decorative items like carrot sticks for ears or olives for eyes if desired. Pair the cheese ball with an assortment of crackers or fresh vegetable sticks, inviting your guests to enjoy this charming appetizer.
Make Ahead Options
Preparing the Easter Bunny Cheese Ball ahead of time is a brilliant way to ease the stress of holiday entertaining! You can mix and shape the cheese ball up to 3 days in advance, ensuring it’s tightly wrapped in plastic wrap to maintain its freshness and prevent any drying out. Once ready to serve, simply remove it from the refrigerator, unwrap it, and let it sit at room temperature for about 15-20 minutes to achieve the perfect spreadable consistency. This method not only saves time but allows the flavors to meld beautifully, making it just as delicious when you serve it as it was when it was freshly made!
What to Serve with Easter Bunny Cheese Ball?
With this charming centerpiece, your holiday table is about to become a delightful feast of flavors and textures.
-
Crunchy Veggie Platter: Fresh carrots, celery, and bell peppers add a vibrant crunch that perfectly contrasts the creamy cheese ball.
-
Assorted Crackers: A variety of crispy crackers provides different textures that complement the creamy filling—try both savory and plain options for variety.
-
Pita Chips: Their hearty crunch pairs wonderfully with the rich flavors of the cheese ball, creating a satisfying bite that keeps guests coming back for more.
-
Fruit Skewers: Sweet fruits like grapes or sliced strawberries offer a light, refreshing balance to the savory cheese, enhancing the overall flavor profile.
-
Sweet Pickles: The tartness of sweet pickles introduces a zing that cuts through the creaminess, offering a delightful contrast for your taste buds.
-
Light Salad: A crisp side salad dressed lightly with vinaigrette will brighten the meal and provide a fresh backdrop to the rich cheese ball.
-
Sparkling Lemonade: A refreshing beverage option, sparkling lemonade cuts through the richness and keeps the celebration bubbly and lighthearted.
-
Mini Cupcakes: Adorable mini cupcakes bring in sweetness and whimsy, making dessert fun and fitting for the festive Easter theme.
Easter Bunny Cheese Ball Variations
Feel free to let your creativity shine as you customize this adorable cheese ball to suit your taste and celebrate the season!
-
Dairy-Free: Substitute the cream cheese with a dairy-free alternative like coconut cream cheese for a vegan-friendly twist.
-
Herbed Cheese: Use herbed cream cheese instead of plain for an extra burst of flavor that marries beautifully with the ranch seasoning.
-
Vegetable Boost: Fold in finely chopped veggies like bell peppers or green onions to add a crunchy texture and fresh taste that lightens each bite.
-
Spicy Kick: Add a dash of hot sauce or chopped jalapeños to the mix for a delightful spicy variation that will surprise your taste buds. Adjust the amount based on your heat preference!
-
Bacon-Free Option: For a vegetarian version, omit the bacon and replace it with roasted sun-dried tomatoes to still bring that savory richness to the cheese ball.
-
Extra Cheese: Elevate flavor by incorporating additional cheese varieties, such as creamy goat cheese or sharp pepper jack cheese for an exciting twist.
-
Shape Shift: Don’t restrict yourself to a bunny shape! Try forming the cheese ball into different holiday designs like eggs or carrots for a festive table display.
-
Garnish & Decor: Surround the cheese ball with various toppings like chopped parsley, crushed nuts, or edible flowers, making it visually stunning while adding different flavors.
Enjoy playing with these variations, and if you’re in the mood for some delightful sweet treats, consider pairing this appetizer with Cheesecake Stuffed Chocolate Chip Cookies or a delightful batch of Pumpkin Cheesecake Truffles to round out your holiday feast!
How to Store and Freeze Easter Bunny Cheese Ball
Fridge: Keep your Easter Bunny Cheese Ball wrapped tightly in plastic wrap or an airtight container in the refrigerator for up to 3 days to maintain freshness and flavor.
Freezer: If you need to store it longer, you can freeze the cheese ball for up to 2 months. Wrap it in plastic wrap and then place it in a freezer-safe container to prevent freezer burn.
Reheating: When you’re ready to serve, transfer it from the freezer to the fridge to thaw overnight. Before serving, allow it to sit at room temperature for about 15-20 minutes for optimal spreadability.
Make-Ahead Tips: This cheese ball can be prepared 2-3 days in advance, allowing you to ease into your holiday festivities while ensuring your appetizer is ready to impress your guests!
Expert Tips for Easter Bunny Cheese Ball
-
Softened Cream Cheese: Make sure your cream cheese is fully softened to room temperature; this avoids lumps and creates a smoother texture for your Easter Bunny Cheese Ball.
-
Mix-Ins: For a unique flavor twist, consider adding roasted garlic or chopped herbs to the cheese mixture. Just be careful not to overload, keeping the balance of flavors intact.
-
Chilling Time: Don’t rush the chilling step! Allow the cheese ball to chill at least 2 hours, or overnight if possible. This helps it firm up, making it easier to slice and serve.
-
Before Serving: Take the cheese ball out of the refrigerator 15-20 minutes before serving. This allows it to soften slightly for optimal spreadability, enhancing your appetizer experience.
-
Decorative Garnishes: Get creative with your bunny decoration using colorful vegetables! Carrot sticks can be both a visual delight and a crunchy dipper for your Easter Bunny Cheese Ball.
Easter Bunny Cheese Ball Recipe FAQs
What type of cream cheese should I use?
Absolutely! Using full-fat cream cheese provides the best creamy texture for your Easter Bunny Cheese Ball. Make sure it’s softened to room temperature; this avoids lumps and allows for easy mixing. If you prefer a lighter option, low-fat cream cheese works, but the flavor and creaminess might be slightly less rich.
How long can I store the cheese ball in the fridge?
You can keep your Easter Bunny Cheese Ball wrapped tightly in plastic wrap or in an airtight container in the refrigerator for up to 3 days. Just ensure it’s well sealed to maintain its freshness and prevent it from absorbing any odors from other foods in the fridge.
Can I freeze the Easter Bunny Cheese Ball?
Very! You can freeze the cheese ball for up to 2 months. To do this, wrap it tightly in plastic wrap and then place it in a freezer-safe container. When you’re ready to enjoy it, transfer it to the fridge to thaw overnight. Before serving, let it sit at room temperature for 15-20 minutes so it softens slightly, making it perfect for spreading.
What if my cheese ball turns out too soft or doesn’t hold its shape?
If your cheese ball seems too soft, it could benefit from additional chilling time. After forming the ball, chill it in the refrigerator for longer, ideally overnight. Additionally, ensure your cream cheese is well blended and that you didn’t add too many wet ingredients. If it’s really too soft, consider mixing in more shredded cheese to help it firm up.
Are there any dietary considerations for the Easter Bunny Cheese Ball?
Absolutely! If you’re serving guests with dietary restrictions, consider using lactose-free cream cheese or a dairy-free cheese alternative. For those avoiding pork, simply leave out the crumbled bacon or replace it with a suitable plant-based alternative, such as chopped olives or nuts for added crunch. Always double-check ingredient labels for potential allergens.
Can I decorate the bunny cheese ball differently?
The more the merrier! You can get creative with decorations—think of using mini bell peppers for feet, a cherry tomato for the nose, or even edible flowers to make it even more festive. The decoration options are only limited by your imagination, and kids love helping out with this part!
Easter Bunny Cheese Ball: A Festive & Easy No-Bake Delight
Ingredients
Equipment
Method
- Begin by placing 8 ounces of softened cream cheese in a mixing bowl. Using an electric mixer, beat until smooth and creamy, about 2-3 minutes. Gradually add in 1 packet of ranch seasoning and blend until well combined.
- Fold in 1 cup of shredded cheddar cheese and ½ cup of crumbled bacon, mixing gently until evenly distributed.
- Transfer the mixture onto a large piece of plastic wrap and shape into a round ball by twisting the edges of the wrap to secure.
- Place the wrapped cheese ball in the refrigerator and chill for at least 2 hours, or preferably overnight.
- Once chilled, unwrap the cheese ball and place it on a serving platter. Decorate as desired and serve with crackers or vegetable sticks.
Leave a Reply