
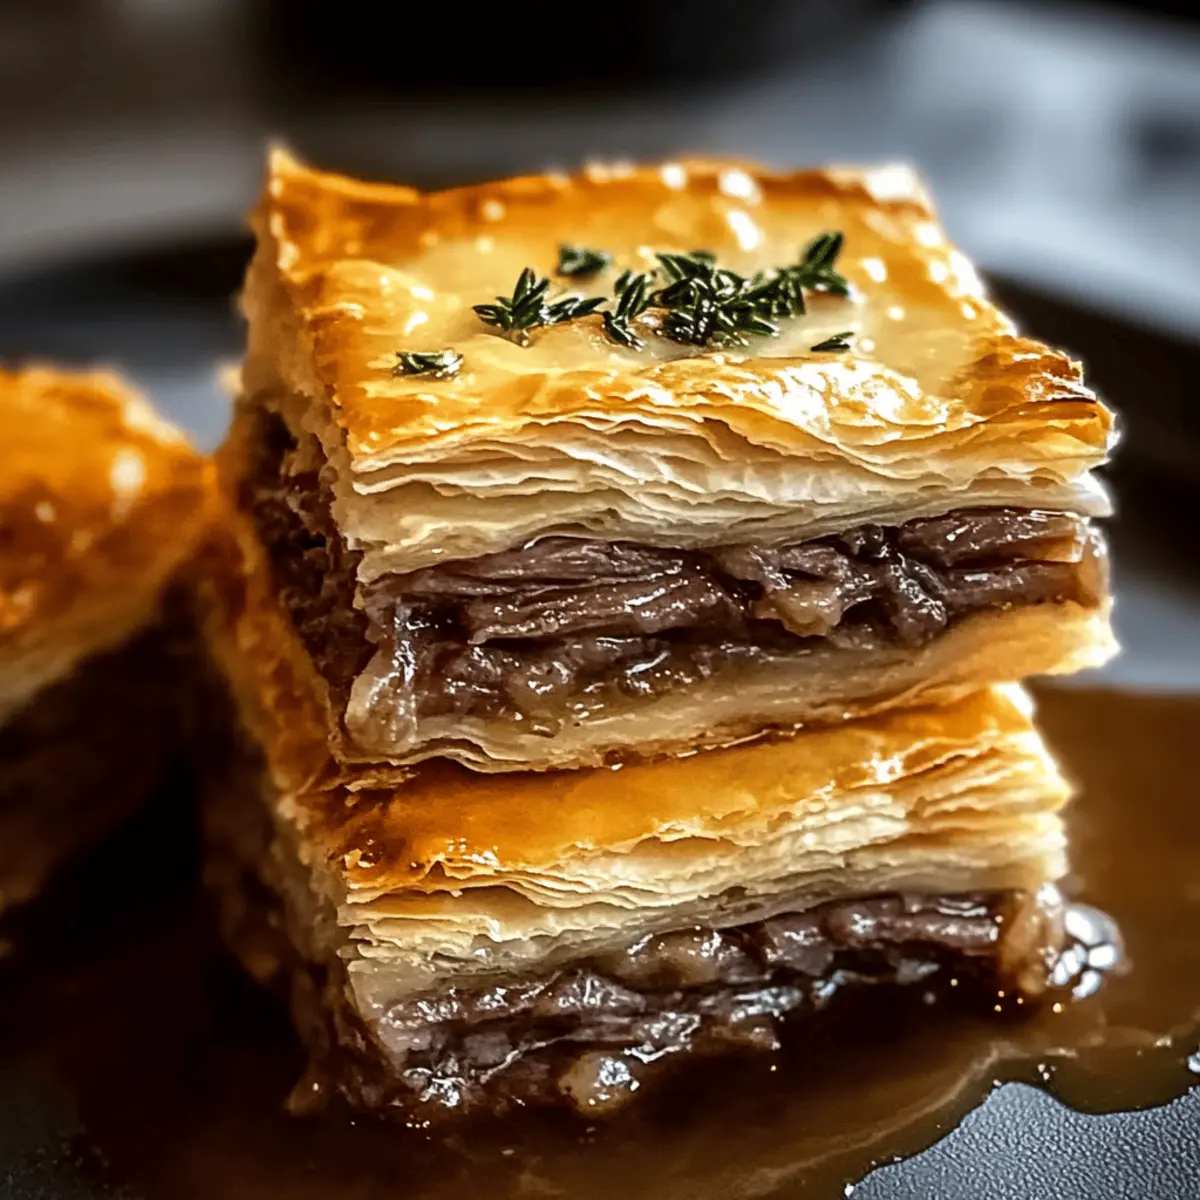
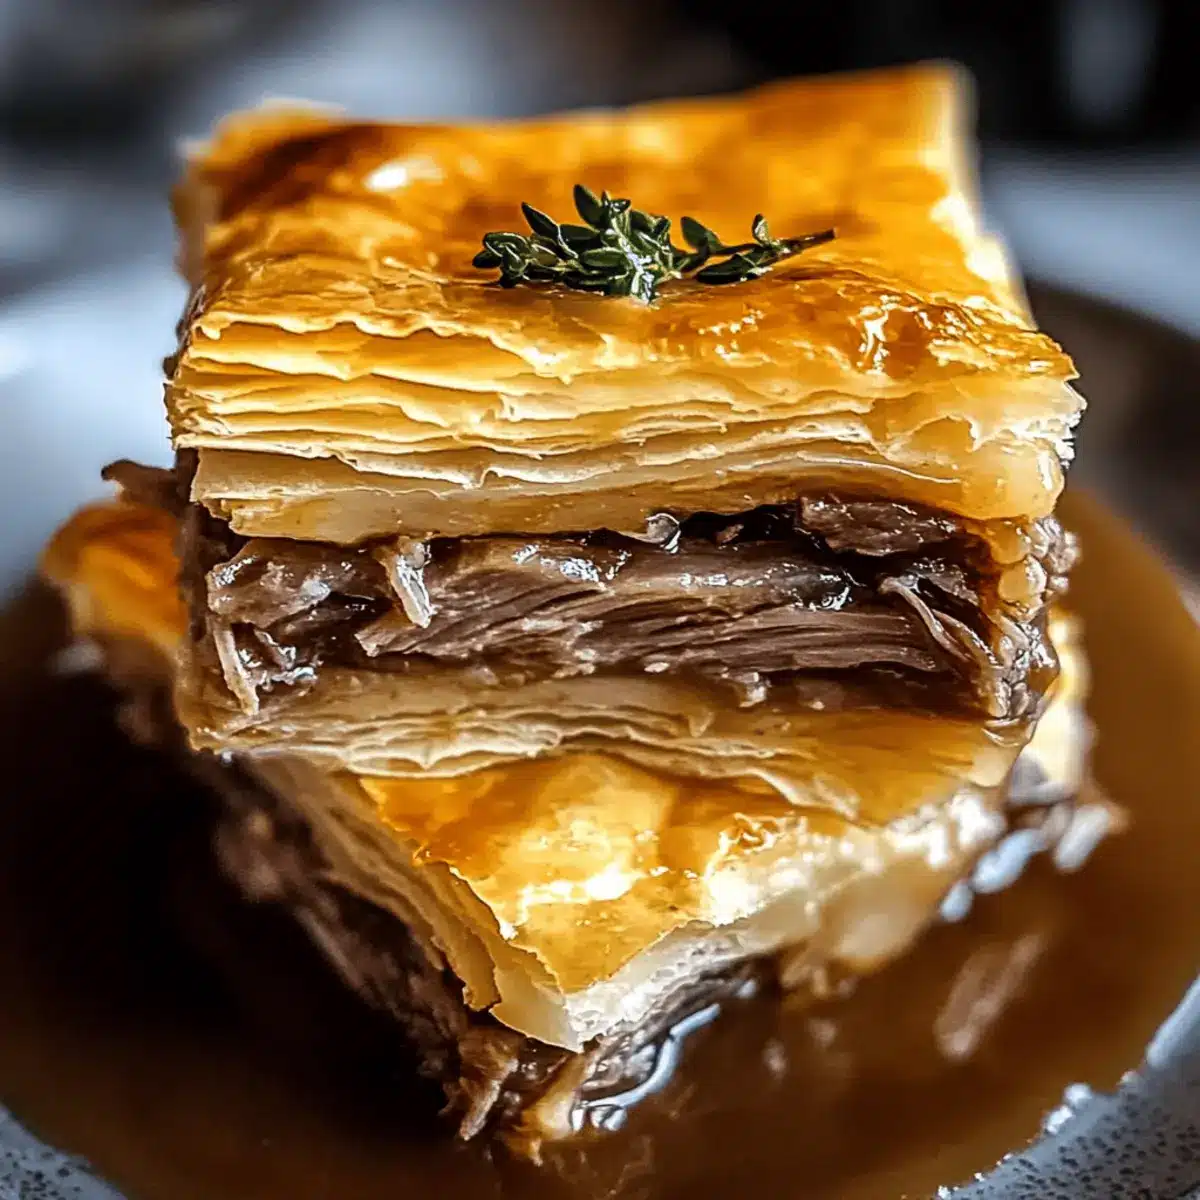
It was a chilly evening, and I found myself craving something cozy that could remind me of both home and hearty gatherings. That’s when I thought of these Easy French Dip Squares. This recipe is my go-to for those moments when comfort food meets convenience. Picture buttery crescent roll dough enveloping tender deli roast beef and melted Swiss cheese, transforming the classic French Dip into a delightful, shareable casserole. The best part? It’s quick to prepare! Whether you’re hosting friends for game night or just want a satisfying weeknight dinner, these squares are sure to impress. Want to learn the secrets behind this crowd-pleaser? Let’s dive into the delicious details!
Why are French Dip Squares so irresistible?
Unmatched Comfort: These French Dip Squares bring the cozy flavors of a classic sandwich directly to your table in a shareable format. Perfect for family gatherings or game nights, they’re a total crowd-pleaser.
Quick Preparation: With simple ingredients and easy steps, you’ll have a delicious meal on the table in no time! Perfect for busy weeknights or last-minute guests.
Savory Combination: The mix of tender roast beef, melty Swiss cheese, and a flavorful broth creates a mouthwatering experience that will leave everyone coming back for more.
Versatile Options: Feel free to personalize them with different cheeses or substitute meats! Pair with a fresh salad or seasoned fries for a well-rounded meal. This recipe is as adaptable as it is delicious, much like my Whipped Pumpkin Dip, perfect for any season!
Perfect for Sharing: These squares are designed for sharing, making them an excellent choice for parties. Everyone will love grabbing a square and dipping it into warm broth!
Incorporate these hearty French Dip Squares into your next meal and create lasting memories!
French Dip Squares Ingredients
For the Dough
• Refrigerated Crescent Rolls – Provides a buttery, flaky crust that serves as the foundation of this dish.
• Butter – Adds richness and helps achieve that golden, inviting top layer.
For the Filling
• Deli Roast Beef – Offers tender, savory flavor and is easy to layer for even cooking.
• Swiss Cheese – Melts beautifully, enhancing each bite with its mild, nutty taste.
For the Sauce
• Dry Onion Soup Mix – Infuses the dish with savory, onion-forward depth that elevates the overall flavor.
• Worcestershire Sauce – Enhances the savory richness, tying all flavors together beautifully.
• Garlic Powder – Adds an aromatic kick, perfect for boosting the taste without any fuss.
For Dipping
• Beef Broth – Essential for dipping, this warm, flavorful broth completes the authentic French Dip experience, making these French Dip Squares even more delightful!
Step‑by‑Step Instructions for French Dip Squares
Step 1: Prep the Oven and Dish
Preheat your oven to 375°F (190°C) while you prepare your baking dish. Lightly spray a 9×13 inch baking dish with non-stick cooking spray to ensure your French Dip Squares come out easily after baking. This initial step sets the stage for the golden, crispy crust that will form on top.
Step 2: Layer the Base
Unroll one can of crescent rolls and carefully place the dough into the prepared baking dish, pressing the seams together to create a solid layer. This will provide a buttery, flaky base for your French Dip Squares. Ensure the dough covers the entire bottom of the dish for even cooking.
Step 3: Add the Filling
Evenly distribute the deli roast beef over the crescent roll layer, ensuring generous coverage for balanced flavor. Next, take slices of Swiss cheese and layer them on top of the roast beef. The cheese should start melting as it warms in the oven, adding to the deliciousness of your French Dip Squares.
Step 4: Make the Savory Sauce
In a mixing bowl, combine the dry onion soup mix, melted butter, Worcestershire sauce, and garlic powder. Stir until the mixture is well blended, then drizzle this savory sauce evenly over the cheese layer. This will enhance the flavors, providing that authentic touch you expect from a classic French dip.
Step 5: Top with Dough
Unroll the second can of crescent rolls, placing it over the filling. Pinch the seams to create a smooth, integrated top layer, covering the filling completely. This helps trap the warmth and moisture inside, ensuring your French Dip Squares come out irresistible and gooey after baking.
Step 6: Bake to Perfection
Place the baking dish in the preheated oven and bake for 15-20 minutes. Keep an eye on the French Dip Squares as they bake; you’re looking for a golden brown top that is beautifully crisp. This visual cue signifies they’re ready to be savored.
Step 7: Heat the Broth
While your squares are baking, pour the beef broth into a small pot and heat it over medium heat. Stir occasionally until it’s warm, preparing it for dipping when your French Dip Squares are finished. This rich broth is essential for the perfect French Dip experience.
Step 8: Cool, Cut, and Serve
Once the French Dip Squares are out of the oven, let them cool for about 5-10 minutes. This cooling time makes them easier to cut and serve. Slice into squares and serve warm alongside a bowl of beef broth for dipping, inviting everyone to enjoy a comforting bite of deliciousness.
What to Serve with Easy French Dip Squares
Serve your family and friends a complete meal that perfectly complements the heartiness of these delightful squares.
-
Crispy French Fries: The crunchiness of hot, seasoned fries adds a delightful contrast to the soft, cheesy squares. Dipping both in warm broth creates a flavor explosion!
-
Simple Green Salad: A light salad with mixed greens, cucumbers, and a tangy vinaigrette provides a refreshing balance to the rich flavors of the French Dip Squares. It’s the ideal way to add freshness.
-
Sweet Potato Wedges: Baked or fried, their natural sweetness pairs beautifully with the savory roast beef, making each bite feel exciting and comforting.
-
Garlic Bread: The buttery, garlicky goodness of warm garlic bread can’t be overlooked. It’s perfect for dipping in the beef broth, adding an extra layer of flavor to your meal.
-
Roasted Vegetables: Colorful roasted veggies, such as carrots and bell peppers, provide a lovely texture and nutritional boost, balancing the richness of the casserole.
-
Coleslaw: A tangy, creamy coleslaw adds a nice crunch that balances out the soft, cheesy texture of the French Dip Squares.
-
Red Wine: A glass of red wine, like Cabernet Sauvignon, pairs wonderfully with the savory beef and cheese, enhancing the overall dining experience.
Grab your friends and family, and enjoy not just the Easy French Dip Squares but a full meal that creates memories around the table!
Expert Tips for French Dip Squares
-
Non-Stick Essential: Use non-stick cooking spray liberally to prevent the squares from sticking to the baking dish, ensuring easy removal after baking.
-
Layer Evenly: Ensure an even distribution of roast beef and Swiss cheese. This guarantees that every bite of your French Dip Squares is loaded with flavor.
-
Watch the Browning: If the top layer begins to brown too quickly while baking, cover it loosely with foil. This prevents burning while the inside finishes cooking.
-
Customize the Cheese: For a fun twist, try using different cheeses, such as cheddar or provolone, to match your taste preferences while still enjoying the classic comfort of French Dip Squares.
-
Leftover Magic: If you have leftovers, store them in the refrigerator and reheat them in the oven. This preserves the flaky texture and delicious taste, making for a quick next-day meal!
How to Store and Freeze French Dip Squares
Fridge: Store leftover French Dip Squares in an airtight container in the fridge for up to 3 days. Reheat in the oven at 350°F (175°C) for the best texture.
Freezer: For longer storage, freeze the squares in a tightly sealed container or freezer bag for up to 3 months. Thaw in the fridge overnight before reheating.
Reheating: To enjoy, reheat thawed squares in the oven at 350°F (175°C) until warmed through, about 15-20 minutes. This keeps them crispy on the outside and gooey on the inside.
Make-Ahead Tips: Assemble the French Dip Squares a day in advance and refrigerate before baking. Bake them fresh for a warm and inviting meal the next day!
Make Ahead Options
These French Dip Squares are a lifesaver for busy home cooks looking to save time! You can assemble the entire dish up to 24 hours in advance; just cover it tightly with plastic wrap and refrigerate to maintain freshness and prevent any browning. If you want to prep even further ahead, feel free to bake them, cool completely, and then store in the refrigerator for up to 3 days or freeze for up to 3 months. To finish, reheat from the refrigerator in a preheated oven at 350°F (175°C) for about 15-20 minutes, or until heated through. This way, you’ll enjoy just as delicious French Dip Squares with minimal effort on busy weeknights!
French Dip Squares Customization Ideas
Feel free to get creative with these French Dip Squares to suit your family’s taste buds and dietary needs!
-
Cheese Variation: Swap the Swiss cheese with cheddar or provolone for a different flavor twist. Each cheese brings its own personality to the dish, elevating your comfort food experience.
-
Meat Alternatives: Use shredded chicken or turkey instead of roast beef for a lighter, but equally satisfying option. These substitutes offer a deliciously different take while maintaining the essence of French Dip flavors.
-
Vegetarian Delight: Try sautéed mushrooms and spinach instead of meat for a crowd-pleasing vegetarian variation. The earthy mushrooms add a wonderful depth, making it a savory choice for everyone.
-
Flavor Boost: Add caramelized onions to the filling for an extra layer of sweetness. This simple addition transforms your French Dip Squares into a gourmet casserole that guests will rave about.
-
Herbed Up: Incorporate fresh herbs like thyme or rosemary into the savory sauce for a fragrant twist. This brings a beautiful freshness that enhances the comforting flavors in each square.
-
Heat It Up: Mix in some diced jalapeños or a splash of hot sauce for those who enjoy a kick. You can adjust the amount based on how spicy you like it, creating a version that appeals to all heat lovers.
-
Dip Variety: Serve with a variety of dips alongside the warm beef broth, such as a creamy horseradish sauce or tangy barbecue sauce. Transforming the dipping experience can be a fun addition that surprises and delights!
-
Bite-Sized Appetizers: Cut the squares into smaller, bite-sized pieces for easy appetizers at parties. Pair it with a selection of dips, and you’ll have a crowd-pleasing platter reminiscent of my delightful Chocolate Nut Squares.
Mix and match these variations to create your perfect French Dip Squares! Your kitchen can become a playful arena for culinary innovation while keeping your loved ones satisfied and smiling.
French Dip Squares Recipe FAQs
How do I select the best deli roast beef for my French Dip Squares?
Absolutely! When choosing deli roast beef, look for slices that are fresh and moist, avoiding any that have dark spots or appear dried out. The best roast beef will be tender and flavorful, typically seasoned with pepper and herbs. Ask your deli staff for a lean cut to ensure maximum flavor without excess fat.
How should I store leftover French Dip Squares, and how long will they last?
You can store leftover French Dip Squares in an airtight container in the refrigerator for up to 3 days. Just remember to reheat them in the oven at 350°F (175°C) for about 15-20 minutes to restore their crispy texture and melty goodness. This method keeps them tasting just as delicious as when they were fresh!
Can I freeze French Dip Squares, and what’s the best way to do it?
Very! To freeze your French Dip Squares, first let them cool completely after baking. Then, wrap individual squares tightly in plastic wrap and place them in a freezer-safe bag or container. They can be frozen for up to 3 months. When you’re ready to enjoy them, simply thaw in the fridge overnight and reheat in the oven at 350°F (175°C) for 15-20 minutes until warmed through.
What should I do if my French Dip Squares are too dry after baking?
If you find your squares are on the dry side after baking, next time, try adding a bit more beef broth or even a layer of sautéed onions or mushrooms for moisture. During baking, you can also cover the dish loosely with foil to trap steam, which helps keep everything juicy. It’s a great way to ensure all that hearty flavor stays locked in!
Are there any dietary considerations I should keep in mind with French Dip Squares?
Certainly! If you have guests with dietary restrictions, consider using gluten-free crescent rolls or alternative meats, such as lean turkey or even a plant-based meat substitute. Also, check the labels of your broth and seasonings for any potential allergens, especially if vegetarians or those with specific food allergies are joining your gathering. Being mindful of everyone’s needs makes for a more inclusive meal!
Can I make French Dip Squares ahead of time?
Absolutely! You can assemble the dish up to 24 hours in advance. Just store it, covered, in the refrigerator until you’re ready to bake. When you’re set to serve, pop it in the oven straight from the fridge—no need to bring it to room temperature first! This makes it super convenient for busy weeknights or last-minute gatherings!
Delicious French Dip Squares: The Ultimate Comfort Party Food
Ingredients
Equipment
Method
- Preheat your oven to 375°F (190°C) and prepare your baking dish by lightly spraying it with non-stick cooking spray.
- Unroll one can of crescent rolls and place the dough into the baking dish, pressing the seams together.
- Distribute the deli roast beef over the crescent roll layer. Layer Swiss cheese slices on top.
- In a mixing bowl, combine the dry onion soup mix, melted butter, Worcestershire sauce, and garlic powder. Drizzle the sauce over the cheese layer.
- Unroll the second can of crescent rolls and place it over the filling, pinching the seams to create a top layer.
- Bake for 15-20 minutes until the top is golden brown.
- Heat the beef broth in a pot over medium heat for dipping.
- Allow the squares to cool for 5-10 minutes, then slice and serve warm with beef broth.
Leave a Reply