
Bite into a slice of Japanese culture with one of my absolute favorites: Japanese Katsu Bowls with Homemade Tonkatsu Sauce! The moment you sink your teeth into those crispy, panko-crusted cutlets, whether made with succulent pork or tender chicken, it’s pure comfort. This recipe captures the joy of creating a meal that’s not just quick to prepare but also exudes restaurant-quality flavors straight from your kitchen. Plus, you have the freedom to customize your katsu and sauce to your liking—perfect for those cozy nights or even impressing friends at dinner. Ready to elevate your weeknight dinner? Let’s dive in!
Why Try These Katsu Bowls?
Crispy Perfection: The panko breadcrumbs offer an irresistible crunch, turning your katsu into a delightful texture experience.
Savory Umami Flavor: Homemade tonkatsu sauce elevates each bite with its rich and zesty notes, ensuring a flavor bomb in every mouthful.
Quick & Easy: With simple steps and common ingredients, you can whip up this dish in no time—ideal for busy weeknights!
Customizable Delight: Whether you choose chicken, pork, or even tofu, this recipe adapts to your taste, making it the perfect meal for everyone.
Crowd-Pleaser: Serve it at gatherings, and watch it vanish—everyone loves a dish that combines comfort and deliciousness, like these Korean BBQ Bowls or Sweet Spicy Bowls for variety!
Japanese Katsu Bowls Ingredients
• Dive right into creating delicious Japanese Katsu Bowls with this simple ingredient list!
For the Katsu
• Pork or Chicken Cutlets – The main protein, can be swapped with chicken for a lighter option.
• Panko Breadcrumbs – Essential for that irresistible crispy coating that makes your katsu unforgettable.
• Egg – Acts as a binder to help the panko adhere perfectly to the cutlet.
• Flour – Helps the egg and panko stick; you can use all-purpose or gluten-free if needed.
• Oil (for frying) – Necessary for frying, ensuring your katsu comes out golden and delicious.
For the Rice
• Steamed Rice – A fluffy base, white or brown rice complements the katsu beautifully.
For the Tonkatsu Sauce
• Tonkatsu Sauce – A rich concoction of sauce, sugar, soy sauce, and spices that brings a zesty punch, easily made at home.
For Optional Toppings
• Green Onions – Freshly sliced for a burst of flavor and color.
• Sesame Seeds – Add an extra layer of nuttiness and a touch of elegance to your dish.
Step‑by‑Step Instructions for Japanese Katsu Bowls
Step 1: Prepare the Katsu
Begin by setting up a breading station. Place flour in one shallow dish, beaten egg in another, and panko breadcrumbs in a third. Dredge each cutlet in the flour, shaking off excess, then dip it into the egg, allowing any excess to drip off. Finally, coat each cutlet generously with panko, pressing it gently to ensure a crispy layer.
Step 2: Fry the Cutlets
Heat oil in a large skillet over medium heat until shimmering, about 350°F (175°C). Gently add the coated cutlets, taking care not to overcrowd the pan. Fry for about 3-4 minutes per side, or until they turn golden brown and crispy. Use tongs to flip them carefully, then transfer the finished katsu to a paper towel-lined plate to drain excess oil.
Step 3: Cook the Rice
While the katsu is frying, prepare your steamed rice. Follow the package instructions for white or brown rice, generally cooking it in boiling water or using a rice cooker. Aim for fluffy texture, which will contrast beautifully with the crispy katsu. Keep the cooked rice warm until it’s time to assemble your Japanese Katsu Bowls.
Step 4: Make the Tonkatsu Sauce
In a mixing bowl, combine your preferred tonkatsu sauce ingredients, including sauce, sugar, soy sauce, and spices. Whisk everything together until the mixture is well combined and smooth. Taste the sauce and adjust sweetness or tanginess as desired for your Japanese Katsu Bowls.
Step 5: Assemble the Bowls
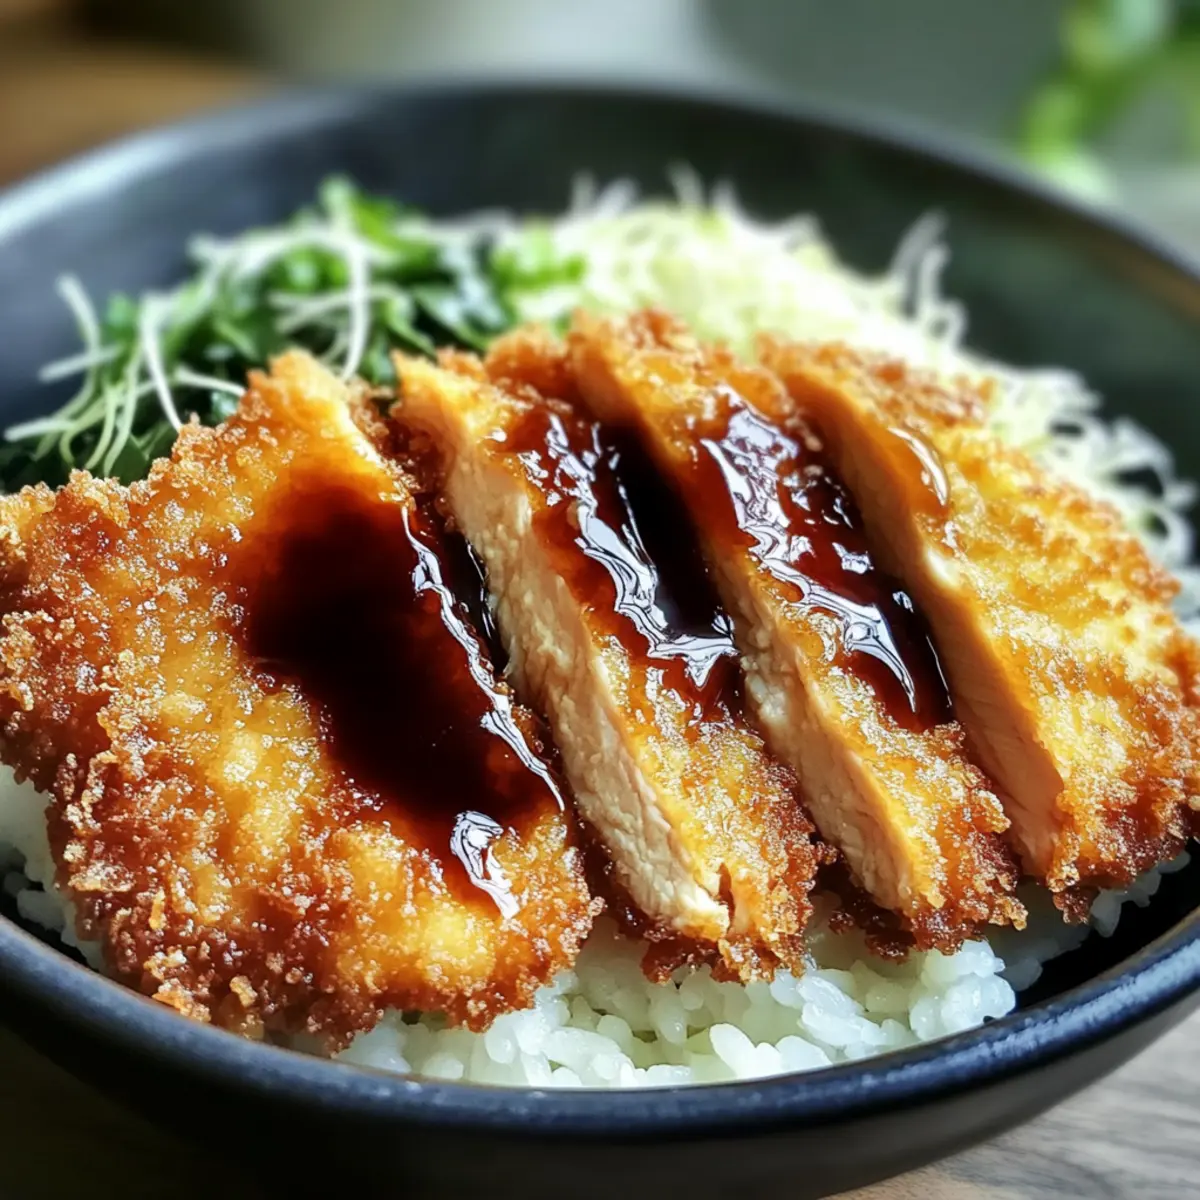
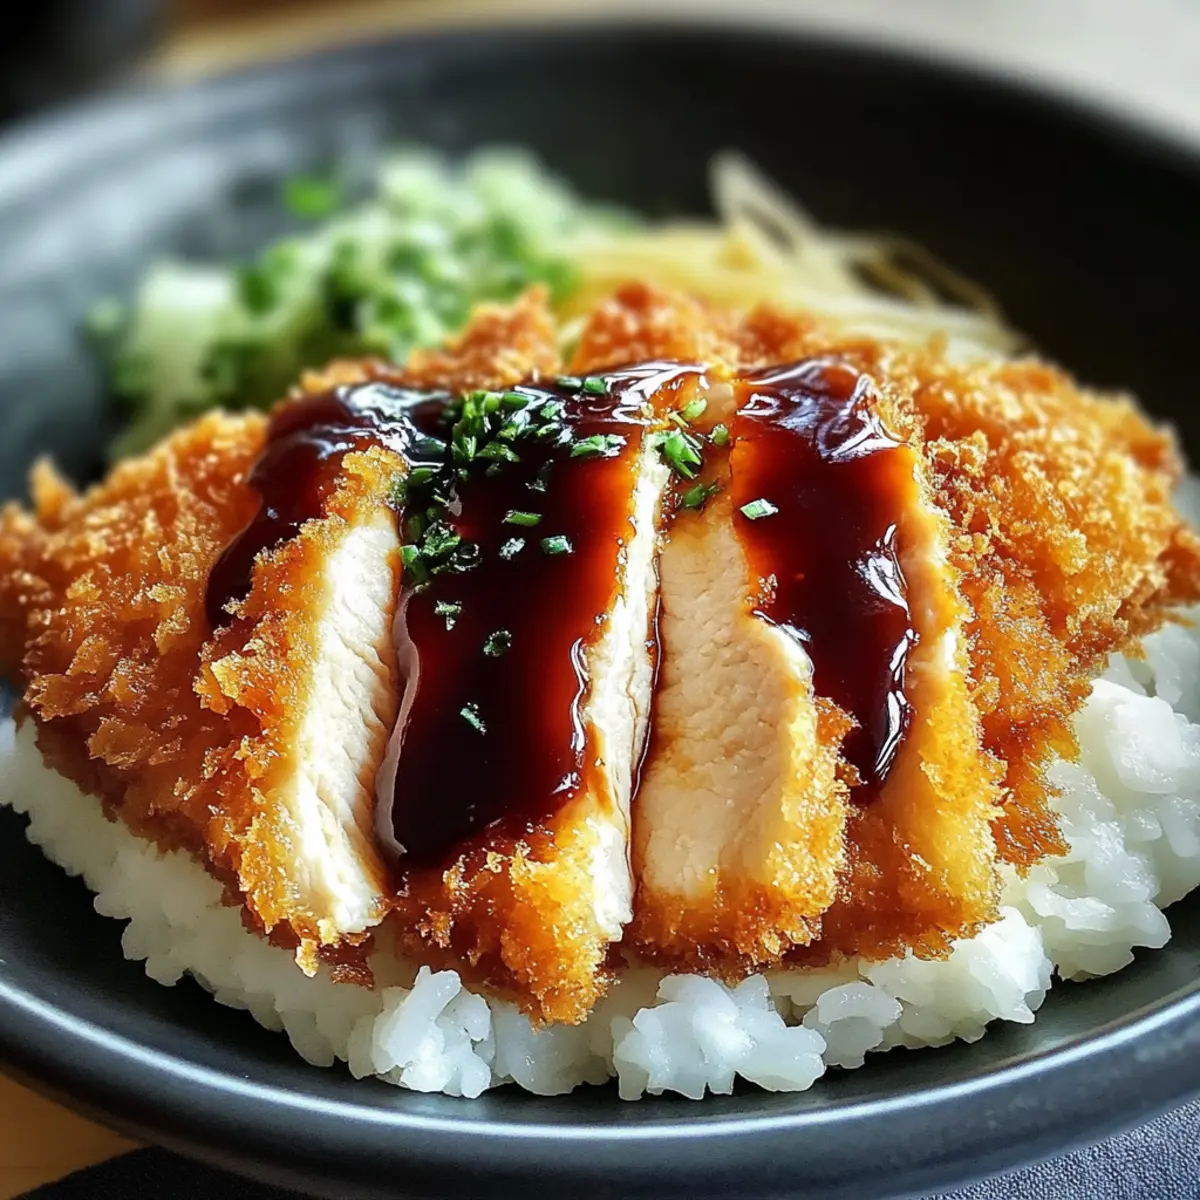
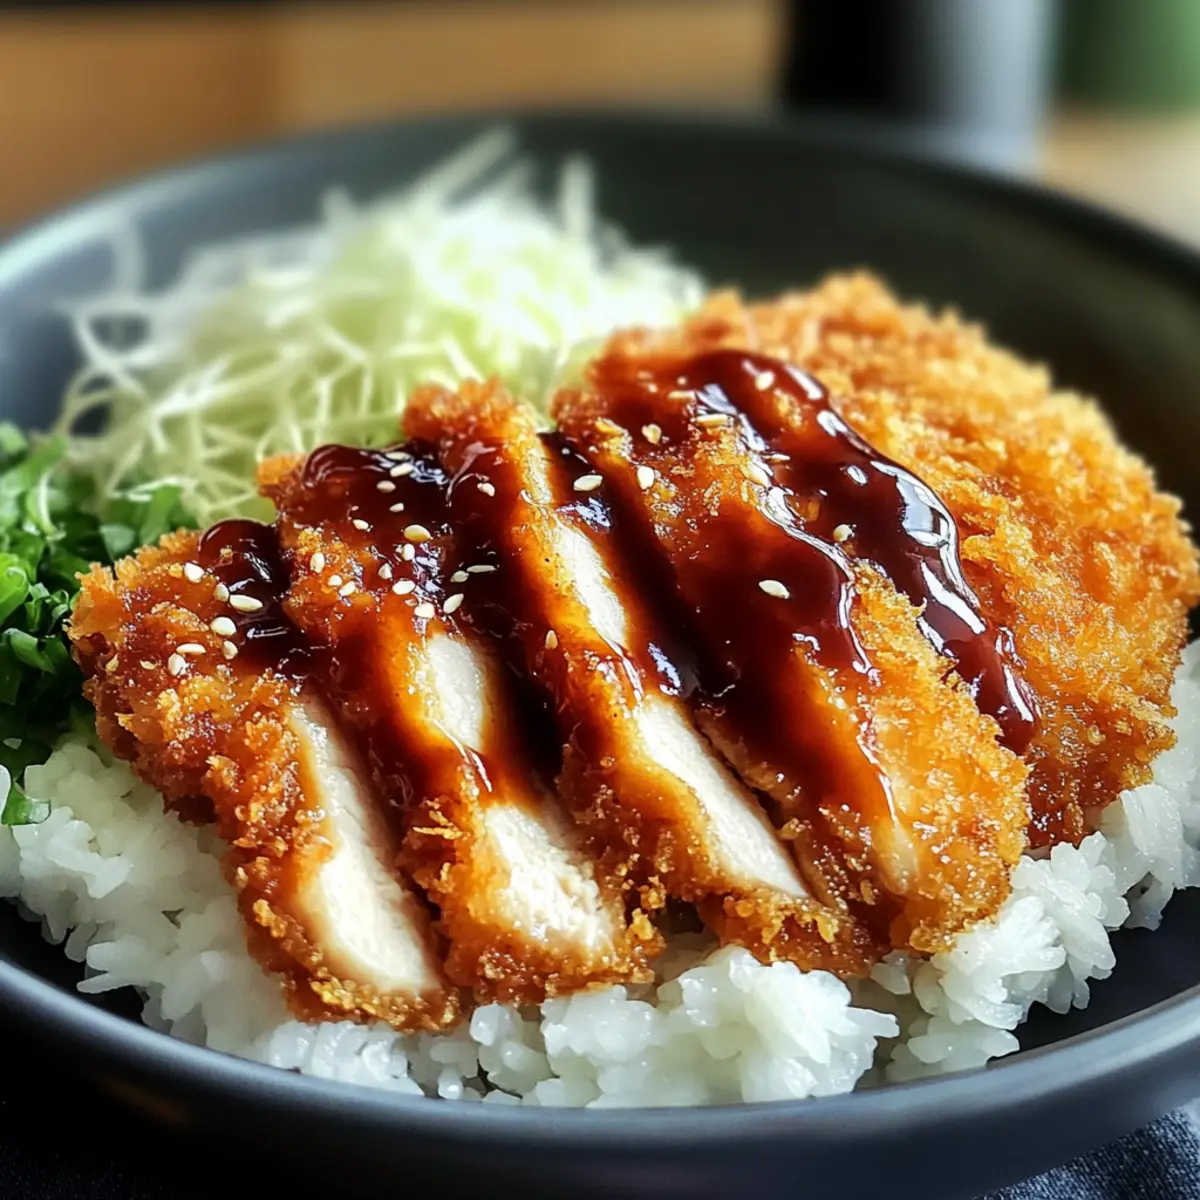
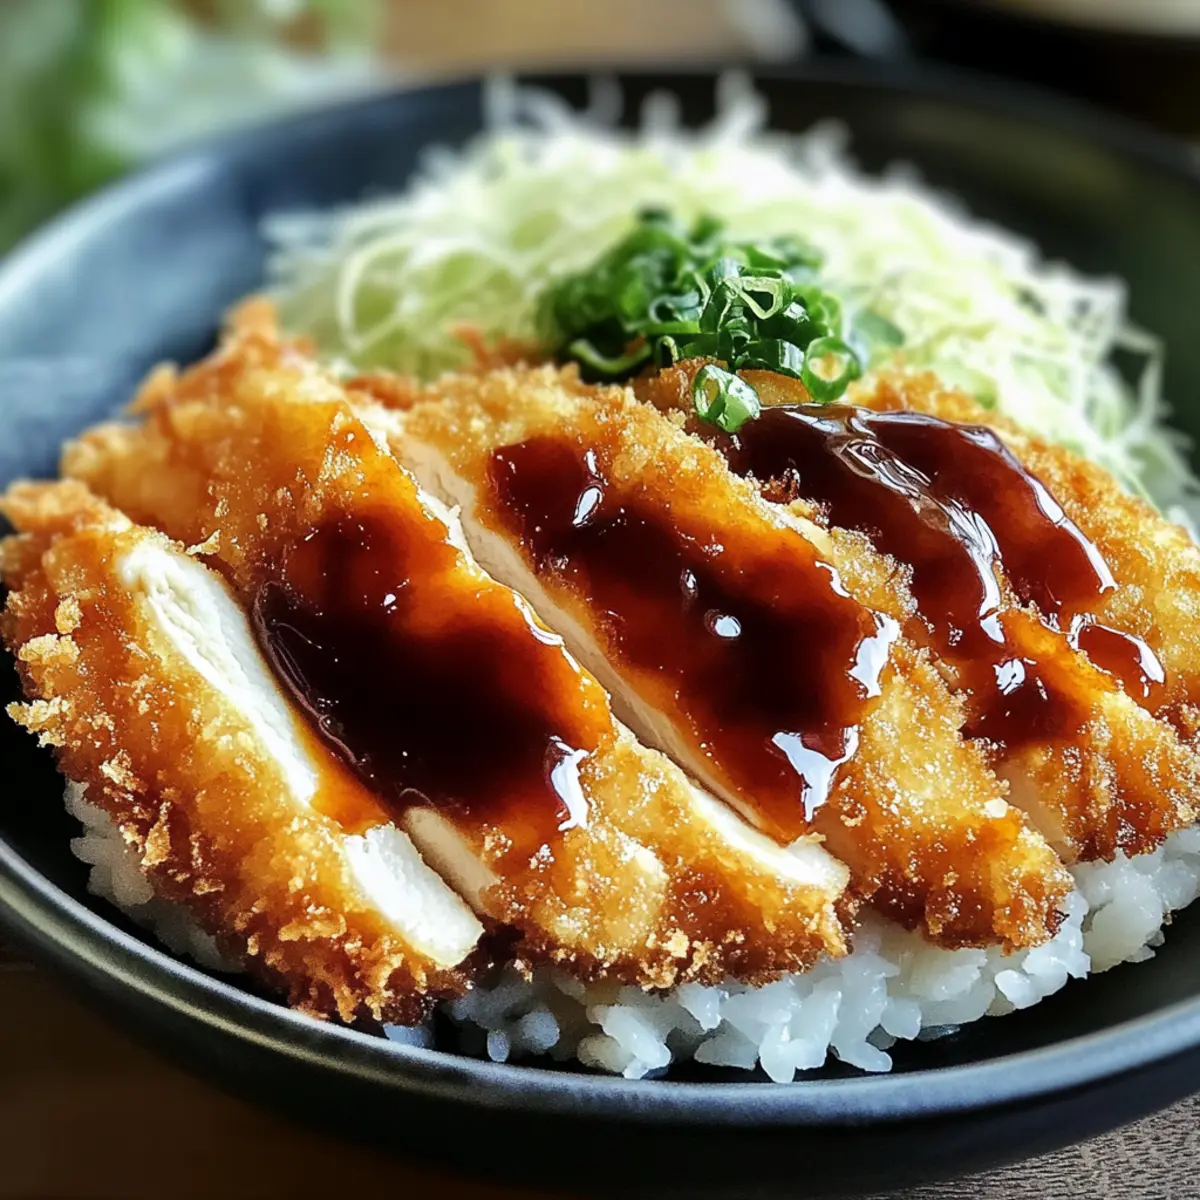
Now it’s time to bring your delicious creation together. Spoon a generous serving of steamed rice into each bowl, and place a crispy katsu cutlet on top. Drizzle the homemade tonkatsu sauce over the katsu, letting it cascade down to the rice, enhancing the flavors of your Japanese Katsu Bowls.
Step 6: Garnish
For that extra touch, sprinkle with optional toppings such as green onions or sesame seeds. This not only enhances the flavor but also adds a lovely visual appeal to your Japanese Katsu Bowls. Serve immediately and watch as everyone enjoys each satisfying bite!
How to Store and Freeze Japanese Katsu Bowls
Fridge: Store leftover katsu cutlets in an airtight container for up to 3 days to retain freshness. Reheat in an oven or skillet for best results.
Freezer: For longer storage, freeze cooked katsu in a single layer on a baking sheet, then transfer to a freezer bag for up to 2 months. To reheat, bake at 375°F (190°C) until heated through.
Tonkatsu Sauce: Keep the sauce in an airtight container in the fridge for up to a week; it can also be frozen for future use.
Reheating: To maintain crispiness, reheat katsu in the oven rather than the microwave. Prepare fresh rice as needed to serve with your Japanese Katsu Bowls.
Japanese Katsu Bowls Variations
Feel free to give your katsu bowls a personal twist to match your cravings!
- Protein Swap: Use chicken or tofu instead of pork for an equally satisfying dish. Tofu offers a great crunch when prepared properly!
- Gluten-Free: Substitute panko with crushed gluten-free cereal or almond flour for a delicious, gluten-free version. It’s all about ensuring texture remains crispy.
- Spicy Katsu: Add a pinch of cayenne pepper to the panko for a spicy kick that will tantalize your taste buds. Embrace the heat for a delightful surprise!
- Herb-Infused Breadcrumbs: Mix fresh herbs like parsley or basil into the panko before coating for a fresh, aromatic twist that elevates the classic flavor.
- Rice Alternatives: Try serving your katsu over cilantro-lime quinoa or cauliflower rice for a lighter option. Both add unique flavors and textures!
- Extra Crunch: Mix in some crushed nuts, like almonds or pistachios, with the panko for added crunch and nuttiness. The layers of flavor are simply irresistible!
- Sweet and Savory: Drizzle a touch of honey or maple syrup on your tonkatsu sauce. It creates a wonderful balance that enhances the umami flavor perfectly.
- Vegetable Additions: Top with sautéed or pickled vegetables for an extra burst of flavor and color. Think cucumber, carrots, or even spicy kimchi for a delightful twist!
Explore these variations to make your Japanese Katsu Bowls truly your own! If you’re curious about trying more delicious combos, check out these delightful Japanese Katsu Bowls or flavorful Sweet Spicy Bowls for some fresh inspiration!
Make Ahead Options
These Japanese Katsu Bowls are fantastic for busy cooks looking to save time during the week! You can prepare the tonkatsu sauce up to 3 days in advance, storing it in an airtight container in the refrigerator, which helps the flavors meld beautifully. Additionally, you can bread the pork or chicken cutlets and refrigerate them for up to 24 hours before frying—this keeps the coating fresh and crispy when cooked. Just remember to fry the katsu right before serving for that perfect crunch. When ready to enjoy your meal, simply cook your rice and fry the cutlets until golden brown, and you’ll have delicious Japanese Katsu Bowls with minimal effort!
Expert Tips for Japanese Katsu Bowls
-
Even Coating: Ensure the panko is evenly packed on the cutlet for maximum crunch; a light hand can lead to patchy results.
-
Oil Temperature: Check that the oil is hot enough before frying—if it’s too cool, the katsu will absorb excess oil instead of crisping up deliciously.
-
Rice Perfection: Rinse your rice before cooking to remove excess starch, yielding fluffy grains that complement the crispy katsu perfectly.
-
Tonkatsu Sauce Balance: Adjust the sweetness and acidity of your tonkatsu sauce according to personal preference; a touch of vinegar can enhance the tanginess.
-
Keeping Katsu Crispy: Serve immediately for the best texture; if you need to wait, place the fried katsu on a wire rack instead of paper towels to keep them crispy.
-
Variety with Ease: Swap proteins or try different toppings for a fun twist, ensuring everyone gets to enjoy these Japanese Katsu Bowls their way!
What to Serve with Japanese Katsu Bowls?
Transform your delightful katsu experience into a full meal with these flavorful pairings that delight the senses.
-
Miso Soup: A warm, savory broth that complements the crunch of katsu and balances the meal with comforting flavors.
-
Pickled Vegetables: These tangy bites not only cleanse the palate between savory katsu bites but also add a pop of color to your meal.
-
Cucumber Salad: A refreshing side with crisp cucumbers and a light vinaigrette can provide a cool contrast to the crispy katsu.
-
Steamed Broccoli: This vibrant green vegetable adds crunch and nutrition, providing a wonderful visual appeal alongside the katsu bowls.
-
Sesame Noodles: Silky noodles, tossed in a light sesame dressing, echo the nuttiness of the sesame seeds as a side, creating a pleasant harmony.
-
Japanese Curry Rice: For a heartier pairing, serve a portion of mild Japanese curry; the rich flavors can beautifully complement the katsu’s crunch.
-
Green Tea: Enjoy a steamy cup to cleanse the palate; its subtle bitterness enhances the umami of the katsu.
-
Chocolate Mochi: Close the meal with a sweet treat that echoes the texture of the katsu; the chewy, sweet mochi is a delightful finish.
-
Sake: A chilled or warmed sake can elevate your dining experience, enhancing the overall flavor profiles of your meal.
Japanese Katsu Bowls Recipe FAQs
How do I choose the right cutlets for my katsu?
Absolutely! Opt for fresh, high-quality pork or chicken cutlets for the best flavor and texture. Look for cutlets that are firm to the touch and free of dark spots. If using chicken, choose boneless, skinless cuts to ensure even cooking.
What are the best storage methods for leftover katsu?
To keep your katsu delicious, store it in an airtight container in the fridge for up to 3 days. For optimal texture, reheat in an oven or skillet to help regain some crispiness that may be lost in the microwave.
Can I freeze my cooked katsu? How do I do it?
Very! To freeze your cooked katsu, first let it cool completely. Then, place the cutlets in a single layer on a baking sheet and freeze until solid (about 1-2 hours). Once frozen, transfer them to a freezer-safe bag, where they can be kept for up to 2 months. When ready to enjoy, bake them at 375°F (190°C) until heated through, ensuring you get that lovely crunch back!
What should I do if my katsu isn’t crispy?
If your katsu isn’t crispy, there are a couple of troubleshooting tips. First, make sure your oil is hot enough (about 350°F or 175°C) when you start frying; if it’s too cool, the katsu will absorb too much oil and become soggy. Secondly, ensure an even coating of panko; a light touch can lead to patchy crust. If needed, refry those cutlets in hotter oil to regain crispiness.
Can I adjust the tonkatsu sauce for dietary preferences?
Absolutely! If you have dietary restrictions, you can easily customize the tonkatsu sauce. For gluten-free options, substitute with gluten-free soy sauce or tamari. If you’re looking to cut back on sugar, consider using natural sweeteners like honey or agave syrup in moderation. Just mix the sauce ingredients according to taste until it meets your dietary needs!
Is this dish safe for pets, like dogs or cats?
Definitely! While the katsu itself is not suitable as a primary food source for pets due to seasonings and frying, plain cooked chicken or pork cutlets without any sauce can be a great treat for them in moderation. Just ensure to remove any breadcrumbs and other sauce ingredients that could be harmful.
Crispy Japanese Katsu Bowls with Homemade Tonkatsu Sauce
Ingredients
Equipment
Method
- Prepare the Katsu: Set up a breading station with flour, beaten egg, and panko breadcrumbs. Dredge cutlets in flour, dip in egg, then coat with panko.
- Fry the Cutlets: Heat oil in a skillet. Fry cutlets for 3-4 minutes per side until golden brown. Transfer to a paper towel-lined plate.
- Cook the Rice: Prepare steamed rice as per instructions, ensuring a fluffy texture.
- Make the Tonkatsu Sauce: Combine sauce ingredients in a bowl and whisk until smooth. Adjust sweetness to taste.
- Assemble the Bowls: Spoon rice into bowls, place katsu on top, and drizzle with tonkatsu sauce.
- Garnish: Sprinkle with green onions and sesame seeds. Serve immediately.
Leave a Reply