
The aroma of sizzling chicken fills the kitchen, wrapping me in a warm embrace as I prepare Japanese Katsu Bowls with Tonkatsu Sauce. This dish transports me to bustling streets of Japan, where every bite unveils a crispy, golden-brown coating resting atop a bed of fluffy rice. Not only is this recipe a crowd-pleaser, but it also comes together quickly, perfect for those evenings when you crave something homemade yet extraordinary. Whether you’re an avid meat-lover or a curious vegetarian looking for a delightful twist, you’ll find this customizable bowl can easily cater to your needs. Ready to explore the satisfying crunch and sweet-savory tang of homemade tonkatsu sauce? Let’s dive into this delicious creation together!
Why You’ll Love These Katsu Bowls?
Crispy Perfection: Each bite of the Japanese Katsu Bowls delivers a satisfying crunch, with the crispy panko breadcrumb coating contrasting beautifully against the juicy chicken or tofu inside.
Customizable Delight: Whether you prefer classic chicken or a vegetarian tofu option, this recipe can easily cater to your dietary preferences, making it versatile for everyone at your table.
Quick & Easy: With a straightforward preparation process, you can whip up a delicious meal in less time than a takeout order. It’s perfect for busy weeknights!
Authentic Flavor: Homemade tonkatsu sauce elevates the dish to new heights with its sweet-savory notes, creating a taste sensation that rivals your favorite Japanese restaurant.
Comfort Food Appeal: Katsu bowls are a beloved staple in Japan, making them not just a meal, but an experience that brings comfort and warmth to your family dinner, reminiscent of cherished traditions.
Perfect Pairings: Enjoy it alongside steamed vegetables or a light salad for a well-rounded meal that satisfies without feeling heavy, just like my Sweet Spicy Bowls.
Japanese Katsu Bowls Ingredients
• Discover the essential components to create delicious Japanese Katsu Bowls with Tonkatsu Sauce.
For the Chicken or Tofu
- Chicken Breasts – Choose boneless, skinless for a tender texture; substitute with firm tofu for a vegetarian option.
For the Breading
- All-Purpose Flour – Helps the coating stick; gluten-free flour is perfect for a gluten-free variant.
- Eggs – Binds the breadcrumbs; a vegan option can be made with water and cornstarch.
- Panko Breadcrumbs – Essential for that light, crispy coating; regular breadcrumbs provide a denser texture.
For Frying
- Vegetable Oil – Adds richness and is ideal for frying; canola or peanut oil works well as alternatives.
For the Tonkatsu Sauce
- Soy Sauce – Delivers umami flavor; use tamari for a gluten-free option.
- Mirin – Adds a hint of sweetness; blend white wine with sugar as a substitute if needed.
- Ketchup – Provides sweetness to the sauce; no substitutes necessary for mouthwatering flavor.
- Worcestershire Sauce – Contributes depth; opt for vegan Worcestershire for a plant-based version.
- Sugar – Sweetens the sauce; try brown sugar for a richer taste that complements the tangy flavors.
Embrace the delightful experience of crafting Japanese Katsu Bowls with Tonkatsu Sauce right at home, bringing flavor and warmth to your family’s dinner table!
Step‑by‑Step Instructions for Japanese Katsu Bowls with Tonkatsu Sauce
Step 1: Prepare Chicken
Start by slicing the chicken breasts into even pieces, about ¾ inch thick, to ensure uniform cooking. If you’re opting for a vegetarian twist, cut your firm tofu into similar-sized slabs. This stage sets the foundation for juicy, crispy Japanese Katsu Bowls, so make sure the pieces are consistent.
Step 2: Breading Setup
Create a coating station by placing flour, beaten eggs, and panko breadcrumbs in separate shallow dishes. This setup allows you to efficiently coat your chicken or tofu. Make sure your panko is light and airy to achieve that signature crispiness once fried. Having these ready will streamline the breading process.
Step 3: Coat Chicken
Dredge each piece of chicken (or tofu) in flour, shaking off any excess. Next, immerse it in the beaten eggs, ensuring it’s fully coated. Finally, press the piece into the panko breadcrumbs, making sure to cover it thoroughly. This three-step coating creates the delicious crunch you’ll love in your Japanese Katsu Bowls.
Step 4: Heat Oil
In a large skillet, pour enough vegetable oil to cover the bottom and heat it over medium heat. Allow the oil to reach around 350°F (175°C); it should shimmer slightly when ready. To test if it’s hot enough, drop a few breadcrumbs into the oil and watch them sizzle immediately—a clear signal that frying can begin!
Step 5: Fry Chicken
Carefully place the breaded chicken pieces into the hot oil, ensuring there’s enough space to prevent crowding. Cook them for about 3-4 minutes on each side, until they turn a beautiful golden brown and become crisp. Once done, transfer the fried pieces onto paper towels to drain excess oil, ready for serving on your katsu bowls.
Step 6: Make Tonkatsu Sauce
While the chicken is frying, whisk together the soy sauce, mirin, ketchup, Worcestershire sauce, and sugar in a bowl. Mix until the sugar dissolves completely, and the flavors meld together into a delightful, tangy sauce. Adjust the taste to your preference, and set aside to drizzle over your Japanese Katsu Bowls later.
Step 7: Assemble Bowls
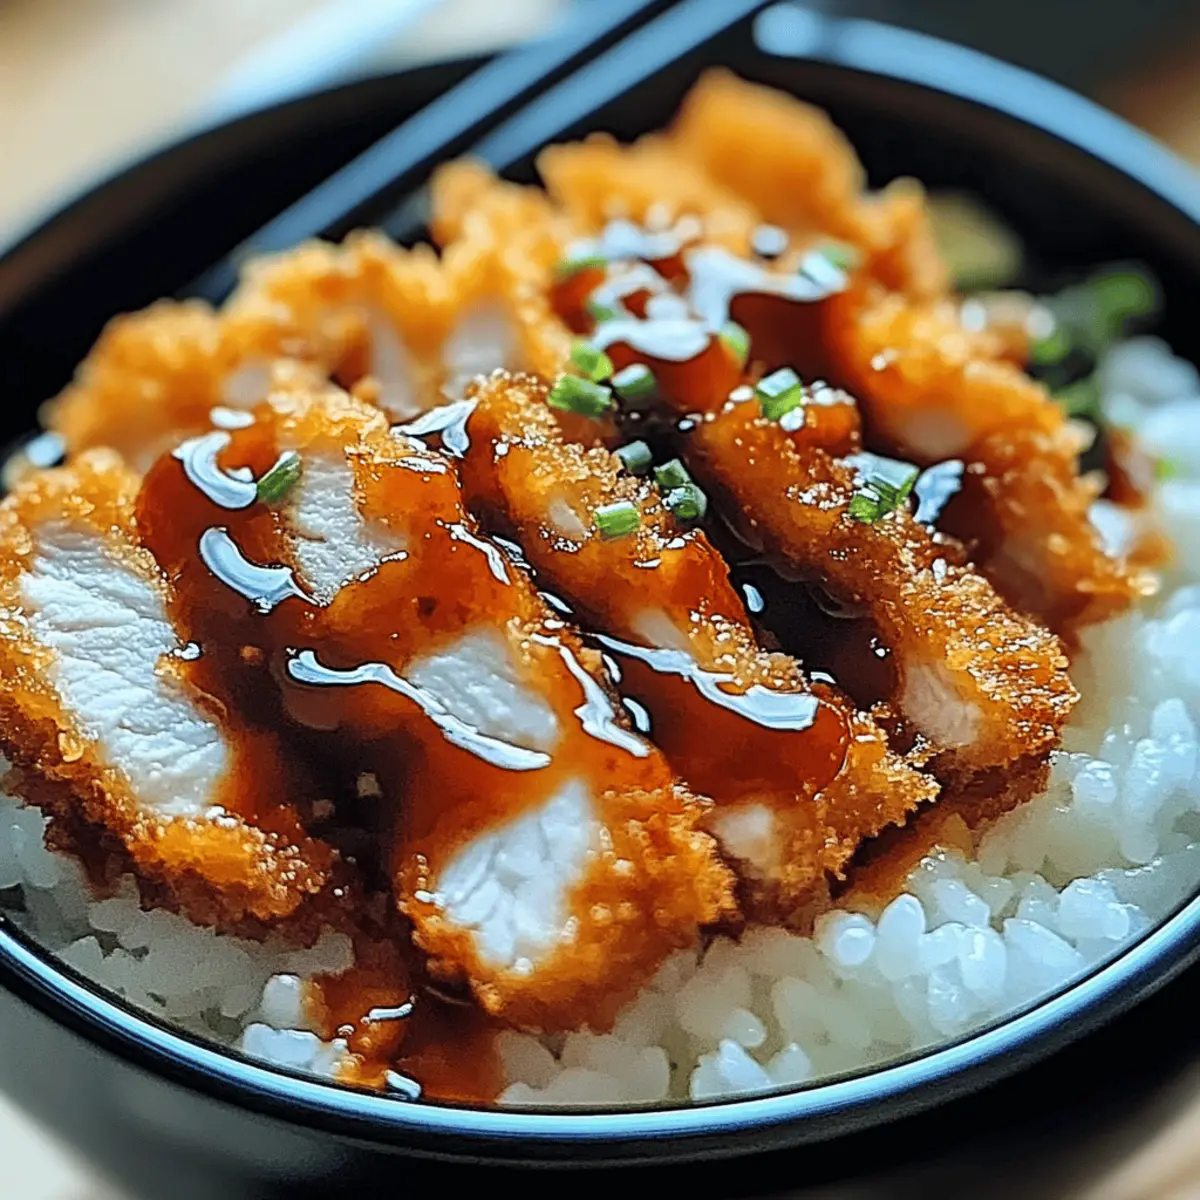
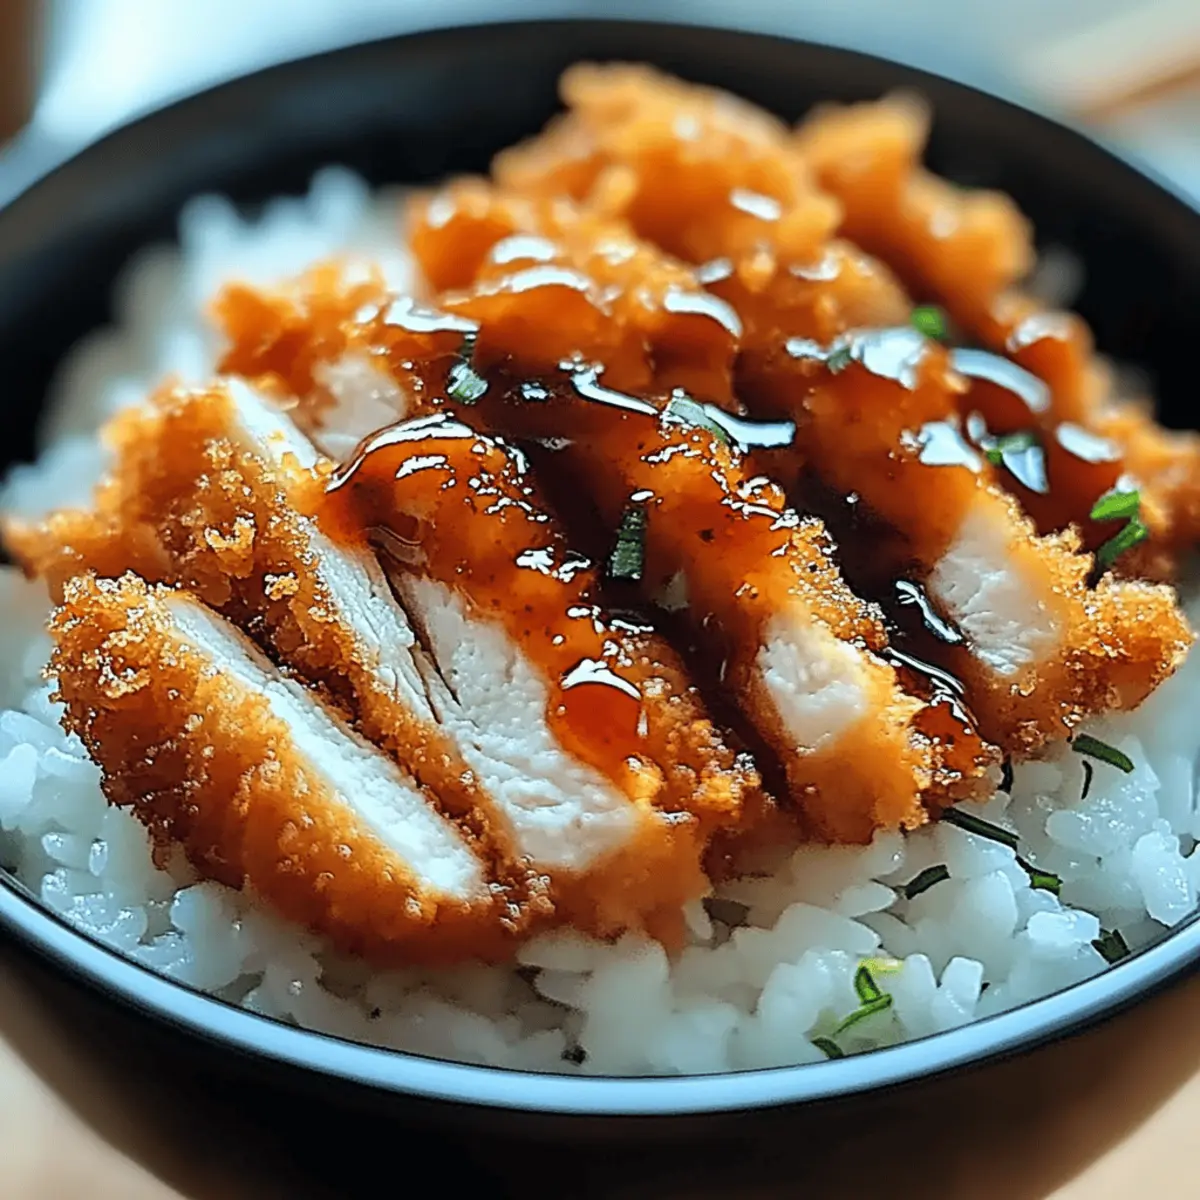
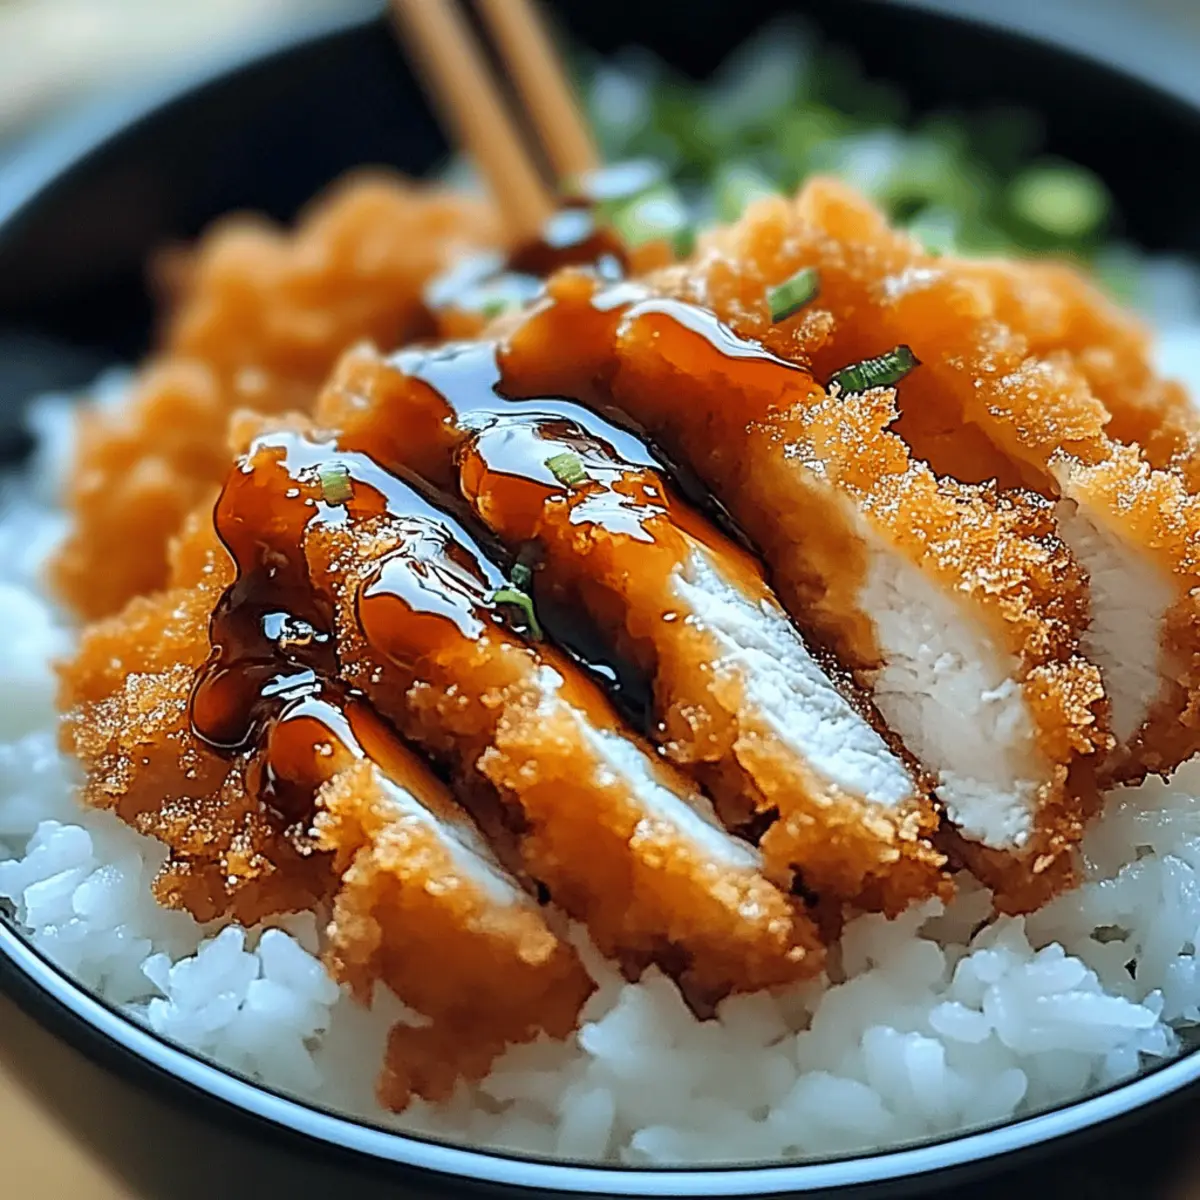
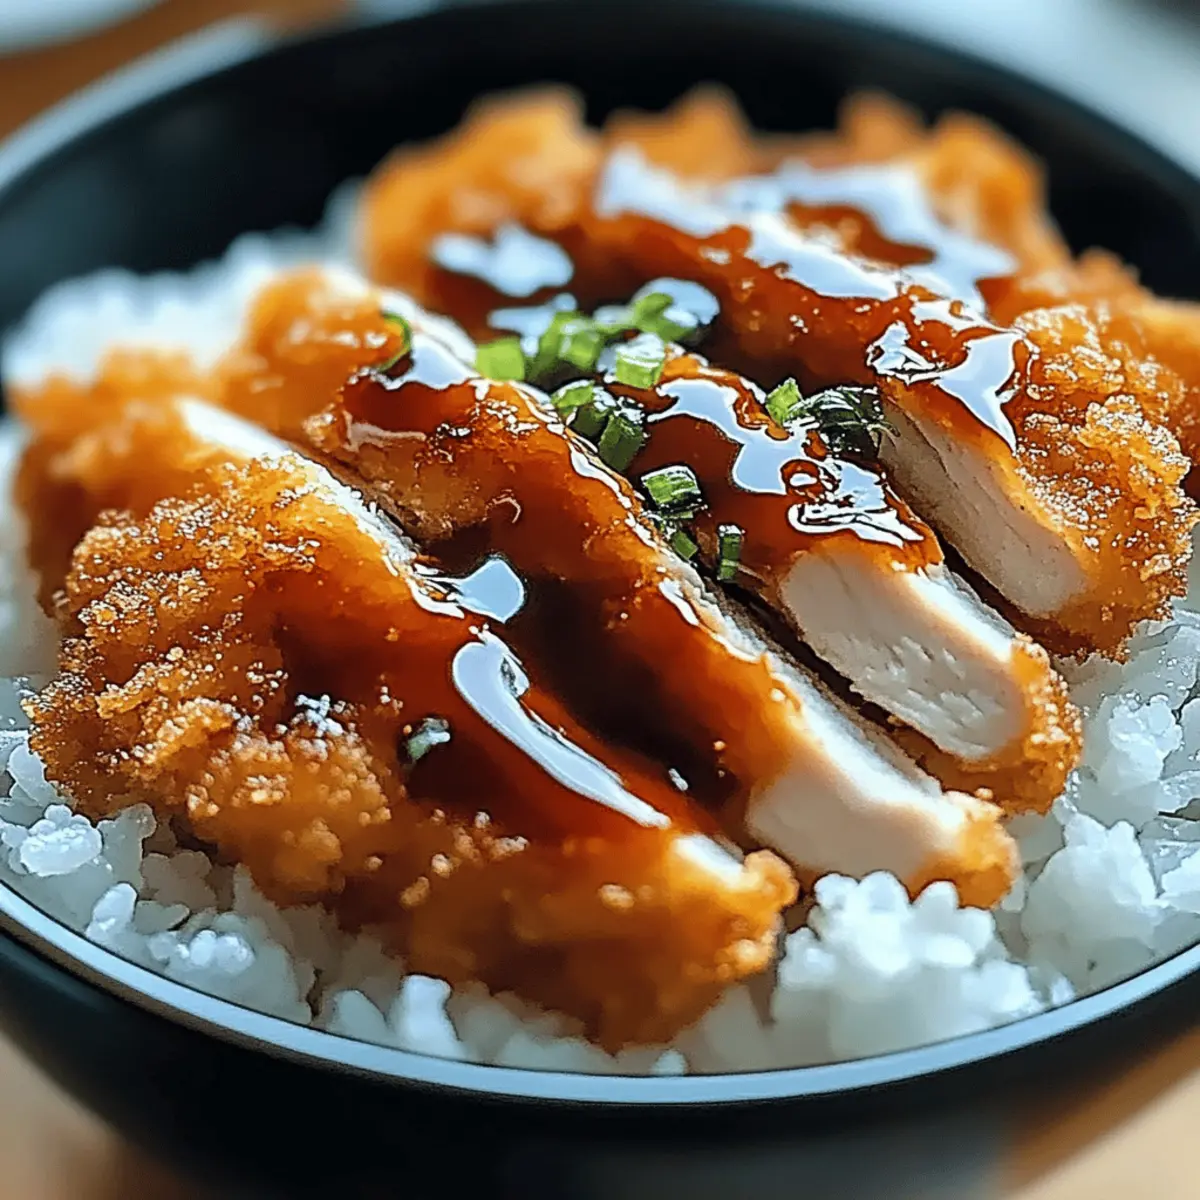
To serve, place a generous scoop of fluffy rice at the bottom of each bowl. Slice the crispy chicken or tofu and lay it on top. Finally, drizzle the homemade tonkatsu sauce generously over the katsu, allowing the rich flavors to soak into the rice. Your Japanese Katsu Bowls are now ready to be savored!
Make Ahead Options
These Japanese Katsu Bowls with Tonkatsu Sauce are perfect for meal prep enthusiasts! You can bread the chicken or tofu up to 24 hours in advance by following the coating instructions and then storing them in an airtight container in the refrigerator. Additionally, the tonkatsu sauce can be made up to 3 days ahead; simply whisk together the ingredients and refrigerate in a sealed jar. To maintain the crispiness of the breaded pieces, fry them fresh just before serving. When you’re ready to enjoy your meal, just fry the breaded chicken or tofu until golden and crispy, serve over rice, and drizzle with your prepared sauce for a hassle-free, delicious dinner!
Japanese Katsu Bowls Variations & Substitutions
Feel free to play around with these delightful variations that cater to your taste and dietary needs!
- Vegetarian Option: Swap chicken for firm tofu or eggplant to create a satisfying plant-based meal that’s just as crispy and delicious.
- Gluten-Free: Use gluten-free flour and tamari instead of soy sauce for a fully gluten-free version while maintaining that authentic flavor.
- Pork Katsu: Replace chicken with pork cutlets for a traditional pork katsu twist, bringing a different savory complexity to your bowl.
- Flavor Boosters: Add pickled ginger or a sprinkle of furikake on top for an extra burst of flavor that complements the katsu beautifully.
- Crispy Onions: Top your katsu bowls with crispy fried onions for an added crunch and delightful sweetness. Think of it as a little crunch surprise in every bite!
- Sweet & Spicy: Mix some chili paste or Sriracha into the tonkatsu sauce if you’re craving a spicy kick that pairs amazingly with the sweetness.
- Rice Varieties: Serve over jasmine, brown, or even cauliflower rice for a healthy twist that maintains the essence of your comforting katsu bowl.
- Side Dishes: Pair with a side of miso soup or a simple cucumber salad for a refreshing balance—a perfect completion to your meal, just like a side of my Street Corn Bowl.
Each of these variations offers a new adventure for your taste buds while still celebrating the delightful essence of Japanese Katsu Bowls!
Storage Tips for Japanese Katsu Bowls
Fridge: Store any leftover Japanese Katsu Bowls in an airtight container for up to 3 days. This will help retain moisture and prevent sogginess.
Freezer: For longer storage, freeze the breaded chicken or tofu separately from the rice and sauce in airtight containers for up to 2 months.
Reheating: When ready to enjoy, reheat the chicken or tofu in a pan over medium heat to restore crispiness, and serve it freshly drizzled with tonkatsu sauce.
What to Serve with Japanese Katsu Bowls with Tonkatsu Sauce
Elevate your katsu bowl experience with some delightful side dishes and beverages that complement the rich flavors and textures of this beloved Japanese dish.
-
Steamed Edamame: Light and nutritious, these young soybeans are a perfect appetizer that adds a pop of freshness and a hint of salt to your meal.
-
Miso Soup: Warm and savory, miso soup adds a comforting touch, often featuring tofu and delicate seaweed, enhancing the overall Japanese dining experience.
-
Crunchy Asian Slaw: The crispness of cabbage, carrots, and a tangy vinaigrette creates a vibrant, fresh contrast to the hearty katsu, making each bite exciting.
-
Pickled Vegetables: A small side of pickled cucumbers or carrots provides balancing acidity, cutting through the richness of the tonkatsu sauce and fried elements.
-
Sushi Rolls: Choose light vegetable rolls or tempura options to keep the meal fresh yet indulgent, complementing the crispy textures of the katsu.
-
Japanese Beer or Sake: For a refreshing drink, pair with an ice-cold lager or a smooth nigori sake, perfectly enhancing the umami flavors of your katsu bowl.
-
Green Tea Ice Cream: For dessert, indulge in a scoop of green tea ice cream; its unique flavor profile offers a sweet yet subtle finish to your meal.
-
Sesame Noodles: These noodles tossed in a light sesame dressing provide a nutty flavor and another layer of satisfaction alongside the katsu.
-
Crispy Tempura Vegetables: Lightly battered and fried veggies like zucchini or sweet potato add another crunchy dimension that resonates with the textures of your katsu bowl.
Expert Tips for Japanese Katsu Bowls
- Oil Temperature: Always ensure your oil is hot enough (around 350°F/175°C) before frying; otherwise, the breading may become soggy instead of crispy.
- Avoid Overcrowding: Fry in batches if necessary; crowded pieces will steam rather than fry, leading to less crispy Japanese Katsu Bowls.
- Quality of Panko: Use good-quality panko breadcrumbs; they are lighter and create that iconic crispy texture that makes this dish a favorite.
- Resting Time: Let the fried katsu rest on paper towels to absorb excess oil; this keeps your dish from getting greasy and helps maintain crispiness.
- Tonkatsu Sauce Balance: Taste and adjust the tonkatsu sauce as you go; balance between sweetness and savoriness is key for the perfect flavor.
- Garnish Wisely: Elevate presentation and flavor by adding toppings like sliced green onions or sesame seeds before serving your Japanese Katsu Bowls.
Japanese Katsu Bowls with Tangy Tonkatsu Sauce Recipe FAQs
How do I choose ripe chicken or tofu?
Absolutely! When selecting chicken, look for meat that is bright pink, with no dark spots or unpleasant odors. If you’re opting for tofu, choose firm or extra-firm varieties, which hold up best during frying. Make sure the tofu has a nice, even texture without excessive moisture.
What is the best way to store leftovers?
Very! Store any leftover Japanese Katsu Bowls in an airtight container in the refrigerator for up to 3 days. To maintain the best texture, keep the chicken or tofu separate from the rice and sauce until you’re ready to reheat. This helps avoid sogginess.
Can I freeze Japanese Katsu Bowls?
Yes, you can! For longer storage, freeze the breaded chicken or tofu separately from the rice and tonkatsu sauce in airtight containers or freezer bags for up to 2 months. To do this, first allow the components to cool, then portion them out before sealing. When you’re ready to enjoy them, thaw the items in the refrigerator overnight before reheating.
What should I do if the breading isn’t crisping up?
A common issue, but no worries! First, make sure your oil is hot enough (around 350°F or 175°C) before adding your breaded chicken or tofu. If your oil is too cool, the breading may absorb oil and become soggy. Fry in batches to prevent overcrowding the pan, as this can also cause steaming instead of frying.
Are there any allergen considerations for this recipe?
Definitely! For gluten-free options, substitute all-purpose flour and soy sauce with gluten-free varieties. Be mindful of egg allergies; you can replace eggs with a mixture of 1 tablespoon of water and 1 tablespoon of cornstarch for each egg. Lastly, check the labels on sauces to ensure they meet your dietary needs, especially if you’re vegan or vegetarian.
How do I make the tonkatsu sauce sweeter or tangier?
You can easily adjust the tonkatsu sauce to match your taste! For sweetness, simply add more sugar or ketchup. If you prefer a tangier flavor, increase the amount of Worcestershire sauce or soy sauce. Mix well after each addition, and give it a taste to ensure it balances to your liking!
Savor Japanese Katsu Bowls with Tangy Tonkatsu Sauce Today
Ingredients
Equipment
Method
- Slice the chicken breasts into even pieces, about ¾ inch thick.
- Create a coating station with flour, beaten eggs, and panko breadcrumbs.
- Dredge each piece of chicken (or tofu) in flour, then coat with eggs, followed by panko breadcrumbs.
- Heat vegetable oil in a skillet over medium heat.
- Fry the breaded chicken pieces for about 3-4 minutes on each side until golden brown.
- Prepare the tonkatsu sauce by whisking soy sauce, mirin, ketchup, Worcestershire sauce, and sugar.
- Assemble the bowls with rice, topped with chicken or tofu, and drizzle the tonkatsu sauce over.
Leave a Reply