
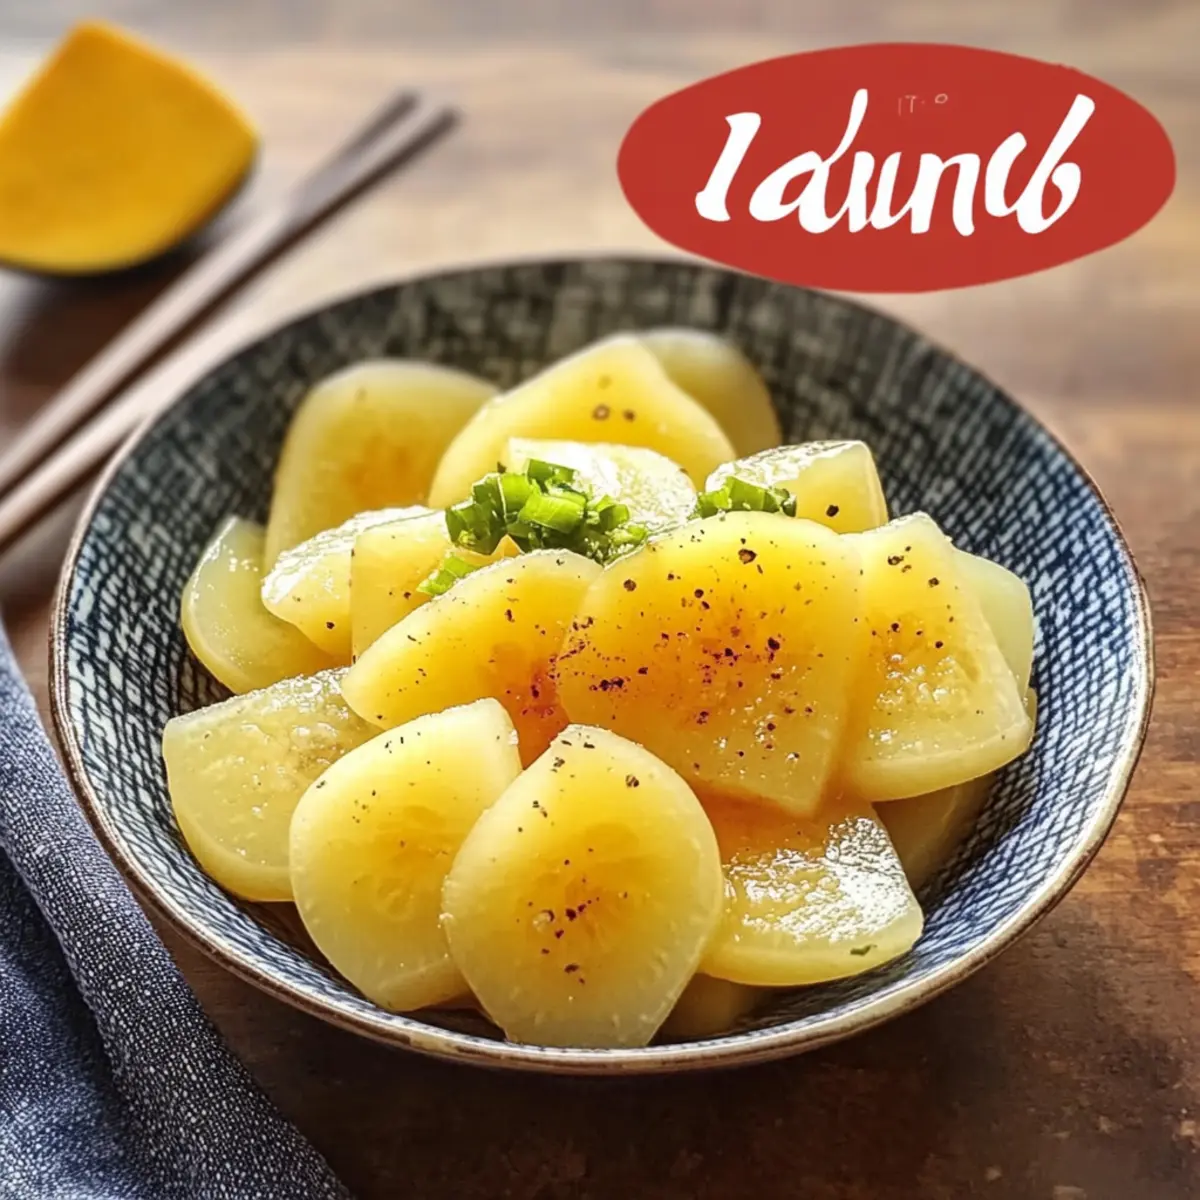
As I rummaged through my fridge, a humble daikon radish caught my eye, its crisp white surface gleaming with potential. What better way to elevate a meal than with a quick and easy Japanese Pickled Daikon? This vibrant dish offers a delightful crunch paired with a sweet-and-tangy zing that can brighten up even the simplest of dinners. Not only is this pickled treat a breeze to make—perfect for busy evenings—but it’s also brimming with digestive benefits, making it a guilt-free addition to your culinary repertoire. Whether paired with rice, added to a bento box, or enjoyed alongside sushi, this refreshing side will quickly become a staple in your kitchen. Curious how to unlock this Japanese classic? Let’s dive into this simple recipe together!

Why Try Japanese Pickled Daikon?
Elevate your meals effortlessly: This quick and easy recipe transforms daikon into a vibrant side dish that complements any culinary creation.
Digestive benefits: Packed with vitamin C and known for its digestive support, this pickle is a healthful choice.
Versatile pairing: Perfect alongside sushi, rice, or as a bento box filler—your meals will never be boring!
Quick prep time: In just a few simple steps, you can create a refreshing pickle that tastes like it took hours.
Customize flavors: With options like adding turmeric for color or chili for heat, you can make it your own!
Give this deliciously crisp Japanese Pickled Daikon a try today; you won’t regret adding this refreshing treat to your kitchen favorites!
Japanese Pickled Daikon Ingredients
For the Pickle
• Daikon Radish – The star ingredient that provides crispness and a mild flavor; choose fresh and firm ones for the best results.
• Rice Vinegar – Adds a perfect balance of mild acidity and sweetness; can be swapped with apple cider vinegar to give a different flavor twist.
• Granulated Sugar – Counteracts the vinegar’s acidity; reducing the amount can yield a more savory pickle if desired.
• Salt – Essential for enhancing flavor and drawing moisture from the daikon; don’t skip this step for successful pickling.
For the Color (Optional)
• Turmeric – Adds a beautiful yellow hue to your pickles; can be omitted or replaced with gardenia fruit to achieve a similar effect.
Enjoy the simplicity and benefits of making your own Japanese Pickled Daikon!
Step‑by‑Step Instructions for Japanese Pickled Daikon
Step 1: Prepare the Daikon
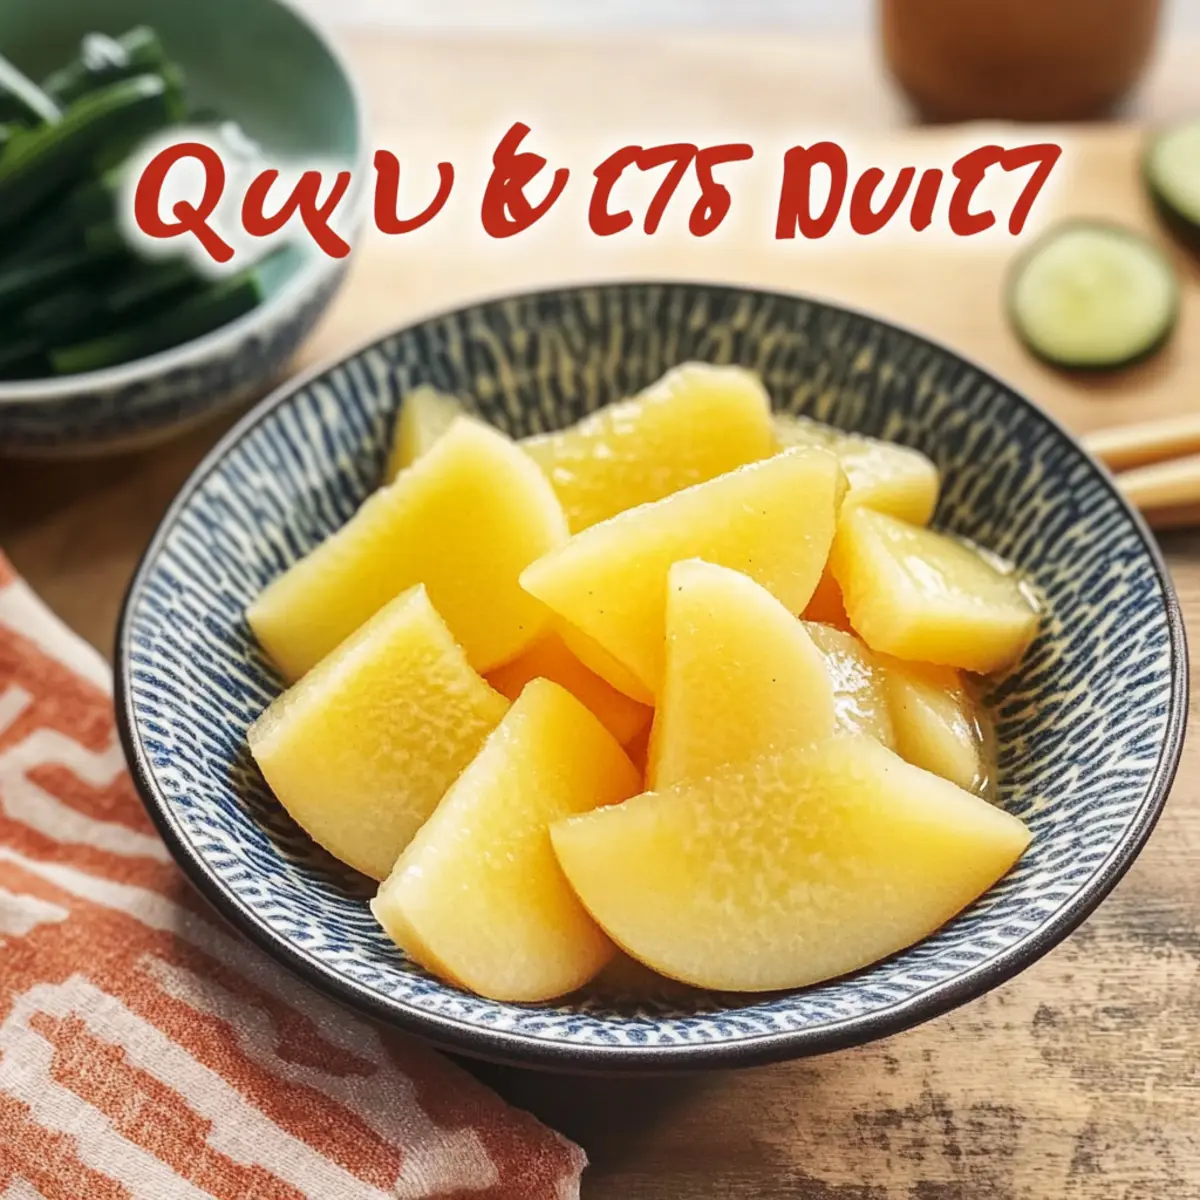
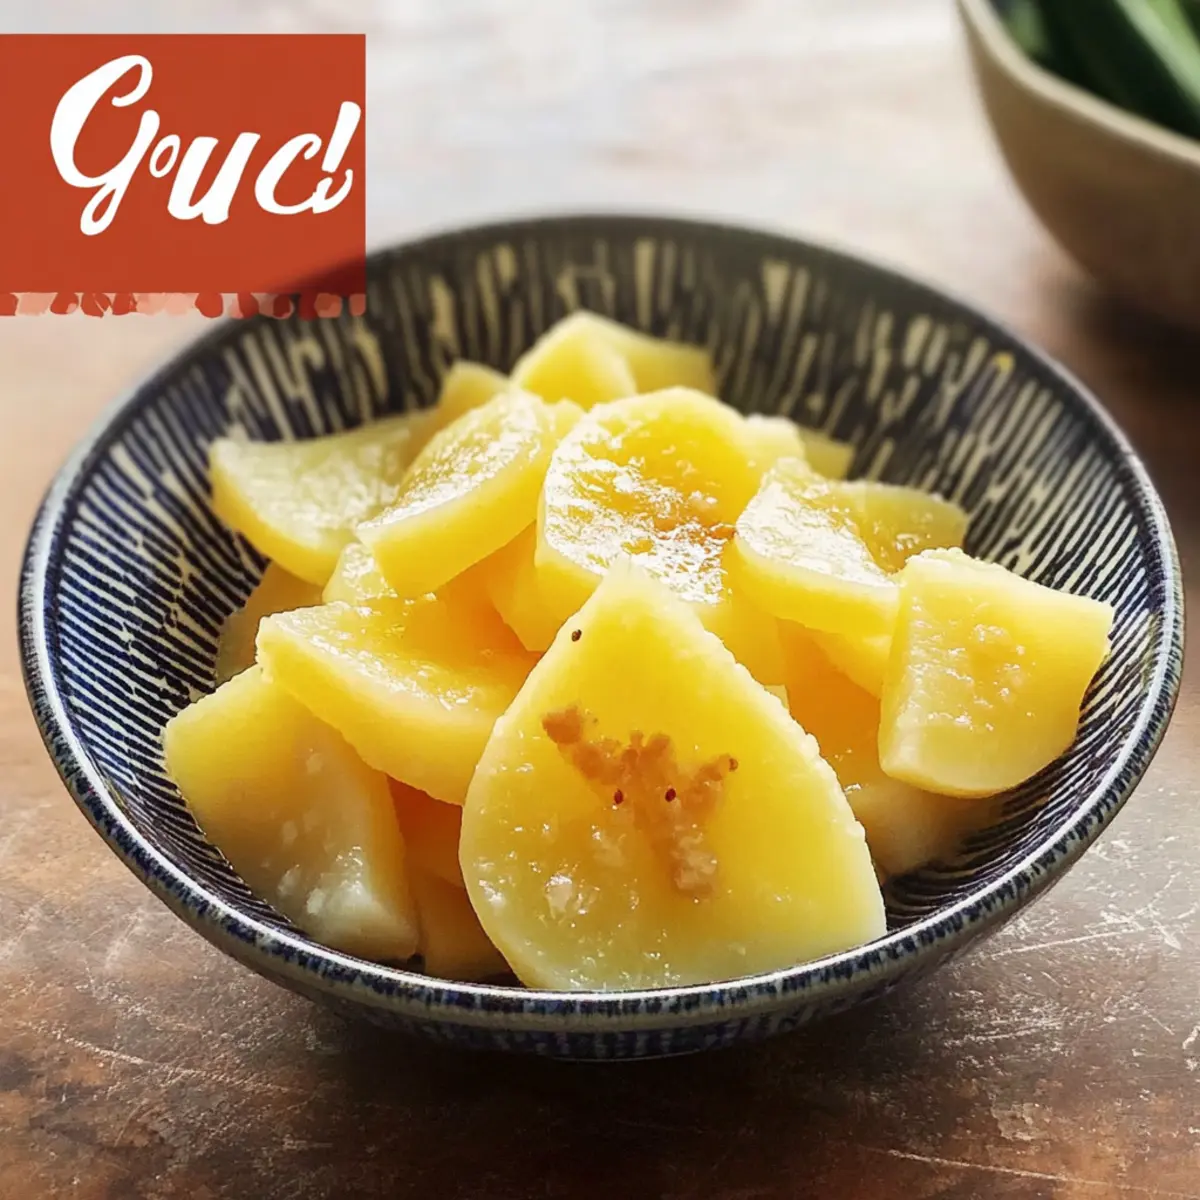
Begin by peeling the daikon radish. Once peeled, slice it into rounds or half-moons, approximately 5-7 mm thick. A sharp knife will ensure clean edges. Arrange the slices in a bowl, displaying their crispness. This simple step is vital for creating the perfect texture in your Japanese Pickled Daikon, enabling the pickles to soak up the flavors beautifully.
Step 2: Salting the Daikon
Sprinkle salt evenly over the daikon slices in the bowl. Gently mix the slices to coat them well with salt, allowing the natural juices to start releasing. Let them rest for about 20-30 minutes; during this time, you’ll notice the daikon slices becoming slightly limp and releasing moisture, which is critical for the pickling process.
Step 3: Removing Excess Water
After the resting period, take each daikon slice and squeeze gently to eliminate excess water. Avoid rinsing, as this will wash away the salt that is essential for flavor. This step ensures that your Japanese Pickled Daikon remains crisp while effectively absorbing the marinade.
Step 4: Prepare the Marinade
In a small saucepan over low heat, combine rice vinegar and granulated sugar. Stir gently until the sugar fully dissolves, making sure the mixture does not boil. This process will create a sweet balance for your pickle. Once dissolved, remove it from heat and allow the marinade to cool—this will enhance the flavor when combined with the daikon.
Step 5: Mixing the Ingredients
Place the squeezed daikon slices in a clean container with a tight-fitting lid. Pour the cooled vinegar mixture over the daikon until they are fully submerged. If desired, you can add optional flavorings, like a dash of turmeric for color or chili flakes for a hint of heat. Mixing these ingredients infuses your Japanese Pickled Daikon with delightful flavors.
Step 6: Chilling and Flavoring
Seal the container tightly and refrigerate the mixture for at least 12 hours. Ideally, let it marinate for 24-48 hours to allow the flavors to meld together beautifully. As it chills, your Japanese Pickled Daikon will develop a vibrant color and a perfectly balanced taste, a refreshing addition to any meal.
Japanese Pickled Daikon Variations
Customize your Japanese Pickled Daikon and discover exciting new flavors! Let your creativity shine through these delightful twists.
-
Turmeric Twist: Add a teaspoon of turmeric to the marinade for a vibrant yellow hue. This adds a warm, earthy note while enhancing the visual appeal.
-
Chili Kick: Incorporate chili flakes or slices of fresh chili to give your pickles a spicy edge. Feel free to adjust the amount to suit your heat tolerance!
-
Citrus Burst: Zest an orange or lemon into the marinade for a refreshing citrus flavor that brightens the dish. This fruity twist complements the daikon’s natural sweetness beautifully.
-
Ginger Infusion: Thinly slice fresh ginger and add to the pickling liquid for an aromatic kick. The warm zing of ginger pairs perfectly with the daikon’s crispness.
-
Sesame Crunch: Garnish your finished pickle with toasted sesame seeds for an added crunch. This not only enriches the texture but also adds nutty flavor notes.
-
Apple Cider Variation: Swap out rice vinegar for apple cider vinegar for a slightly sweeter profile. This makes the pickles even more approachable for those new to Japanese flavors.
-
Herbaceous Touch: Toss in a few fresh herbs, like mint or cilantro, before sealing the container. These herbs offer a refreshing aroma and a mildly sweet undertone.
For more delicious ideas, consider using your pickled daikon in a bento box or as a flavor-packed garnish for sushi. Enjoy experimenting and making this vibrant dish your own!
What to Serve with Quick and Easy Japanese Pickled Daikon
Imagine the delightful crunch and bright flavor of pickled daikon paired perfectly with other dishes for a rounded culinary experience.
- Steamed Rice: A classic companion, its fluffy texture perfectly balances the tangy flavor of the pickled daikon, creating a satisfying meal.
- Grilled Salmon: The richness of the salmon contrasts beautifully with the crisp, refreshing daikon, enhancing the dish with layers of flavor.
- Sushi Rolls: Use pickled daikon as an ideal garnish or ingredient. Its brightness elevates sushi rolls, cleansing the palate with every bite.
- Miso Soup: Pairing this comforting soup with pickled daikon adds a delightful tang that enlivens the traditional flavors of the broth.
- Korean BBQ: The inviting sweetness and crunch of pickled daikon serve as a perfect palate cleanser, balancing the savory richness of grilled meats.
- Roasted Vegetables: Their earthy flavors contrast with the sweet-and-tangy crunch of daikon, offering a delightful textural harmony in every bite.
- Chilled Green Tea: This refreshing, slightly bitter drink complements the brightness of pickled daikon, offering a soothing finish to your meal.
- Fruit Sorbet: A light, fruity dessert can also be a fantastic way to end your meal, perfectly contrasting the freshness of the pickled daikon.
How to Store and Freeze Japanese Pickled Daikon
Fridge: Keep your Japanese Pickled Daikon in an airtight container in the refrigerator for up to one week. This will maintain its freshness and crisp texture.
Freezer: For longer storage, you can freeze the pickled daikon in a freezer-safe bag. Ideally, use within 3 months for best flavor and texture, though it may lose some crunch.
Reheating: If you prefer to enjoy it warm, simply thaw in the fridge overnight and then quickly heat in a pan over low flame, adding a splash of rice vinegar to refresh its flavor.
Serving: Once stored, always give your pickles a little shake before serving; the flavors tend to settle at the bottom. Enjoy this delightful crunch as an excellent side dish!
Tips for the Best Japanese Pickled Daikon
• Even Slices Matter: Slice the daikon evenly to ensure consistent pickling. This helps each piece absorb the marinade thoroughly, enhancing the overall flavor of your Japanese Pickled Daikon.
• Be Patient: Allow the pickles to sit for at least 24-48 hours for best results. Patience increases the depth of flavor as it allows the ingredients to meld beautifully.
• Keep It Clean: Use clean utensils and containers to prevent contamination. This not only preserves the freshness of your Japanese Pickled Daikon but also extends its shelf life.
• Adjust the Sweetness: Feel free to modify the sugar to your taste. A little extra sweetness can balance the tang, while less sugar can create a more savory profile.
• Experiment with Flavors: Don’t hesitate to add slices of fresh ginger or chili flakes for a unique twist on this classic. Customizing the flavor will keep things exciting at your dinner table!
Make Ahead Options
These Japanese Pickled Daikon are perfect for meal prep enthusiasts! You can slice and salt the daikon up to 24 hours in advance, allowing the moisture to be drawn out, making them ready for quick pickling. After the resting step, simply refrigerate the salted daikon slices and hold off on the marinade until the day you plan to serve. To finish, prepare the vinegar mixture as described, pour it over the daikon, and let it chill for at least 12 hours (or ideally 24-48 hours) to meld the flavors. This way, you’ll have a refreshing, crisp side ready with minimal effort when meal time arrives—just as delicious as if you made it all at once!
Japanese Pickled Daikon Recipe FAQs
How do I choose the right daikon radish?
Absolutely! When selecting a daikon radish, look for one that is firm, smooth, and free from dark spots or blemishes. The ideal daikon should feel heavy for its size and should not have any soft spots. Freshness is key to achieving that delightful crunch!
How should I store my Japanese Pickled Daikon?
Very! Store your pickled daikon in an airtight container in the refrigerator. It will remain fresh for up to one week, retaining its crisp texture and flavor. For optimal storage, keep it sealed tightly to prevent any air exposure.
Can I freeze Japanese Pickled Daikon?
Absolutely! You can freeze your pickled daikon in a freezer-safe bag. To do this, make sure to remove as much air as possible before sealing. For best flavor and texture, use it within 3 months. When ready to enjoy, allow it to thaw in the fridge overnight and give it a gentle stir before serving.
What do I do if my pickles are too salty?
Oh no! If your Japanese Pickled Daikon turns out too salty, you can balance the flavor by rinsing the daikon slices lightly under cold water before serving. Alternatively, consider adding a bit of sugar to the marinade to counteract the saltiness. Just make sure to taste as you go until you achieve your desired flavor.
Are there any dietary concerns with this recipe?
Very! This Japanese Pickled Daikon recipe is gluten-free and low-calorie, making it suitable for most diets. However, if you have sensitive pets, be aware that radishes are not suitable for them, as they can cause digestive upset. The recipe also avoids common allergens, but always check the labels of your ingredients to ensure safety for yourself and your guests.
Deliciously Crisp Japanese Pickled Daikon You’ll Love
Ingredients
Equipment
Method
- Peel the daikon radish and slice it into rounds or half-moons, approximately 5-7 mm thick.
- Sprinkle salt evenly over the daikon slices and let them rest for about 20-30 minutes.
- After resting, squeeze the daikon slices to eliminate excess water.
- In a small saucepan, combine rice vinegar and granulated sugar over low heat until the sugar dissolves.
- Place the squeezed daikon slices in a clean container and pour the cooled vinegar mixture over them.
- Seal the container and refrigerate for at least 12 hours, ideally 24-48 hours.
Leave a Reply