
As I stood in my kitchen surrounded by cheerful pastel colors and the scent of freshly baked cake, I couldn’t help but smile at the thought of creating an Ombre Bunny Rosette Cake for Easter. This delightful cake not only captures the spirit of spring but also brings a playful twist to your dinner table. With 25 adorable Easter Bunny cake ideas, you can easily impress family and friends, whether you’re a novice or an experienced baker. Each cake variation offers quick prep and the chance to unleash your creativity, adding a festive flair that will leave everyone enchanted. Are you ready to hop into the sweetest part of your holiday celebrations?
Why Will You Adore This Cake?
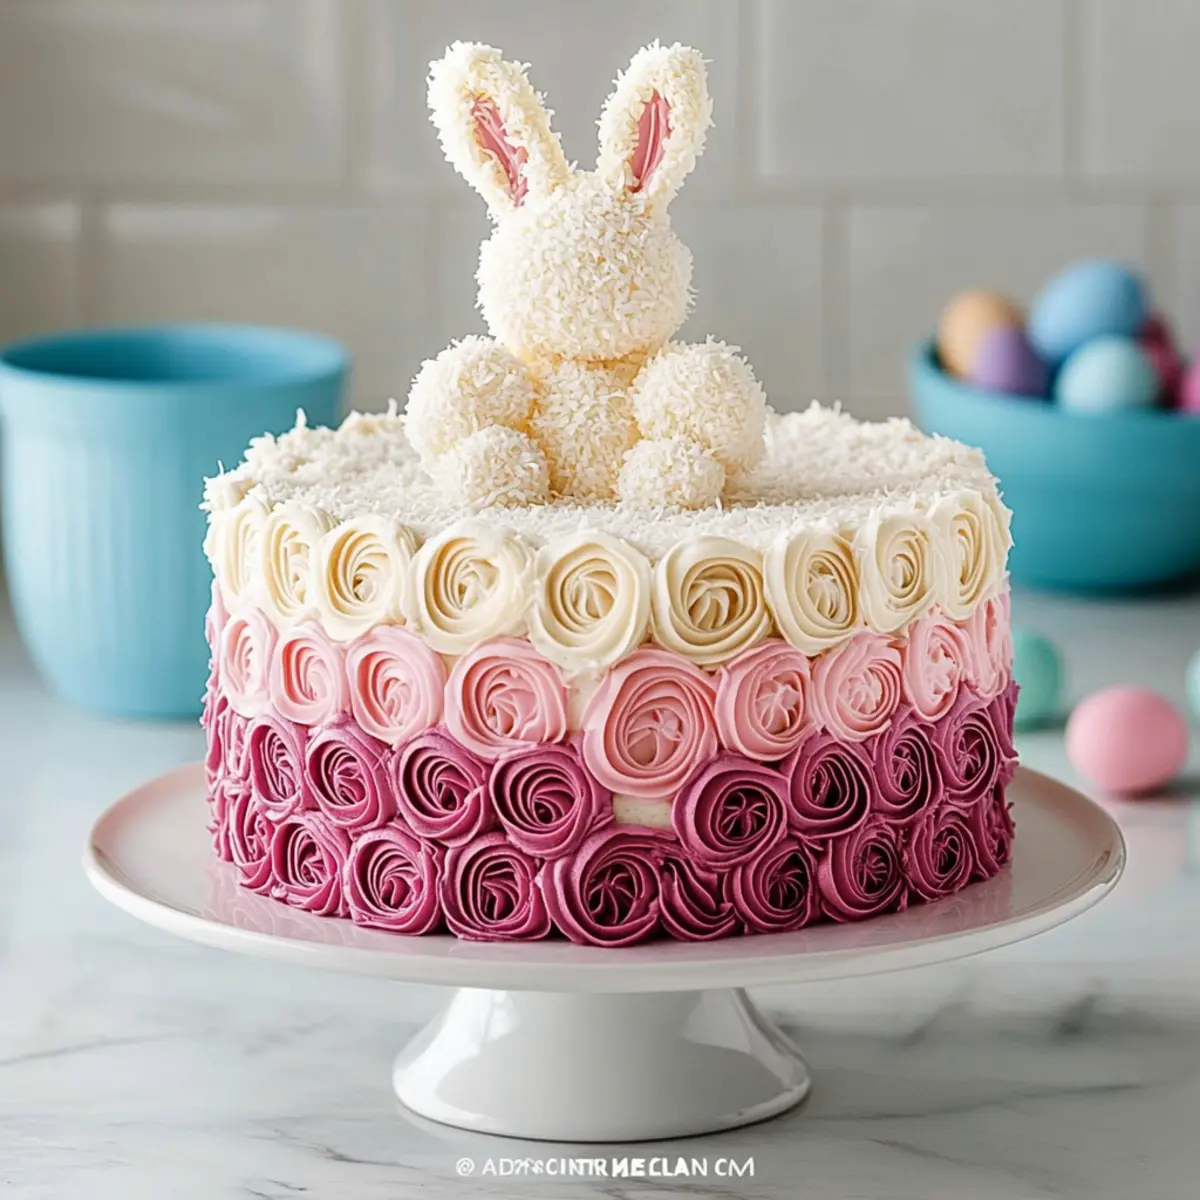
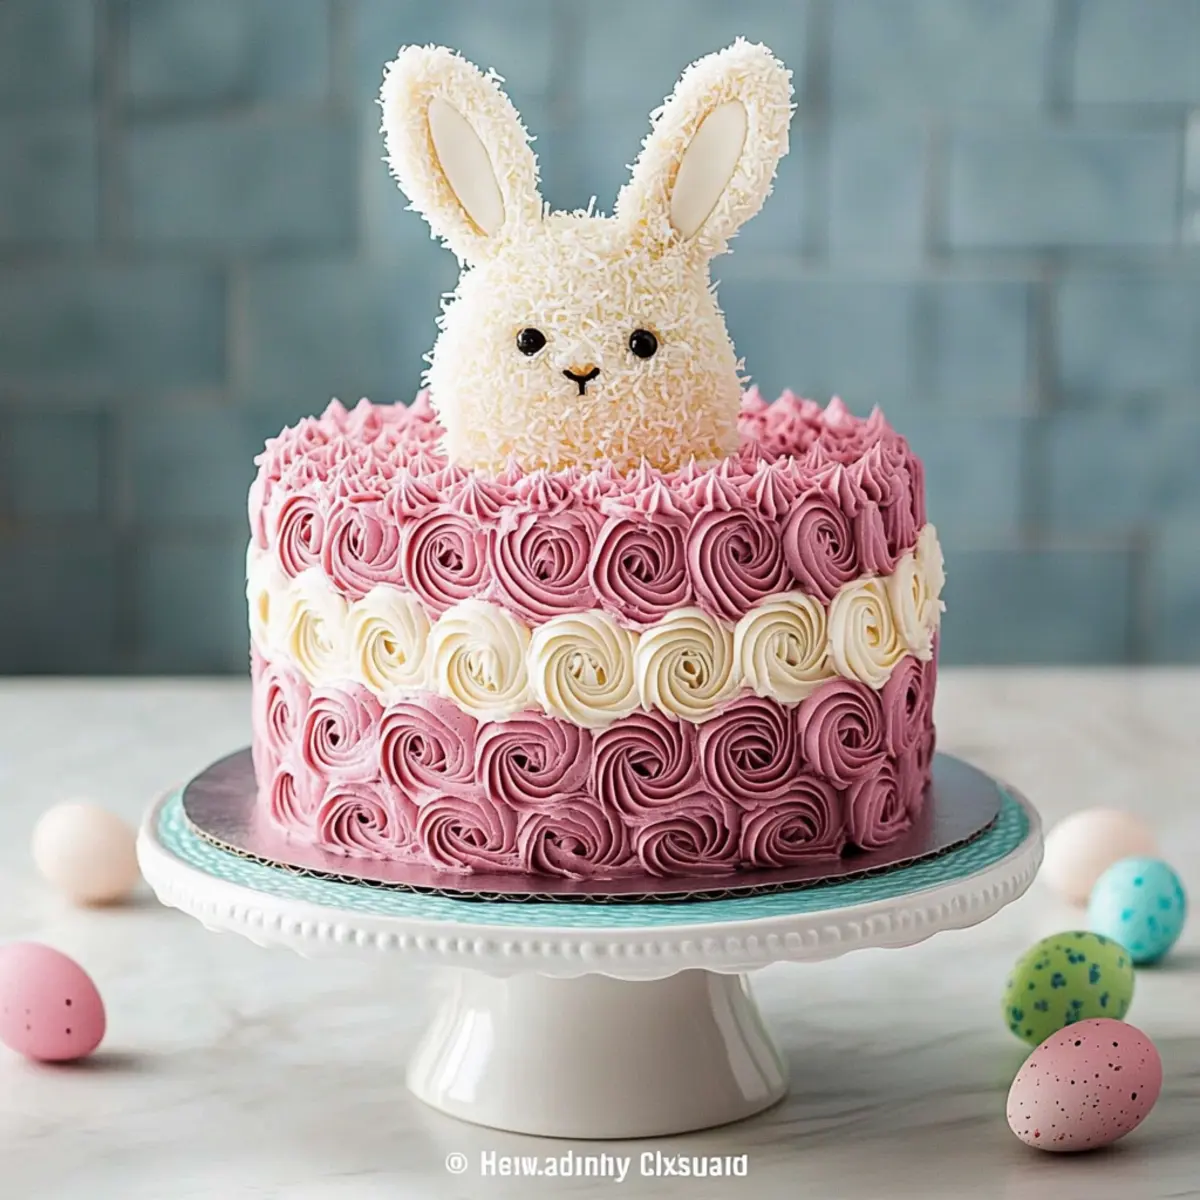
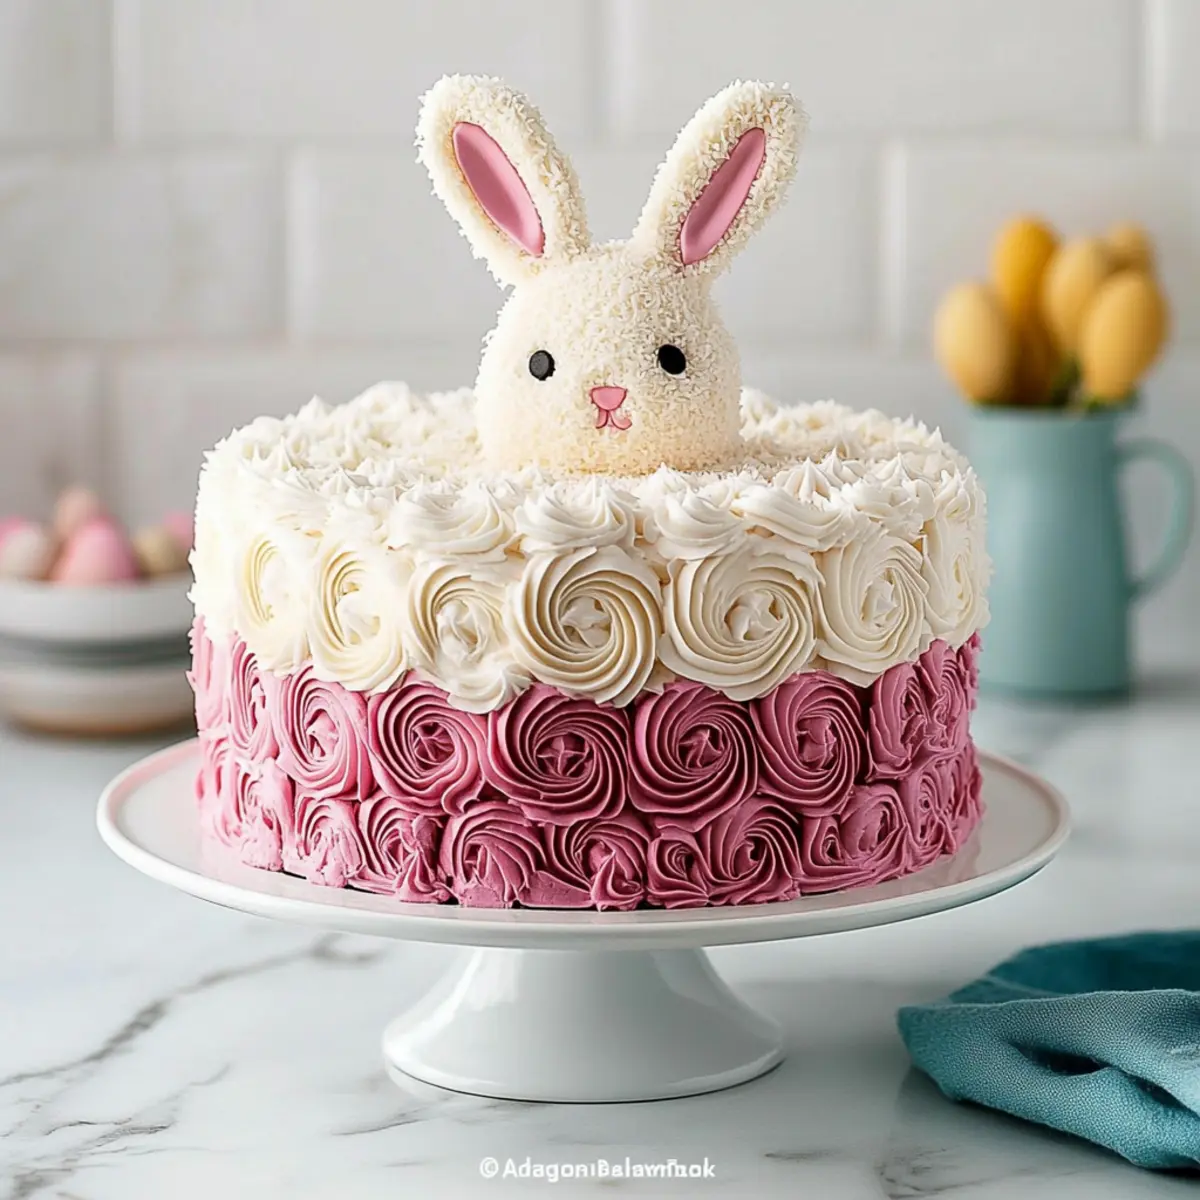
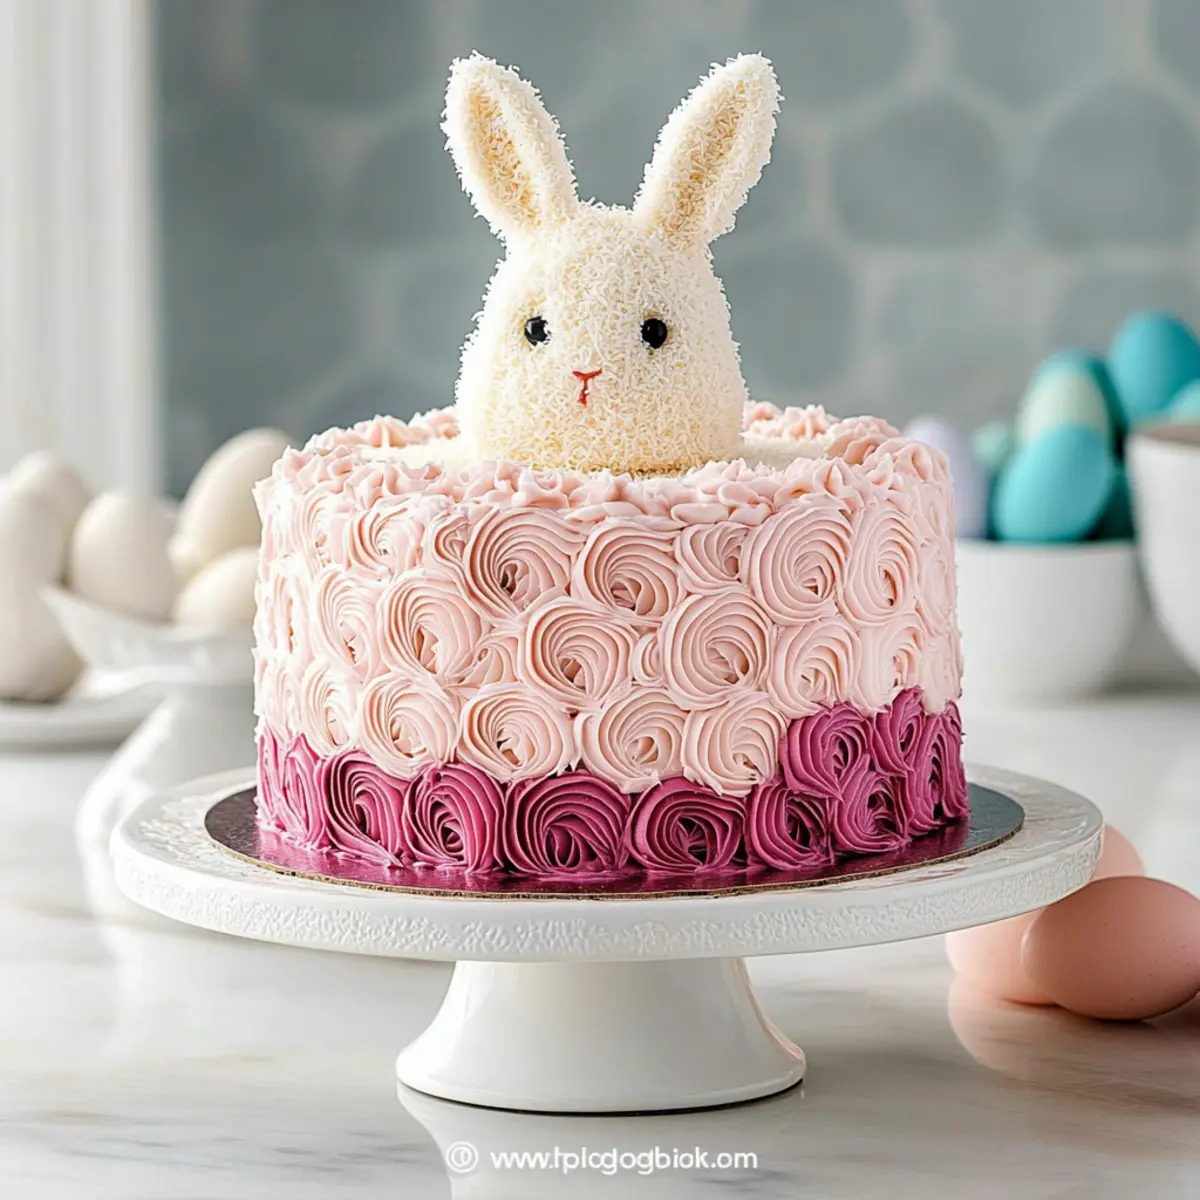
Vibrant Appeal: The Ombre Bunny Rosette Cake bursts with stunning pastel colors that mirror the joys of Easter, making it an eye-catching centerpiece for any celebration.
Playful Design: Each rosette adds a whimsical touch, ensuring your cake is not just delicious but also a visual delight that sparks smiles.
Easy to Personalize: Use different cake flavors and frosting styles to match your personal taste or dietary needs, whether you prefer rich chocolate or light vanilla.
Crowd-Pleaser: Perfect for gatherings, this cake is designed to impress both kids and adults alike, filling everyone with holiday cheer! Take inspiration from other festive creations, like Cheesecake Stuffed Chocolate or Pumpkin Cheesecake Truffles to elevate your dessert table.
Time-Saving: With straightforward instructions, you’ll have more time to spend with loved ones, making this dessert as stress-free as it is delightful.
Ombre Bunny Rosette Cake Ingredients
For the Cake
• Cake Mix – The foundation of flavor; use a gluten-free mix if needed.
• Eggs – Essential for binding; can replace with applesauce for a vegan option.
• Vegetable Oil – Keeps the cake moist; coconut oil works well as a substitute.
• Water or Milk – Adds moisture; opt for almond milk for a dairy-free version.
For the Buttercream Frosting
• Butter – The star ingredient for richness; dairy-free options can be used.
• Powdered Sugar – Sweetens the frosting; sifted for a smooth texture.
• Heavy Cream – Helps achieve a silky consistency; substitute with coconut cream for a lighter option.
• Gel Food Coloring – Used to create the ombre effect; choose natural coloring for a healthier alternative.
For the Decorations
• Shredded Coconut – Adds a fluffy texture, perfect for mimicking bunny fur; almond flour can be used instead.
• Candy Decorations (eyes, ears) – Bring your bunny cake to life; mix and match for fun features.
• Edible Glitter or Sprinkles – A playful touch that adds sparkle to your beautiful cake.
Optional Add-Ons
• Edible Image Paper – For a professional finish; can be replaced with piped frosting if preferred.
• Fresh Berries – A lovely garnish that complements the festive theme beautifully.
This Ombre Bunny Rosette Cake is not just a dessert; it’s a centerpiece that celebrates the joy of Easter!
Step‑by‑Step Instructions for Ombre Bunny Rosette Cake
Step 1: Baking the Cake
Preheat your oven to 350°F (175°C) and prepare the cake mix according to the package instructions, mixing in eggs, vegetable oil, and water or milk until smooth. Pour the batter into bunny-shaped or traditional cake pans, filling them about two-thirds full. Bake in the preheated oven for 25-30 minutes, or until a toothpick inserted in the center comes out clean. Once baked, let the cakes cool in the pans for 10 minutes before transferring them to a wire rack to cool completely.
Step 2: Preparing the Buttercream Frosting
While your cakes are cooling, make the buttercream frosting for your Ombre Bunny Rosette Cake. In a large mixing bowl, beat together softened butter and powdered sugar until light and fluffy, about 3-5 minutes. Gradually add heavy cream while mixing until you achieve a smooth, spreadable consistency. Divide the frosting into separate bowls and tint each with gel food coloring, creating several shades that complement the delightful ombre effect you desire for your cake.
Step 3: Applying the Base Layer of Frosting
Once the cakes are completely cooled, level the tops with a knife if necessary to ensure an even stacking. Place one cake layer on a cake stand or plate and spread a generous layer of the lightest colored frosting on top using an offset spatula. Carefully place the second cake layer on top and cover the entire cake with a thin layer of the same light frosting to create a base coat, which will act as a crumb barrier. Chill the cake in the refrigerator for about 30 minutes to set this layer.
Step 4: Creating the Ombre Rosette Design
After the base layer has set, use a piping bag fitted with a star tip to pipe rosettes of the medium and darker frosting shades onto the sides and top of the Ombre Bunny Rosette Cake. Start at the bottom and work your way up, alternating colors and ensuring a beautifully blended ombre effect. Continue piping rosettes until the entire cake is covered, adjusting the size and spacing as needed for a whimsical appearance that captures the playful spirit of Easter.
Step 5: Adding Bunny Features and Finishing Touches
Embellish your cake further by adding the shredded coconut to the sides to mimic bunny fur, gently pressing it into the frosting. Use candy decorations to create eyes and ears on top, placing them strategically for a fun and lively look. If desired, sprinkle edible glitter or colorful sprinkles on the cake’s surface to add a festive sparkle. Let the decorations set for a brief moment before chilling your finished Ombre Bunny Rosette Cake in the fridge for 30 minutes to ensure everything stays in place.
Step 6: Serving the Cake
Once the kaleidoscope of colors has set, your Ombre Bunny Rosette Cake is ready to shine at your Easter celebration! Carefully slice the cake into pieces using a sharp knife, revealing its beautiful ombre layers. Serve on decorative plates, and watch as your friends and family marvel at this delightful centerpiece that perfectly embodies the joy and spirit of the holiday. Enjoy this wonderful treat, and delight in the smiles it brings!
Make Ahead Options
These delightful Ombre Bunny Rosette Cakes are perfect for meal prep enthusiasts! You can bake the cake layers up to 2 days in advance. Simply let them cool completely, then wrap them tightly in plastic wrap to maintain freshness. Additionally, you can prepare the buttercream frosting and refrigerate it for up to 3 days; just give it a quick whisk to bring back its smooth texture before frosting. For the best results on the day of serving, frost the cakes just a few hours before your gathering to keep the decorations looking fresh and the flavors vibrant. This way, you’ll save time and have a stunning centerpiece ready to impress your guests without all the last-minute stress!
Ombre Bunny Rosette Cake Variations
Customize your Ombre Bunny Rosette Cake to reflect your tastes and dietary preferences while still retaining that festive charm!
- Gluten-Free: Use a gluten-free cake mix to accommodate those with gluten sensitivities. This way, everyone can enjoy a slice of joy!
- Dairy-Free Frosting: Swap regular butter for a plant-based alternative to create a tasty, dairy-free frosting that doesn’t compromise on flavor. You’ll still achieve that creamy texture with a good dairy substitute.
- Chocolate Lovers: Incorporate chocolate cake mix for a rich twist that’s sure to please chocolate aficionados; this versatile base will provide a delightful contrast to the sweet frosting.
- Nutty Twist: Replace shredded coconut with chopped nuts for a crunchy dimension; this adds an unexpected texture that complements the soft cake beautifully.
- Mini Bunny Cakes: Create individual-sized mini cakes using bunny-shaped molds for fun, personal servings. Everyone loves a dessert they can call their own!
- Berry Burst: Incorporate fresh berries or a fruit puree between the layers for a burst of berry flavor. Strawberries or raspberries offer a lovely contrast to the sweetness of the frosting.
- Zingy Citrus: Infuse your cake with lemon or orange zest for a bright, refreshing flavor profile; it’s the perfect way to give your cake a little zing, making it stand out at the dessert table.
- Sugar-Free Option: Use sugar-free or natural sweeteners in the frosting for a healthier option that still tastes fabulous; your waistline will thank you while those flavors delight your palate.
Explore and experiment with these variations to create a unique Ombre Bunny Rosette Cake that captures both your culinary creativity and the spirit of Easter. And to keep the festive vibes flowing, check out these delicious Apple Crumb Cake with Cinnamon Apple Drizzle for a delightful brunch option!
How to Store and Freeze Ombre Bunny Rosette Cake
Room Temperature: Store your Ombre Bunny Rosette Cake in a cool, dry place for up to 2 days, covered lightly with a cake dome or plastic wrap to maintain freshness.
Fridge: If using cream-based frosting, refrigerate the cake for up to 5 days. Cover it well to prevent it from absorbing odors and to keep the frosting from drying out.
Freezer: For longer preservation, freeze the cake wrapped tightly in plastic wrap and then in aluminum foil for up to 3 months. Thaw overnight in the fridge before serving.
Reheating: If you prefer slightly warm cake, let it come to room temperature after freezing, and gently heat individual slices in the microwave for about 10-15 seconds.
What to Serve with Ombre Bunny Rosette Cake?
Indulge in delightful accompaniments that elevate your festive table and complement the playful charm of your Easter cake.
- Fresh Berries: Bursting with flavor, strawberries and blueberries add a fresh pop to balance the sweetness of the cake.
- Vanilla Ice Cream: A scoop of creamy vanilla ice cream pairs beautifully, enhancing the cake’s vibrant colors and flavors in a delightful contrast.
- Coconut Macaroons: Their chewy texture and sweet coconut flavor echo the shredded coconut on the cake, creating a harmonious dessert experience.
- Mint-Infused Lemonade: A refreshing drink that adds a zesty twist to your meal, making every bite of the cake feel more vibrant.
- Whipped Cream: Light, fluffy whipped cream serves as a canvas for adding flavors, offering a creamy contrast to the cake’s soft layers.
- Chocolate-Covered Strawberries: These treats offer a rich and decadent touch, providing a deliciously luxurious pairing with the playful bunny cake.
- Carrot Cake Bites: Mini carrot cakes add a festive theme and echo the springtime spirit, enhancing your Easter dessert table.
- Fruit Tartlets: Crisp tart shells filled with pastry cream and topped with seasonal fruits create a sweet and colorful addition next to your cake.
- Sparkling Water: A bubbly drink option that refreshes and cleanses the palate, allowing the flavors of the Ombre Bunny Rosette Cake to shine.
- Easter-Themed Cookies: Adorable bunny or egg-shaped cookies enhance the festive atmosphere, making your dessert spread even more whimsical.
Expert Tips for Ombre Bunny Rosette Cake
-
Color Fusion: Start with the lightest shade at the bottom and gradually work your way to the darkest at the top. This enhances the beautiful ombre effect you desire.
-
Frosting Consistency: Ensure your buttercream frosting is the right viscosity—too runny will disrupt the rosette shape, while too stiff won’t pipe smoothly.
-
Chilling is Key: Don’t skip refrigerating the base layer before decorating. This step helps achieve a clean application and prevents the frosting from slipping.
-
Piping Precision: Use a star tip when piping rosettes for a classic look. Practicing on parchment paper first can boost your confidence and technique.
-
Transportation Tip: When moving your Ombre Bunny Rosette Cake, use a sturdy cake carrier to prevent decorations from being damaged.
-
Final Touch-Up: Keep some extra frosting on hand for touch-ups after transporting your cake. It’s a great way to address any minor bumps or nicks.
Ombre Bunny Rosette Cake Recipe FAQs
What type of cake mix should I use for the Ombre Bunny Rosette Cake?
You can use any cake mix flavor you like, such as vanilla, chocolate, or funfetti! If you’re looking for a gluten-free option, I recommend choosing a gluten-free cake mix to maintain that fluffy texture while accommodating dietary needs.
How long can I store the Ombre Bunny Rosette Cake?
Store your cake covered in a cool, dry place for up to 2 days if you are keeping it at room temperature. If you’ve used cream-based frosting, refrigerate it for up to 5 days. Just be sure to wrap it well, so it doesn’t absorb any refrigerator odors!
Can I freeze leftovers of the Ombre Bunny Rosette Cake?
Absolutely! To freeze your cake, wrap it tightly in plastic wrap, then cover it in aluminum foil. It can last in the freezer for up to 3 months. When you’re ready to enjoy it again, just thaw it overnight in the refrigerator.
How do I prevent my frosting from sliding off the cake?
To keep that beautiful frosting in place, be sure to chill the base layer after applying the crumb coat for about 30 minutes. This sets the frosting and helps maintain neat layers. Additionally, sturdy piping and the right frosting consistency can make a huge difference!
Are there any dietary considerations for the Ombre Bunny Rosette Cake?
Definitely! You can easily make this cake dairy-free by using dairy-free butter alternatives in both the cake and frosting. For vegan options, you can replace eggs with applesauce and heavy cream with coconut cream. Just make sure to choose suitable decorations to match your dietary preferences.
What should I do if the rosettes are not holding their shape?
If your rosettes aren’t maintaining their shape, this could be due to the frosting being too warm or runny. Be sure your butter and sugar are adequately mixed, and consider chilling the frosting for a little while before piping. If it’s too stiff, add a teaspoon of cream or milk.
Ombre Bunny Rosette Cake: A Sweet Easter Showstopper!
Ingredients
Equipment
Method
- Preheat your oven to 350°F (175°C) and prepare the cake mix according to the package instructions, mixing in eggs, vegetable oil, and water or milk until smooth. Pour the batter into bunny-shaped or traditional cake pans, filling them about two-thirds full.
- Bake in the preheated oven for 25-30 minutes, or until a toothpick inserted in the center comes out clean. Once baked, let the cakes cool in the pans for 10 minutes before transferring them to a wire rack to cool completely.
- In a large mixing bowl, beat together softened butter and powdered sugar until light and fluffy, about 3-5 minutes. Gradually add heavy cream while mixing until you achieve a smooth, spreadable consistency.
- Divide the frosting into separate bowls and tint each with gel food coloring, creating several shades that complement the delightful ombre effect you desire for your cake.
- Once the cakes are completely cooled, level the tops with a knife if necessary. Place one cake layer on a cake stand and spread a generous layer of the lightest colored frosting on top.
- Carefully place the second cake layer on top and cover the entire cake with a thin layer of the same light frosting to create a base coat, which will act as a crumb barrier. Chill the cake in the refrigerator for about 30 minutes to set this layer.
- Use a piping bag fitted with a star tip to pipe rosettes of the medium and darker frosting shades onto the sides and top of the cake, starting at the bottom and working your way up, alternating colors.
- Embellish your cake further by adding shredded coconut to the sides to mimic bunny fur and use candy decorations for eyes and ears on top.
- Sprinkle edible glitter or colorful sprinkles on the cake’s surface to add a festive sparkle. Let the decorations set for a brief moment before chilling your finished cake in the fridge for 30 minutes.
- Once set, slice the cake into pieces and serve on decorative plates, delighting in the smiles it brings.
Leave a Reply