
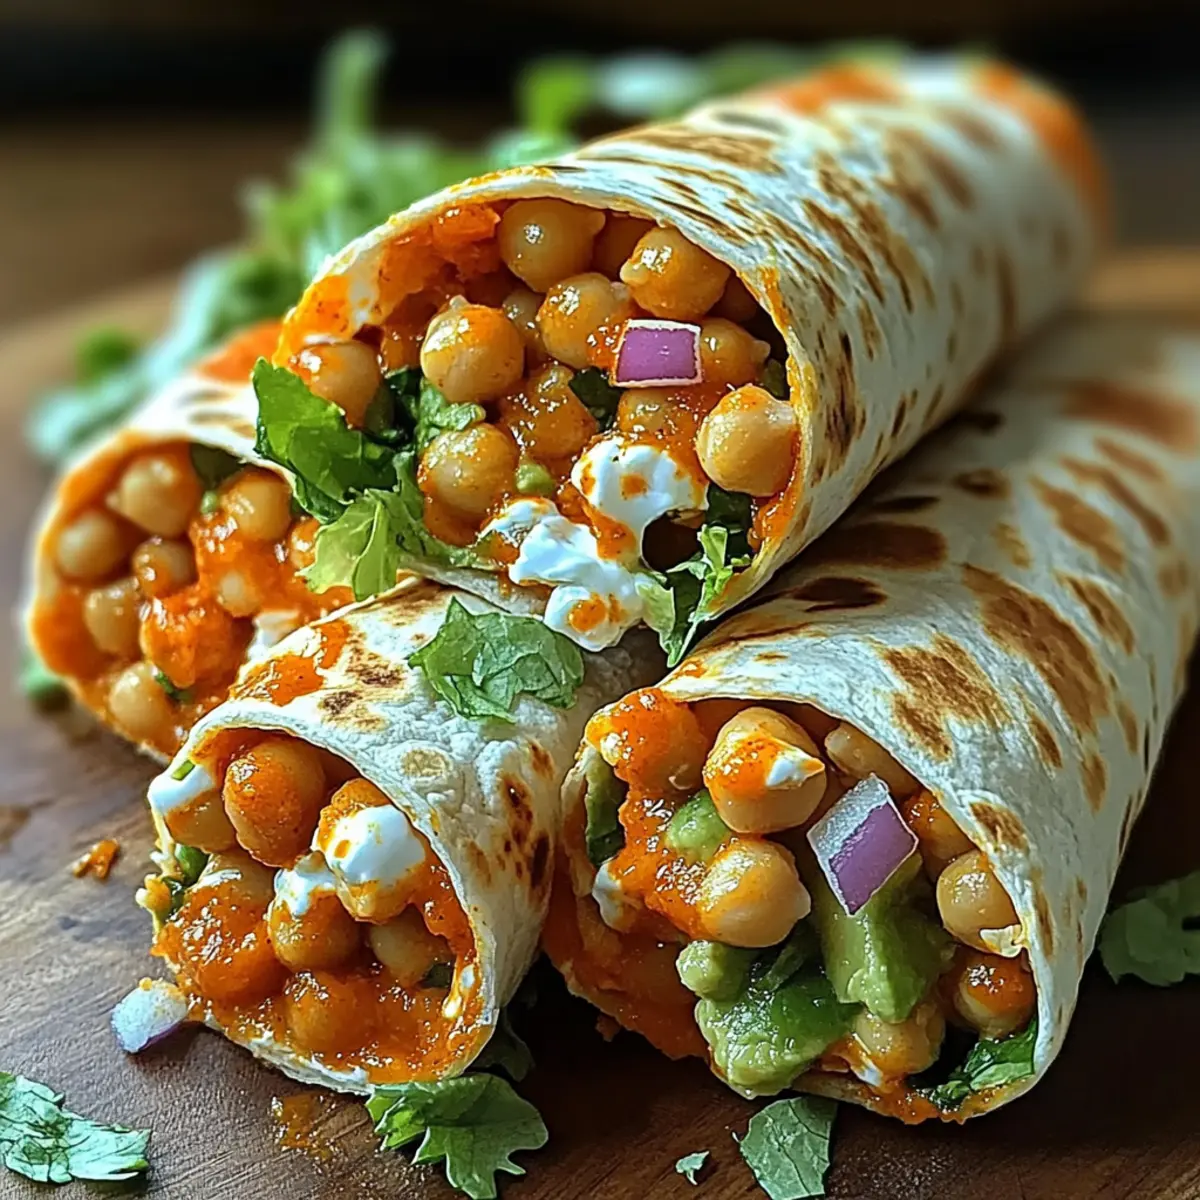
In the heart of a bustling kitchen, I overheard a friend lamenting their cravings for something satisfying yet healthy. That’s when the idea struck me: Spicy Buffalo Chickpea Wraps! Merging the fiery kick of Buffalo wings with hearty chickpeas, this recipe presents a delightful plant-based twist that’s not only quick to whip up but also packed with protein. Perfect for those mornings when you’re craving a burst of flavor, these wraps can be pulled together in under 45 minutes. As a bonus, they’re completely vegan and gluten-free, ensuring everyone can savor their goodness. Whether you’re gearing up for brunch with friends or simply looking to spice up your lunch routine, these wraps are bound to become a staple in your home. Ready to dive into this vibrant recipe and discover endless serving suggestions? Let’s get cooking!
Why Are These Wraps So Irresistible?
Bold flavors: The tangy Buffalo sauce marries perfectly with crispy chickpeas for a taste explosion.
Quick prep time: In just 45 minutes, you can whip up a delicious and nutritious meal.
Vegan-friendly: This recipe is completely plant-based, catering to health-conscious eaters and vegans alike.
Versatile: Swap ingredients easily—try roasted cauliflower or tempeh for a different texture!
Crowd-pleaser: These wraps are bound to impress at any gathering, just like my Buffalo Chicken Sliders.
Healthy twist: Packed with protein, they’re a filling choice without compromising on flavor!
Spicy Buffalo Chickpea Wraps Ingredients
For the Chickpeas
• Chickpeas – The hearty base of the wrap that’s full of plant protein; make sure to pat them dry for a crispy finish.
• Olive Oil – Essential for roasting the chickpeas to a golden, crunchy perfection.
• Smoked Paprika – Adds a delightful smoky flavor that enhances the overall taste.
• Garlic Powder – Provides savory depth to the chickpeas, making every bite flavorful.
For the Buffalo Sauce
• Buffalo Sauce – Infuses that signature spicy, tangy flavor; feel free to adjust the heat level to your liking!
• Vegan Butter – Helps to mellow the spiciness while adding a rich finish to the sauce.
• Maple Syrup – A touch of sweetness to balance the heat of the Buffalo sauce.
For the Wraps
• Whole Wheat Tortillas – A wholesome wrap that holds the filling beautifully; gluten-free tortillas can be pleasant for sensitive diets.
• Fresh Lettuce – Introduces a crunchy, refreshing layer to each wrap.
• Tomatoes – Adds juiciness and a bit of acidity that enhances the flavors.
• Red Onion – Offers a sharpness and crunch, a perfect contrast to the creamy ingredients.
• Avocado – Acts as a creamy spread, toning down the spice; season it with lime and salt for more flavor!
These Spicy Buffalo Chickpea Wraps are not just delicious; they’re packed with nutrients and bursting with flavor!
Step‑by‑Step Instructions for Spicy Buffalo Chickpea Wraps
Step 1: Preheat the Oven
Begin by preheating your oven to 400°F (200°C). This temperature ensures that your chickpeas will roast to golden perfection. Set out a large baking sheet lined with parchment paper to prevent sticking and for easy cleanup later.
Step 2: Prepare the Chickpeas
Thoroughly drain and rinse your chickpeas, then pat them dry using a clean kitchen towel. In a mixing bowl, toss the chickpeas with olive oil, smoked paprika, garlic powder, and a pinch of salt until evenly coated. This step is crucial for achieving that crunchy texture when you roast them.
Step 3: Roast the Chickpeas
Spread the seasoned chickpeas in a single layer on the prepared baking sheet. Roast them in the preheated oven for 20-25 minutes, stirring halfway through. You’ll know they’re done when they appear crispy and golden brown—this is when the magic happens for your Spicy Buffalo Chickpea Wraps!
Step 4: Make the Buffalo Sauce
While the chickpeas are roasting, prepare the Buffalo sauce. In a small saucepan over low heat, whisk together hot sauce, melted vegan butter, and maple syrup until well combined. Allow the sauce to warm gently, letting the flavors meld together—a delightful aroma will tell you it’s ready!
Step 5: Warm the Tortillas
To ensure your tortillas are pliable for wrapping, heat a dry skillet over medium heat. Warm each tortilla for about 30 seconds on each side, just until you see small bubbles forming. This simple step elevates your Spicy Buffalo Chickpea Wraps by preventing them from cracking when you fill and roll them.
Step 6: Assemble the Wraps
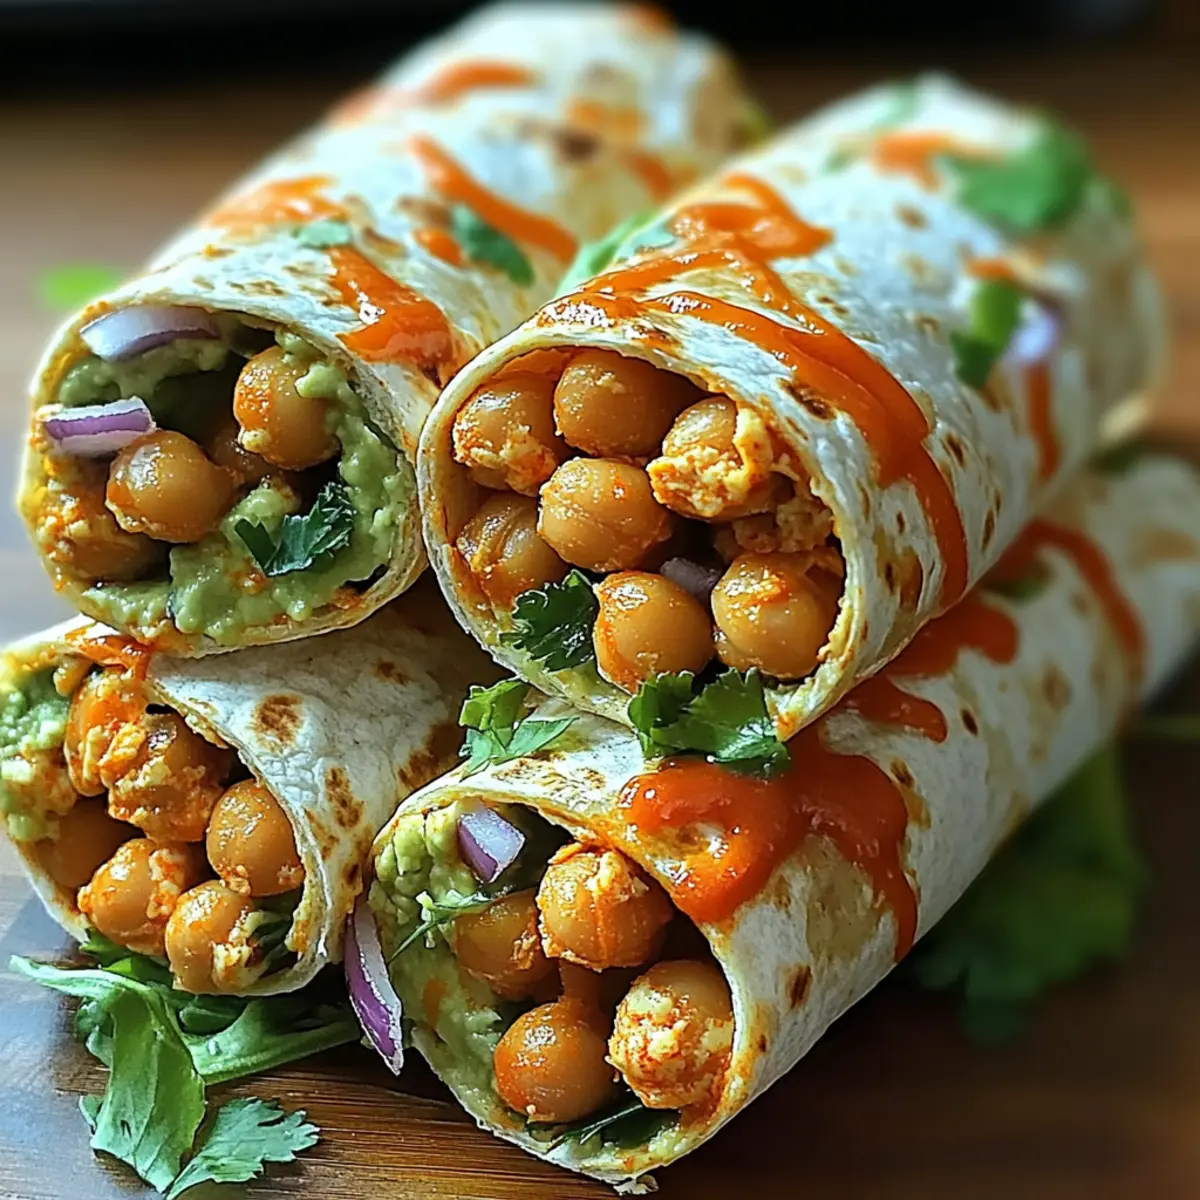
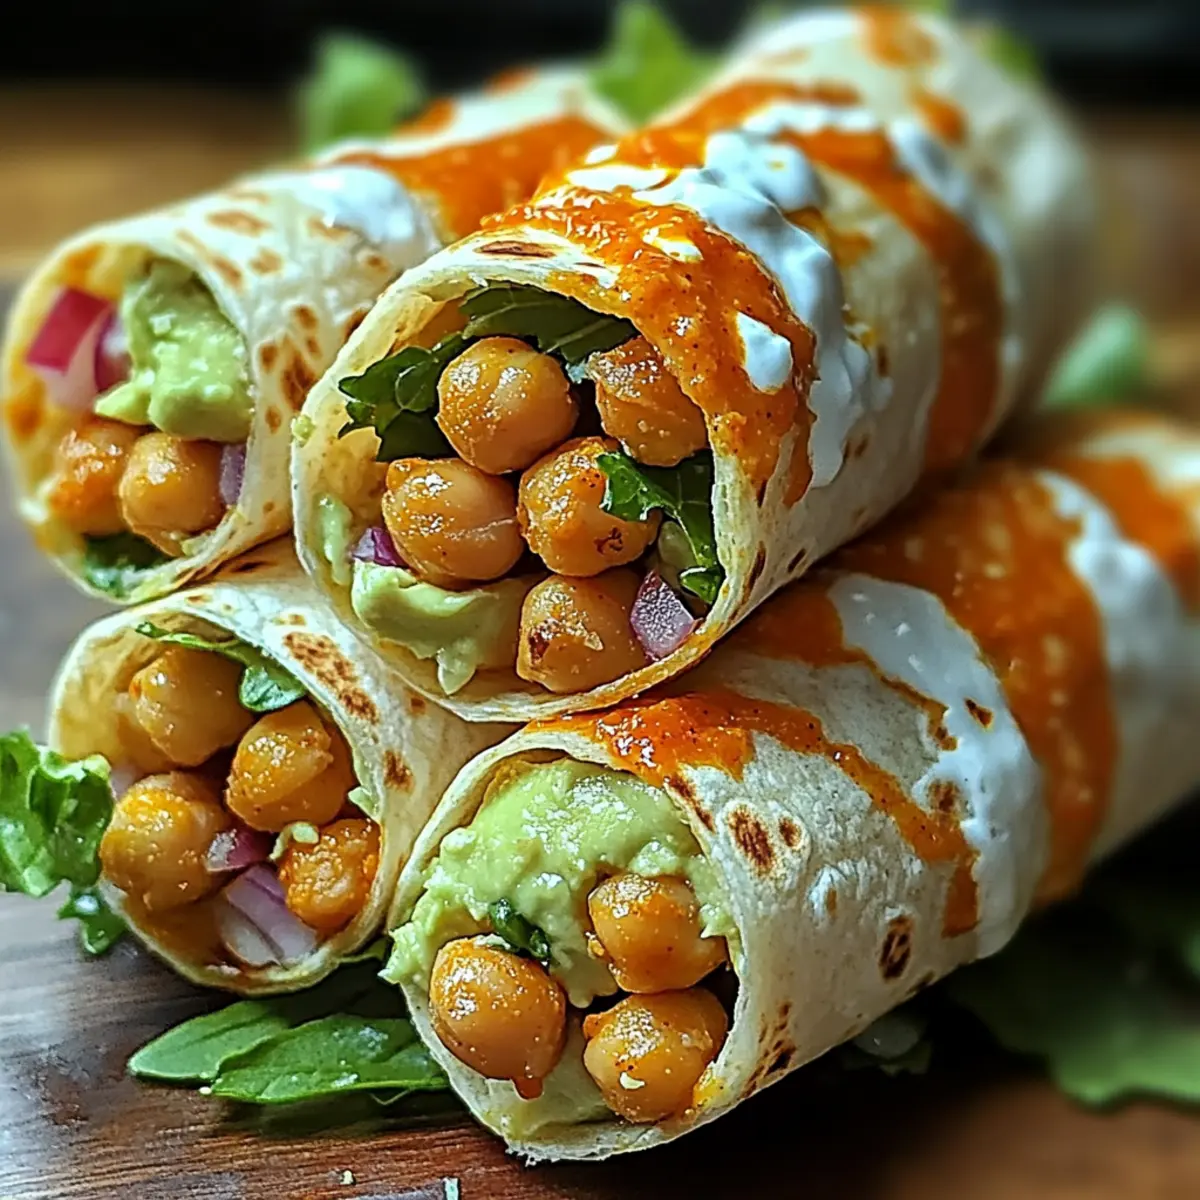
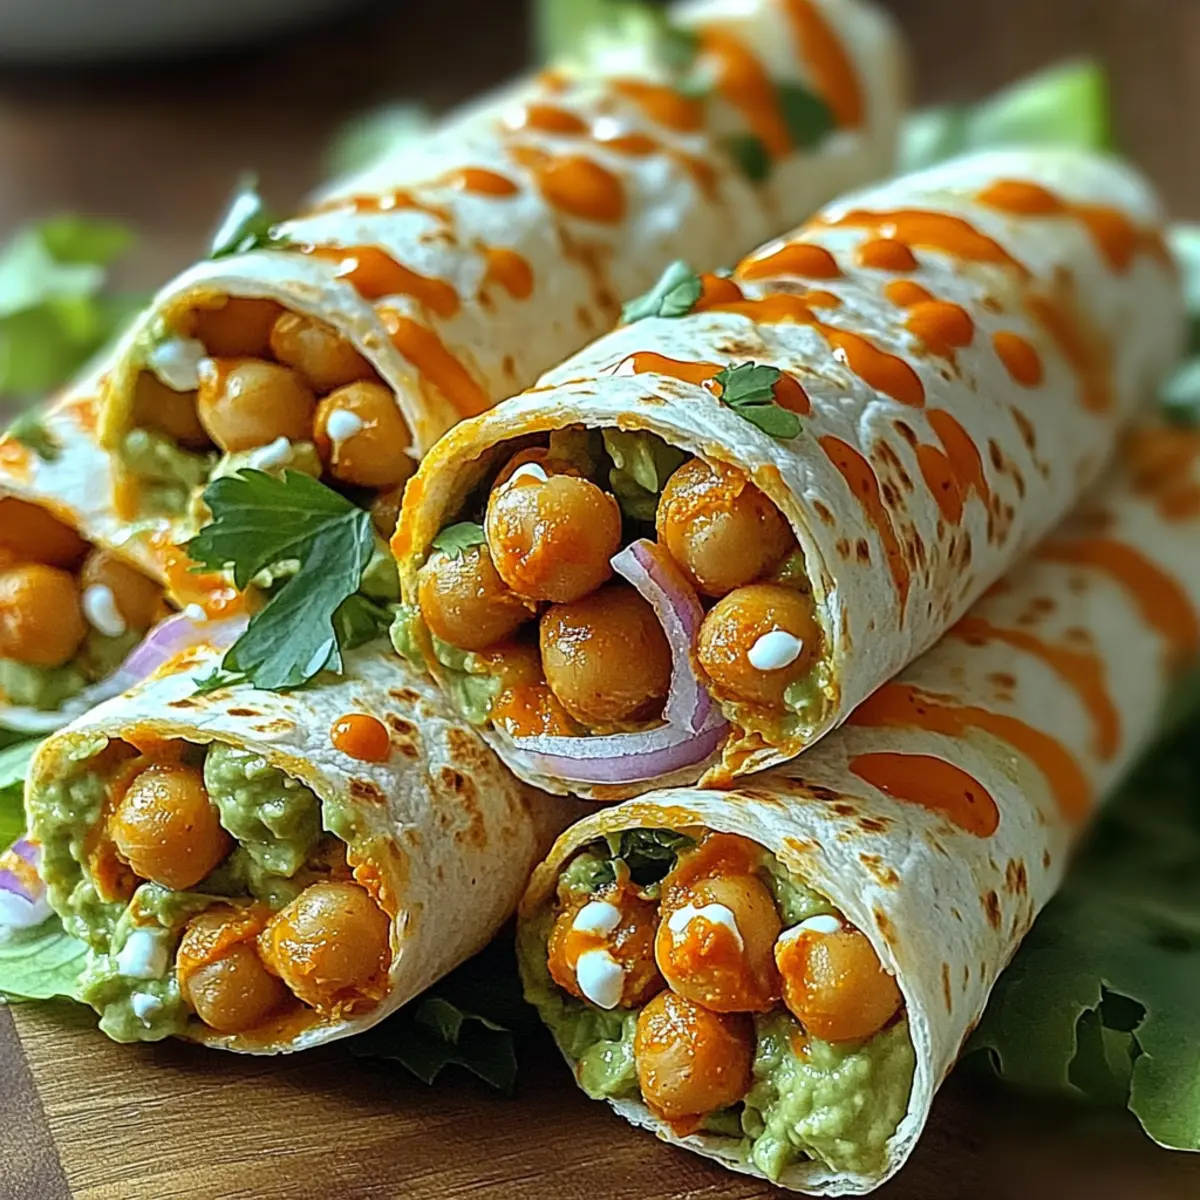
Once everything is ready, spread a generous layer of mashed avocado onto the center of each warm tortilla. Next, layer with fresh lettuce, juicy tomatoes, thinly sliced red onion, and the crispy roasted chickpeas. This combination creates a colorful and inviting filling that’s sure to excite your taste buds.
Step 7: Roll and Serve
Carefully roll each tortilla tightly around the filling to keep everything inside. If desired, you can cut the wraps in half for easier handling. Serve immediately, enjoying these Spicy Buffalo Chickpea Wraps fresh while the flavors are vibrant and the chickpeas are still warm and crispy.
How to Store and Freeze Spicy Buffalo Chickpea Wraps
Fridge: Store leftover wraps in an airtight container for up to 3 days. To maintain crispiness, it’s best to keep the filling and tortillas separate if possible.
Freezer: For longer storage, freeze the filling separately in a freezer-safe bag for up to 2 months. When ready to enjoy, simply reheat the filling in a skillet and assemble with fresh veggies.
Reheating: To reheat, place the filling in a skillet over medium heat until heated through. Then, wrap in warmed tortillas for the ultimate Spicy Buffalo Chickpea Wraps experience!
Make Ahead Options
These Spicy Buffalo Chickpea Wraps are a fantastic choice for meal prep, saving you precious time during busy days! You can roast the chickpeas and prepare the Buffalo sauce up to 3 days in advance, allowing the flavors to deepen. Simply store the roasted chickpeas and sauce separately in airtight containers in the refrigerator. The wraps can be assembled right before serving; warm the tortillas in a skillet and layer on fresh ingredients such as avocado, lettuce, and tomatoes. For the best quality, assemble the wraps just prior to enjoying them to keep everything fresh and crisp—this way, you’ll have a satisfying and delicious meal ready in minutes!
Spicy Buffalo Chickpea Wraps Variations
Feel free to get creative and adapt these wraps to suit your taste buds!
- Cauliflower Swap: Substitute chickpeas with roasted cauliflower for a deliciously different texture and flavor.
- Milder Sauce: For gentler heat, opt for a non-spicy hot sauce or simply add a splash of apple cider vinegar for tang without the burn.
- Creamy Twist: Replace the avocado spread with a tahini-lemon sauce for a nutty flavor that pairs beautifully with the spiced chickpeas.
- Crunchy Seeds: Add toasted pumpkin seeds on top for an extra crunch that elevates the texture of each bite.
- Bold Toppings: Enhance your wraps with grilled bell peppers or spicy jalapeños for an extra punch of flavor and vibrant color.
- Side Pairing: Serve with a refreshing fruit salad to balance the spice, or pair with a zingy coleslaw for that perfect contrast.
- Feedback Loop: Experiment with different herbs like cilantro or chives in the filling; they’ll add both freshness and personality to your wraps.
- Complete Meal: Turn these wraps into a fun family meal by creating a “wrap bar” with all the fixings—everyone can assemble their dream wrap, just like my tasty Sticky Sesame Chickpeas!
What to Serve with Spicy Buffalo Chickpea Wraps
Create a vibrant meal that tantalizes your taste buds and complements the exciting flavors of your wraps.
-
Creamy Coleslaw: A crunchy, tangy side that adds a refreshing contrast to the spicy wraps, making every bite harmonious and delightful.
-
Sweet Potato Fries: Crispy on the outside and tender inside, these sweet potato fries provide a lovely contrast in texture and a touch of sweetness that balances the heat.
-
Quinoa Salad: A protein-packed, fluffy grain salad mixed with fresh vegetables and a zesty dressing, it brings a nutritious boost to your meal.
Savor every element of the meal by serving the warm wraps with a side of creamy coleslaw, as its crisp texture and coolness perfectly offset the spiciness. Pairing them with sweet potato fries invites a comforting element and makes the meal feel like a feast.
-
Fresh Fruit Salad: Bright and juicy, a mix of seasonal fruits adds a refreshing burst and balances the meal with its natural sweetness.
-
Garlic Breadsticks: Made with whole wheat, these scrumptious, chewy breadsticks are great for mopping up any leftover sauce, providing a satisfying finish.
-
Sparkling Lemonade: This invigorating drink complements the vibrant flavors, delivering a citrusy kick that quenches thirst while enhancing the meal experience.
Expert Tips for Spicy Buffalo Chickpea Wraps
- Crispy Chickpeas: Ensure your chickpeas are thoroughly dried to avoid sogginess; excess moisture leads to a less crunchy wrap.
- Layering Wisely: Start with the avocado spread first on the tortilla, followed by the chickpeas and veggies to keep everything contained and prevent leaks.
- Heat Control: Adjust the level of Buffalo sauce based on your spice preference; you can always add more later to individual servings.
- Roasting Technique: Spread chickpeas in a single layer without overcrowding on the sheet pan; this allows them to roast evenly and get crispy, not steamed.
- Storage Reminder: Store leftover wraps in an airtight container for up to 3 days, but keep the filling and tortillas separate if possible, to maintain freshness.
Spicy Buffalo Chickpea Wraps Recipe FAQs
How do I select the best chickpeas for this recipe?
Absolutely! If using canned chickpeas, go for those labeled as “low sodium” for better control over salt content. For dried chickpeas, choose ones that are whole and intact without any dark spots or blemishes, as these indicate age and possible spoilage. Remember to soak dried chickpeas overnight for the best texture when preparing them.
What is the best way to store leftover wraps?
Very good question! Store any leftover wraps in an airtight container in the fridge for up to 3 days. To ensure the best taste and texture, I recommend separating the filling and tortillas before storage. This keeps the crispy chickpeas crunchy and prevents the tortillas from becoming soggy.
Can I freeze the filling for later use?
Of course! To freeze the filling, allow it to cool completely and then place it in a freezer-safe bag or container. It can be stored for up to 2 months. When you’re ready to enjoy, simply reheat the filling in a skillet over medium heat until hot, then assemble your wraps with fresh ingredients.
What should I do if my chickpeas don’t get crispy?
Great question! If your chickpeas aren’t crisping up, it could be that they weren’t dried thoroughly before roasting or they were overcrowded on the baking sheet. Next time, pat the chickpeas dry really well with a towel before tossing them with oil and spices, and make sure to spread them out in a single layer on the pan. An oven temperature of 400°F is ideal, so keep an eye on them and give them a good stir halfway through roasting.
Are these wraps suitable for people with gluten allergies?
Yes! These delicious Spicy Buffalo Chickpea Wraps can definitely accommodate those with gluten sensitivities. Just substitute the whole wheat tortillas with gluten-free options widely available at most grocery stores. They work beautifully and maintain all the flavors you love about this recipe!
Can I make these wraps spicier?
Absolutely! If you’re craving extra heat, you can add more Buffalo sauce or include hot sauce directly into your avocado spread for a creamy kick. Another option is to sprinkle in some cayenne pepper or red pepper flakes while roasting the chickpeas to enhance the spice level throughout the dish. Enjoy experimenting with heat!
Irresistible Spicy Buffalo Chickpea Wraps You’ll Love
Ingredients
Equipment
Method
- Preheat your oven to 400°F (200°C) and line a large baking sheet with parchment paper.
- Drain and rinse the chickpeas, then pat them dry and toss with olive oil, smoked paprika, garlic powder, and a pinch of salt.
- Spread the chickpeas in a single layer on the baking sheet and roast for 20-25 minutes, stirring halfway through.
- In a small saucepan, whisk together Buffalo sauce, melted vegan butter, and maple syrup over low heat until combined.
- Heat a dry skillet over medium heat and warm each tortilla for about 30 seconds on each side.
- Spread a layer of mashed avocado on each warmed tortilla, and layer with lettuce, tomatoes, red onion, and chickpeas.
- Roll each tortilla tightly around the filling and serve immediately.
Leave a Reply