
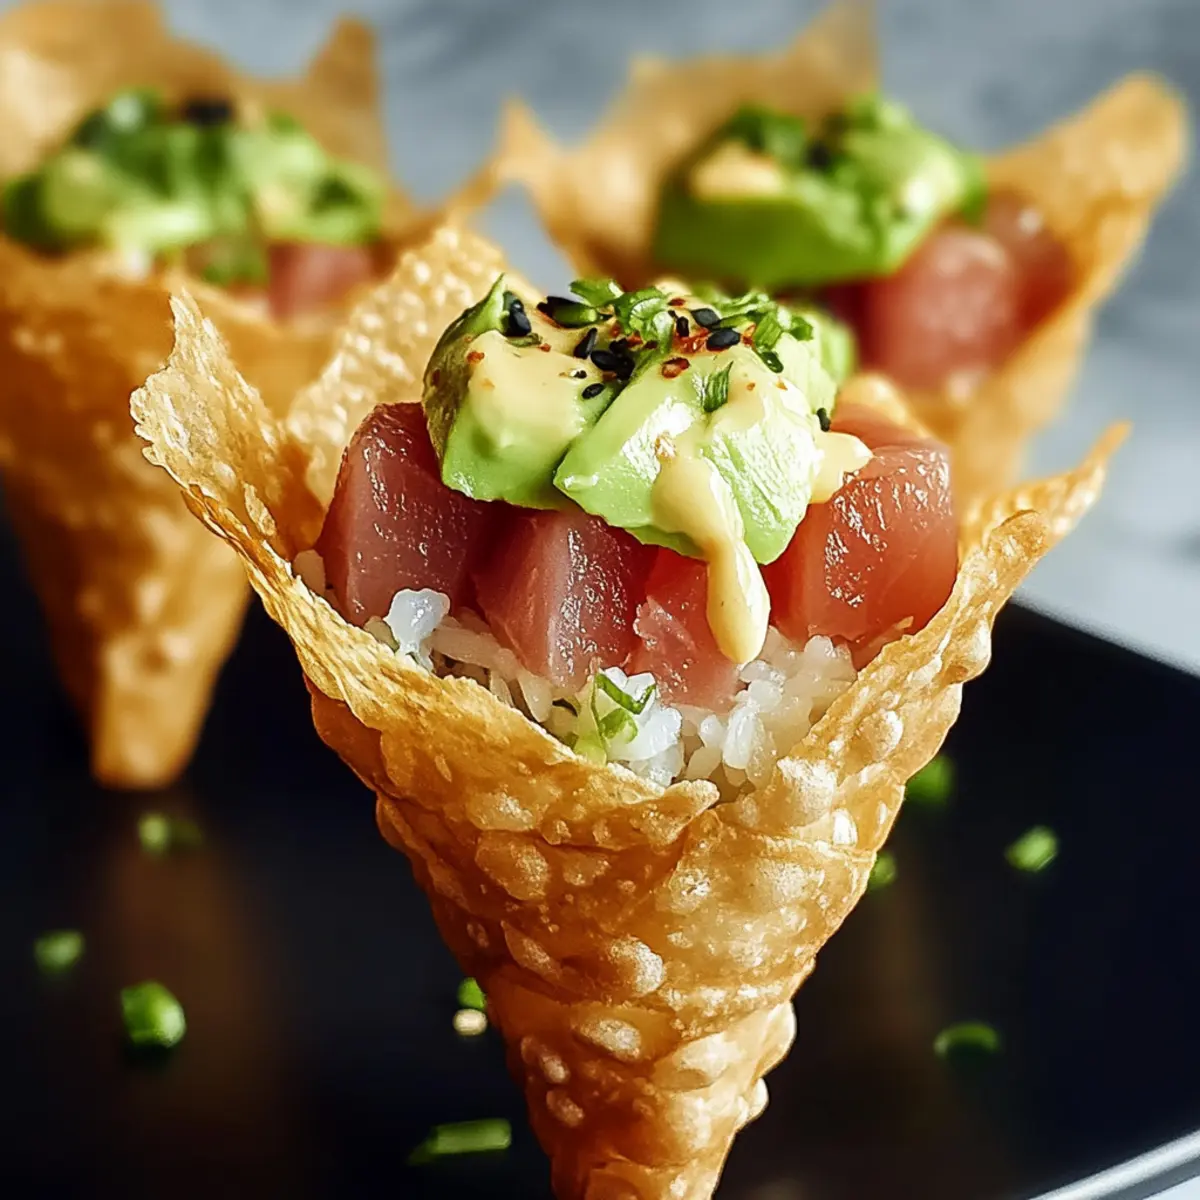
As I bit into the crispy shell of a freshly fried wonton cone, memories of beach picnics and sushi nights flooded back. These Sushi Wonton Cones are the perfect marriage of tradition and innovation, bringing a delightful twist to your favorite sushi experience. With their crunchy exterior and customizable fillings, they’re not only a fun appetizer for gatherings but also quick to whip up when you crave something fresh and handheld. Imagine combining savory sushi-grade tuna, creamy avocado, and perfectly seasoned rice into one delightful bite! Whether you’re a sushi enthusiast or someone looking to impress guests with an interactive dish, these cones tick all the boxes. Which filling will you choose to make your clumsy chopstick days a thing of the past?
Why Are These Wonton Cones So Special?
Crispy Delight: The golden wonton shells offer a satisfying crunch that perfectly complements the creamy and tender fillings inside.
Customizable Options: You can easily switch up the protein or create vegetarian versions, making these cones versatile for any dietary preference.
Interactive Snacking: These handheld treats encourage creativity, allowing your guests to choose their favorite fillings in a fun, engaging way.
Quick Preparation: With simple steps for assembly and frying, these are an easy appetizer that comes together in no time, perfect for last-minute gatherings.
Party Pleaser: Brightly presented and bursting with flavor, these Sushi Wonton Cones are sure to impress—even the pickiest eaters! Whether you want more ideas for savory snacks, check out our snack recipes to keep those taste buds excited!
Sushi Wonton Cones Ingredients
For the Wontons
• Wonton wrappers – Provides a crispy, crunchy base for the cones; can be substituted with rice paper for a gluten-free option.
• Coconut oil (for frying) – Used to fry the cones, offering a crisp texture; can replace with vegetable oil if desired.
For the Sushi Rice
• Sushi rice (short-grain, sticky) – Gives a tender, sticky texture necessary for sushi; regular short-grain rice may work as a substitute.
• Rice vinegar – Enhances flavor by seasoning sushi rice; apple cider vinegar may be a substitute.
• Sugar – Balances the acidity in sushi rice; use honey or agave syrup as an alternative.
• Salt – Enhances overall flavor; no direct substitutes, but adjust to taste.
For the Filling
• Avocado – Adds creaminess and healthy fats; substitute with hummus or silken tofu for a vegan option.
• Tuna steak (sushi-grade) – Provides lean protein; can substitute with salmon or cooked shrimp.
• Kewpie mayonnaise – Adds umami and creaminess; regular mayonnaise can work as an alternative but may differ in flavor.
• Tomato ketchup or sauce – Adds sweetness and tang; can be swapped for sweet chili sauce if desired.
• Sriracha (optional) – Provides heat; can omit or replace with another hot sauce.
• Lime zest – Adds brightness; can use lemon zest as a substitute.
• Furikake or black sesame seeds – Enhances flavor and garnishes; can replace with chopped herbs like cilantro.
These Sushi Wonton Cones are a delightful treat, perfect for any gathering!
Step‑by‑Step Instructions for Sushi Wonton Cones
Step 1: Prepare Wonton Cones
Start by preheating your oil in a deep pan—aim for around 175 °C (350 °F). While the oil warms, take each wonton wrapper and gently wrap it around a cream horn or cone mold, pressing the edges to seal securely. This forms the outer shell for your Sushi Wonton Cones, which will soon become crispy and golden.
Step 2: Heat Oil
Once your oil reaches the target temperature, carefully lower the wrapped wonton cones into the hot oil using tongs. Fry them for about 2-3 minutes until they are golden brown and fully crispy, turning occasionally to ensure even cooking. The sizzling sound will signal that you’re on the right track!
Step 3: Fry Cones
After achieving that perfect golden brown color, use a slotted spoon to remove the cones from the oil, allowing excess oil to drain off. Place them on paper towels to absorb any remaining oil and let them cool while you prepare the filling. You want the cones to maintain their crunch for the ultimate Sushi Wonton Cone experience.
Step 4: Cook Sushi Rice
In a saucepan, combine sushi rice with water and cook until tender, following package directions. Once cooked, transfer the rice to a bowl and let it cool to room temperature. Gently mix in rice vinegar, sugar, and salt, ensuring each grain is seasoned perfectly to enhance the delightful flavors of your Sushi Wonton Cones.
Step 5: Prepare Tuna Mixture
Next, take your sushi-grade tuna and cube or flake it into bite-sized pieces. In a mixing bowl, combine the tuna with Kewpie mayonnaise, tomato sauce, sriracha (if desired), and a sprinkle of lime zest. Taste and adjust the seasoning to match your preference, ensuring a creamy and flavorful filling for your cones.
Step 6: Assemble Cones
Now comes the fun part! Take your cooled wonton cones and fill each one with a layer of seasoned sushi rice, followed by slices of creamy avocado, and a generous scoop of your flavorful tuna mixture. As you fill, take care not to overstuff; this will help keep each Sushi Wonton Cone intact and easy to enjoy.
Step 7: Garnish and Serve
To finish, sprinkle furikake or black sesame seeds atop the filled cones for an extra touch of flavor and visual appeal. Serve your Sushi Wonton Cones upright in mini muffin tins or on a platter for your guests to enjoy. Their engaging presentation makes them perfect for parties, allowing everyone to relish in this delicious handheld treat!

Tips for the Best Sushi Wonton Cones
Frying Temperature: Keep a close eye on the oil temperature; too hot, and the cones burn; too low, and they become greasy. Aim for 175 °C (350 °F) for perfect results.
Prep Ahead: Make your sushi rice and tuna mixture in advance. Just fill the cones just before serving to maintain that delightful crunch of the Sushi Wonton Cones.
Avoid Overstuffing: Be mindful of the filling amount when assembling. Too much can cause the cones to break; a modest scoop ensures stability and easy handling.
Customize Fillings: Feel free to mix and match fillings according to your taste or dietary preferences. Try different proteins like shrimp or tofu for unique variations.
Serve with Style: Present your cones upright in mini muffin tins; it enhances their visual appeal and makes them accessible for guests to grab and enjoy!
Make Ahead Options
These Sushi Wonton Cones are a fantastic meal prep solution for busy home cooks! You can prepare the wonton cones and fry them up to 24 hours in advance, then store them in an airtight container to maintain their crispiness. Additionally, the sushi rice can be cooked and seasoned up to 3 days ahead; just refrigerate it in a sealed container. The flavorful tuna mixture can also be made ahead (up to 2 days) and stored in the fridge. When you’re ready to serve, simply fill the cooled cones with the rice, avocado, and tuna mixture, and you’ll have a delicious appetizer that’s just as delightful as if it were made fresh!
What to Serve with Sushi Wonton Cones
Dive into a world of flavors and complementary tastes that will elevate your Sushi Wonton Cones to new heights!
-
Crispy Tempura Vegetables: These tender, lightly battered and fried veggies add an extra crunch, perfectly balancing the creamy tuna and savory fillings.
-
Light Green Salad: A refreshing mix of greens, avocado, and crisp cucumbers drizzled with sesame dressing will provide a bright contrast to the rich flavors of the cones.
-
Spicy Edamame: Lightly salted and tossed with spicy seasonings, these vibrant beans bring an addictively bold flavor that pairs perfectly with sushi-inspired appetizers.
-
Miso Soup: Warm and comforting, this traditional soup adds a soothing element to your meal, enhancing the umami notes of the tuna and the savory essence of the cones.
-
Chilled Sake: This Japanese rice wine, served cold, naturally complements the flavors of your Sushi Wonton Cones while adding a layer of sophistication to your gathering.
-
Ginger Limeade: The refreshing zing of ginger combined with lime is not only revitalizing but also cuts through the richness of the filling for a pleasing balance.
-
Matcha Cheesecake: End on a sweet note with this creamy dessert featuring earthy matcha, offering a delightful contrast to the savory cones and leaving your guests craving more.
With these pairings, your Sushi Wonton Cones will shine as the star of any gathering!
Sushi Wonton Cones: Fun Variations Await!
Feel free to let your creativity shine as you personalize these delightful cones with unique twists and flavors!
- Vegetarian Delight: Swap out tuna for a mix of roasted vegetables and your favorite sauce for a vibrant vegan option.
- Spicy Kick: For heat lovers, add jalapeños or a generous dollop of kimchi to the tuna mixture for a fiery twist.
- Creamy Avocado Swap: Use silken tofu blended with herbs instead of avocado for a lighter, protein-packed filling.
- Crispy Tempura: Incorporate tempura-battered vegetables in place of shrimp for a satisfying crunch in every bite.
- Flavor Fusion: Try a fusion of flavors by mixing wasabi into Kewpie mayonnaise for an exciting twist on the classic taste.
- Tropical Mango: Add cubed mango along with the tuna for a refreshing sweet-and-savory combination.
- Teriyaki Bliss: Experiment by drizzling teriyaki sauce over your filling for an extra layer of flavor that blends harmoniously with the other ingredients.
- Zesty Lime: A little extra lime juice in your filling can brighten all the flavors, perfectly balancing the richness of the avocado and tuna.
Whether you’re keen on trying out a spicy twist or a refreshing tropical variation, these options will surely elevate your Sushi Wonton Cones experience! For more inspiration, browse our snack recipes or explore ideas for delightful sauces in our sauces section.
How to Store and Freeze Sushi Wonton Cones
Fridge: Store assembled Sushi Wonton Cones in an airtight container for up to 2 hours. If you prepare them in advance, keep the filling separate from the cones to maintain their crispness.
Freezer: Freeze unassembled wonton cones in a single layer on a baking sheet for up to 2 months. Once frozen, transfer to a zip-top bag, ensuring all air is removed to prevent freezer burn.
Reheating: If you’re reheating fried cones from the freezer, bake them in a preheated oven at 190 °C (375 °F) for about 10-12 minutes or until crispy again. Avoid microwaving, as it may make them soggy.
Making Ahead: Prepare filling and sushi rice in advance, keeping them refrigerated for up to 3 days. Assemble the cones just before serving for the ultimate fresh experience!

Sushi Wonton Cones Recipe FAQs
How do I select ripe avocados for my Sushi Wonton Cones?
Absolutely! Look for avocados that slightly yield to gentle pressure, indicating ripeness. Avoid those with dark spots all over or overly mushy areas. If they’re still hard, let them ripen at room temperature for a few days before use.
What is the best way to store leftover Sushi Wonton Cones?
Very! Store any assembled Sushi Wonton Cones in an airtight container for up to 2 hours, as they are best enjoyed fresh. If prepared in advance, keep the filling separate from the cones to maintain their crispness. Alternatively, wrap leftover filling tightly and refrigerate for up to 3 days; enjoy them within that timeframe for the best flavor!
Can I freeze unassembled Sushi Wonton Cones?
Of course! Freeze your unassembled wonton cones by placing them in a single layer on a baking sheet. Once frozen solid (about 2-3 hours), transfer them to a zip-top bag, removing as much air as possible to prevent freezer burn. Enjoy within 2 months for best results.
What if I overstuff my cones?
No worries! If you find that your cones are overflowing, carefully remove some filling and adjust. It’s important to leave enough space at the top to prevent them from breaking or being difficult to handle. A modest scoop of filling not only helps keep the structure but makes eating them much easier too!
Are there any allergy considerations for my Sushi Wonton Cones?
Absolutely! When making substitutions, be mindful of common allergens such as gluten found in wonton wrappers. For a gluten-free option, consider using rice paper. Additionally, if someone has a seafood allergy, you can easily swap tuna for cooked shrimp or tofu. Always check the labels on pre-made sauces like Kewpie mayonnaise to ensure they’re allergy-friendly.
How can I keep the filling fresh while preparing my Sushi Wonton Cones?
Very! To keep your filling fresh, prepare the sushi rice and tuna mixture in advance and refrigerate them in separate containers. Assemble the cones just before serving. This way, you’ll maintain that satisfying crispiness of the wonton shells while ensuring every bite is bursting with flavor!

Sushi Wonton Cones: Easy Handheld Snacks for Any Party
Ingredients
Equipment
Method
- Prepare Wonton Cones: Preheat oil in a deep pan to around 175 °C (350 °F). Wrap wonton wrappers around a cream horn or cone mold, sealing edges securely.
- Heat Oil: Lower wrapped cones into hot oil with tongs. Fry for 2-3 minutes until golden brown, turning occasionally.
- Fry Cones: Remove cones with a slotted spoon and drain on paper towels. Let cool while preparing filling.
- Cook Sushi Rice: Combine sushi rice with water in a saucepan. Cook until tender, then mix in vinegar, sugar, and salt.
- Prepare Tuna Mixture: Cube or flake sushi-grade tuna and mix with Kewpie mayo, tomato sauce, sriracha (if using), and lime zest. Adjust seasoning to taste.
- Assemble Cones: Fill wonton cones with sushi rice, slices of avocado, and the tuna mixture, avoiding overstuffing.
- Garnish and Serve: Sprinkle furikake or black sesame seeds on top. Serve upright in mini muffin tins or on a platter.
Leave a Reply