
Walking through the bustling streets of my childhood, the scent of sweet bananas always brings back fond memories of family gatherings and laughter. If you’re in search of a quick dessert that strikes that perfect nostalgic chord, look no further than these Mini Banana Pudding Cups. They’re the ultimate comfort food, featuring creamy layers of vanilla pudding, ripe bananas, and a satisfying crunch of Nilla wafers, making each bite a delightful experience. Plus, they’re incredibly easy to whip up and impressive enough to wow your guests at any get-together. Whether you enjoy them as an everyday treat or dress them up for a special occasion, these no-bake cups are sure to bring joy to your table. What’s your favorite way to reinvent classic desserts?
What makes these Mini Banana Pudding Cups special?
Nostalgic Flavors: Indulge in the classic taste of banana pudding, transforming it into a fun, individual dessert.
No-Bake Convenience: Perfect for busy days, these cups require minimal effort while delivering maximum satisfaction.
Customization Options: Easily adapt the recipe with seasonal fruits or alternative cookies to suit your taste.
Crowd-Pleasing Delight: Serve these at gatherings; their charming presentation will impress both kids and adults alike!
Quick Preparation: Whip up these indulgent treats in under 30 minutes—perfect for spontaneous cravings or last-minute entertaining.
Mini Banana Pudding Ingredients
• Get ready for delightful layers!
For the Pudding
- Vanilla Pudding – This creamy base sets the stage for your Mini Banana Pudding Cups; feel free to use instant pudding for a quicker version.
- Milk – Essential for preparing the pudding; opt for whole or plant-based milk for a rich texture.
For the Layering
- Ripe Bananas – Adds sweetness and a fresh fruitiness; toss slices in lemon juice to keep them vibrant.
- Nilla Wafers – Provides a delightful crunch and vanilla flavor; substitute with any vanilla cookies or graham crackers for a unique twist.
For the Topping
- Whipped Cream (optional) – A luscious topping that adds richness and an elegant finish to your Mini Banana Pudding Cups.
- Cinnamon (optional) – Sprinkle between layers for a warm, spiced flavor that elevates the dessert experience.
Step‑by‑Step Instructions for Mini Banana Pudding Cups
Step 1: Prepare Layering Cups
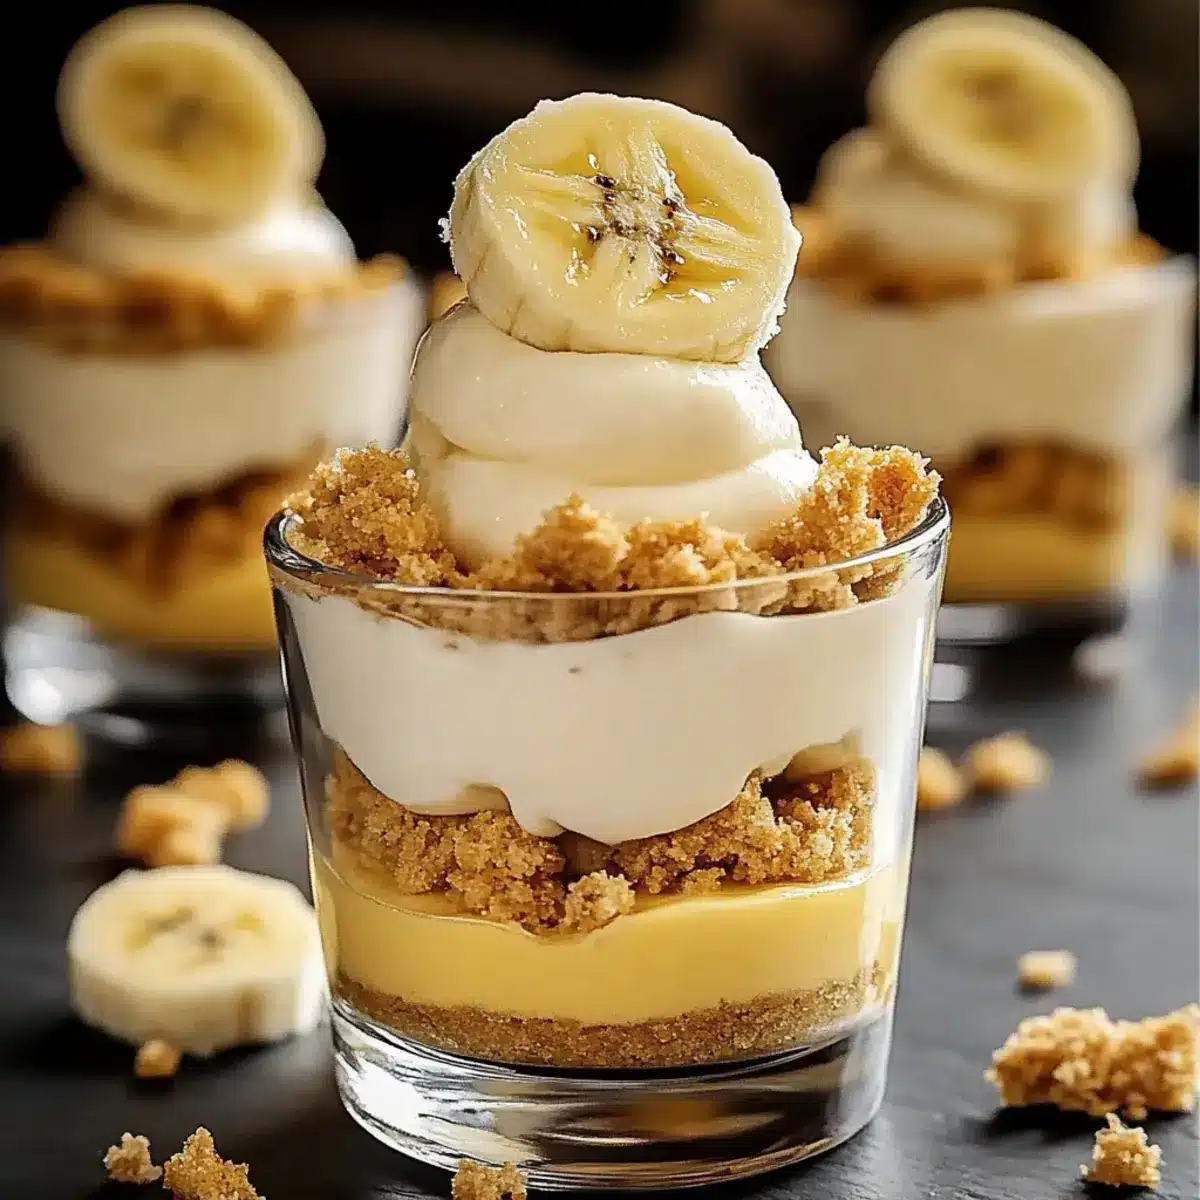
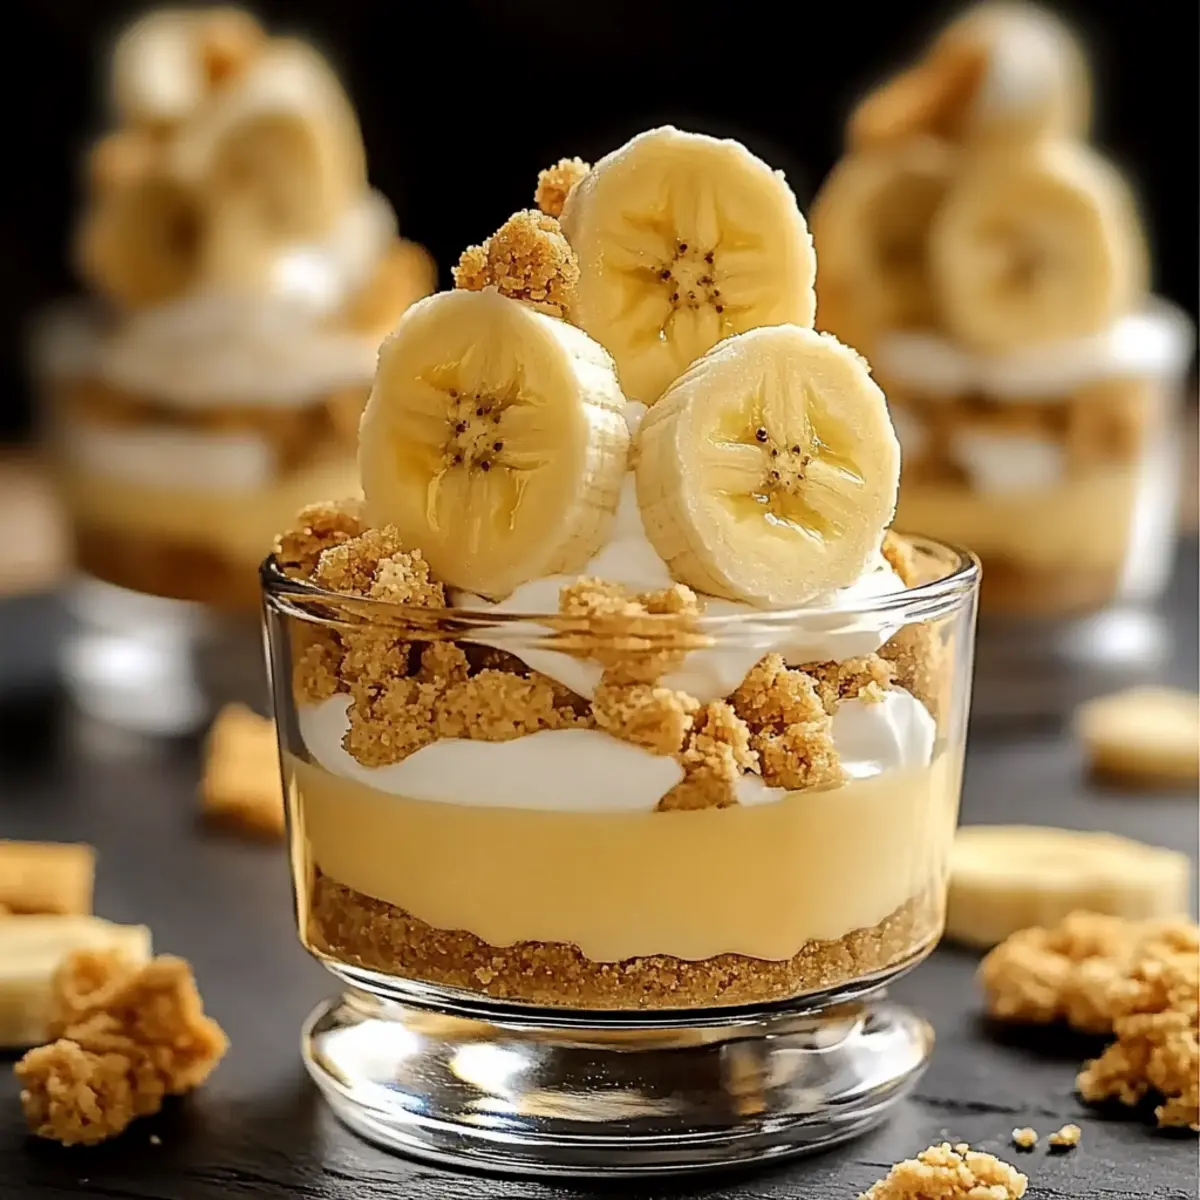
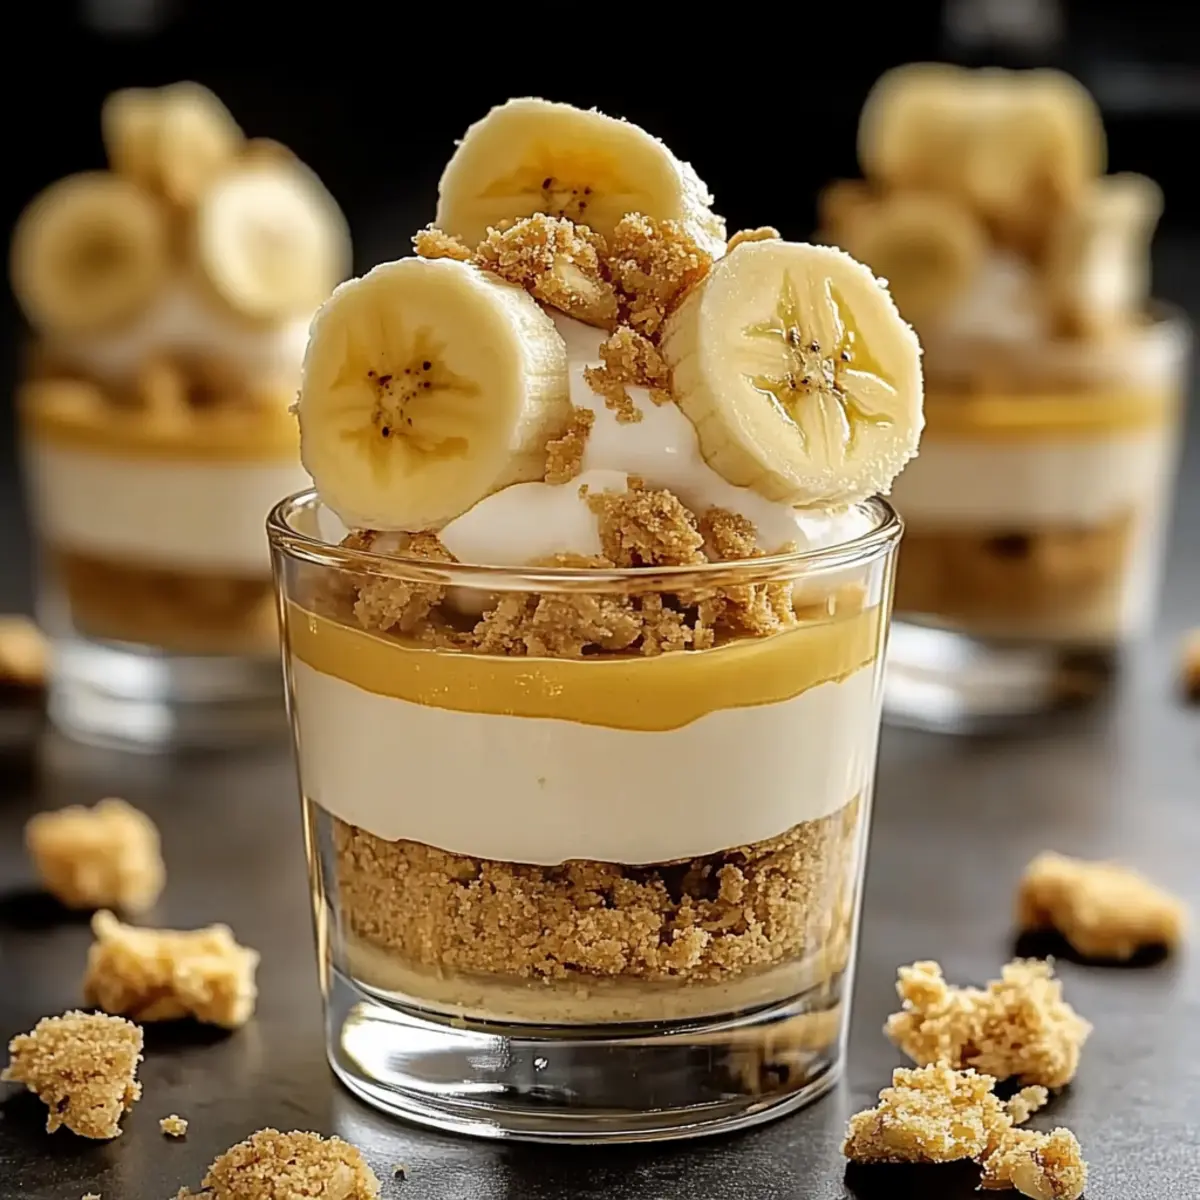
Gather small cups or glasses to serve as your vessels for the Mini Banana Pudding Cups. Ensure they are clean and dry. Clear cups work wonders for showcasing the beautiful layers you’ll create. Place the cups on a stable surface, ready to be filled with creamy layers of pudding and fresh banana slices.
Step 2: Make Vanilla Pudding
In a mixing bowl, combine your vanilla pudding mix with the milk according to package instructions, whisking until smooth and well-blended. Allow the pudding to thicken for about 5 minutes at room temperature before using it. You’ll notice a creamy consistency that gives the pudding its luscious texture; this will be your base layer.
Step 3: Layer Vanilla Pudding
Spoon a generous layer of the prepared vanilla pudding into each cup, filling them about one-third full. Use the back of your spoon to smooth the pudding evenly across the bottom of the cups, allowing it to settle nicely. A good visual cue is to level off the pudding so it creates a solid foundation for the layers ahead.
Step 4: Add Bananas
Carefully slice ripe bananas into even rounds and place a layer of banana slices on top of the vanilla pudding in each cup. Aim for an even distribution, ensuring that all cups have a similar amount of bananas. The yellow slices should be visible, creating a vibrant contrast against the white pudding and infusing a sweet aroma.
Step 5: Sprinkle Crushed Nilla Wafers
Crush Nilla wafers into small pieces using a zip-top bag and a rolling pin or by hand. Sprinkle a crunchy layer of crushed Nilla wafers over the bananas in each cup. This layer adds texture and flavor, creating a delightful bite. The additional crunch will balance the softness of the pudding and bananas beautifully.
Step 6: Repeat Layers
Continue layering by adding another scoop of vanilla pudding over the crushed wafers, followed by another layer of banana slices. Repeat this process until your cups are filled, finishing with a layer of pudding at the very top. Make sure each layer is even and visually appealing for a stunning presentation of your Mini Banana Pudding Cups.
Step 7: Finish with Pudding
Top each cup with a final layer of vanilla pudding, smoothing it out to ensure a nice finish. If desired, add a dollop of whipped cream on top for an extra touch of indulgence. This layer enhances the dessert’s richness and adds a beautiful, fluffy texture that complements the other ingredients.
Step 8: Chill
Cover the filled cups with plastic wrap and place them in the refrigerator for at least one hour to chill and set. This step allows the flavors to meld together while ensuring the layers hold their structure. Once chilled, the Mini Banana Pudding Cups are ready to serve and will look invitingly delicious!

What to Serve with Mini Banana Pudding Cups
Elevate your dessert experience with delightful accompaniments that perfectly complement the creamy sweetness of these charming cups.
-
Fresh Berries: A mix of strawberries, raspberries, and blueberries adds a pop of flavor and vibrant color, brightening each spoonful of pudding.
-
Tropical Fruit Salad: Combine pineapple, mango, and kiwi for a refreshing side; this fruity medley brings a zing that harmonizes beautifully with the dessert’s creaminess.
-
Light Sweet Tea: Serve a chilled glass of sweet tea infused with mint to balance the dessert’s richness, providing a refreshing contrast after each bite.
-
Chocolate-Dipped Biscotti: The crunchy texture and cocoa notes of biscotti create an elegant pairing with the soft layers of pudding, offering a delightful contrast.
-
Coconut Fluff: A light coconut cream on the side complements the banana flavors, adding a tropical twist that enhances the nostalgic feel of the dessert.
-
Sparkling Lemonade: This fizzy drink brightens the palate and adds a citrus tang that lifts the rich flavors of the Mini Banana Pudding Cups, making every bite feel special.
-
Caramel Drizzle: A sweet caramel sauce served on the side allows guests to customize their cups, adding an extra layer of indulgence and decadence.
Your table will be filled with warmth and joy as guests enjoy these comforting dessert pairings, transforming your gathering into a memorable occasion!
Make Ahead Options
These Mini Banana Pudding Cups are ideal for meal prep, allowing you to savor the delightful flavors without the last-minute rush! You can prepare the vanilla pudding and layer it with Nilla wafers up to 24 hours in advance, simply refrigerating the cups to keep everything fresh. However, slice the bananas just before serving (or toss them in lemon juice) to prevent browning. When you’re ready to enjoy your delicious dessert, finish by adding fresh banana slices on top, followed by a dollop of whipped cream for that charming touch. This way, you’ll maintain the dessert’s irresistible creamy texture and vibrant flavors while saving valuable time on busy days!
Mini Banana Pudding Cups Variations
Feel free to tweak these delightful Mini Banana Pudding Cups to suit your taste and cravings!
- Seasonal Twist: Substitute ripe bananas with fresh strawberries or peaches for a fruity twist that’s vibrant and refreshing. Seasonal fruits add a bright touch that changes the dessert vibe beautifully.
- Chocolate Delight: Replace vanilla pudding with rich chocolate pudding for a decadent twist that chocolate lovers will adore. This creates a luxurious dessert experience, reminiscent of chocolate-covered bananas!
- Cookie Swap: Use almond biscotti or graham crackers in place of Nilla wafers for unexpected flavor and texture. The unique crunch adds an exciting dimension to each cup.
- Nutty Addition: Incorporate chopped walnuts or pecans between the layers for a delightful crunch and nutty richness. This variation brings a satisfying element of surprise to each bite!
- Coconut Cream: Top the pudding layer with unsweetened shredded coconut for a tropical flair that complements the bananas beautifully. It adds a lovely chewiness and enhances the dessert’s overall flavor.
- Dairy-Free Option: Use coconut or almond milk along with plant-based pudding for a delightful dairy-free dessert. This swap keeps the creamy texture while catering to different dietary needs.
- Spicy Kick: Add a dash of cinnamon or nutmeg to your pudding mix for a warm, spiced flavor that elevates the dessert. These spices give the pudding a cozy essence reminiscent of homemade treats from childhood.
- Mini Cheesecake Twist: Swap the vanilla pudding with cheesecake filling for a richer, creamier layer that gives the cups a delightful cheesecake vibe. This will definitely impress everyone at the table!
If you love creative adaptations as much as I do, you might also enjoy these Banana Chocolate Chip and Cauldron Cookie Cups. Enjoy crafting your personal version of these charming cups!
Expert Tips for Mini Banana Pudding Cups
- Layering Technique: Start with pudding first, then bananas, followed by Nilla wafers. Proper layering prevents sogginess and ensures every bite is delicious!
- Prevent Browning: Toss banana slices in lemon juice before layering to keep them fresh and vibrant-looking in your Mini Banana Pudding Cups.
- Make Ahead: Prepare these cups a day in advance! Chilling overnight enhances flavor and consistency, making them a perfect make-ahead dessert.
- Presentation Matters: Use clear cups to show off the beautiful layers—it’s as much about looks as it is about taste!
- Customize Wisely: Feel free to switch out Nilla wafers with your favorite vanilla cookies, but ensure they provide the same crunchy texture.
- Whipped Cream Finishing Touch: Don’t skip the whipped cream; it adds a luxurious finish to your already delightful Mini Banana Pudding Cups!
How to Store and Freeze Mini Banana Pudding Cups
Fridge: Store Mini Banana Pudding Cups in the refrigerator for up to 3 days. Cover each cup with plastic wrap to prevent the bananas from browning and maintain freshness.
Freezer: While it’s best to consume these cups fresh, you can freeze them for up to 1 month. Ensure the cups are well-sealed or placed in airtight containers.
Reheating: These cups are best enjoyed chilled and do not require reheating. Simply thaw in the fridge if frozen before serving.
Serving Tip: Always garnish with additional whipped cream and Nilla wafers just before serving for that fresh, delightful touch!
Mini Banana Pudding Cups Recipe FAQs
What type of bananas should I use for my Mini Banana Pudding Cups?
Absolutely! Use ripe bananas for the best sweetness and flavor. Look for bananas that are slightly speckled with brown spots, indicating they’re sweet and soft. You can prevent browning by tossing the sliced bananas in a little lemon juice before layering them in your cups.
How long can I store Mini Banana Pudding Cups in the refrigerator?
You can keep your delicious Mini Banana Pudding Cups in the refrigerator for up to 3 days. Make sure to cover them with plastic wrap to keep the bananas from browning and to maintain the creamy texture of the pudding.
Can I freeze Mini Banana Pudding Cups?
While it’s best to enjoy these cups fresh, you can freeze them for up to 1 month. To do this, ensure each cup is sealed tightly or placed in airtight containers. When you’re ready to enjoy them, thaw them in the refrigerator overnight before serving.
What can I do if my pudding doesn’t thicken properly?
Very! If you find that your pudding isn’t thickening as expected, it might be due to the mixing process. Make sure to whisk the pudding mix and milk thoroughly and allow it to sit undisturbed for about 5 minutes. If it still seems runny, you can mix in a little cornstarch dissolved in cold milk to help thicken it as you reheat it gently on the stove.
Are Mini Banana Pudding Cups safe for kids and those with nut allergies?
Yes! Mini Banana Pudding Cups are generally safe for kids and can easily be made nut-free if you ensure that your pudding mix, cookies, and any additional toppings don’t contain any nuts. Always check labels for allergen information to be safe.
Can I make these Mini Banana Pudding Cups a day in advance?
Definitely! In fact, I recommend preparing them a day ahead. Chilling allows the flavors to meld and improves the texture, making them even more delicious when you’re ready to serve. Just remember to store them properly to keep that freshness intact!
Delicious Mini Banana Pudding Cups for Easy Nostalgic Enjoyment
Ingredients
Equipment
Method
- Gather small cups or glasses; ensure they are clean and dry.
- In a mixing bowl, combine vanilla pudding mix with milk according to package instructions and whisk until smooth. Let it thicken for about 5 minutes.
- Spoon a generous layer of pudding into each cup, filling them about one-third full.
- Slice ripe bananas into rounds and add a layer on top of the pudding in each cup.
- Crush Nilla wafers and sprinkle a layer over the bananas in each cup.
- Continue layering with more pudding, banana slices, and finish with pudding on top.
- Top each cup with whipped cream if desired and chill in the refrigerator for at least one hour.
Leave a Reply