
As I rummaged through my pantry, I stumbled upon a familiar can of tuna, and suddenly, memories of family dinners came flooding back. That’s when the idea sparked to create an Ultimate Creamy Tuna Casserole with Crunchy Potato Chip Topping. This cheesy tuna macar dish isn’t just a meal; it’s a heartwarming embrace of nostalgia wrapped in creamy comfort food. With its rich velvety sauce and that unforgettable crunch from the potato chips, it transforms those simple pantry staples into something truly special. Plus, it’s an easy recipe that’s perfect for busy weeknights or cozy gatherings. Curious how such comforting flavors can come together so quickly? Let’s dive into this delightful culinary journey!
Why is this Tuna Macar so special?
Creamy, Dreamy Comfort: This cheesy tuna macar is bursting with rich flavors that embrace you like a warm hug. Easy to prepare, it requires just a few simple ingredients and minimal effort. Perfect for busy nights, this dish comes together quickly, yet the savory goodness makes it feel like a gourmet meal. Versatile and customizable, you can easily swap ingredients to cater to your family’s tastes—like adding veggies or experimenting with different cheeses for a twist. If you love family favorites, this recipe is reminiscent of beloved classics like a Cheesy Hamburger Casserole. Get ready to gather around the table and savor every bite!
Cheesy Tuna Macar Ingredients
For the Creamy Base
• Condensed Cream of Mushroom Soup – Provides a rich, creamy base; you can substitute it with a lighter option for a healthier twist.
• Milk – Helps loosen the sauce for a perfect consistency; use skim milk if you prefer a lighter version.
• Mayonnaise – Adds silkiness to the sauce; consider Greek yogurt for a healthier alternative.
For the Pasta & Protein
• Elbow Macaroni – The heart of the dish; holds the sauce beautifully; gluten-free elbow pasta works too.
• Canned Tuna – Essential for that classic flavor; choose high-quality tuna for the best results.
For Extra Flavor
• Frozen Peas – Add a pop of color and sweetness; you might opt for diced bell peppers for a different taste.
• Onions and Celery – Bring sweetness and crunch to the dish; sauté until soft for maximum flavor.
• Garlic Powder – Enhances the savory depth of the casserole; feel free to omit if desired.
• Dried Dill – Adds a distinctive herby flavor; thyme can be a great substitute if you prefer.
For the Topping
• Shredded Cheddar Cheese – Melts beautifully and creates a lovely crust; try Monterey Jack for a different twist.
• Crushed Potato Chips – Gives a delightful crunch on top; whole-grain breadcrumbs can be used but will alter the texture.
For Garnish
• Green Onions – Add a fresh touch and mild flavor; totally optional but makes a lovely garnish.
• Black Pepper – Provides a gentle heat; adjust according to your preference.
This cheesy tuna macar recipe is sure to become a favorite in your household, transforming simple ingredients into a comforting masterpiece!
Step‑by‑Step Instructions for Cheesy Tuna Macar
Step 1: Preheat the Oven
Begin by preheating your oven to 375°F (190°C). This temperature is essential for achieving the perfect melt on the cheddar cheese and a crisp potato chip topping. As the oven warms up, gather your ingredients and prepare your baking dish by greasing it to prevent sticking during baking.
Step 2: Cook the Pasta
Bring a large pot of salted water to a rolling boil. Add in the elbow macaroni and cook for about 7 minutes or until it’s just shy of al dente. Make sure to stir occasionally to prevent sticking. Once cooked, drain the macaroni, reserving a cup of the pasta water for later, and set it aside while you prepare the sauce.
Step 3: Sauté Aromatics
In a skillet, melt 1 tablespoon of butter over medium heat. Add the diced onions and celery, sautéing for about 5 minutes until they’ve become translucent and fragrant. This step builds a flavorful base for your cheesy tuna macar, enhancing the overall taste of the casserole.
Step 4: Mix the Creamy Base
In the pot where you cooked the macaroni, combine the condensed cream of mushroom soup and ¾ cup of milk. Stir vigorously until the mixture is smooth and creamy, creating a delicious sauce that will envelop the pasta. This rich base is foundational to your casserole’s texture and flavor.
Step 5: Add Flavor Enhancers
To the creamy base, mix in the mayonnaise, garlic powder, dill, and season with salt and black pepper. Stir until well incorporated. If the mixture seems thick, gradually add reserved pasta water to achieve your desired consistency. This step ensures every bite of your cheesy tuna macar is rich and flavorful.
Step 6: Fold in the Fillings
Gently fold in the canned tuna, frozen peas, and sautéed onions with celery until everything is evenly distributed. You want to ensure that each ingredient is well combined, enhancing the overall flavor and texture of the casserole. This is where your comfort food starts to come together beautifully.
Step 7: Transfer to Baking Dish
Carefully pour the macaroni mixture into the greased 9×13-inch baking dish. Spread the mixture evenly with a spatula to ensure an even bake. This step is crucial for a consistent cooking result and prevents any dry pockets from forming in your cheesy tuna macar.
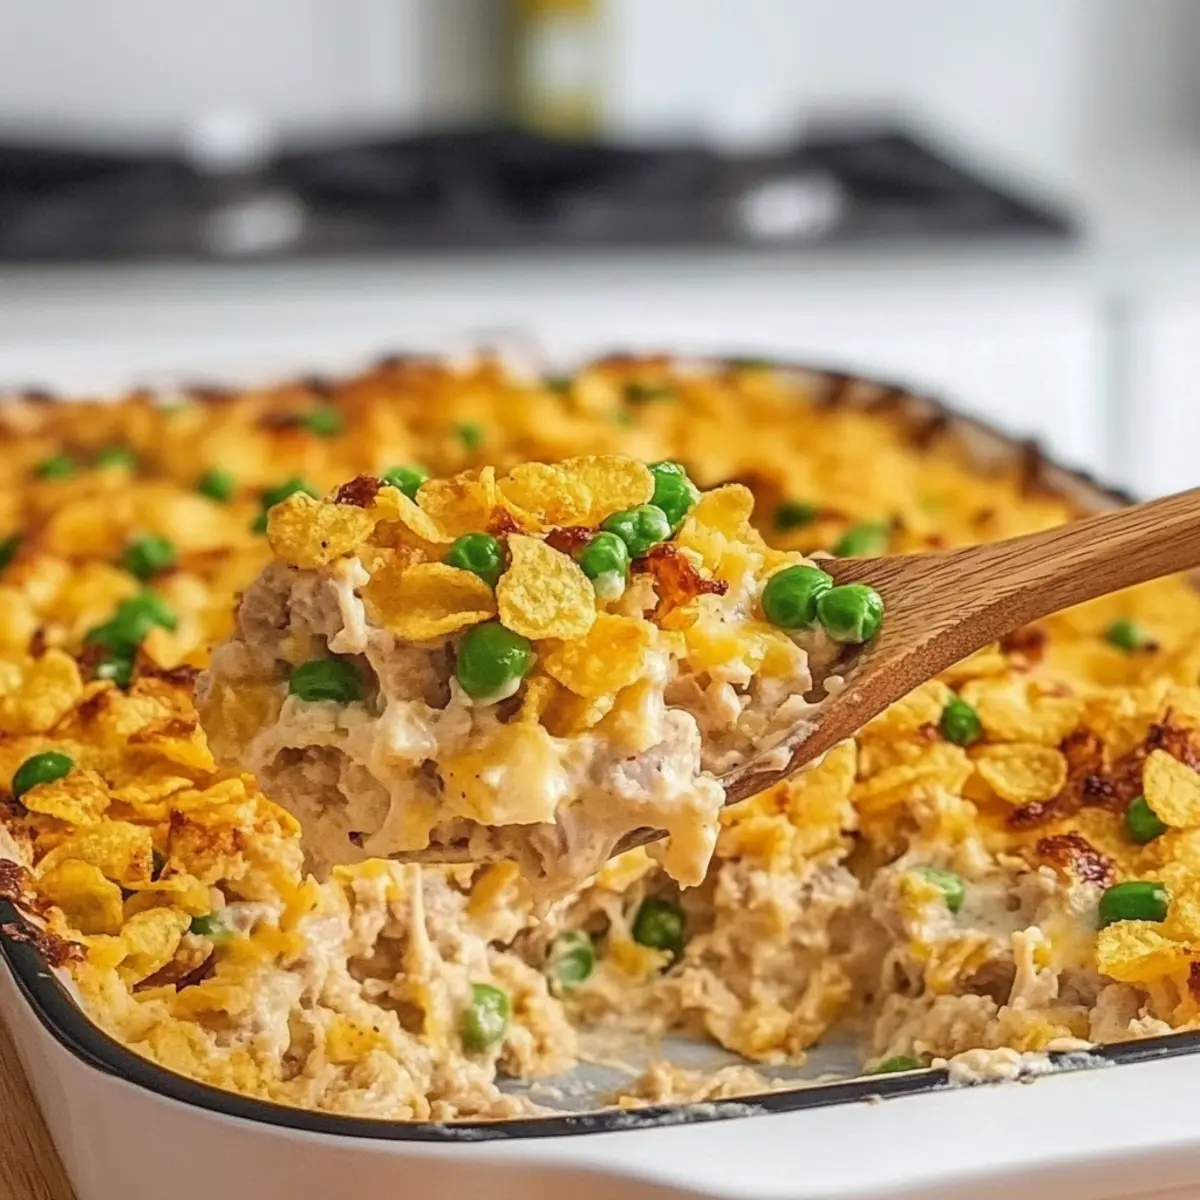
Step 8: Add Cheese and Chips
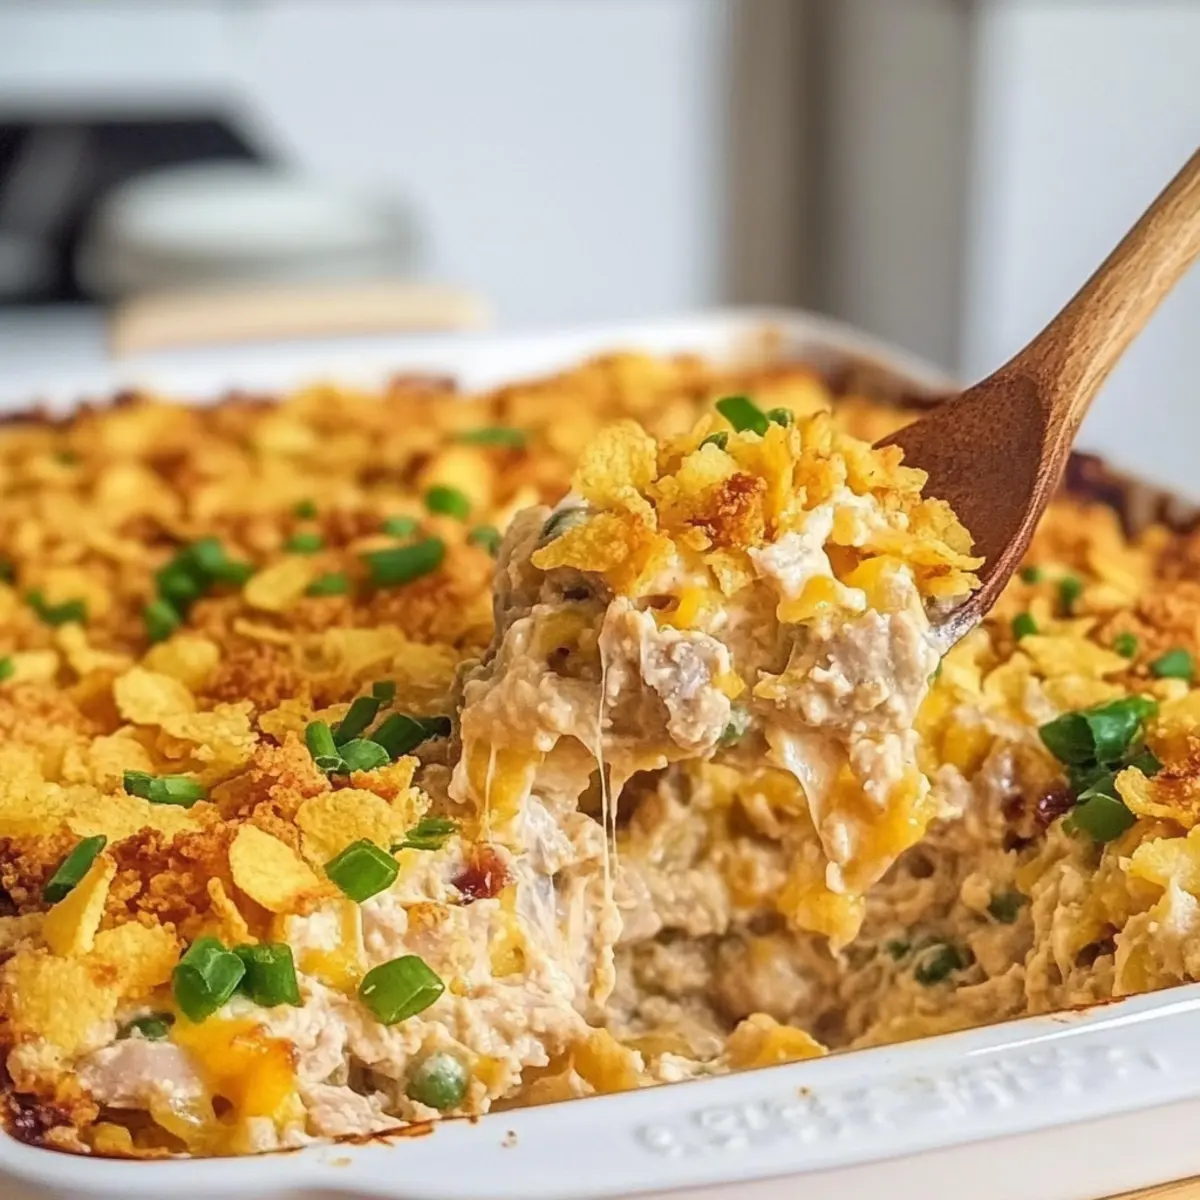
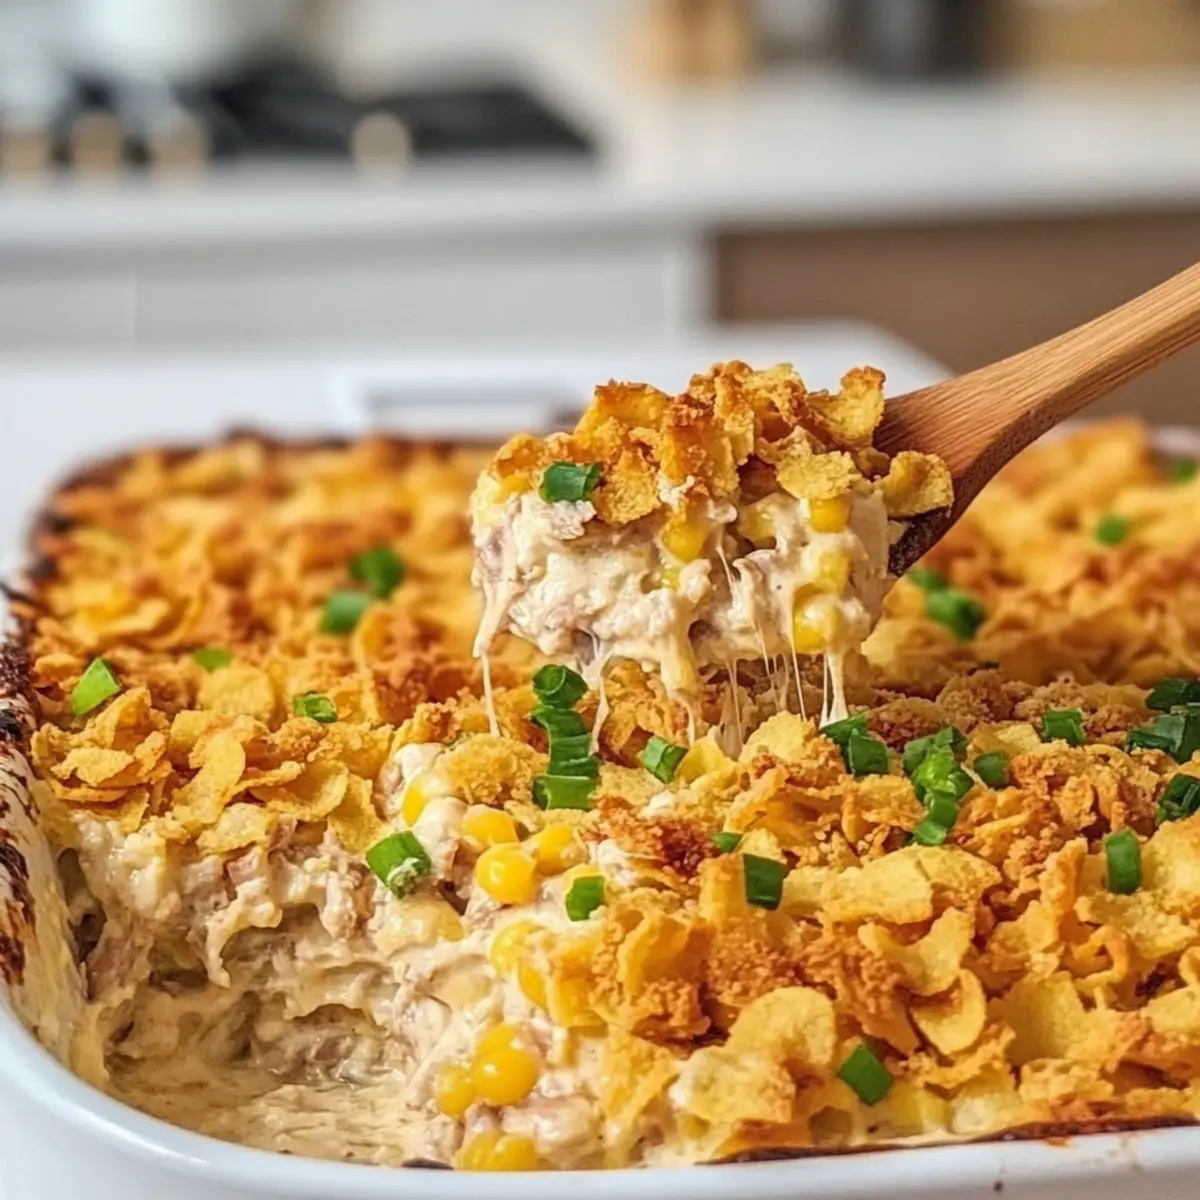
Sprinkle the top with the shredded cheddar cheese, covering the macaroni mixture evenly. Then, generously top with crushed potato chips, lightly pressing them down for better adhesion. This topping provides a delightful crunch that contrasts with the creamy filling of your casserole.
Step 9: Bake to Perfection
Place the assembled casserole in the oven and bake for 20–25 minutes. Keep an eye on it; you want the top to be golden brown and bubbly while the edges pull away slightly from the dish. The aroma will fill your kitchen, signaling that comfort food bliss is just moments away.
Step 10: Rest and Serve
Once baked, remove the casserole from the oven and let it rest for 5 minutes before serving. This short resting time allows the flavors to meld and makes serving easier. Garnish with sliced green onions for a fresh touch, and enjoy sharing this warm, delightful cheesy tuna macar with your loved ones!
Storage Tips for Cheesy Tuna Macar
Fridge: Store any leftover cheesy tuna macar in an airtight container in the refrigerator for up to 3 days. Reheat in the microwave, adding a splash of milk to retain creaminess.
Freezer: For long-term storage, freeze portions in freezer-safe containers for up to 2 months. Thaw overnight in the fridge before reheating.
Reheating: When reheating, sprinkle a little additional cheddar cheese on top and cover with foil to keep it moist while warming. Enjoy the comforting flavors of this dish even after it’s been stored!
What to Serve with Ultimate Creamy Tuna Casserole?
Serve this delightful dish alongside fresh, flavorful accompaniments that elevate your meal into a cozy feast.
- Simple Green Salad: A crisp salad with mixed greens and a light vinaigrette balances the creaminess of the casserole.
- Garlic Breadsticks: Warm, buttery garlic breadsticks offer a delightful crunch, perfect for soaking up any extra creamy sauce.
- Steamed Broccoli: Bright green broccoli adds a nutritious touch and vibrant color, complementing the casserole’s richness.
- Sweet Corn on the Cob: The sweetness of fresh corn pairs beautifully with the creamy tuna, creating a harmonious flavor experience.
- Roasted Brussels Sprouts: These tender sprouts bring a slightly smoky flavor, making them a great contrast to the richness of the tuna macar.
- Chardonnay or Sauvignon Blanc: A crisp glass of white wine enhances the meal, harmonizing with the casserole’s creamy notes.
- Chocolate Chip Cookies: For dessert, classic chocolate chip cookies offer a sweet ending that mixes nostalgia and comfort.
- Fruit Compote: A side of vibrant fruit compote brings a refreshing sweetness that cuts through the richness, providing balance.
- Lemonade or Iced Tea: A chilled glass of lemonade or iced tea adds a refreshing twist to your dining experience, brightening every bite.
Cheesy Tuna Macar Variations
Feel free to make this delightful cheesy tuna macar your own by trying out some of these creative twists or healthier swaps!
-
Spicy Kick: Add fresh jalapeños or cayenne pepper to the mixture for a delightful heat that brings unexpected zing.
-
Veggie Upgrade: Swap the frozen peas for fresh spinach or chopped bell peppers to amp up the nutrition and add vibrant color.
-
Gourmet Cheese: Experiment with a cheese blend, like Gruyère and Parmesan, for a more upscale flavor profile that elevates this comfort dish.
-
Breakfast Casserole: Incorporate scrambled eggs and diced ham for a delightful breakfast casserole that makes this dish great for any meal.
-
Gluten-Free Delight: Use gluten-free elbow pasta and cracker toppings to make this recipe suitable for those with gluten sensitivities.
-
Creamy Twist: Replace mayonnaise with Greek yogurt for a tangy, healthier alternative that still maintains luscious creaminess.
-
Herb Swap: Switch out dill for Italian seasoning for a new flavor twist, giving this casserole an entirely different aromatic profile.
-
Nutty Crunch: Instead of potato chips, use toasted breadcrumbs mixed with Parmesan to bring a nutty, artisanal crunch to the top.
For more ways to enjoy delicious comfort food, check out this Spooktacular Halloween Macarons for a festive twist or indulge in classic Chocolate Chip Cookies for dessert after your meal.
Expert Tips for Cheesy Tuna Macar
Baking Perfection: Ensure your oven is preheated to 375°F for optimal cheese melting and a crispy topping. This makes a noticeable difference in texture!
Pasta Precautions: Cook the elbow macaroni just shy of al dente to prevent it from becoming mushy during baking. This keeps the cheesy tuna macar perfectly textured.
Quality Matters: Choose high-quality canned tuna for the best flavor. Rinse it under cold water to lessen saltiness while enhancing freshness.
Consistency Check: Adjust the cream sauce’s thickness with reserved pasta water, ensuring each macaroni piece is enveloped in a luscious coating without being dry.
Resting Period: Allow the casserole to rest for about 5 minutes after baking. This helps the layers set, making serving neater and enhancing overall taste.
Make Ahead Options
Preparing this creamy tuna casserole ahead of time is a game changer for busy weeknights! You can assemble the whole dish up to 24 hours in advance. Simply follow the recipe’s steps up until transferring the mixture to the baking dish, cover tightly with foil, and refrigerate. This helps meld the flavors beautifully while keeping the casserole fresh. For the best quality, avoid adding the potato chip topping until just before baking to maintain its crunch. When you’re ready to serve, preheat the oven and simply bake the casserole for 25-30 minutes until heated through and bubbly. Enjoy that homemade comfort food with minimal last-minute effort!

Creamy Cheesy Tuna Macar Recipe FAQs
What kind of tuna should I use for the cheesy tuna macar?
Absolutely! I recommend using high-quality canned tuna, which enhances the overall taste of your casserole. Look for tuna packed in water for a lighter option, and rinse it under cold water before adding to reduce excess saltiness. This small step makes a big difference in flavor and keeps your dish nicely balanced.
How can I store leftover cheesy tuna macar?
Leftovers can be stored in an airtight container in the refrigerator for up to 3 days. To reheat, simply put the portions in the microwave and add a splash of milk to help retain that creamy texture. Alternatively, for longer storage, freeze portions in freezer-safe containers for up to 2 months. Thaw overnight in the fridge before reheating.
Can I freeze cheesy tuna macar?
Yes, you can! To freeze, first, allow the casserole to cool completely. Then, portion the cheesy tuna macar into freezer-safe containers, ensuring you leave some space at the top for expansion. It will keep well for up to 2 months. When you’re ready to enjoy it again, simply thaw it in the refrigerator overnight and then reheat thoroughly in the oven until warm and bubbly.
What if my casserole looks dry after baking?
If your cheesy tuna macar appears dry, it might be due to baking it for too long or not adding enough moisture initially. To avoid this, make sure to cook the macaroni to just shy of al dente and reserve some pasta water to adjust the sauce’s consistency as needed. For future bakes, cover it with foil during the first half of baking to retain moisture. If it’s already dry, just add a splash of milk and heat it in the microwave, stirring to bring back some creaminess.
Are there any dietary considerations for this recipe?
Definitely! If you have gluten sensitivities, simply substitute elbow macaroni with gluten-free pasta. Additionally, if you’re looking to lighten the dish, you can replace mayonnaise with Greek yogurt. Always be mindful of allergies—if anyone is sensitive to dairy, you might consider using non-dairy milk and cheese alternatives. Enjoy the comfort of this cheesy tuna macar while catering to dietary needs!
Can I add vegetables to the cheesy tuna macar?
The more, the merrier! You can absolutely enhance this casserole by adding veggies. Frozen spinach, diced bell peppers, or even sautéed mushrooms can be terrific additions, bringing extra flavor and nutrients. Just make sure to sauté any fresh veggies beforehand to ensure they cook evenly and mesh beautifully with the creamy sauce.
Creamy Cheesy Tuna Macar: Comfort Food Bliss in a Bowl
Ingredients
Equipment
Method
- Preheat the oven to 375°F (190°C). Grease a baking dish.
- Cook elbow macaroni in salted water for about 7 minutes until just shy of al dente. Reserve a cup of water, then drain.
- Melt butter in a skillet. Sauté diced onions and celery for about 5 minutes until translucent.
- In the pot with macaroni, combine condensed soup and milk until smooth.
- Mix in mayonnaise, garlic powder, dill, and season with salt and pepper. Adjust thickness with reserved pasta water if needed.
- Fold in the canned tuna, frozen peas, and sautéed onions and celery.
- Pour the mixture into the greased baking dish and spread evenly.
- Sprinkle with shredded cheddar cheese and crushed potato chips.
- Bake for 20-25 minutes until golden brown and bubbly.
- Let rest for 5 minutes before serving. Garnish with sliced green onions.
Leave a Reply