
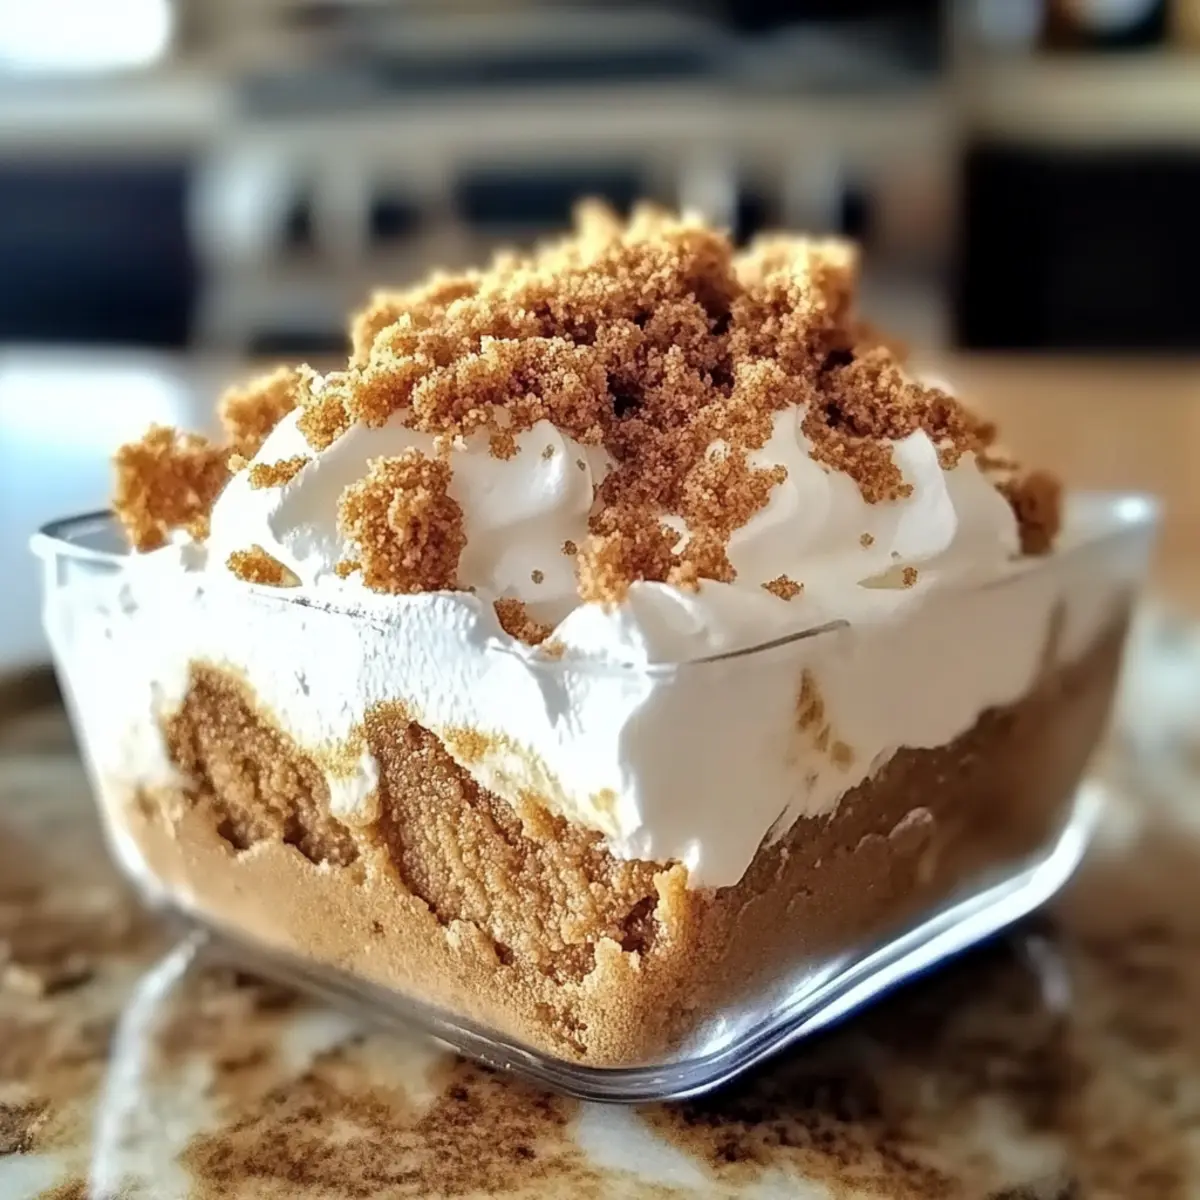
As I sunk my spoon into what looked like pure heaven, I marveled at the layers of this Irresistibly Creamy No-Bake Biscoff Cookie Pudding. Each spoonful reveals a delightful mix of velvety whipped cream and the rich essence of caramelized Biscoff cookies. It’s astonishing how just five ingredients can create such an indulgent dessert that’s deceptively easy to whip up. Whether you’re hosting friends or treating yourself, this crowd-pleaser is sure to win hearts with its charming simplicity and luscious texture. Plus, you can customize it to fit your dietary preferences. What sweet twist will you add to your version of this dreamy dessert?
Why is This Biscoff Pudding Irresistible?
Simplicity at Its Best: With just five easy ingredients, this No-Bake Biscoff Cookie Pudding comes together effortlessly.
Decadent Flavor: Enjoy the luxurious combination of creamy whipped goodness paired with the caramelized notes of Biscoff cookies.
Crowd-pleaser: Perfect for gatherings, this pudding will leave your friends raving and asking for the recipe.
Customizable Delights: From adding banana slices to mixing in Nutella, you can make this dish your own!
Versatile Options: Catering to different diets is easy—options like coconut cream keep it dairy-free, and gluten-free cookies can fit the bill too.
Make-Ahead Magic: Prepare it in advance and whip it out for last-minute entertaining, just like with my Garlic Parmesan Chicken for effortless hosting!
Creamy Biscoff Cookie Pudding Ingredients
-
For the Cookie Layer
• Lotus Biscoff Cookies – Provides crunchy texture and sweetness; use approximately 20 cookies (2 packages) for the base layer. -
For the Pudding Layers
• Lotus Biscoff Spread – Adds rich, caramelized flavor enhancing the pudding experience; use 7 oz (half a jar) for layering and drizzling.
• Heavy Cream – Essential for a light and airy whipped cream layer; ensure it is chilled (2.5 cups required).
• Vanilla Extract – Enhances flavor and depth of the pudding; 1 tsp is sufficient.
• Powdered Sugar – Sweetens and stabilizes the whipped cream; only 1 tbsp is needed for a touch of sweetness in this creamy Biscoff cookie pudding.
Step‑by‑Step Instructions for Creamy Biscoff Cookie Pudding
Step 1: Melt Biscoff Spread
Begin by taking your Lotus Biscoff spread and microwaving it in a microwave-safe bowl for about 30 seconds. This will soften the spread, making it easier to layer. Once melted, give it a good stir until it’s smooth and glossy, creating a delightful drizzle texture perfect for your creamy Biscoff cookie pudding.
Step 2: Whip Heavy Cream
In a large mixing bowl, combine 2.5 cups of chilled heavy cream, 1 tablespoon of powdered sugar, and 1 teaspoon of vanilla extract. Using an electric mixer, whip the mixture on medium speed for around 2-3 minutes until soft peaks form. The cream should be fluffy and airy, ready to cloak your Biscoff layers in velvety goodness.
Step 3: Prepare Base Layer
In a trifle bowl or a similar dish, layer approximately 20 Biscoff cookies evenly at the bottom. Make sure to alternate the positioning for an even base and a beautiful presentation. These cookies will provide a satisfying crunch that contrasts beautifully with the creamy Biscoff cookie pudding you’re creating.
Step 4: Layer Whipped Cream
Using a spatula, carefully spread a generous layer of the whipped cream over the cookie base, ensuring it covers the cookies completely. This will create a smooth, fluffy layer that compliments the crunch below. Aim for an even distribution that sets the stage for the next delightful layer of your creamy Biscoff cookie pudding.
Step 5: Drizzle Biscoff Spread
Once the whipped cream is evenly spread, take your melted Biscoff spread and drizzle it generously over the whipped cream. Let it flow in a zigzag pattern across the surface, allowing it to seep slightly into the layers below. This adds a rich caramelized flavor that will enhance each bite of your creamy Biscoff cookie pudding.
Step 6: Repeat Layers
Continue the layering process by repeating the base layer of Biscoff cookies followed by the whipped cream and a drizzle of Biscoff spread. Aim for at least two to three layers, depending on your bowl size. Each layer should build up delicious flavors and textures, making your dessert visually appealing as well as tasty.
Step 7: Decorate
Use any remaining melted Biscoff spread in a piping bag to create decorative swirls on top of the final whipped cream layer. This will not only add visual flair but also ensure that every spoonful of your creamy Biscoff cookie pudding is beautifully adorned with rich Biscoff goodness.
Step 8: Garnish & Chill
Sprinkle crushed Biscoff cookie pieces around the edge of the whipped cream for added texture and interest. After garnishing, cover the pudding with plastic wrap and refrigerate for at least 2 hours. This chilling time allows the flavors to meld beautifully, making each bite of your creamy Biscoff cookie pudding an irresistible treat.
Make Ahead Options
These Irresistibly Creamy No-Bake Biscoff Cookie Pudding layers are a fantastic option for meal prep, saving you time on busy days! You can prepare the whipped cream layers and the cookie base up to 24 hours in advance, ensuring they stay fresh and delicious. Simply whip the cream and store it in an airtight container in the refrigerator, while the layers of Biscoff cookies can be assembled in advance, though it’s best to layer them just before serving to maintain their delightful texture. When ready to enjoy, layer the prepped components in a trifle bowl, drizzle with Biscoff spread, and let it chill for one last hour to meld the flavors beautifully, giving you a stunning dessert that’s just as delectable as if made fresh!
How to Store and Freeze Creamy Biscoff Cookie Pudding
- Fridge: Store the pudding in an airtight container and enjoy it within 3 days for the best flavor and texture. The chilled environment helps maintain its creamy consistency.
- Reheating: This pudding is best served cold, so there’s no need to reheat; simply scoop and enjoy a delightful layer of creamy Biscoff cookie pudding straight from the fridge.
- Make-Ahead Tips: You can prepare the whipped cream and cookie layers up to 24 hours in advance. Assemble and refrigerate to allow the flavors to meld beautifully right before serving.
- Freezer: Freezing is not recommended for this dessert as it may affect the texture of the whipped cream and cookies, leading to a less enjoyable experience.
Variations & Substitutions of Creamy Biscoff Cookie Pudding
Feel free to creatively enhance this dessert and make it your own with these delightful twists!
-
Banana Layer: Add slices of ripe banana between layers for a fruity and refreshing twist. The creamy pudding is elevated by the sweetness of bananas, creating an irresistible combo.
-
Chocolate Ganache: Introduce a layer of rich chocolate ganache for an indulgent treat. Simply melt dark chocolate with heavy cream for a luxurious chocolate layer that pairs beautifully with Biscoff.
-
Cream Cheese Twist: Mix softened cream cheese into the whipped cream for a tangy depth. This addition brings a delightful richness that contrasts with the sweet Biscoff nuances.
-
Nut Substitution: Swap out Biscoff cookies for Nutella in your layers for a hazelnut variation that’s equally delicious. The nutty flavor adds an exciting dimension to your creamy pudding.
-
Dairy-Free Option: Use coconut cream instead of heavy cream for a dairy-free dessert. This change not only makes the pudding accessible to more diets but also infuses a tropical vibe.
-
Spiced Cookie Layers: Experiment with ginger snaps instead of Biscoff cookies for a warm, spiced alternative. This twist adds an unexpected zing and pairs perfectly with the creamy layers.
-
Nuts for Crunch: Toss in crushed nuts, like pecans or almonds, for a delightful crunchy texture. It provides a nice contrast to the smooth pudding and adds nutritional benefits.
-
Spicy Kick: For the adventurous, blend in a pinch of cayenne pepper into the whipped cream. This surprising addition creates a flavor balance that leaves a lingering warmth.
Get inspired to mix and match to create your own unique version of this dessert! You might also love the lovely flavors of my Garlic Butter Pasta or enjoy a sweet treat like Cute Cauldron Cookie Cups. Your dessert table will never look the same!
What to Serve with Irresistibly Creamy No-Bake Biscoff Cookie Pudding
Elevate your dessert experience by pairing this luscious pudding with delightful accompaniments that balance its creamy richness.
-
Fresh Berries: The tartness of strawberries or raspberries cuts through the richness, adding a burst of freshness and color to your presentation.
-
Mint Chocolate Chip Ice Cream: The cool, creamy mint complements the warm spices in Biscoff, creating a heavenly contrast. A scoop alongside your pudding is pure joy!
-
Espresso or Coffee: A bold cup of coffee enhances the flavors of the Biscoff, making each bite feel like a luxurious coffeehouse treat.
-
Caramel Sauce Drizzle: Drizzling warm caramel over the pudding adds an extra layer of indulgence that mirrors the Biscoff’s sweetness while introducing a silky texture.
-
Chopped Nuts: Toasted almonds or pecans sprinkled on top provide a delightful crunch, enriching the flavor profile with an earthy depth.
-
Coconut Whipped Cream: Switch things up by adding a dollop of dairy-free coconut whipped cream that matches the pudding’s creamy dreams while catering to vegan guests.
-
Crisp Apple Slices: The crispness of fresh apples offers a refreshing counterpoint. The subtle sweetness pairs beautifully, making for an unexpected but delightful pairing.
-
Chocolate-Dipped Strawberries: For a romantic touch, the contrast between the creamy pudding and juicy berries brings indulgence to a new level.
-
Chai-Spiced Tea: Serve a warm cup of chai tea to echo the beautiful spices in the Biscoff, uniting flavors that will envelop your taste buds.
Expert Tips for Creamy Biscoff Cookie Pudding
-
Chill Everything: Ensure your heavy cream and mixing tools are cold for optimal whipping. This prevents the cream from becoming grainy.
-
Perfect Whipping: Watch closely while whipping the cream; stop as soon as soft peaks form to ensure a light texture that complements the creamy Biscoff cookie pudding.
-
Layer Wisely: Alternate layers of whipped cream and Biscoff cookies. This prevents the cookies from becoming overly soggy and maintains delightful crunches in every bite.
-
Decorative Touches: Use additional melted Biscoff spread for decorative swirls; it enhances the presentation and adds rich flavor to the top layer.
-
Make-Ahead Advantage: Prepare the layers in advance and assemble shortly before serving. This allows flavors to meld beautifully without compromising freshness.
Creamy Biscoff Cookie Pudding Recipe FAQs
What type of cookies should I use for the base layer?
Absolutely! For the base layer, you’ll want to use Lotus Biscoff cookies as they provide both a lovely crunchy texture and the signature caramelized sweetness that complements the creamy Biscoff cookie pudding perfectly. Aim for around 20 cookies to fill the bottom of your trifle bowl.
How should I store the Creamy Biscoff Cookie Pudding?
To keep your pudding at its best, store it in an airtight container in the refrigerator. It will remain delicious for about 3 days. This will help maintain its creamy texture and flavor, allowing you to enjoy this indulgent dessert over a few days!
Can I freeze Creamy Biscoff Cookie Pudding?
Not really! Freezing this pudding isn’t recommended, as it may affect the texture of the whipped cream and cookies, causing them to become soggy or icy. Instead, it’s best enjoyed fresh! Keep it refrigerated for optimal taste and creamy consistency.
What if my whipped cream isn’t thickening properly?
No worries! If your whipped cream isn’t thickening, it may be due to the cream being too warm or your mixing bowl not being chilled. Make sure to use heavy cream that’s very cold and chill your mixing bowl and beaters in the refrigerator for about 15 minutes before whipping. This should help the cream achieve those lovely soft peaks.
Are there any dietary considerations I should keep in mind for guests?
Very good thought! If you have guests with dietary restrictions, consider using dairy-free alternatives like coconut cream to make the pudding vegan. Also, check the label on your Biscoff cookies for allergens—they may contain gluten, so you can opt for gluten-free versions to accommodate everyone’s dietary needs.
Can I customize the recipe with other flavors?
Absolutely! This creamy Biscoff cookie pudding is highly customizable. Feel free to add layers of banana slices, Nutella, or even a bit of cayenne pepper for a spicy kick! There’s no limit to the magic you can create with this easy dessert.
Creamy Biscoff Cookie Pudding That Melts in Your Mouth
Ingredients
Equipment
Method
- Begin by microwaving the Lotus Biscoff spread in a microwave-safe bowl for about 30 seconds until soft, then stir until smooth.
- In a large mixing bowl, combine the chilled heavy cream, powdered sugar, and vanilla extract. Whip on medium speed until soft peaks form.
- Layer the Biscoff cookies evenly at the bottom of a trifle bowl, alternating their positioning for a beautiful presentation.
- Spread a generous layer of whipped cream over the cookie base, ensuring complete coverage.
- Drizzle melted Biscoff spread over the whipped cream in a zigzag pattern.
- Repeat layering with more Biscoff cookies, whipped cream, and another drizzle of Biscoff spread according to your bowl size.
- Use remaining melted Biscoff spread in a piping bag to create decorative swirls on top of the final whipped cream layer.
- Garnish with crushed Biscoff cookie pieces around the edge of the whipped cream and refrigerate for at least 2 hours before serving.
Leave a Reply