
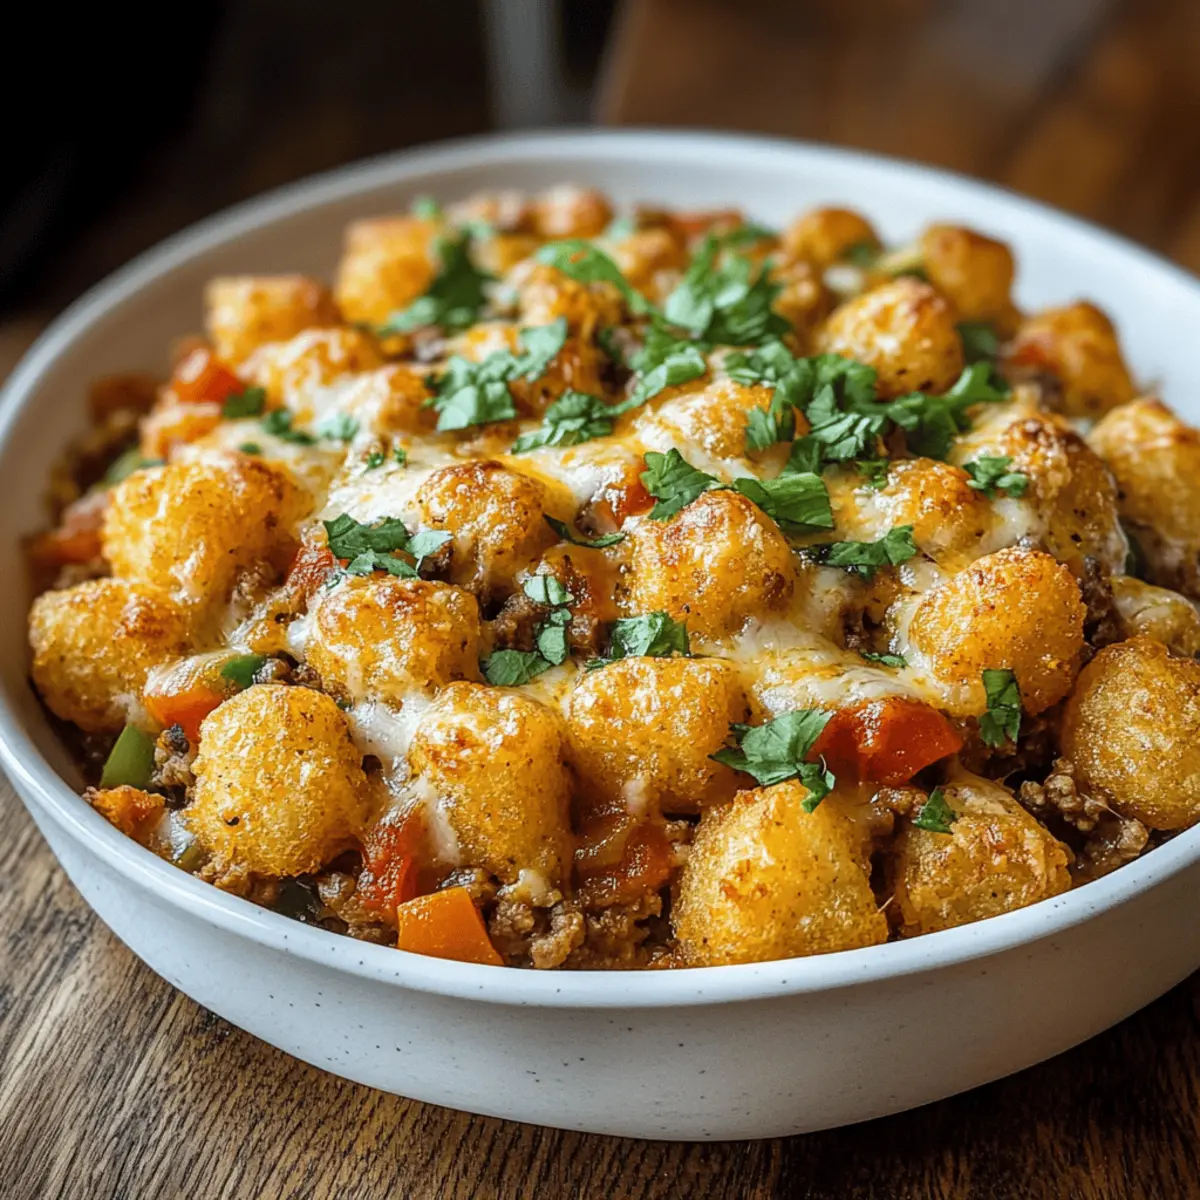
As I stood in my kitchen, a delicious aroma wafted through the air, reminiscing about cozy family dinners from my childhood. This Dairy Free Tater Tot Casserole has become my go-to recipe for those moments when I crave comforting, hearty food without the dairy and gluten. With its crispy tater top and hearty filling, this dish not only satisfies my taste buds but also caters to dietary needs without compromising on flavor. The best part? It’s perfect for busy weeknights, coming together in under an hour, and makes for exceptional leftovers. Trust me, once you try this satisfying casserole, you’ll find yourself wondering how you ever lived without it! What twist will you add to make it your own?

Why is this casserole a family favorite?
Easy Preparation: This Dairy Free Tater Tot Casserole comes together in less than an hour, making it a quick option for busy weeknights.
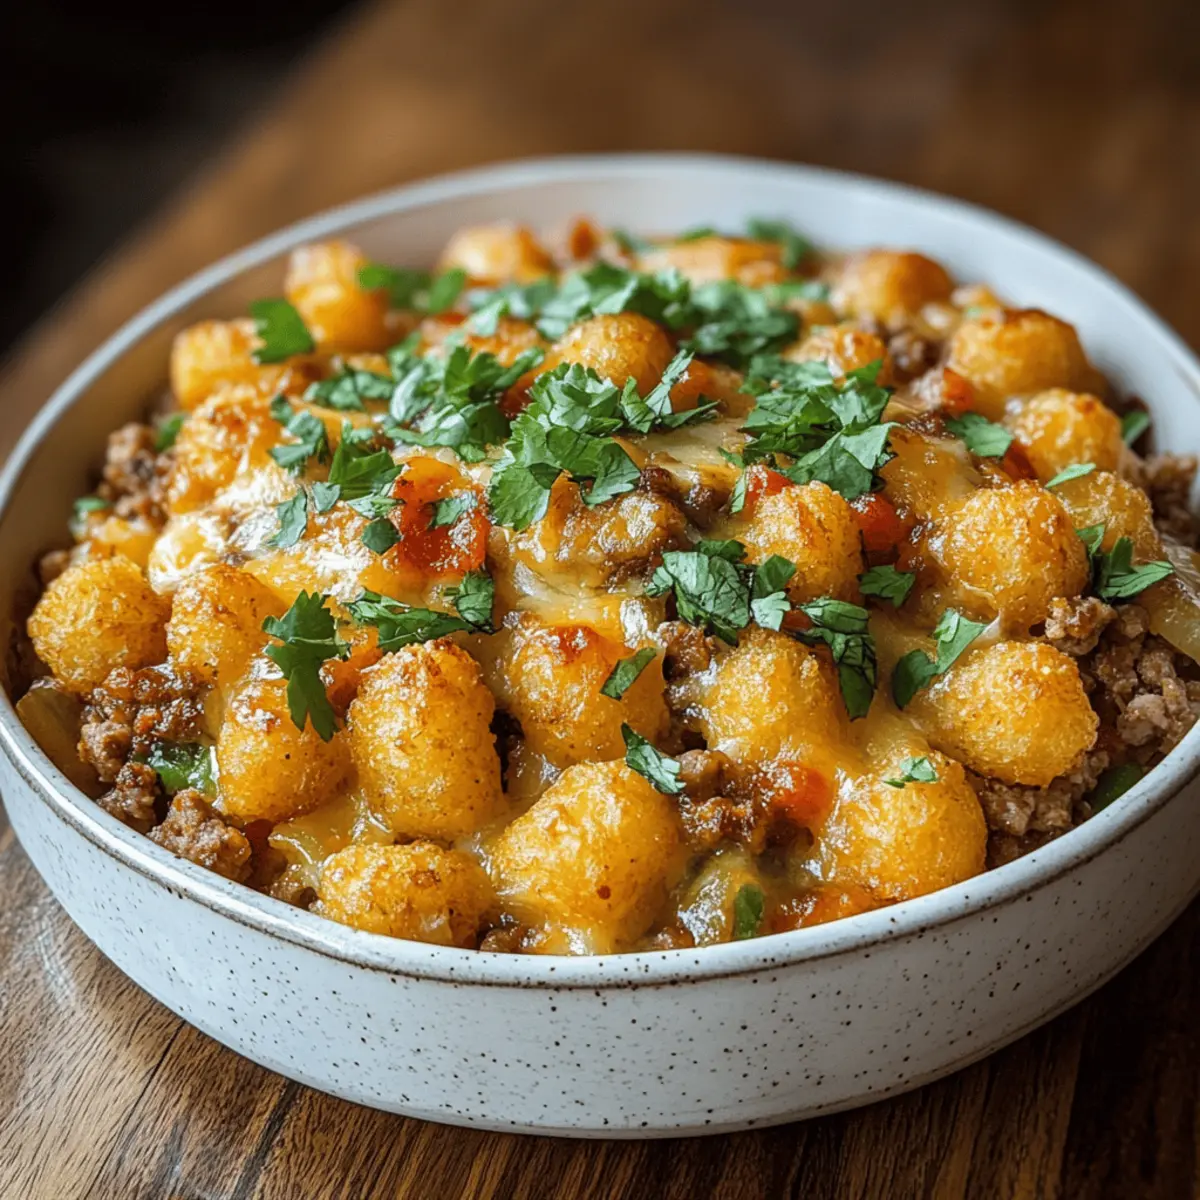
Nostalgic Comfort Food: With a crispy tater tot topping and a creamy, hearty filling, it brings back lovely memories of family dinners without the dairy and gluten.
Customizable Delight: Change up the ingredients by using different proteins or adding fresh vegetables, such as spinach or kale, to suit your family’s tastes!
Healthy and Satisfying: At approximately 300 calories per serving, it’s a filling meal that won’t weigh you down, perfect for health-conscious eaters.
Crowd-Pleasing Appeal: This dish is sure to impress everyone gathered around the table, making it a go-to for gatherings and celebrations.
After enjoying the warmth of this casserole, you might also love trying a Cheesy Hamburger Casserole or a sweet Glazed Corn Casserole.
Dairy-Free Tater Tot Casserole Ingredients
• This section lists everything you need to create this comforting dish that leaves dietary restrictions behind.
For the Filling
- Ground Turkey or Beef – Provides protein and heartiness; for a vegan version, substitute with plant-based meat.
- Onion – Adds sweetness and depth; shallots can be used for a different flavor.
- Garlic – Infuses robust flavor; if fresh isn’t available, use garlic powder (1/4 tsp per clove).
- Red Bell Pepper – Contributes color and sweetness; green bell pepper can be used instead.
- Frozen Corn – Provides sweetness and texture; fresh corn works beautifully when in season.
- Frozen Mixed Vegetables – Offers nutrition and variety; fresh veggies, pre-cooked, can be substituted.
- Coconut Milk (15 oz) – Acts as a creamy sauce base; almond milk serves for a lighter result.
- Dried Thyme – Adds herbaceous flavor; opt for fresh thyme if available (1 tsp fresh = 3 tsp dried).
- Paprika – Imparts warmth and color; smoked paprika can give a lovely twist.
- Salt and Pepper – Essential for seasoning; adjust to suit dietary preferences.
For the Topping
- Frozen Tater Tots (32 oz, gluten-free) – Creates a crispy top layer; choose those labeled gluten-free or make homemade tots.
This Dairy-Free Tater Tot Casserole is sure to delight both the culinary enthusiast and the comfort-food seeker in your home!
Step‑by‑Step Instructions for Dairy Free Tater Tot Casserole
Step 1: Preheat the Oven
Begin by preheating your oven to 425°F (220°C). This temperature ensures the tater tots will turn wonderfully crispy while your filling is infused with flavor. Use a reliable oven thermometer to verify the actual temperature if necessary, as an accurate preheat is crucial for the perfect Dairy Free Tater Tot Casserole outcomes.
Step 2: Brown the Meat
In a large skillet over medium heat, add your choice of ground turkey or beef. Cook for about 5-7 minutes, breaking it apart with a spatula as it browns. You’re looking for a nice caramelization that adds rich flavor to your casserole. Make sure there’s no pink left, as this will ensure it cooks thoroughly before being mixed with the other ingredients.
Step 3: Sauté the Aromatics
Once the meat is browned, toss in the chopped onion and minced garlic. Sauté these for around 3-4 minutes until the onion is translucent and fragrant, stirring frequently. The combination of the onion’s sweetness and garlic’s robust flavor will create a delicious base for your casserole, enhancing every bite of the Dairy Free Tater Tot Casserole.
Step 4: Add the Vegetables and Seasonings
Introduce the diced red bell pepper, frozen corn, and mixed vegetables to the skillet. Pour in the coconut milk and sprinkle in the dried thyme and paprika, along with salt and pepper to taste. Stir this mixture for an additional 5-7 minutes until everything is well combined and heated through. You’ll notice a creamy consistency forming, igniting the comforting essence of your casserole.
Step 5: Assemble the Casserole
Carefully transfer the hearty filling mixture to a 9×13 inch baking dish, spreading it evenly with a spatula. This base is where the magic of the Dairy Free Tater Tot Casserole happens; you want it to be flat and even to ensure every forkful has the same deliciousness.
Step 6: Top with Tater Tots
Now, take the frozen tater tots and arrange them in a single layer atop the filling. Try to have them close but not touching to allow for optimal crispiness during baking. This crispy layer is what makes your Dairy Free Tater Tot Casserole truly unforgettable, delivering that satisfying crunch everyone loves.
Step 7: Bake to Perfection
Place the baking dish in the preheated oven and bake for 25-30 minutes. Keep an eye on the tater tots, looking for a golden-brown color and a crispy texture. This step transforms your assembly into a bubbling, inviting dish, filling your kitchen with that irresistible homey aroma.
Step 8: Cool and Serve
After baking, remove the casserole from the oven and let it cool for a few minutes before serving. This brief cooling period allows the layers to set, making it easier to serve without falling apart. Enjoy the warmth and satisfaction that comes from this Dairy Free Tater Tot Casserole with family and friends!
Dairy-Free Tater Tot Casserole Variations
Feel free to customize this comforting casserole to cater to your cravings and dietary needs!
-
Vegan Option: Substitute ground turkey or beef with plant-based meat for a delicious vegan twist. This alternative maintains the heartiness while being completely dairy-free.
-
Different Veggies: Mix up the frozen vegetables, or toss in fresh leafy greens like spinach or kale. Adding vibrant colors will not only boost nutrition but also enhance the visual appeal of your casserole.
-
Spice it Up: Add a dash of crushed red pepper flakes or hot sauce for a fiery kick. Adjust the heat level to suit your family’s taste preferences and make each bite exciting!
-
Creamy Additions: Mix in a dollop of dairy-free cream cheese or ricotta for a creamier filling. This adjustment layers in richness and oh-so-good flavor without compromising on dietary restrictions.
-
Cheesy Flavor: Sprinkle some dairy-free cheese on top of the filling before adding the tater tots. This gives a cheesy, gooey texture that often has everyone coming back for seconds!
-
Flavorful Broths: Swap out coconut milk for vegetable broth for a lighter option. This twist still ensures the casserole remains moist while providing sharper flavors for those who prefer them.
-
Homemade Tater Tots: Make your own gluten-free tater tots for a truly personalized touch! Using sweet potatoes or regular potatoes gives you the chance to play around with flavors and textures.
-
Extra Herbs: Enhance the flavor profile with fresh herbs like parsley or dill mixed into the filling. This simple addition can elevate the overall freshness and brighten up the dish.
Once you’ve savored this Dairy-Free Tater Tot Casserole, consider pairing it with a rich Chicken Parmesan Casserole or a delightful Glazed Corn Casserole for your next family gathering!
Expert Tips for Dairy Free Tater Tot Casserole
-
Crispy Tater Tots: Ensure tater tots are spread out nicely in a single layer. Overcrowding can lead to sogginess instead of that delightful crunch.
-
Flavor Enhancements: Experiment by adding herbs like rosemary or parsley for extra flavor. Incorporating spices can personalize your Dairy Free Tater Tot Casserole to your taste.
-
Vegetable Varieties: Don’t hesitate to mix different frozen veggies or use fresh ones to elevate nutrition. Look for vibrant colors to enhance the visual appeal too!
-
Meal Prep Friendly: This casserole keeps well—refrigerate leftovers for up to three days, or freeze for up to a month. Just reheat in the oven for the best results!
-
Garnish for Glam: Consider garnishing your casserole with fresh cilantro or green onions before serving for a pop of color and fresh flavor.
How to Store and Freeze Dairy Free Tater Tot Casserole
Fridge: Keep leftovers in an airtight container for up to 3 days. Ensure it’s completely cooled before sealing to maintain texture and flavor.
Freezer: For longer storage, freeze the unbaked casserole wrapped tightly in plastic wrap and aluminum foil for up to 1 month. This way, you can enjoy your Dairy Free Tater Tot Casserole anytime!
Reheating: To reheat, thaw overnight in the fridge if frozen. Bake in a 350°F (175°C) oven for about 25-30 minutes until heated through and the tater tots regain their crispiness.
Make-Ahead: Assemble the casserole a day in advance and refrigerate, then bake it when ready. This strategy saves time and ensures a hassle-free family dinner!
Make Ahead Options
These Dairy-Free Tater Tot Casserole preparations are perfect for busy home cooks aiming to save time! You can assemble the entire casserole up to 24 hours in advance. Just refrigerate it before baking; this keeps the flavors melded while maintaining the integrity of the ingredients. Alternatively, if you’re looking for longer storage, you can prep and freeze the uncooked casserole for up to 3 months. When ready to serve, simply bake from frozen at 425°F for about 40-50 minutes, adding a few extra minutes for a perfectly crispy topping! This way, you’ll have a comforting, home-cooked meal with minimal effort on the day you need it most.
What to Serve with Dairy-Free Tater Tot Casserole
Create a cozy family meal with delightful sides that complement your comforting casserole.
-
Fresh Green Salad: Crisp greens and a light vinaigrette add a refreshing balance to the rich flavors of the casserole. The crunch of vegetables contrasts beautifully with the creamy filling.
-
Steamed Broccoli: This vibrant side adds a pop of color and nutrition, enhancing your meal without overpowering it. The slight bitterness of broccoli provides a satisfying counterpoint to the dish’s sweetness.
-
Avocado Slices: Creamy avocado offers a rich addition, elevating the dish with healthy fats and a velvety texture. Each bite will enhance your enjoyment of the casserole.
-
Garlic Bread: Crunchy, buttery slices of garlic bread will be a hit at your dinner table, perfect for scooping up those flavorful layers. The aromatic garlic complements the casserole’s rich taste wonderfully.
-
Herb Quinoa: This fluffy quinoa, tossed with fresh herbs, adds a nutritious and hearty element to your meal. The nuttiness of quinoa will harmonize beautifully with the flavors of the casserole.
-
Crispy Roasted Potatoes: Golden, crispy potatoes offer another textural element and pair seamlessly with the casserole’s comforting vibe. Seasoned with herbs, they’re the perfect comfort food companion.
-
Pineapple Coconut Smoothie: For a delightful drink, this tropical smoothie adds a refreshing sweetness that pairs well with the savory casserole. It’s a fun twist to brighten your family dinner!
-
Fruit Crisp: For dessert, a warm fruit crisp satisfies the sweet tooth while remaining light and comforting. The array of flavors will perfectly round out your meal.

Dairy-Free Tater Tot Casserole Recipe FAQs
What type of tater tots should I use for this casserole?
For the best results, look for frozen tater tots that are labeled gluten-free to ensure they fit the dietary needs of everyone at the table. You can also make your own homemade tater tots using potatoes, which can be healthier and cater more closely to your preferences.
How should I store leftovers of the Dairy-Free Tater Tot Casserole?
Leftovers can be stored in an airtight container in the refrigerator for up to 3 days. Make sure to let the casserole cool completely before sealing it. This will help maintain its delightful texture and flavors!
Can I freeze Dairy-Free Tater Tot Casserole?
Absolutely! You can freeze the assembled, unbaked casserole by wrapping it tightly in plastic wrap followed by aluminum foil. It will remain good for up to 1 month. Just remember to label it with the date for your reference.
What’s the best way to reheat the casserole?
To reheat, if it’s been frozen, allow it to thaw overnight in the fridge. Preheat your oven to 350°F (175°C) and bake for about 25-30 minutes, ensuring it’s heated through and the tater tots crisp back up for that satisfying crunch.
What if I can’t find coconut milk?
No worries! You can substitute coconut milk with almond milk or any other dairy-free milk you prefer. For a creamier texture, you can try using unsweetened cashew milk, which offers a lovely richness without dairy.
Are there any specific dietary considerations for pets?
Yes! This casserole includes ingredients like onions and garlic that can be toxic to dogs and cats. Always ensure that your pets don’t have access to human food without checking for harmful ingredients first.
Dairy-Free Tater Tot Casserole for Cozy Family Nights
Ingredients
Equipment
Method
- Preheat your oven to 425°F (220°C) to ensure crispy tater tots.
- In a large skillet over medium heat, add your choice of ground turkey or beef and cook for about 5-7 minutes until browned.
- Add chopped onion and minced garlic to the skillet, sauté for 3-4 minutes until onion is translucent.
- Introduce diced red bell pepper, frozen corn, and mixed vegetables, along with coconut milk, thyme, paprika, salt, and pepper. Stir for 5-7 minutes.
- Transfer the filling mixture to a 9x13 inch baking dish, spreading it evenly with a spatula.
- Arrange frozen tater tots in a single layer on top of the filling.
- Bake in the preheated oven for 25-30 minutes until tater tots are golden brown.
- Let the casserole cool for a few minutes before serving to allow layers to set.
Leave a Reply