
As the holiday season approaches, the kitchen soon transforms into a hub of laughter and creativity, often igniting a mini crisis: what to bring to the next festive gathering? Enter the Rudolph Christmas Cheese Ball—a no-bake marvel that brightens any table with its charming presentation and deliciously creamy texture. This vegetarian appetizer isn’t just eye-catching; it’s incredibly easy to whip up, making it a perfect choice for last-minute plans or family fun. Plus, the chance to decorate Rudolph’s adorable face invites everyone to join in, especially the kids! Are you ready to make a statement this holiday season? Let’s dive into this delightful recipe that’s bound to become a new festive favorite.
Why is Rudolph Christmas Cheese Ball a Must-Try?
Festive Delight: This no-bake cheese ball is a whimsical addition to your holiday spread, instantly elevating your gathering’s aesthetic.
Easy to Customize: With endless options for cheese and decorations, you can make it uniquely yours! Try experimenting with goat cheese for a twist or bell pepper pieces for decor.
Family-Friendly Fun: Get everyone involved! Kids love decorating Rudolph’s face, making it a delightful family activity.
Savory and Creamy: With a blend of rich cheeses and crunchy nuts, every bite delivers a perfect harmony of flavors, pleasing both kids and adults alike.
Quick Preparation: Ready in minutes and chilled before serving, this dish is great for last-minute party plans or cozy family nights.
Crowd-Pleasing Appeal: Serve it alongside crunchy veggies and crackers for a versatile appetizer sure to impress! Want to add more deliciousness to your table? Pair it with Pumpkin Cheese Balls or serve it alongside a colorful Christmas Salad Honey for a festive feast!
Rudolph Christmas Cheese Ball Ingredients
• Create this festive symphony of flavors with these simple ingredients!
For the Cheese Ball
- Cream Cheese – the creamy base that brings richness; substitute with ricotta for a lighter touch.
- Shredded Cheese (cheddar/mozzarella) – enhances flavor and texture; try sharp cheddar for a bolder taste.
- Blue Cheese – adds a tangy richness; feta or sharp white cheddar work as excellent alternatives.
- Chopped Herbs (parsley/chives) – elevates flavor and adds freshness; feel free to swap with any soft herb of your choice.
- Chopped Nuts (walnuts/pecans) – contributes a delightful crunch; simply omit if nut-free is preferred.
For Decoration
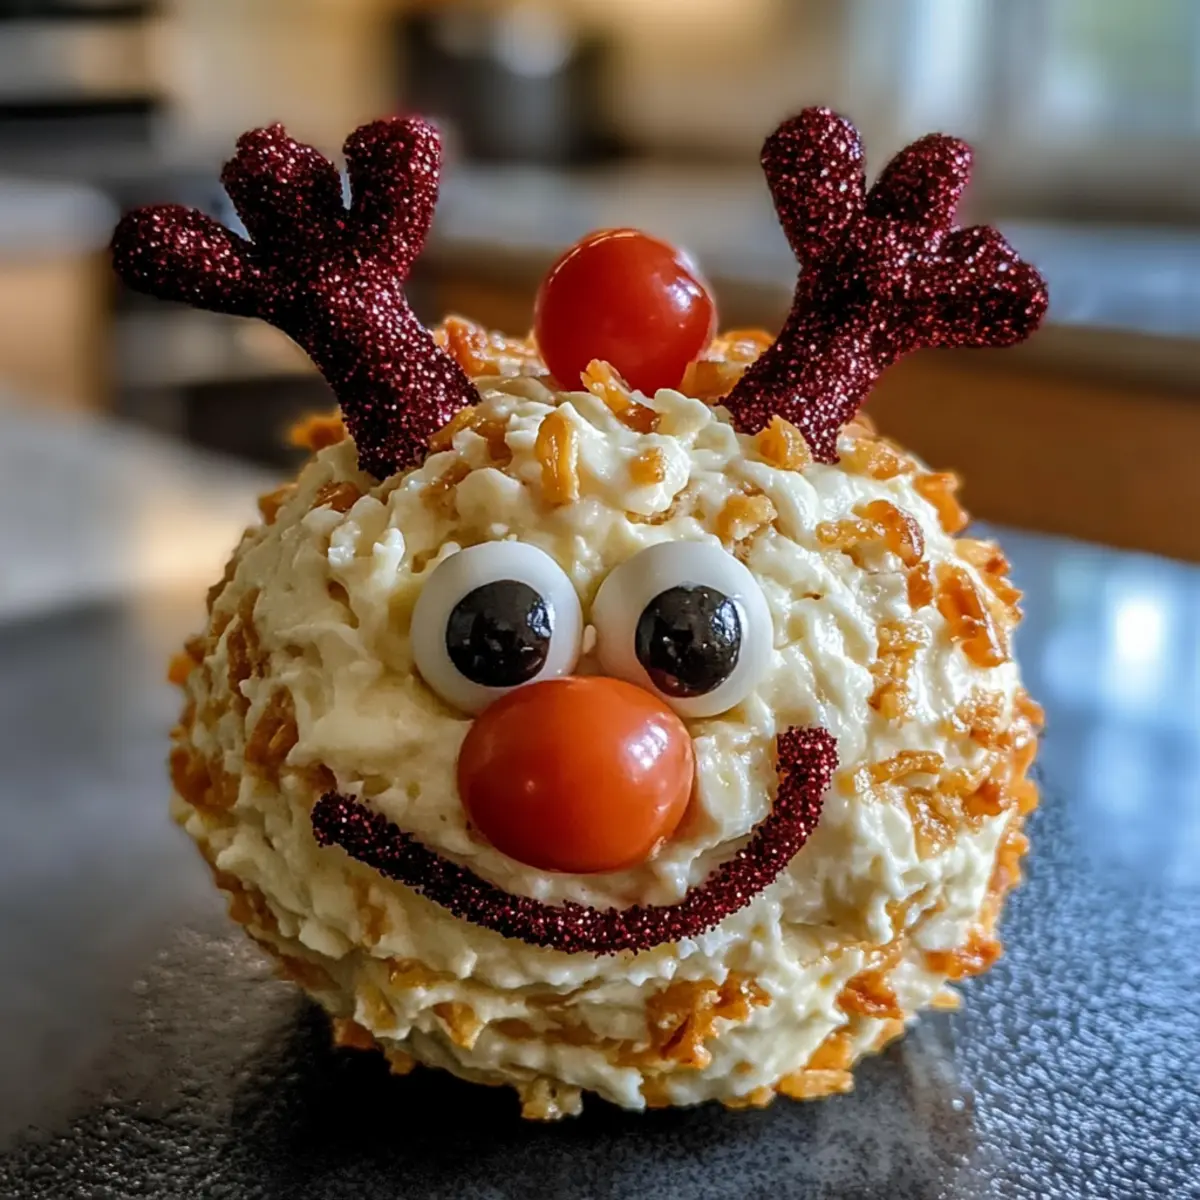
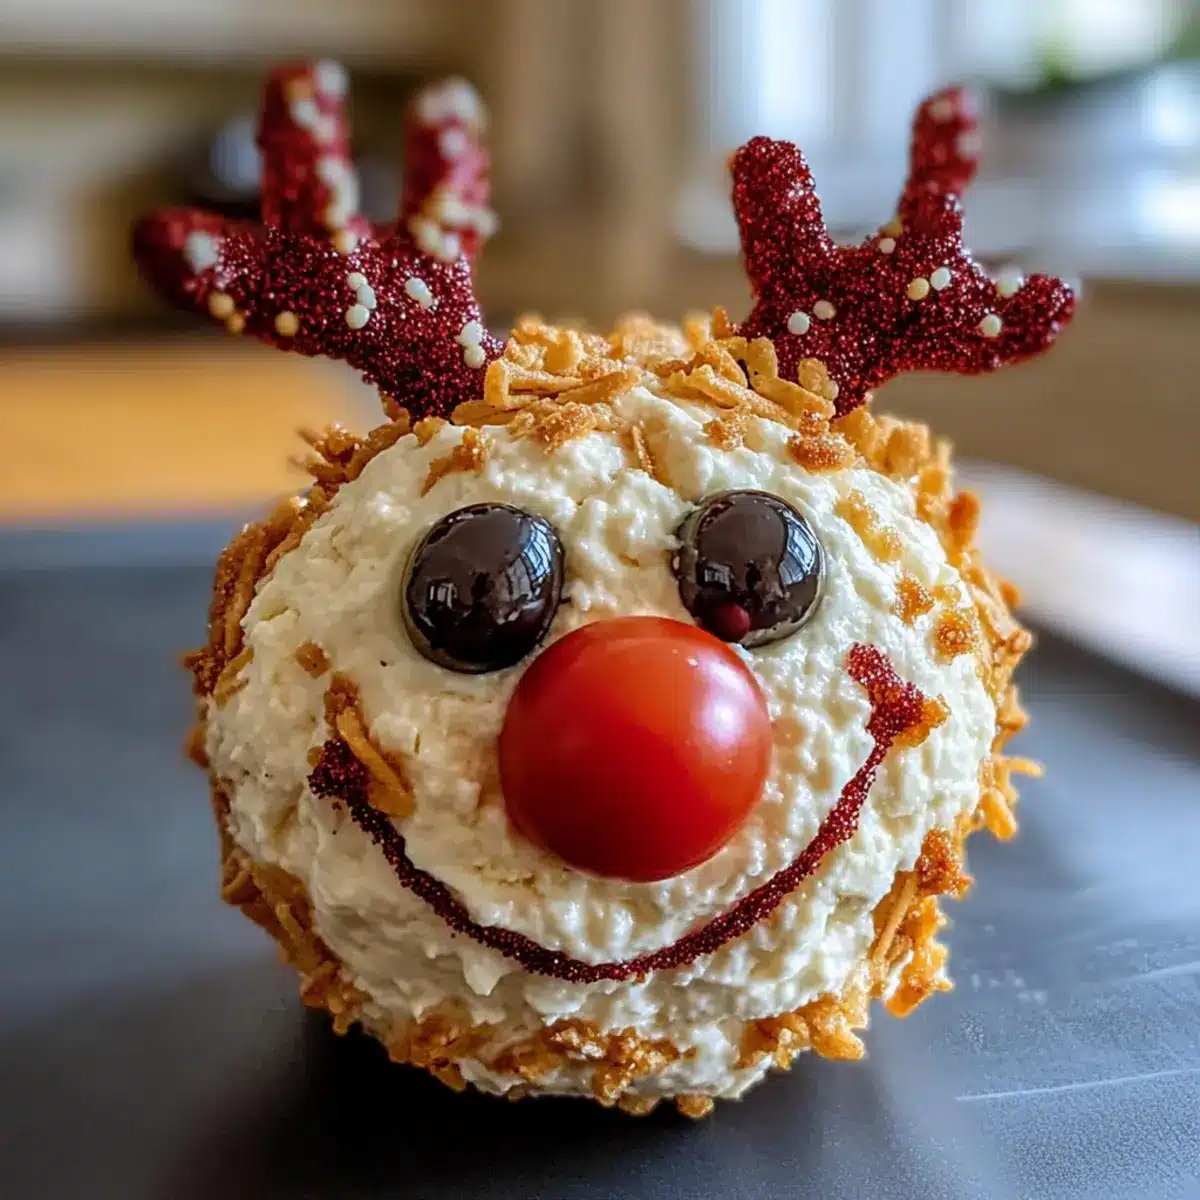
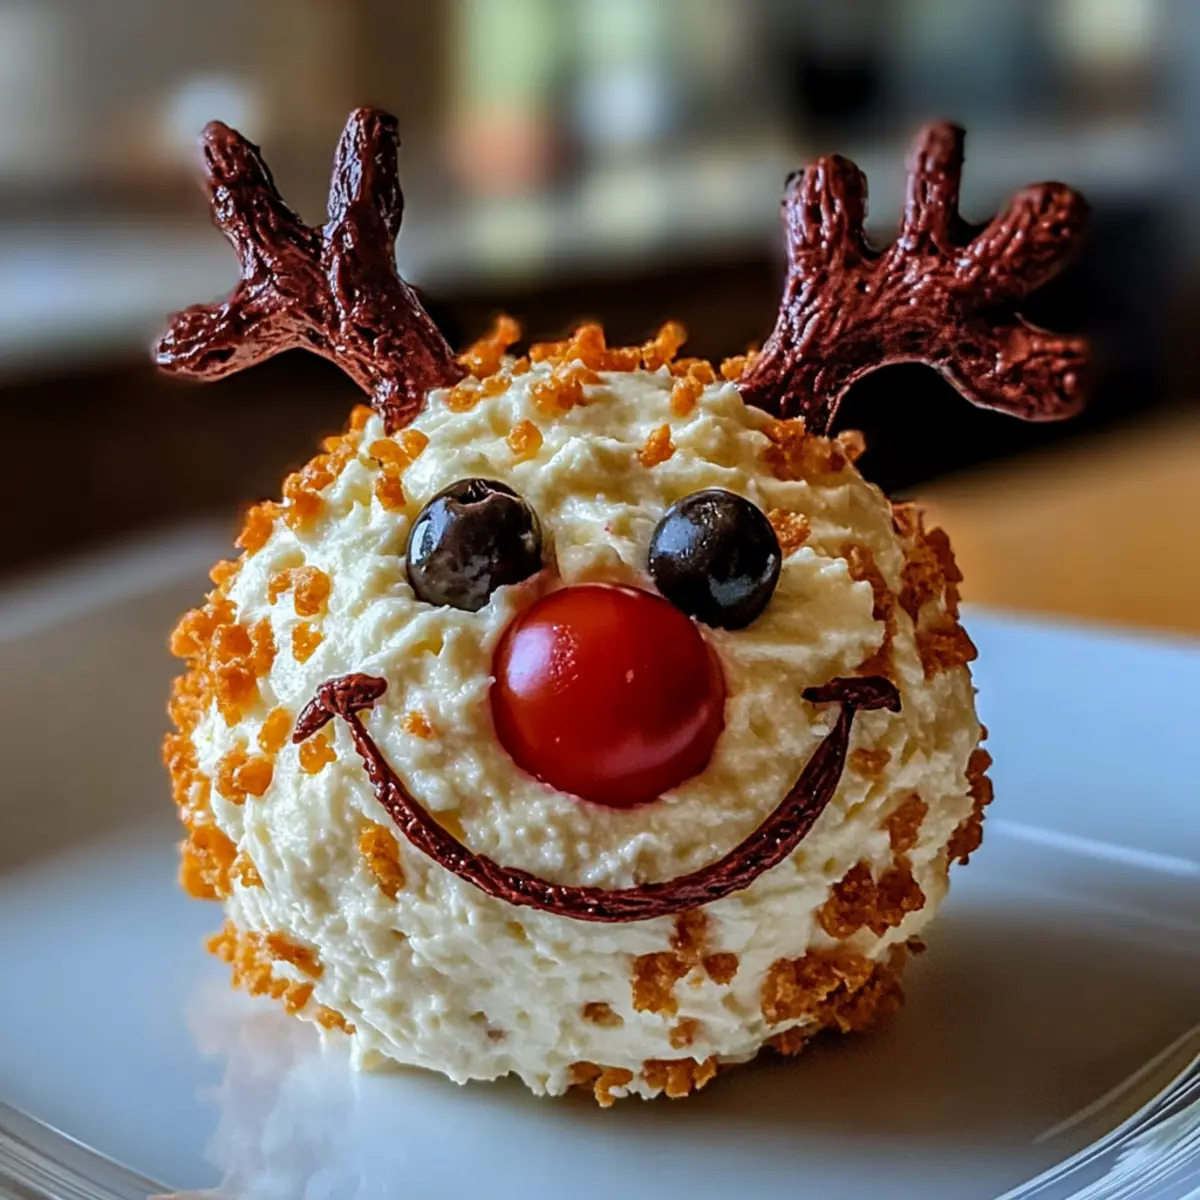
- Olives – used for eyes, adding a fun character to your cheese ball.
- Cherry Tomatoes – serve as Rudolph’s bright, festive nose; get creative with any garnish you like!
Bring the joy of making the Rudolph Christmas Cheese Ball to your holiday gatherings with these simple ingredients!
Step‑by‑Step Instructions for Rudolph Christmas Cheese Ball
Step 1: Mixing Ingredients
In a large mixing bowl, combine 8 ounces of softened cream cheese with 1 cup of shredded cheese, such as cheddar, and ½ cup of crumbled blue cheese. Use a sturdy spatula or electric mixer to blend until smooth and creamy, ensuring no lumps remain. This should take about 3-5 minutes. The mixture should easily hold its shape but be fluffy and light.
Step 2: Adding Flavors
Next, fold in ¼ cup of chopped fresh herbs like parsley or chives, along with ½ cup of chopped nuts such as walnuts or pecans for added crunch. Mix thoroughly until evenly combined. The Chevrolet Christmas Cheese Ball should take on a festive and inviting aroma as the flavors meld together beautifully, creating a savory base for your holiday appetizer.
Step 3: Forming the Cheese Ball
Using clean hands, scoop the cheese mixture and gently shape it into a ball, ensuring it’s firm and cohesive. Aim for a smooth exterior without cracks, which will help the Rudolph Christmas Cheese Ball hold up when decorated. Place the formed ball on a large plate, adjusting its shape if needed, and enjoy the charming base you’ve created for decorating!
Step 4: Chilling
Wrap the formed cheese ball tightly in plastic wrap and refrigerate it for at least 2 hours. This chilling time allows it to firm up, making it easier to handle during the decoration stage. When you unwrap it, the cheese ball should feel solid and keep its shape, ready for the fun embellishments to come.
Step 5: Decorating
After chilling, carefully unwrap the cheese ball and place it on your serving platter. Use pitted olives to create eyes by pressing them into the surface, and a bright cherry tomato as Rudolph’s nose. Feel free to get creative with additional decorations—consider using sliced vegetables or alternative garnishes to enhance its festive appeal!
Step 6: Serving
Serve your Rudolph Christmas Cheese Ball with an assortment of crackers, veggie sticks, or bread slices. For the best experience, let it sit out for about 15-20 minutes before serving to reach a creamy consistency. This not only enhances the flavor but makes it easier for guests to scoop onto their favorite dippers.
What to Serve with Rudolph Christmas Cheese Ball
Looking to create a festive feast that dazzles both the eyes and taste buds?
- Crunchy Vegetable Platter: A medley of fresh carrots, celery, and bell peppers offers crispness, balancing the creamy cheese ball beautifully.
- Savory Crackers: Choose an assortment of flavored crackers that enhance the rich flavors of the cheese while providing delightful crunch.
- Fruit Skewers: Bright and juicy pieces of watermelon, kiwi, and pineapple add a refreshing contrast, inviting a burst of sweetness with every bite. The sweetness works harmoniously with the savory cheese.
- Spiced Nuts: Roasted nuts like almonds or cashews tossed with a hint of sweetness and spices create a delightful crunch alongside the cheese ball.
- Festive Cheese Platter: Include a variety of cheeses like gouda and brie. This complements the Rudolph Christmas Cheese Ball, creating an inviting spread.
- Wine Pairing: A crisp white wine, such as Sauvignon Blanc, pairs wonderfully with the savory notes, elevating the entire tasting experience.
- Holiday Punch: A light and fruity punch adds a festive flair to your gathering, perfectly complementing the rich flavors of the cheese ball.
- Chocolate-Covered Fruit: For dessert, combine the savory with something sweet like dark chocolate-covered strawberries, providing a delectable end to your holiday meal.
- Mini Pretzel Bites: These bites offer a fun, salty counterpoint that pairs beautifully with the creaminess of the cheese ball, adding a touch of whimsy.
Each of these pairings not only enhances the festive spirit but ensures a delightful explosion of flavors that everyone will love!
Variations & Substitutions for Rudolph Christmas Cheese Ball
Customize your Rudolph Christmas Cheese Ball for a unique festive flair that’s sure to delight everyone’s taste buds!
- Dairy-Free: Use cream cheese made from cashews or tofu to keep it creamy while being dairy-free.
- Spicy Twist: Add diced jalapeños or a sprinkle of cayenne pepper for a delightful kick that complements the cheese beautifully.
- Herbaceous Burst: Swap out the usual herbs for fresh dill or basil for a refreshing twist that invigorates the flavor profile!
- Nut-Free: Leave out the nuts entirely and add crushed sunflower seeds for a crunchy texture that’s safe for nut allergies.
- Flavor Boost: Mix in some garlic powder or smoked paprika to ignite a cozy warmth that dances on your palate.
- Creative Garnish: Consider cherry peppers or radish slices for Rudolph’s nose and antlers, introducing colorful vibrancy to your cheese ball!
- Fun Shapes: Rather than a ball, shape it into a festive star or Christmas tree for an eye-catching centerpiece that wows your guests.
- Cheese Mix-Up: Try using a blend of cream cheese and goat cheese for a tangy flavor that’s as clever as it is tasty.
Looking for more festive inspirations? You might enjoy adding some Pumpkin Cheese Balls to your spread or a refreshing Christmas Salad Honey to complement your cheese ball. Happy cooking!
Make Ahead Options
Making the Rudolph Christmas Cheese Ball ahead of time is a fantastic way to save precious minutes on busy holiday days! You can prepare the entire cheese ball mixture up to 24 hours in advance and store it tightly wrapped in plastic wrap in the refrigerator. This not only helps the flavors meld beautifully but also keeps it fresh. If you’re feeling extra organized, you could even form the ball and chill it for up to 3 days beforehand. Just make sure to keep it covered to maintain its delicious taste. When you’re ready to serve, simply decorate the cheese ball with olives and a cherry tomato to bring Rudolph to life, and allow it to sit at room temperature for about 15-20 minutes prior to serving for that perfect creamy texture. Enjoy hassle-free entertaining this festive season!
Storage Tips for Rudolph Christmas Cheese Ball
Fridge: Store the Rudolph Christmas Cheese Ball in an airtight container for up to 3-5 days. Make sure it is well covered to prevent it from absorbing any odors from the fridge.
Freezer: If you want to prepare it in advance, freeze the cheese ball for up to 3 months. Wrap it tightly in plastic wrap before placing it in a freezer-safe bag. Thaw in the fridge overnight before serving.
Serving Tip: For the best flavor and texture, let the cheese ball sit at room temperature for about 15-20 minutes before serving.
Reheating: This festive appetizer is best enjoyed cold and does not require reheating, keeping it simple and convenient for your gatherings.
Expert Tips for Rudolph Christmas Cheese Ball
- Chill Time Matters: Ensure you chill the cheese ball for at least 2 hours. This not only firms it up but also enhances the flavors.
- Fresh Ingredients: Use fresh herbs and high-quality cheeses, as this greatly impacts the taste of your Rudolph Christmas Cheese Ball.
- Avoid Over-mixing: When combining ingredients, mix just until incorporated. Over-mixing can lead to a dense texture instead of creamy bliss.
- Creative Garnishing: Don’t hesitate to get playful with decorations! Consider using small pepper pieces or fun-shaped crackers to make your Rudolph stand out.
- Nut-free Variation: If you need a nut-free option, simply omit the nuts and perhaps add more herbs for texture and flavor in your Rudolph Christmas Cheese Ball.

Rudolph Christmas Cheese Ball Recipe FAQs
How do I select the best cream cheese for this recipe?
Absolutely! When choosing cream cheese, look for a brand that feels fresh and creamy. You can always go for a full-fat variety for a richer taste, but if you prefer a lighter option, low-fat cream cheese or ricotta can work beautifully as substitutes. Just ensure it’s at room temperature for easy mixing—a great tip for creamy consistency!
How long can I store the Rudolph Christmas Cheese Ball in the fridge?
Your Rudolph Christmas Cheese Ball can be stored in an airtight container in the fridge for up to 3-5 days. Be sure to keep it covered properly, as it might absorb other odors from the fridge. If you’re planning to make it ahead of time, preparing it a day in advance works wonders, as it allows the flavors to meld together for that extra deliciousness.
Can I freeze the Rudolph Christmas Cheese Ball?
Very! To freeze the cheese ball, wrap it tightly in plastic wrap and then place it inside a freezer-safe bag. You can freeze it for up to 3 months. When you’re ready to serve, simply remove it from the freezer and let it thaw in the fridge overnight. This method ensures your cheese ball retains its creamy texture without compromising flavor.
What if my cheese ball is too soft to hold its shape?
No worries! If you find that your cheese ball is too soft after mixing, try chilling it longer—at least an additional 30 minutes should do the trick. Also, consider adding a bit more shredded cheese or nuts to help firm it up. Always remember to shape it gently; a little patience goes a long way in achieving that perfect Rudolph form!
Are there any allergy considerations I should be aware of for this recipe?
Very thoughtful of you to ask! The Rudolph Christmas Cheese Ball recipe includes dairy and nuts, which are common allergens. If you’re serving guests with allergies, you can easily omit the nuts and substitute the blue cheese with a cream cheese-based alternative or a dairy-free option, ensuring everyone can enjoy this festive treat without worry.
What garnishes work best for decorating the Rudolph Cheese Ball?
Get creative—really! While the recipe suggests olives for the eyes and cherry tomatoes for the nose, feel free to explore with your decorations. You could use sliced bell peppers for ears or even pretzel sticks for antlers. Let your imagination run wild; the more the merrier when it comes to festive flair for your cheese ball!
These Rudolph Christmas Cheese Ball Recipe FAQs will guide you smoothly through any queries you might have as you create this delightful holiday appetizer!
Rudolph Christmas Cheese Ball: A Festive Holiday Treat
Ingredients
Equipment
Method
- In a large mixing bowl, combine the softened cream cheese, shredded cheese, and crumbled blue cheese until smooth and creamy.
- Fold in chopped fresh herbs and chopped nuts, mixing until evenly combined.
- Shape the mixture into a ball, ensuring it's firm and cohesive. Place it on a plate.
- Wrap the cheese ball in plastic wrap and refrigerate for at least 2 hours.
- Unwrap and decorate with olives for eyes and a cherry tomato for the nose.
- Serve with an assortment of crackers, veggie sticks, or bread slices.
Leave a Reply