
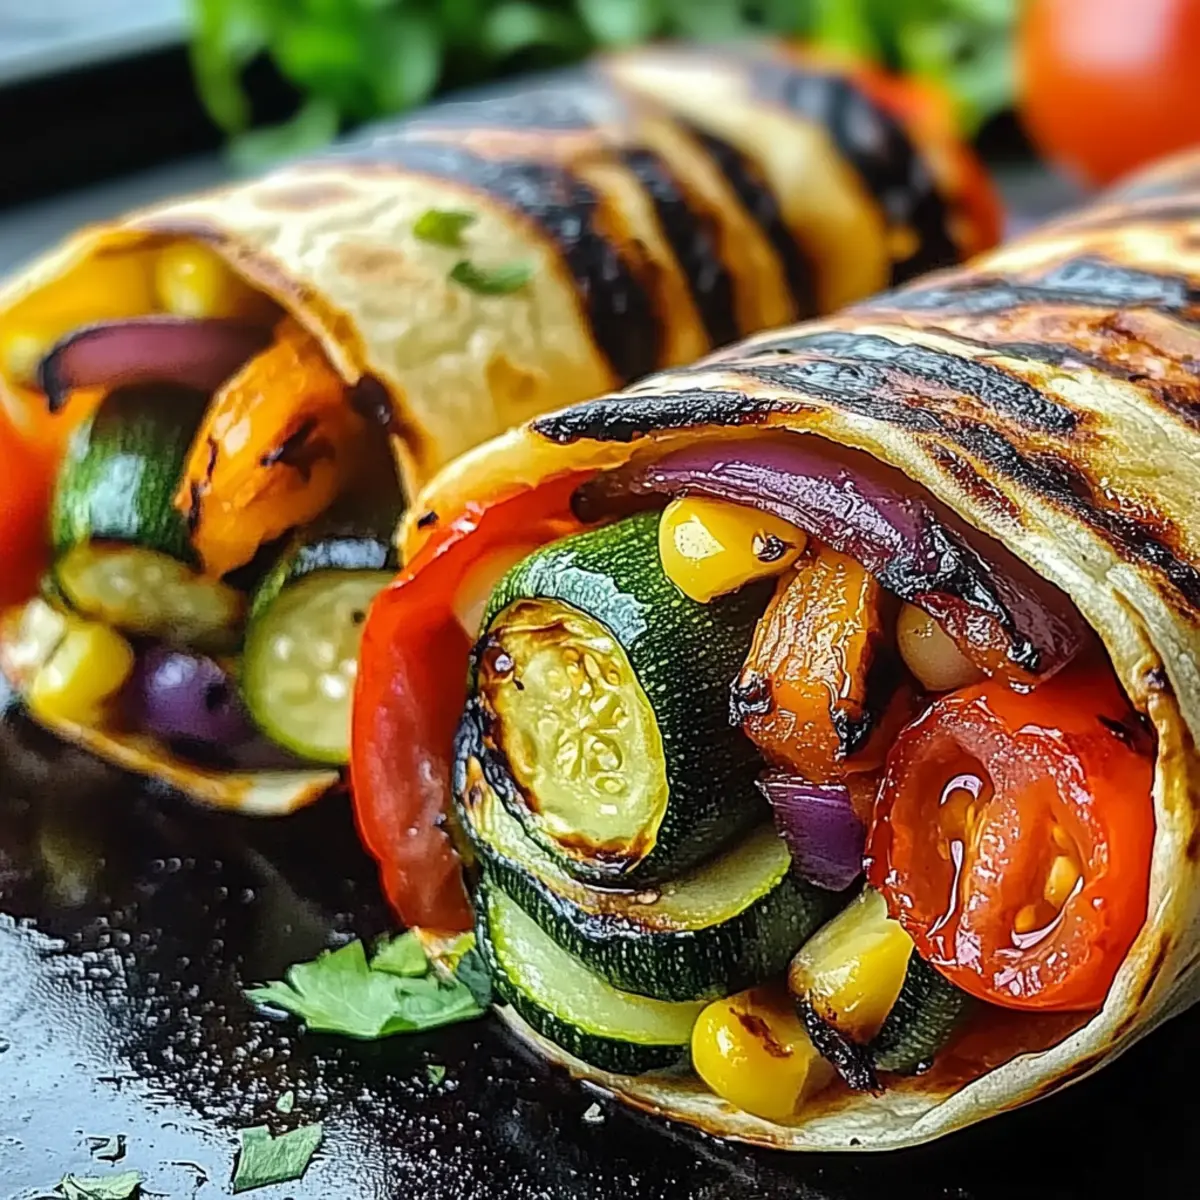
As I flipped through my recipe book on a sun-drenched afternoon, the memory of warm summer evenings gathered around the grill came flooding back. It’s a celebration of vibrant produce, a chance to turn simple veggies into something truly special. Enter the Grilled Vegetable Wrap—a delightful and healthy option that’s not only delicious but also incredibly adaptable. You can customize this dish to suit your preferences or what you have on hand, making it perfect for those busy weekdays or leisurely weekends. Whether you’re feeding a crowd or just looking for a satisfying solo meal, these wraps are a guaranteed hit! So, which combination of colorful veggies will you choose for your next wrap adventure?
Why You’ll Love Grilled Vegetable Wraps
Simplicity at Its Best: This recipe is easy to prepare, requiring just a few steps and minimal kitchen skills.
Flavor Explosion: The grilled vegetables create a mouthwatering contrast of smoky sweetness, especially when paired with tangy hummus.
Endless Customization: Adjust the ingredients based on your pantry! Substitute or combine different vegetables for a fresh experience every time.
Perfect for Meal Prep: Make a big batch and enjoy leftovers in salads or quick wraps, just like in a Chimichurri Grilled Chicken bowl.
Healthy and Satisfying: Packed with vitamins and fiber, these wraps are perfect for a nutritious meal without sacrificing flavor.
Crowd-Pleasing Appeal: Guests will love these vibrant wraps at gatherings, and they’re suitable for both vegetarians and meat-eaters alike. Enjoy a summer feast while savoring every bite!
Grilled Vegetable Wrap Ingredients
-
For the Vegetables
• Bell Peppers (various colors) – Adds sweetness and crunch; feel free to substitute with any color or type of pepper based on availability.
• Red Onion – Provides sharpness and depth of flavor; sweet onions or shallots can be used for a milder taste.
• Zucchini – Offers moisture and a soft texture; summer squash can be a delightful replacement.
• Yellow Squash – Mirrors the zucchini’s role; any squash variety can work for a vibrant touch.
• Eggplant (medium-sized) – Imparts richness and a meaty texture; consider portobello mushrooms for a different flavor.
• Asparagus Spears – Adds crunch and distinct flavor; green beans or broccoli are suitable substitutes.
• Cherry or Grape Tomatoes – Brings juiciness and freshness; chopped heirloom tomatoes are a sweeter option.
• Corn on the Cob (shucked) – Introduces sweetness and texture; canned or frozen corn can suffice but lacks that grilled essence. -
For the Marinade
• Olive Oil – Essential for marination, enhancing flavor and promoting grilling; avocado or canola oil can also substitute.
• Balsamic Vinegar – Provides a tangy depth; red wine vinegar or apple cider vinegar work as alternatives.
• Soy Sauce (or Tamari for gluten-free) – Adds umami richness; liquid aminos or coconut aminos can serve as gluten-free options.
• Garlic (minced) – Delivers bold flavor; garlic powder can be a quick stand-in, but remember to use less.
• Fresh Thyme and Dried Oregano – Infuse herbal notes; other herbs like basil or rosemary may also fit your taste.
• Red Pepper Flakes (optional) – Adds heat to the mix; adjust according to your spice preference or omit for no heat.
• Salt and Black Pepper – Crucial for seasoning; opt for sea salt and freshly ground pepper for the best flavor. -
For Assembly
• Large Tortillas (whole wheat, spinach, or regular) – The wrap base; gluten-free tortillas or large lettuce leaves are excellent substitutes.
• Hummus (or another spread like pesto or tzatziki) – Adds creaminess and flavor; avocado or vegan cream cheese can be tasty alternatives.
Prepare your adventure with these Grilled Vegetable Wrap ingredients and let your creativity shine in the kitchen!
Step‑by‑Step Instructions for Grilled Vegetable Wrap
Step 1: Prepare the Vegetables
Begin by washing and chopping your vibrant array of vegetables, including bell peppers, red onion, zucchini, yellow squash, eggplant, asparagus, corn, and cherry tomatoes. Aim for uniform pieces to ensure even grilling. Set aside the chopped veggies in a large mixing bowl; the colors and textures should be inviting and ready for marination.
Step 2: Make the Marinade
In a medium-sized bowl, whisk together olive oil, balsamic vinegar, soy sauce, minced garlic, fresh thyme, dried oregano, red pepper flakes, salt, and black pepper. Mix until well combined to create a flavorful marinade for your grilled vegetable wrap. The dressing should be fragrant and slightly thick, perfect for coating your vegetables evenly.
Step 3: Marinate the Vegetables
Pour the prepared marinade over the chopped vegetables, tossing gently to ensure each piece is well-coated. Allow the vegetables to marinate for at least 20 minutes at room temperature, which helps them absorb all the delicious flavors. You’ll see the marinade stick to the veggies, making them irresistibly tasty once grilled.
Step 4: Preheat the Grill
While the vegetables marinate, preheat your grill to medium-high heat, around 400°F (200°C). This ensures that the vegetables will cook quickly and evenly, achieving that desirable char. It’s a great time to prepare any necessary tools, such as skewers or a grilling basket for easier handling of small veggies.
Step 5: Grill the Vegetables
Once the grill is hot, place the marinated vegetables in batches on it. Start with zucchini and yellow squash, grilling them for about 3-4 minutes per side until they turn golden and tender. Follow with asparagus, corn, and finish with cherry tomatoes, which will take less time. The goal is to achieve a nice char without overcooking.
Step 6: Chop the Grilled Vegetables
After grilling, remove the vegetables from the heat and let them cool for a few minutes. Once slightly cooled, chop the veggies into bite-sized pieces for easy assembly in your grilled vegetable wrap. The charred edges should add a delightful smokiness, enhancing the overall flavor profile.
Step 7: Warm the Tortillas
To prepare the tortillas, place them on the grill for just about 30 seconds on each side or warm them in a skillet over medium heat until they are pliable. This quick warming step enhances the texture and makes it easy to roll your grilled vegetable wrap without tearing the tortillas.
Step 8: Assemble the Wraps
Spread a generous layer of hummus on each warmed tortilla, adding a flavorful base for the grilled vegetables. Then, pile on the chopped grilled vegetables, layering them as desired. Optionally, add toppings like fresh herbs or extra spices, then wrap tightly. The finished grilled vegetable wraps should look hearty and inviting, ready to serve.
Make Ahead Options
These Grilled Vegetable Wraps are perfect for busy home cooks looking to save time during the week! You can chop and marinate the vegetables up to 24 hours in advance, allowing them to absorb all those delicious flavors. Simply refrigerate the marinated veggies in an airtight container. Additionally, the grilled vegetables can be stored in the refrigerator for up to 3 days, ready to be assembled whenever you’re craving a wrap. When you’re ready to serve, warm the tortillas and fill them with the prepped veggies and your favorite spread. This way, your Grilled Vegetable Wraps remain just as vibrant and tasty, making healthy eating a breeze!
What to Serve with Grilled Vegetable Wraps
Elevate your dining experience by pairing these colorful wraps with complementary dishes that enhance their vibrant flavors.
-
Crispy Sweet Potato Fries: These add a delightful crunch and a hint of sweetness that balances the smoky vegetables perfectly.
-
Zesty Quinoa Salad: A refreshing mix of quinoa, cucumber, and lemon can provide a light, tangy contrast to the robust wraps.
-
Garden Fresh Gazpacho: This chilled tomato soup brings a refreshing, bright flavor profile to your meal, making every bite enjoyable.
-
Creamy Avocado Dip: Smooth and rich, this dip enhances the wraps’ creamy hummus and complements the grilled veggies beautifully.
-
Herbed Couscous: Light and fluffy, seasoned couscous delivers a nutty flavor and pairs well, adding a satisfying texture to your table.
-
Mixed Green Salad: A simple salad with arugula, cherry tomatoes, and a balsamic vinaigrette adds crispness and a peppery bite that brightens every bite.
-
Chilled Lemonade or Iced Tea: Refreshing beverages that keep the meal light and complement the fresh flavors of the grilled vegetable wraps perfectly.
-
Dark Chocolate Almond Cookies: For a sweet ending, these cookies offer a satisfying crunch and rich flavor that pairs well with the savory elements of your meal.
Grilled Vegetable Wrap Variations
Feel free to get creative with these Grilled Vegetable Wraps, inviting your taste buds on a fun culinary adventure!
-
Dairy-Free: Substitute hummus with avocado or a vegan cream cheese spread for a creamy touch without dairy. The rich texture will keep it deliciously satisfying!
-
Low-Carb: Replace tortillas with large lettuce leaves for a refreshing wrap. This twist is perfect for those looking to cut carbs while enjoying vibrant flavors.
-
Spicy Kick: For some heat, add diced jalapeños or pickled peppers to your veggies before grilling. It’s a fun way to spice up every bite!
-
Earthy Flavor: Switch out eggplant for portobello mushrooms to add a meaty texture and earthy depth. Grilled mushrooms can really enhance the overall taste experience.
-
Extra Crunch: Include crunchy vegetables like radishes or sliced cucumbers in your wrap for added texture. They’ll bring a delightful crunch that contrasts with the grilled veggies.
-
Mediterranean Twist: Add olives and feta cheese for a Mediterranean flair. These ingredients transform your wraps into a delicious taste of the Mediterranean, reminiscent of warm summer nights.
-
Seasonal Surprises: Use seasonal vegetables, such as roasted butternut squash in the fall or zucchini and peppers in the summer. Embarking on this journey means your wraps will always feel fresh and exciting!
-
Hearty Grains: Mix in some cooked quinoa or couscous inside your wrap for added protein and substance. This addition not only elevates the dish but can turn it into a complete meal.
Explore different combinations of these ideas, and don’t forget to check out delightful recipes like the Grilled Shrimp Bowl or the hearty Chicken and Vegetables Skillet for more options to satisfy your taste buds!
Expert Tips for Grilled Vegetable Wraps
-
Choose Fresh Veggies: Use the freshest vegetables available for the best flavor; wilted produce can lead to less crunchy, enjoyable wraps.
-
Avoid Sogginess: Ensure grilled vegetables cool down before assembling the wraps to prevent them from making the tortillas soggy.
-
Use Proper Heat: Grill at medium-high heat to ensure vegetables cook quickly, allowing for that smoky char without becoming mushy inside.
-
Marinate Longer: If time permits, marinate the vegetables for up to an hour. This will deepen the flavors and enhance the overall taste of your grilled vegetable wrap.
-
Flexible Fillings: Feel free to mix and match vegetables based on what you have on hand. This adaptability makes grilled vegetable wraps perfect for using up leftovers.
How to Store and Freeze Grilled Vegetable Wraps
Fridge: Store assembled wraps in an airtight container for up to 2 days. Place parchment paper between wraps to prevent sticking.
Freezer: For longer storage, freeze assembled wraps in plastic wrap and then in a freezer bag for up to 1 month. Thaw in the refrigerator overnight before reheating.
Reheating: Reheat in a skillet over medium heat for about 5 minutes, or until warmed through. Enjoy the vibrant flavors of your Grilled Vegetable Wraps as if they were just made!
Grilled Vegetable Wrap Recipe FAQs
What vegetables are best for grilling?
Absolutely! When it comes to grilling, choose fresh, in-season vegetables like bell peppers, zucchini, eggplant, and asparagus for the best flavor and texture. Look for veggies that are firm and vibrant in color. Avoid those with dark spots or wrinkles, which indicate over-ripeness.
How should I store leftover grilled vegetable wraps?
I recommend wrapping any leftover grilled vegetable wraps tightly in plastic wrap or placing them in an airtight container. They can be stored in the fridge for up to 2 days. To enjoy them at their best, add a little fresh hummus or a drizzle of olive oil before serving!
Can I freeze assembled grilled vegetable wraps?
Yes, you can! To freeze, wrap each assembled grilled vegetable wrap tightly in plastic wrap and then place them in a freezer bag. They will last for about 1 month. When you’re ready to enjoy them, thaw in the refrigerator overnight and reheat in a skillet for 5 minutes over medium heat.
What if my grilled vegetables are soggy?
If your vegetables end up soggy, it’s often due to excess moisture. To troubleshoot, grill them until they are nicely charred and tender but not mushy. After grilling, let them cool slightly before assembling the wraps. You can also ensure that the tortillas are warm but not overheated to help maintain their texture.
Are these grilled vegetable wraps suitable for a gluten-free diet?
Very! To adapt the grilled vegetable wrap for a gluten-free diet, simply substitute regular tortillas with gluten-free tortillas or use large lettuce leaves as the wrap. This ensures everyone at your table can enjoy this delicious, healthy meal without worry!
Grilled Vegetable Wrap: Easy, Healthy Fun for Your Table
Ingredients
Equipment
Method
- Begin by washing and chopping your vibrant array of vegetables, including bell peppers, red onion, zucchini, yellow squash, eggplant, asparagus, corn, and cherry tomatoes.
- Set aside the chopped veggies in a large mixing bowl; aim for uniform pieces to ensure even grilling.
- In a medium-sized bowl, whisk together olive oil, balsamic vinegar, soy sauce, minced garlic, fresh thyme, dried oregano, red pepper flakes, salt, and black pepper.
- Mix until well combined to create a flavorful marinade.
- Pour the prepared marinade over the chopped vegetables, tossing gently to ensure each piece is well-coated.
- Allow the vegetables to marinate for at least 20 minutes at room temperature.
- Preheat your grill to medium-high heat, around 400°F (200°C).
- Once the grill is hot, place the marinated vegetables in batches on it, starting with zucchini and yellow squash.
- Grill for about 3-4 minutes per side until they turn golden and tender.
- Finish with asparagus, corn, and cherry tomatoes, which will take less time.
- After grilling, remove the vegetables from the heat and let them cool for a few minutes before chopping into bite-sized pieces.
- Warm the tortillas on the grill or in a skillet.
- Spread a generous layer of hummus on each warmed tortilla.
- Add the chopped grilled vegetables, layer on toppings if desired, then wrap tightly.
Leave a Reply