
Walking through the kitchen, the heavenly aroma of vanilla and chocolate wafted through the air, beckoning me to whip up a treat that marries the best of both worlds—our beloved classic marble cake. This Classic Marble Cake Recipe is a delightful dance of contrasting flavors, offering a gorgeous blend of rich chocolate and creamy vanilla batters that swirl together like a canvas of edible art. Not only is this cake a visual masterpiece, but it’s also incredibly simple to make, perfect for both weekday family desserts and festive occasions. Plus, it’s easily adaptable—feel free to explore variations like a Chocolate Chip Marble Cake or a citrus twist! Are you ready to sprinkle some joy into your baking routine and create a cake that will steal the spotlight? Let’s dive in!
Why is marble cake so delightful?
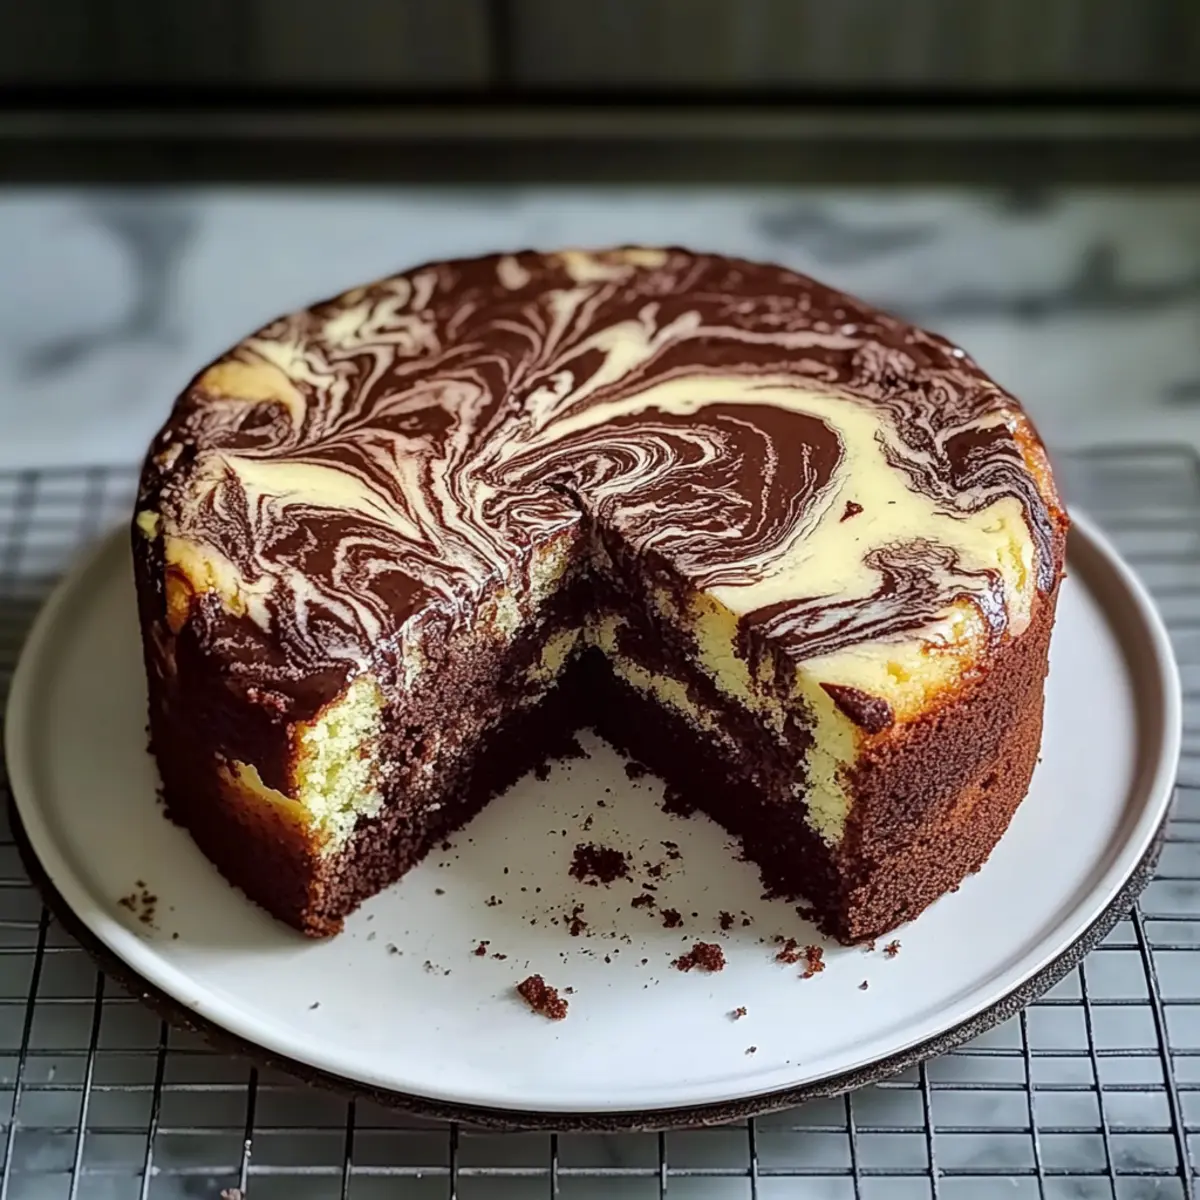
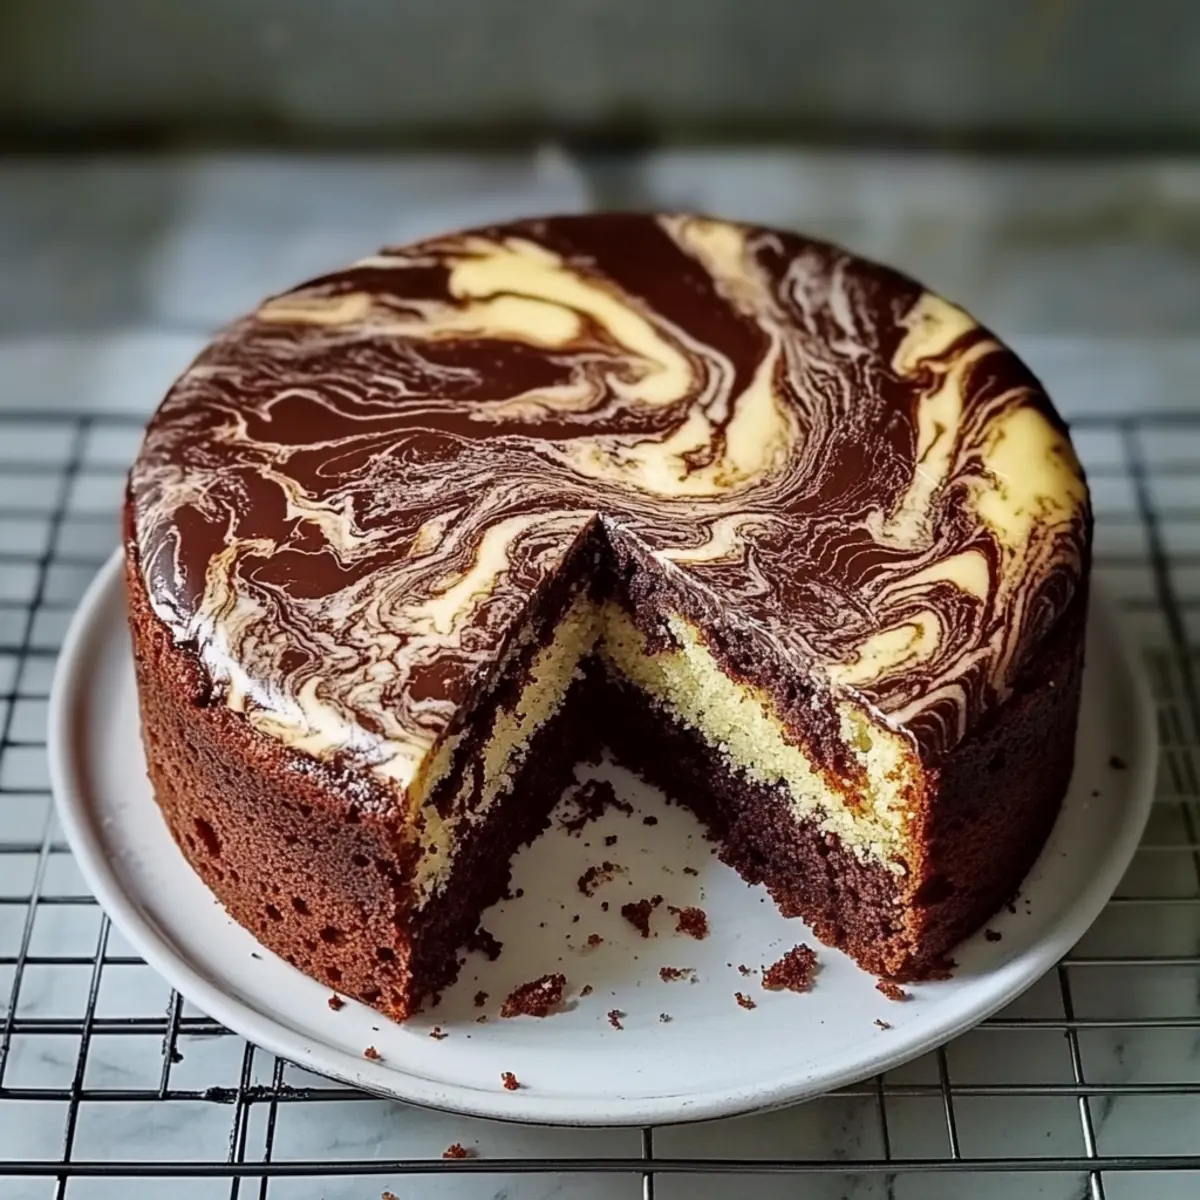
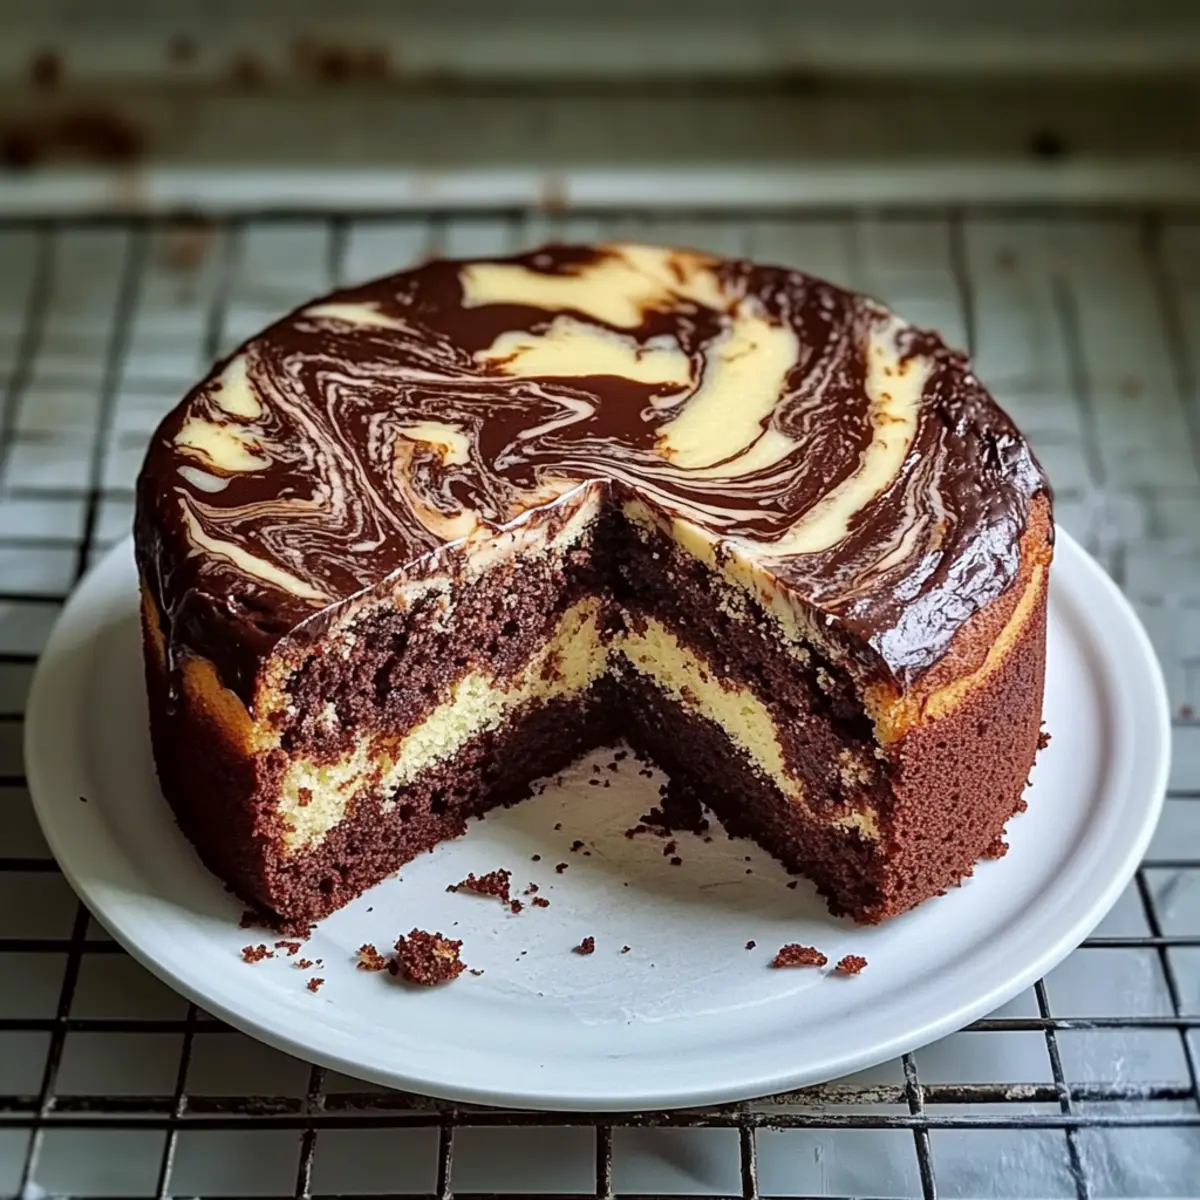
Visual Appeal: Each slice reveals a stunning swirl of chocolate and vanilla that’s sure to impress your guests.
Easy to Make: With straightforward steps and minimal prep time, this recipe is perfect for bakers of all skill levels.
Versatile Options: Love customization? Switch it up with variations like Chocolate Chip Marble Cake or even a refreshing Citrus Marble Cake!
Comforting Flavor: The harmonious blend of rich chocolate and creamy vanilla offers that classic homemade taste that everyone craves.
Perfect for Any Occasion: Whether it’s a casual family dinner or a celebratory event, this cake is a guaranteed crowd-pleaser!
Feel free to explore this delightful Classic Marble Cake Recipe for a sweet addition to your next gathering.
Classic Marble Cake Recipe Ingredients
• Dive into the deliciousness of this Classic Marble Cake Recipe with these essential ingredients!
For the Batter
- All-purpose flour – A key ingredient that provides structure; make sure to spoon it into your measuring cup for accuracy.
- White sugar – Sweetens your cake while contributing to a fine texture and beautiful golden color; balance is crucial!
- Milk – Adds moisture for a tender, flavorful crumb; you can opt for whole or 2% milk based on your preference.
- Eggs – Essential for structure and moisture, helping the cake rise and bind; they’re crucial for a perfect texture.
- Butter – Brings rich flavor and a velvety mouthfeel; make sure it’s softened for optimal creaming with sugar.
- Baking powder – The hero that helps your cake rise; check its freshness to ensure it’s effective.
- Vanilla extract – Infuses your cake with aromatic flavors; always choose pure extract for best results.
- Salt – Balances out the sweetness and enhances the overall flavor; it’s a small but mighty player!
- Unsweetened cocoa powder – Transforms part of the batter into chocolate, creating that signature marble effect; natural cocoa works best!
Step‑by‑Step Instructions for Classic Marble Cake Recipe
Step 1: Prepare Cake Pan
Start by preheating your oven to 350°F (175°C). While it warms up, grab a 9-inch round cake pan, greasing it thoroughly with butter or cooking spray, then lightly dust it with flour. This will keep your Classic Marble Cake from sticking and ensure a lovely, even release once baked.
Step 2: Mix Dry Ingredients
In a medium mixing bowl, whisk together 2 cups of all-purpose flour, 2 teaspoons of baking powder, and a pinch of salt. Sifting the dry ingredients helps aerate them, ensuring a light, fluffy cake. Set this mixture aside, as you’ll integrate it with the wet ingredients shortly.
Step 3: Cream Butter and Sugar
In a large mixing bowl, beat together 1 cup of softened butter and 1 ¾ cups of white sugar using a hand mixer or stand mixer until the blend becomes light and fluffy—this should take about 3 to 5 minutes. The texture should resemble a cloud, crucial for achieving the right moisture level in your Classic Marble Cake.
Step 4: Incorporate Eggs and Milk
Add 4 large eggs one at a time, mixing well after each addition to ensure a smooth batter. Then, pour in 1 cup of milk and 2 teaspoons of vanilla extract, blending until everything is fully incorporated and the mixture looks uniform and creamy. This step is key to introducing rich flavor and moisture to your cake.
Step 5: Combine Wet and Dry Mixtures
Gradually add the dry mixture to your creamed butter and sugar, mixing until just combined. Be careful not to overmix, as this can lead to a dense cake. The final batter should be thick and smooth, perfect for creating the delightful marbling effect in your Classic Marble Cake.
Step 6: Prepare Chocolate Batter
Scoop out half of the batter and transfer it into another mixing bowl. To this portion, add ½ cup of unsweetened cocoa powder. Mix until the cocoa is fully incorporated, and the batter turns a deep chocolate color. This will create the signature chocolate layer in your marble cake.
Step 7: Marble the Batter
In your prepared cake pan, alternate spooning dollops of vanilla and chocolate batter. Create a stunning marbled effect by gently swirling them together with a knife or skewer—be careful not to overmix, as you want distinct chocolate and vanilla patterns to shine through in your Classic Marble Cake.
Step 8: Bake
Once your batter is beautifully marbled, place the pan in the preheated oven. Bake for approximately 30 minutes, or until a toothpick inserted into the center comes out clean or with just a few crumbs attached. The top should be golden and slightly springy to the touch, signaling it’s ready to come out.
Step 9: Cool the Cake
After baking, remove the Classic Marble Cake from the oven and allow it to cool in the pan for about 10 minutes. Then, carefully turn it out onto a wire rack, letting it cool completely before icing or serving. This cooling step is essential, as it locks in moisture for a tender crumb.
Make Ahead Options
These Classic Marble Cake preparations are perfect for busy home cooks looking to save time without sacrificing flavor! You can prepare the batter up to 24 hours in advance; simply mix the vanilla and chocolate batters as instructed but don’t bake. Store the combined batter in an airtight container in the refrigerator to ensure freshness. When you’re ready to bake, allow it to come to room temperature for about 30 minutes before transferring to the prepared cake pan and baking as directed. Alternatively, you can also bake the cake ahead of time and store it in an airtight container at room temperature for up to 3 days or refrigerate for up to 5 days. Just remember not to frost until you’re ready to serve for that fresh, delightful taste!
What to Serve with Classic Marble Cake Recipe
Imagine the joy of delighting your family and friends with the visual and culinary splendor of your homemade marble cake, beautifully accompanied by carefully selected pairings.
- Fresh Berries: Bright, juicy berries add a refreshing contrast, elevating the rich flavors of the cake with a burst of natural sweetness.
- Vanilla Ice Cream: Creamy vanilla ice cream perfectly complements the cake’s tender crumb, creating a delightful contrast of temperatures and textures.
- Chocolate Ganache: Drizzling warm chocolate ganache enhances the chocolate flavor while adding a luxurious touch to each slice of marble cake.
- Whipped Cream: Light and airy whipped cream balances the cake’s richness and adds a touch of elegance to your dessert presentation.
- Coffee or Espresso: The warm, bold notes of coffee or espresso enhance the cake’s chocolate flavors, making it a lovely duo for dessert time.
- Citrus Salad: A zesty citrus salad brightens your plate, cutting through the sweetness of the cake and providing a vibrant, uplifting finish.
- Lemon Glaze: A tangy lemon glaze drizzled over the cake creates a beautiful contrast in flavors, bringing a bright note to the indulgence.
- Sparkling Water: Keep it light and refreshing with sparkling water, providing an effervescent palate cleanser between bites.
- Cheese Platter: Consider pairing with a mild cheese selection, like brie or mascarpone, to offer a delightful savory counterpoint that complements the dessert.
How to Store and Freeze Classic Marble Cake
Room Temperature: Keep the cake in an airtight container at room temperature for up to 3 days. This helps maintain its moist and tender texture.
Fridge: If you want to keep the cake fresh longer, refrigerate it for up to 5 days. Wrap it in plastic wrap or place it in a container to prevent drying.
Freezer: For long-term storage, wrap the Classic Marble Cake tightly in plastic wrap and then foil. It can be frozen for up to 3 months. Thaw in the refrigerator before serving.
Reheating: To enjoy leftovers warm, gently reheat slices in the microwave for about 10-15 seconds. This will revive its delicious flavors and soft texture.
Classic Marble Cake Recipe Variations
Feel free to unleash your creativity and make this classic marble cake uniquely yours with these delightful twists!
-
Chocolate Chip Marble Cake: Stir in mini chocolate chips into the vanilla batter for extra sweetness and texture.
-
Citrus Marble Cake: Add zest from an orange or lemon to the vanilla batter for a refreshing, zesty kick.
-
Mocha Marble: Mix in a tablespoon of dissolved instant coffee into the chocolate batter for an indulgent caffeine boost.
-
Almond Marble Cake: Substitute vanilla extract with almond extract for a nutty flavor that adds a warm touch to the cake.
-
Bundt Cake Version: Double the batter and pour it into a bundt pan for an elegant presentation that’s perfect for gatherings.
-
Marbled Cupcakes: Use the classic recipe in cupcake liners for fun, portable desserts. They’re great for parties or lunchboxes!
-
Nutty Additions: Fold in chopped nuts such as walnuts or pecans into the batter for a delightful crunch and added richness.
-
Spiced Marble Cake: Introduce a pinch of cinnamon or nutmeg to the vanilla batter for a cozy, aromatic variation that warms the soul.
Explore these variations and pair this classic marvel with a side of fresh fruit or a scoop of vanilla ice cream. You might also enjoy delightful recipes like Apple Crumb Cake alongside your marble cake for a fabulous dessert spread!
Expert Tips for Classic Marble Cake
-
Accurate Measurements: Always spoon and level your flour for precision; too much can make the cake dense rather than light.
-
Distinct Marble Effect: Swirl the batters gently and avoid overmixing. You want to see the beautiful layers of the Classic Marble Cake, not a uniform color.
-
Fresh Ingredients: Ensure your baking powder is fresh to guarantee a good rise and fluffy texture in your cake.
-
Cool Before Icing: Allow the cake to cool completely on a wire rack; this prevents icing from melting and ensures a beautiful finish.
-
Storage Tips: Store your Classic Marble Cake in an airtight container at room temperature for about 3 days, or refrigerate for up to 5 days to maintain freshness.

Classic Marble Cake Recipe FAQs
How do I select the right ingredients for the Classic Marble Cake?
Absolutely! Choosing fresh, quality ingredients will significantly enhance your marble cake. Look for eggs that are not past their expiration date, fresh baking powder (it should be less than 6 months old), and unsweetened cocoa powder with a vivid color—this indicates freshness. For the butter, aim for high-fat content and make sure it’s at room temperature for easy creaming.
How should I store the Classic Marble Cake?
I recommend storing your Classic Marble Cake in an airtight container at room temperature for about 3 days to keep it moist and tender. If it’s not consumed within that timeframe, you can safely refrigerate it for up to 5 days—just wrap it well to prevent it from drying out!
Can I freeze the Classic Marble Cake?
Definitely! To freeze the Classic Marble Cake, first let it cool completely. Then wrap it tightly in plastic wrap, followed by a layer of aluminum foil to prevent freezer burn. It can be stored in the freezer for up to 3 months. When you’re ready to enjoy it, simply thaw it in the refrigerator overnight for the best results.
What should I do if my marble cake isn’t rising properly?
The most common reason for a cake not rising is using old baking powder—always check the expiration date. Additionally, make sure you’re not overmixing the batter when combining wet and dry ingredients, as this can lead to a dense cake. Mixing just until combined ensures a light, airy crumb.
Are there any dietary considerations I should be aware of for the Classic Marble Cake?
Yes, if you’re baking for someone with allergies, keep in mind that this cake contains gluten (from flour), dairy (from milk and butter), and eggs. For a gluten-free version, you can substitute the all-purpose flour with a 1:1 gluten-free baking blend. You could also use plant-based milk and a vegan butter alternative to make it dairy-free!
What can I do if my chocolate batter is too thick?
If your chocolate batter ends up being too thick after mixing in cocoa powder, don’t worry! Just add a tablespoon of milk at a time until it reaches a smoother consistency that’s more in line with the vanilla batter. This will ensure a better marbling effect when you swirl them together!
Classic Marble Cake Recipe: Irresistible Chocolate & Vanilla Delight
Ingredients
Equipment
Method
- Preheat your oven to 350°F (175°C) and grease a 9-inch round cake pan.
- In a medium bowl, whisk together flour, baking powder, and salt; set aside.
- In a large bowl, beat butter and sugar until light and fluffy, about 3-5 minutes.
- Add eggs one at a time, mixing well after each, then mix in milk and vanilla.
- Gradually add dry ingredients, mixing until just combined.
- Pour half the batter into a separate bowl and mix in cocoa powder until fully incorporated.
- Alternate spooning dollops of vanilla and chocolate batter into the prepared pan, swirling gently.
- Bake for approximately 30 minutes, or until a toothpick comes out clean.
- Allow to cool in the pan for about 10 minutes, then turn out onto a wire rack to cool completely.
Leave a Reply