
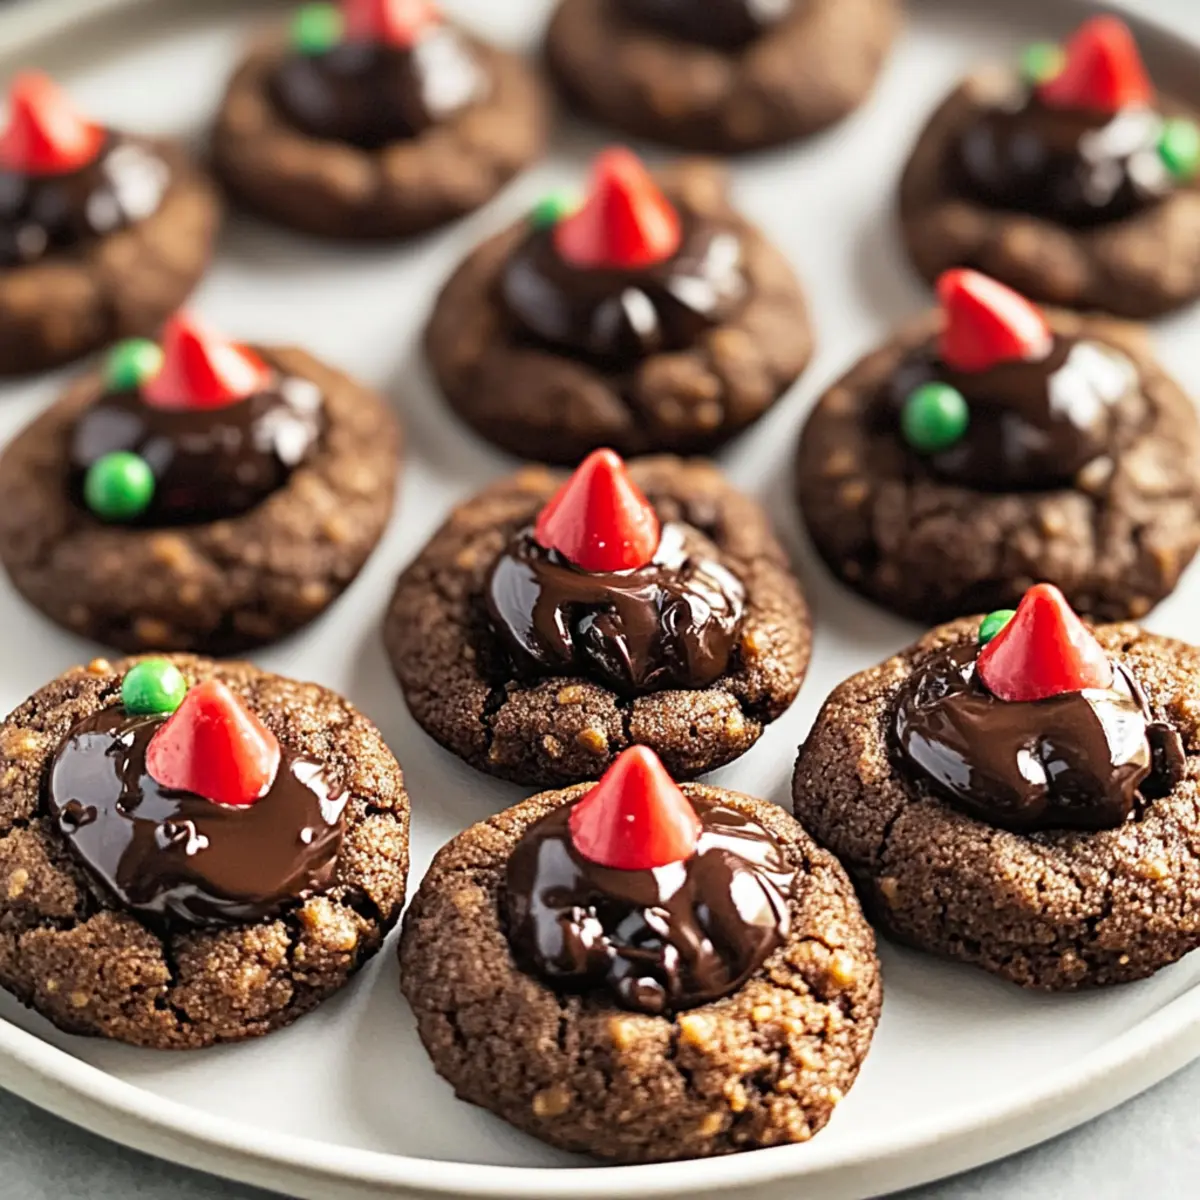
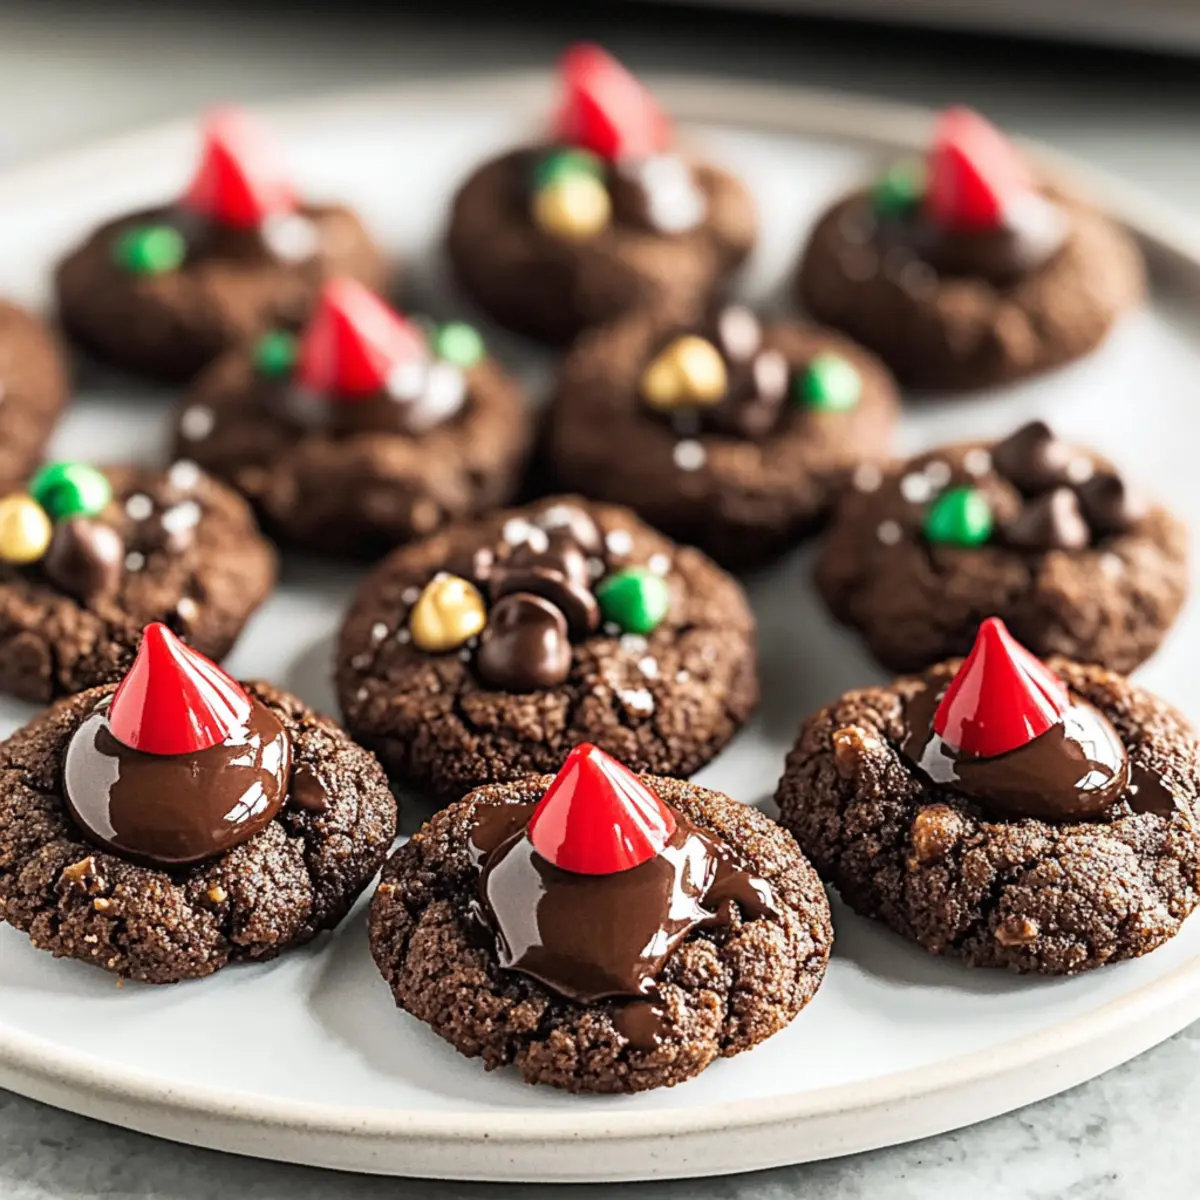
As the holiday season approaches, the joy of baking fills the air, bringing back memories of laughter and warmth around the kitchen. Enter the Chocolate Blossom Cookies—a delightful treat that captures the essence of festive gatherings. These cookies are not only soft and fudgy but also incredibly easy to whip up, making them the ideal holiday cookies to brighten any occasion. Topped with melted Hershey’s Kisses, they present a sweet indulgence that’ll charm your family and friends alike at cookie exchanges or cozy get-togethers. Plus, they’re perfect for those of us looking to leave fast food behind and embrace homemade goodness. Ready to embark on a delicious baking adventure that will fill your home with mouthwatering aromas? Let’s get started!
Why are Chocolate Blossom Cookies a must-try?
Irresistible Flavor: The rich chocolate base combined with creamy Hershey’s Kisses creates a decadent treat that will satisfy any sweet tooth.
Quick and Easy: You can whip these up in no time, making them perfect for last-minute gatherings or holiday baking marathons.
Festive Appeal: With their inviting appearance and delightful taste, these cookies are sure to impress guests at any celebration or cookie exchange.
Versatile Treat: Customize them with different coatings or fillings to suit your taste; try swapping Hershey’s Kisses for caramel candies for a delicious twist!
Perfect for Sharing: Their soft, fudgy texture and chocolatey goodness make them ideal for sharing with loved ones; one bite, and everyone will be asking for more!
Chocolate Blossom Cookies Ingredients
For the Dough:
- All-purpose flour – Essential for structure; substitute with a gluten-free blend for a gluten-free option.
- Natural cocoa powder – Adds rich flavor and color; using Dutch-processed cocoa enhances the chocolate intensity.
- Baking powder – A necessary leavening agent that ensures the cookies rise beautifully.
- Baking soda – Another crucial leavening agent for a perfect rise and golden color; avoid substituting with cornstarch.
- Salt – Balances the sweetness of the cookies; opt for kosher salt for a rustic touch.
- Unsalted butter – Provides moisture and richness; vegan butter can be used for a dairy-free version.
- Brown sugar – Introduces sweetness and moisture; dark brown sugar will impart a deeper flavor.
- Large egg – Binds the ingredients and adds moisture; replace with a flax egg (1 tbsp ground flaxseed + 2.5 tbsp water) for a vegan alternative.
- Vanilla extract – Enhances flavor; always choose pure vanilla for the best taste.
For the Coating and Topping:
- Granulated sugar – Provides a delightful crunch when rolled; can also give a beautiful sparkle.
- Sprinkles – Add color and fun; perfect for festive occasions!
- Powdered sugar – Drizzle for a smooth finish and elegant presentation.
- Hershey’s Kisses – The delicious topping; try different flavors for unique twists, like peppermint or almond.
Explore the joy of making these Chocolate Blossom Cookies, and let the delightful aroma fill your home with warmth and the spirit of the holidays!
Step‑by‑Step Instructions for Chocolate Blossom Cookies
Step 1: Preheat and Prepare
Begin by preheating your oven to 350°F (175°C). While it heats, line a baking sheet with parchment paper to prevent sticking and ensure even baking. The preparation of the baking sheet is key, as it will hold your delicious Chocolate Blossom Cookies once they are shaped.
Step 2: Mix the Dry Ingredients
In a medium bowl, whisk together the all-purpose flour, natural cocoa powder, baking powder, baking soda, and salt. Ensuring your dry ingredients are well combined will create a consistent flavor throughout the batch. Once mixed, set this bowl aside to keep your workspace tidy.
Step 3: Cream the Butter and Sugar
In a large mixing bowl, use a hand mixer to cream together the softened unsalted butter and brown sugar until the mixture is light and fluffy, about 2-3 minutes. The airy consistency is crucial as it contributes to the soft, fudgy texture of the Chocolate Blossom Cookies you want.
Step 4: Add Egg and Vanilla
Next, add the large egg and vanilla extract to the creamed butter and sugar, mixing well until fully incorporated. This step adds moisture and enhances the cookies’ flavor profile. Take a moment to enjoy the sweet aroma that fills your kitchen as these ingredients blend together.
Step 5: Combine Dry and Wet Mixtures
Gradually incorporate the dry mixture into the wet ingredients. Mix just until combined; avoid overmixing to keep your cookies tender. The dough should be thick yet smooth, ready to be molded into delightful shapes that will soon become your favorite Chocolate Blossom Cookies.
Step 6: Shape the Cookies
Scoop out about 1 to 1.5 tablespoons of dough and roll it into a ball. For added flair, roll each ball in granulated sugar, sprinkles, or powdered sugar for a fun and festive touch. Place the coated balls onto the prepared baking sheet, spacing them about 2 inches apart to allow for spreading while baking.
Step 7: Bake the Cookies
Place the baking sheet in the preheated oven and bake the cookies for 7-8 minutes, or until they appear puffy and slightly crackled on top. They may seem a bit soft, but don’t worry—they will firm up as they cool, resulting in the soft and chewy Chocolate Blossom Cookies everyone loves.
Step 8: Add the Hershey’s Kisses
Immediately after you remove the cookies from the oven, gently press an unwrapped Hershey’s Kiss into the center of each cookie. This step creates the signature look and delicious surprise that makes these cookies truly memorable. The chocolate will melt and set beautifully as they cool.
Step 9: Cool and Serve
Allow the cookies to cool on the baking sheet for about 5-10 minutes, just until they are firm enough to handle. Then, transfer the Chocolate Blossom Cookies to a wire rack to cool completely. The delightful aroma and melty chocolate in the center are sure to tempt you as they cool!

What to Serve with Chocolate Blossom Cookies?
Indulge in a delightful spread that complements the sweet, fudgy bites of chocolate goodness and enhances your baking experience.
-
Cold Glass of Milk: A classic pairing, the creamy richness of milk enhances the chocolate flavors and balances the sweetness beautifully.
-
Rich Hot Chocolate: For a cozy twist, serve your cookies with a warm cup of hot chocolate, creating a double-chocolate delight that’s perfect for chilly evenings.
-
Vanilla Ice Cream: The cool creaminess of vanilla ice cream contrasts beautifully with the warm cookies, making for a delicious combination of textures and temperatures.
-
Fresh Fruit Salad: A vibrant mix of fresh fruits adds a refreshing note, providing a nice contrast to the rich chocolate and making the meal more balanced.
-
Chocolate Drizzle: Elevate your cookies by drizzling some melted chocolate on top before serving; it adds an extra boost of chocolatey goodness that every chocoholic will adore.
-
Homemade Whipped Cream: Light and airy, whipped cream complements the dense, fudgy texture of the cookies, bringing airy elegance to your dessert table.
-
Festive Spritz Cookies: Serve alongside other holiday favorites like spritz cookies for a fun, colorful variety on your dessert platter, enhancing the festive spirit.
-
Gourmet Coffee: A robust cup of coffee pairs wonderfully with these cookies, balancing the sweetness while offering a warm, inviting aroma to your table.
Let the Chocolate Blossom Cookies shine as you build a memorable feast that delights all the senses!
Chocolate Blossom Cookies Variations & Substitutions
Feel free to unleash your creativity and make these Chocolate Blossom Cookies your own with these fun variations!
- Gluten-Free: Substitute all-purpose flour with a gluten-free blend to accommodate dietary needs without sacrificing taste.
- Vegan: Opt for coconut oil instead of butter and replace the egg with a flax egg (1 tbsp ground flaxseed + 2.5 tbsp water) for a cruelty-free treat.
- Nutty Addition: Stir in chopped nuts, such as walnuts or pecans, to add a delightful crunch to your cookies. The balance of textures will elevate your baking experience.
- Minty Twist: Use mint-flavored Hershey’s Kisses for a refreshing change, marrying chocolate and mint in perfect harmony. It’s like a holiday party in every bite!
- Caramel Surprise: Swap out Hershey’s Kisses for caramel candies, adding an oozy, sweet center that will leave your taste buds dancing with joy.
- Chocolate Chip Boost: Mix in semi-sweet or dark chocolate chips into the cookie dough for an extra chocolaty experience. After all, can there ever be too much chocolate?
- Spice It Up: Add a pinch of cinnamon or espresso powder to the dry ingredients for a warm, unexpected flavor twist.
- Sugary Coating: Coat the cookie balls in a mixture of colored sugar or nonpareils for festive flair, making your cookies as visually delightful as they are delicious!
These variations let you add your personal touch to the classic Chocolate Blossom Cookies. You might also enjoy other chocolatey creations like Chocolate Cherry Cookies or 4-ingredient Crispy Chocolate Oat Cookies. Happy baking!
Expert Tips for Chocolate Blossom Cookies
-
Proper Butter Softening: Ensure your butter is softened to room temperature; this helps create a light and fluffy batter, crucial for delicious Chocolate Blossom Cookies.
-
Avoid Overmixing: Mix the dough just until combined after adding the dry ingredients. Overmixing can lead to tough cookies; we want them soft and fudgy!
-
Unwrap Ahead: Unwrap the Hershey’s Kisses before baking. This little trick saves time and ensures you’re ready to add them right after the cookies come out of the oven.
-
Puffy Appearance: Don’t worry if the cookies look puffy while baking; they will settle slightly as they cool. This keeps the inside soft and chewy!
-
Experiment with Coatings: Feel free to get creative with your coatings! Try different combinations of granulated sugar, sprinkles, or powdered sugar to make your Chocolate Blossom Cookies festive and fun.
Make Ahead Options
These Chocolate Blossom Cookies are ideal for meal prep enthusiasts looking to save time during the busy holiday season! You can prepare the cookie dough ahead of time and refrigerate it for up to 3 days in an airtight container, which helps maintain their flavorful richness. If you prefer, freeze the dough for up to 1 month; just ensure you thaw it to room temperature before baking. You can also roll the dough balls in sugar and store them this way to cut down on final prep time. When you’re ready to enjoy, simply bake as directed, adding the Hershey’s Kisses immediately after they come out of the oven for that delicious melted center. By prepping ahead, you’ll have homemade treats ready to impress at a moment’s notice!
How to Store and Freeze Chocolate Blossom Cookies
Room Temperature: Store your Chocolate Blossom Cookies in an airtight container at room temperature for up to 7 days to maintain their softness and flavor.
Fridge: If you prefer a slightly firmer cookie, you can refrigerate them for up to 10 days. Just ensure they’re in an airtight container to prevent them from drying out.
Freezer: For longer storage, freeze the baked cookies in a single layer, then transfer them to an airtight freezer bag. They can last for up to 1 month.
Dough Storage: Refrigerate the dough for up to 3 days or freeze it for up to 1 month. When ready to bake, thaw it to room temperature before shaping and baking.
Chocolate Blossom Cookies Recipe FAQs
What type of flour should I use for Chocolate Blossom Cookies?
Absolutely! All-purpose flour is best for structure, but if you’re looking for a gluten-free alternative, you can substitute it with a gluten-free flour blend. Just ensure it’s a blend that’s designed for baking for the best results.
How long do Chocolate Blossom Cookies last?
These delightful treats can be stored in an airtight container at room temperature for up to 7 days. If you find yourself with leftovers and want them to last longer, refrigerating them is a great option for up to 10 days.
Can I freeze Chocolate Blossom Cookies?
Yes! To freeze the baked cookies, place them in a single layer on a baking sheet until solid, then transfer them to an airtight freezer bag. They can be frozen for up to 1 month. When you’re ready to enjoy, let them thaw at room temperature before savoring!
What should I do if my cookies are too flat?
If your cookies come out too flat, it might be due to too much butter or not enough flour. Be sure to measure your ingredients accurately. If you’ve already baked them, you can try to add more flour next time, or refrigerate the dough for about 30 minutes before baking to help them maintain their shape.
Are Chocolate Blossom Cookies safe for pets?
No, chocolate is toxic to pets, particularly dogs, so it’s essential to keep these cookies out of their reach. Always be mindful of where you’re storing your baked treats to ensure that your furry friends are safe and sound!

Chocolate Blossom Cookies: Irresistibly Soft with a Surprise
Ingredients
Equipment
Method
- Preheat your oven to 350°F (175°C) and line a baking sheet with parchment paper.
- In a medium bowl, whisk together the all-purpose flour, natural cocoa powder, baking powder, baking soda, and salt.
- In a large mixing bowl, cream together the softened unsalted butter and brown sugar until light and fluffy, about 2-3 minutes.
- Add the large egg and vanilla extract to the creamed mixture, mixing until fully incorporated.
- Gradually incorporate the dry mixture into the wet ingredients, mixing just until combined.
- Scoop out 1 to 1.5 tablespoons of dough, roll into balls, and coat with granulated sugar, sprinkles, or powdered sugar.
- Place the coated balls onto the prepared baking sheet, spacing them about 2 inches apart.
- Bake the cookies for 7-8 minutes, or until puffy and slightly crackled.
- Immediately press an unwrapped Hershey's Kiss into the center of each cookie.
- Allow the cookies to cool on the baking sheet for 5-10 minutes before transferring to a wire rack.
Leave a Reply