
As I stood in my kitchen one afternoon, an all-too-familiar feeling struck me: the hunger pangs that demanded something quick yet satisfying. After rummaging through my pantry, I decided to whip up a batch of No-Bake Peanut Butter Protein Bars (5 Simple Ingredients!). With just four simple ingredients, these bars come together in a snap, offering a fabulous, healthy alternative to those sugar-laden store-bought snacks. Not only are they packed with protein for energy, but they also keep sugar cravings at bay, making them perfect for a post-workout treat or an afternoon boost. Plus, the best part? You can tailor them to your liking with your favorite mix-ins or toppings. Curiosity piqued? Let’s dive into how to make these deliciously easy bars that will keep you coming back for more!
Why Are These Protein Bars Amazing?
Simplicity at its best: These No-Bake Peanut Butter Protein Bars require only five ingredients, making them a breeze to whip up, even on your busiest days. Customizable options: From nut butter swaps to tasty add-ins like chocolate chips or dried fruit, you can create your perfect bar. Guilt-free indulgence: Packed with protein and low in sugar, these bars satisfy cravings without compromising health. Quick energy boost: Perfect for pre- or post-workout, they deliver the fuel you need anytime. Pair them with your favorite smoothie for a refreshing combo or enjoy alongside a piece of fruit for a balanced snack!
No-Bake Peanut Butter Protein Bars Ingredients
• Keep it simple and delicious with these essential ingredients for your No-Bake Peanut Butter Protein Bars!
For the Base
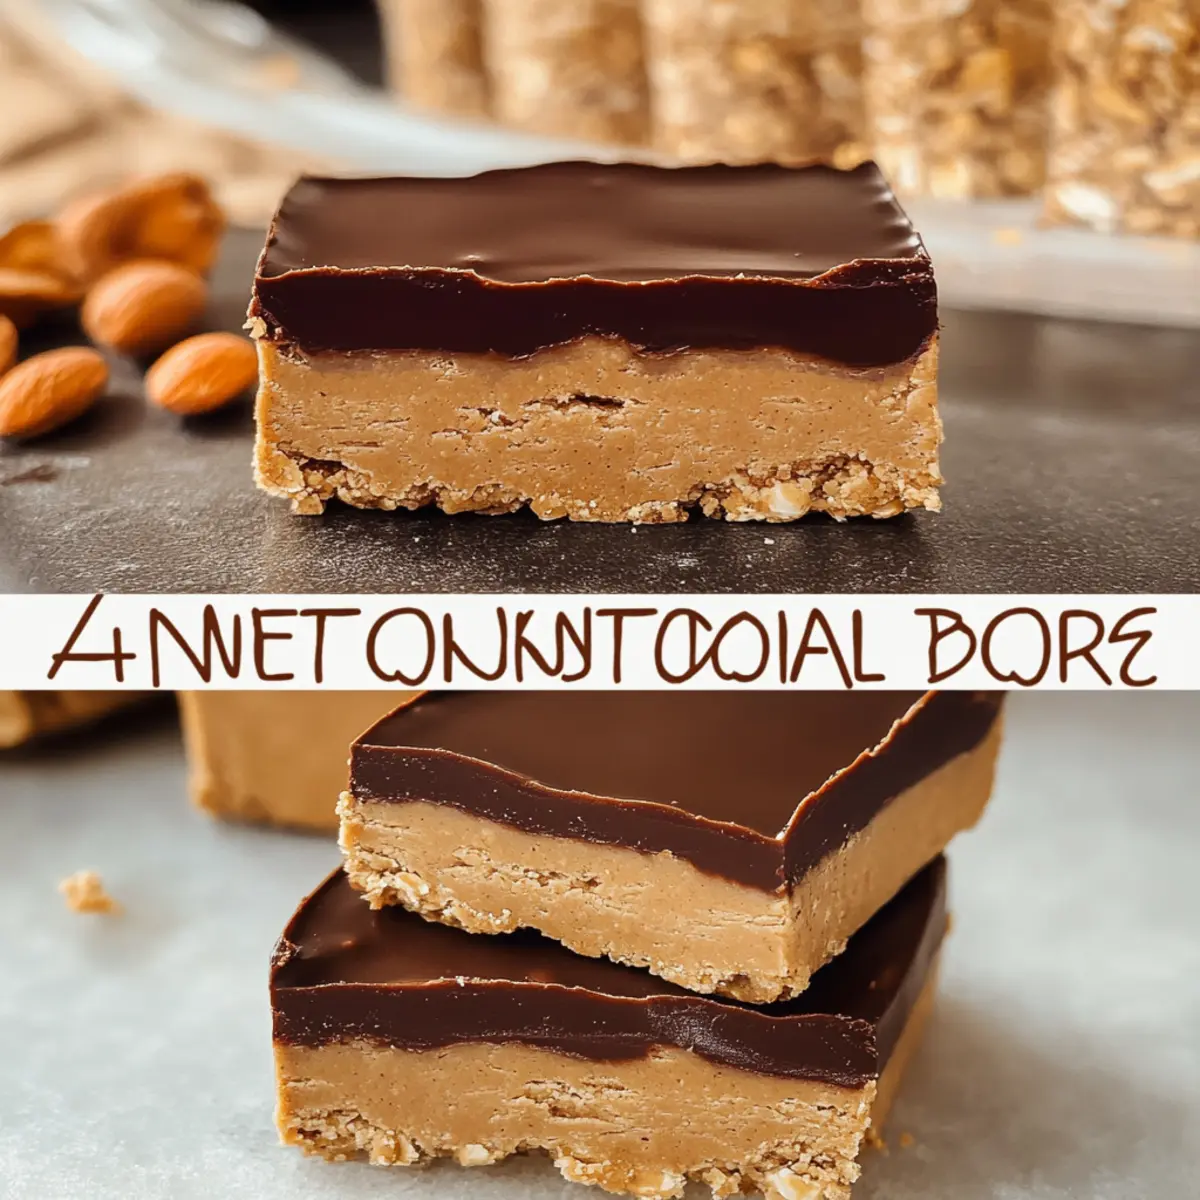
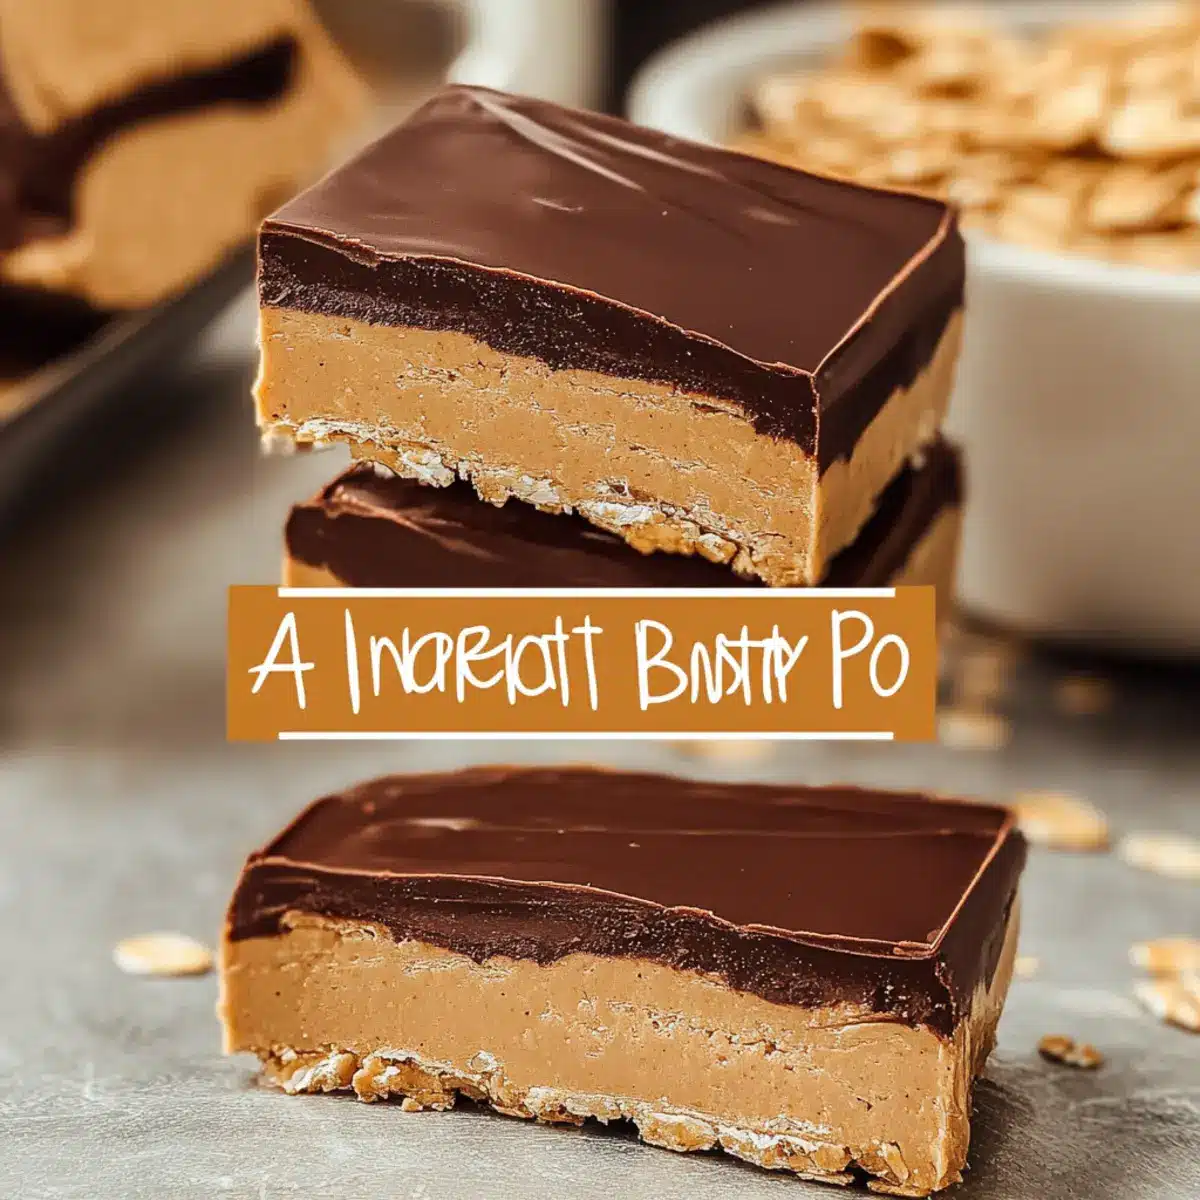
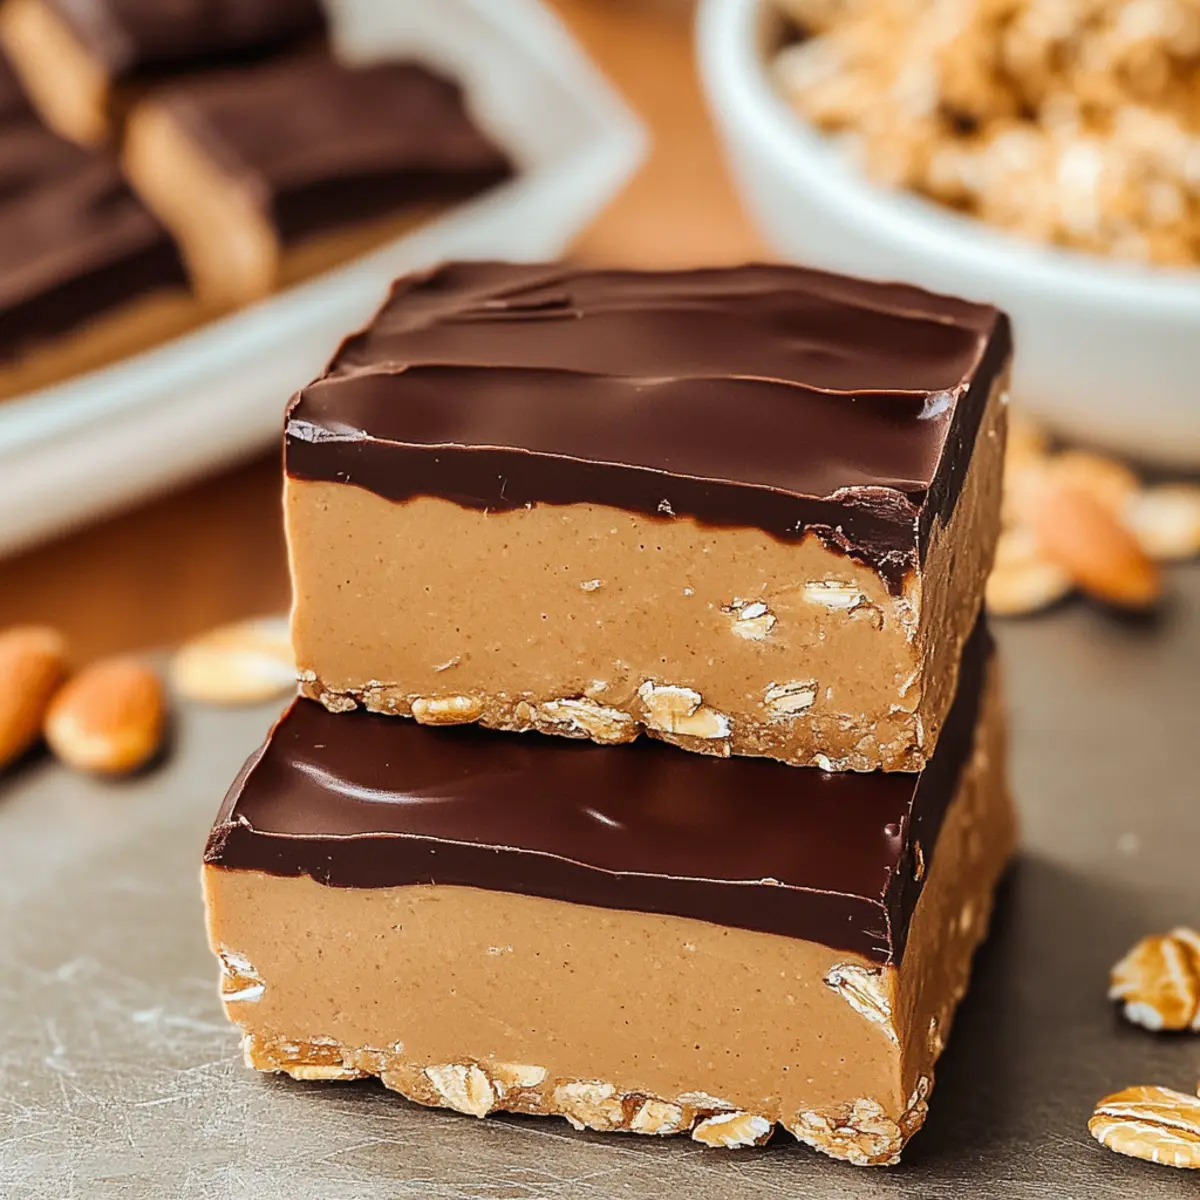
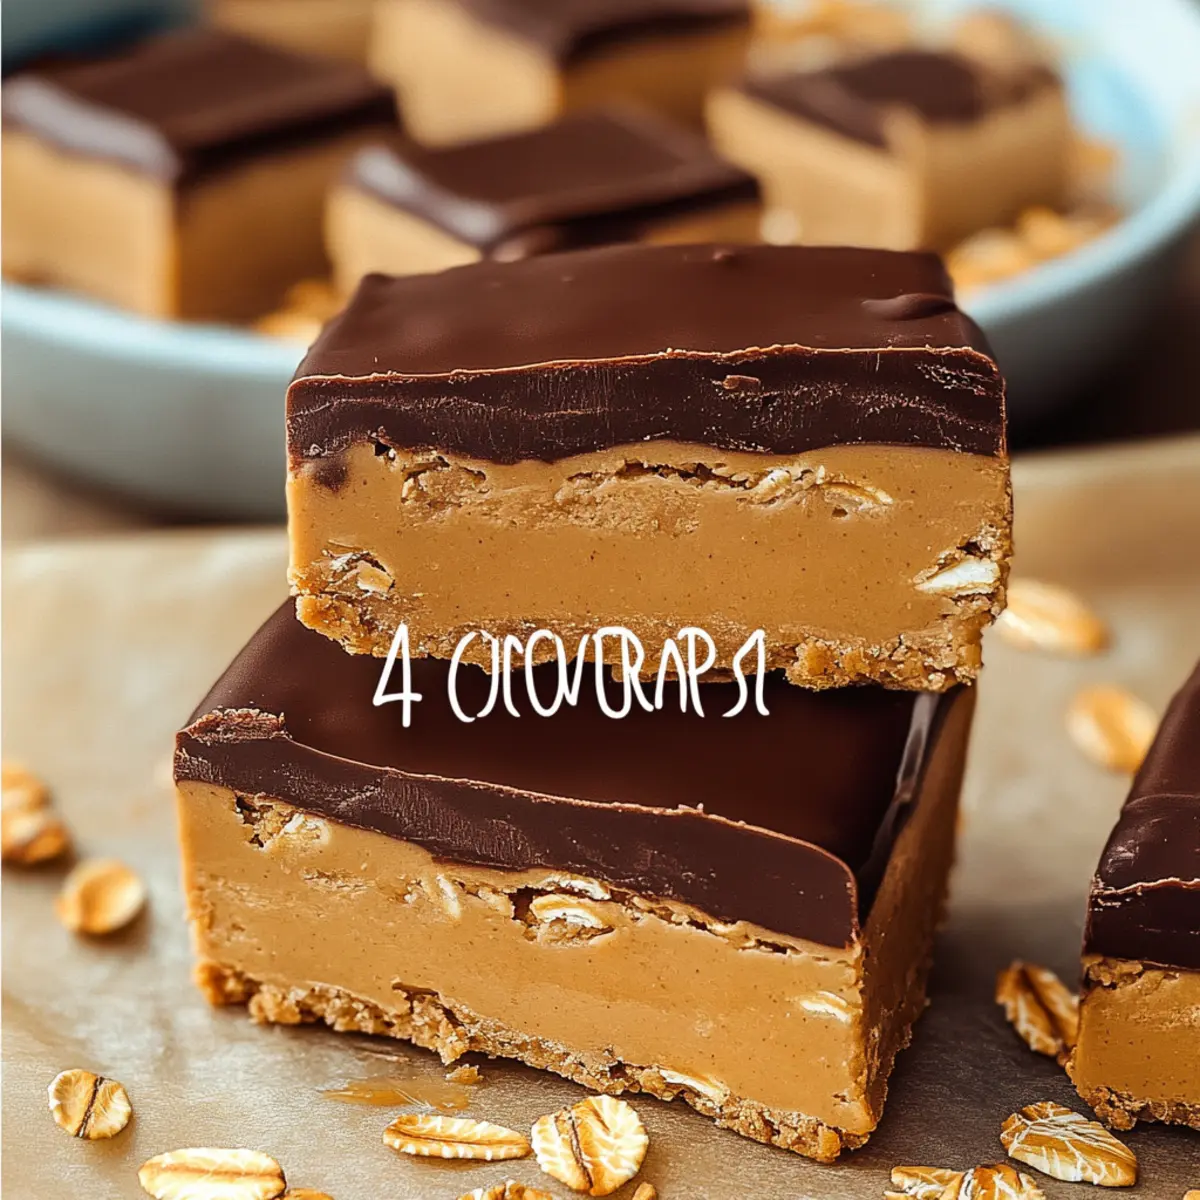
- Peanut Butter – Provides a creamy texture and healthy fats; opt for natural peanut butter for the cleanest choice.
- Oats – Adds structure and fiber; quick oats are perfect for a smooth consistency.
- Honey or Maple Syrup – Acts as a natural sweetener and binding agent; choose maple syrup for a vegan friendly bar.
For the Topping
- Chocolate Chips – Adds a rich sweetness; dark chocolate chips elevate the healthiness, or use dairy-free chocolate for a vegan option.
These No-Bake Peanut Butter Protein Bars are more than just healthy treats—they’re a canvas for your culinary creativity!
Step‑by‑Step Instructions for No-Bake Peanut Butter Protein Bars (5 Simple Ingredients!)
Step 1: Prepare the Base
In a decent-size mixing bowl, combine 1 cup of creamy natural peanut butter, 1 cup of quick oats, and ½ cup of honey or maple syrup. Use a sturdy spatula to mix these ingredients together until fully blended and the mixture holds together. This should take about 2-3 minutes. The result will be a thick, sticky dough that’s ready for shaping.
Step 2: Shape the Bars
Line an 8×8-inch baking dish with parchment paper for easy removal. Transfer the peanut butter mixture into the prepared dish and use a spatula or your hands to firmly press it down into an even layer. Aim for about 1-inch thickness; this will help maintain the bars’ structure after cutting. Pressing firmly is key to ensuring they hold together nicely.
Step 3: Add Chocolate Topping
In a microwave-safe bowl, place ½ cup of chocolate chips and microwave in 30-second intervals, stirring in between, until melted and smooth—usually takes around 1-2 minutes. Once melted, drizzle or spread the chocolate evenly over the pressed peanut butter base. The chocolate layer will provide a delightful sweetness and creamy finish to your no-bake protein bars.
Step 4: Chill
Cover the baking dish with plastic wrap or foil to avoid any air exposure, and place it in the refrigerator for at least 1 hour. This chilling time allows the bars to firm up nicely, making them easier to cut later. You’ll know they’re ready when they feel firm to the touch and have set up well.
Step 5: Cut and Serve
Once chilled, remove the dish from the refrigerator and lift the bars out using the parchment paper. Place them on a cutting board and slice them into even squares or rectangles, as per your size preference. These No-Bake Peanut Butter Protein Bars are now ready to be enjoyed as a wholesome, protein-packed snack!
Expert Tips for No-Bake Peanut Butter Protein Bars
-
Mix Well: Ensure all ingredients are combined thoroughly to avoid dry pockets; this guarantees a deliciously cohesive No-Bake Peanut Butter Protein Bar.
-
Press Firmly: A common mistake is not pressing the mixture enough into the baking dish. This step is crucial to prevent the bars from crumbling later.
-
Cool Chocolate Carefully: Allow melted chocolate to cool slightly before spreading it on the bars; this avoids melting the base, ensuring a perfect layer of sweetness.
-
Chill Completely: Be patient while the bars chill. Make sure they are fully set before cutting; this will prevent them from falling apart when served.
-
Experiment with Add-Ins: Feel free to customize your bars! Consider adding nuts or seeds for extra protein and crunch, but remember to adjust the base ingredients accordingly.
What to Serve with No-Bake Peanut Butter Protein Bars?
These delightful bars are perfect for fueling your day, and pairing them with complementary snacks can elevate your experience.
-
Fresh Fruit: A crisp apple or ripe banana makes for a refreshing balance to the creamy bars, enhancing their nutritious profile.
-
Greek Yogurt: Creamy and tangy, Greek yogurt adds a protein boost and pairs beautifully with the rich peanut butter flavor.
-
Dark Chocolate Covered Almonds: Add a satisfying crunch alongside your bars. Their nutty, slightly bitter taste perfectly complements the sweetness of the chocolate topping.
-
Smoothie: Whip up a green smoothie for a refreshing drink. The leafy greens, fruit, and protein powder will blend smoothly with your bars for a balanced treat.
-
Nut Mix: A handful of mixed nuts offers crunchy variety, adding healthy fats and protein that pairs excellently with your soft bars.
-
Coconut Flakes: Sprinkle some unsweetened coconut flakes on top! They provide a tropical twist and contrasting texture, enhancing the overall flavor experience.
-
Chamomile Tea: This soothing herbal tea creates a calming atmosphere and balances the richness of your bars, perfect for a mid-afternoon energy boost.
-
Protein Shake: For those high-energy moments, a protein shake enhances the bars’ nutritional content, making them ideal for an after-workout snack.
-
Cinnamon Apple Chips: These crispy treats add sweetness and a touch of spice, echoing the flavors in your protein bars while providing added crunch.
Storage Tips for No-Bake Peanut Butter Protein Bars
-
Room Temperature: These bars are best enjoyed chilled, but if left out, they can stay fresh for up to 2 hours without melting, ideal for picnics or road trips.
-
Fridge: Store your No-Bake Peanut Butter Protein Bars in an airtight container in the fridge for up to 1 week. This keeps them firm and fresh for daily snacking.
-
Freezer: For longer storage, freeze the bars by wrapping them individually in plastic wrap, then placing them in a freezer-safe bag. They can last up to 2 months.
-
Reheating: If you prefer a softer texture, let them sit at room temperature for about 10-15 minutes before enjoying, allowing the flavors to come alive!
Make Ahead Options
These No-Bake Peanut Butter Protein Bars are perfect for meal prep enthusiasts looking to save time during busy weekdays! You can prepare the base mixture (peanut butter, oats, and honey or maple syrup) up to 24 hours in advance and store it in the refrigerator. Just press it into the baking dish and allow it to set before adding the chocolate topping. To maintain quality, refrigerate the bars after chilling, and ensure they are covered to prevent drying out. When you’re ready to enjoy, simply melt the chocolate chips and spread them over the top, chill again, and slice into your delicious, easy-to-make snack!
No-Bake Peanut Butter Protein Bars Variations
Feel free to make these No-Bake Peanut Butter Protein Bars your own by mixing in delightful twists that suit your taste buds!
-
Dairy-Free: Swap chocolate chips for dairy-free varieties to create a completely vegan snack that everyone can enjoy.
-
Flavor Variations: Add a teaspoon of cinnamon or a splash of vanilla extract to the peanut butter mixture for a warm, comforting flavor explosion.
-
Nut Butter Swap: Try almond or cashew butter instead of peanut butter for a nutty twist that changes the whole dynamic of the bars.
-
Crunch Factor: Mix in a handful of chopped nuts or seeds for added texture, creating a delightful crunch with every bite.
-
Fruity Boost: Toss in dried fruits, like cranberries or apricots, for a hint of natural sweetness and extra fiber in your bars. Adding fruit not only enhances flavor but also increases nutrition.
-
Protein Power: Add a scoop of your favorite protein powder to the base mix for an extra protein boost, perfect for post-workout recovery.
-
Chocolate Lovers: For those serious about chocolate, incorporate cocoa powder into the peanut butter mixture for a richer chocolatey flavor throughout the bar.
-
Zesty Energy: Experiment with citrus zest—like lemon or orange—for a bright, refreshing flavor that contrasts deliciously with the creamy peanut butter.
Let your creativity shine as you create personalized versions of these delicious bars! They would pair beautifully with a glass of dairy-free milk or alongside a slice of Salted Caramel Bars for a dessert-like experience.
No-Bake Peanut Butter Protein Bars Recipe FAQs
What type of peanut butter should I use?
Absolutely! I recommend using natural peanut butter without added sugars or oils for the best flavor and health benefits. Look for one that has just peanuts and salt on the label. This will give your bars that creamy texture without unnecessary additives.
How do I store these protein bars?
These bars are best stored in an airtight container in the fridge, where they will stay fresh for up to 1 week. If you need to keep them longer, wrap them individually in plastic wrap and store them in a freezer-safe bag in the freezer for up to 3 months. Just let them thaw at room temperature for about 10-15 minutes when you’re ready to enjoy them!
Can I freeze No-Bake Peanut Butter Protein Bars?
Yes, you can! To freeze your bars, first, cut them into pieces after they have set in the fridge. Then, place each piece on a baking sheet lined with parchment paper and freeze them for about 1 hour. Once they are firm, wrap them individually in plastic wrap and place them in a freezer-safe bag. They will last for up to 3 months in the freezer.
What if my bars are too crumbly?
If your bars are crumbling, it might mean that the mixture wasn’t pressed firmly enough into the baking dish. A gentle tip is to really pack the ingredients down when shaping; this keeps them compact. If they’re still too loose, mix in a little extra peanut butter or a tablespoon of honey/maple syrup to help bind them better.
Are these protein bars suitable for everyone?
While tasty and nutritious, be mindful of the ingredients if you’re serving these protein bars to someone with allergies. The recipe contains peanuts, honey (or maple syrup), oats, and chocolate chips. If you’re preparing them for someone with nut allergies, you might consider replacing the peanut butter with sunflower seed butter, but keep in mind that the flavor will change slightly.
No-Bake Peanut Butter Protein Bars Made Easy with 5 Ingredients
Ingredients
Equipment
Method
- In a mixing bowl, combine peanut butter, quick oats, and honey or maple syrup until blended.
- Line a baking dish with parchment paper and press the mixture into an even layer.
- Melt chocolate chips in a microwave-safe bowl and drizzle over the pressed peanut butter base.
- Cover with plastic wrap and refrigerate for at least 1 hour to firm up.
- Remove from fridge, cut into bars, and serve.
Leave a Reply