
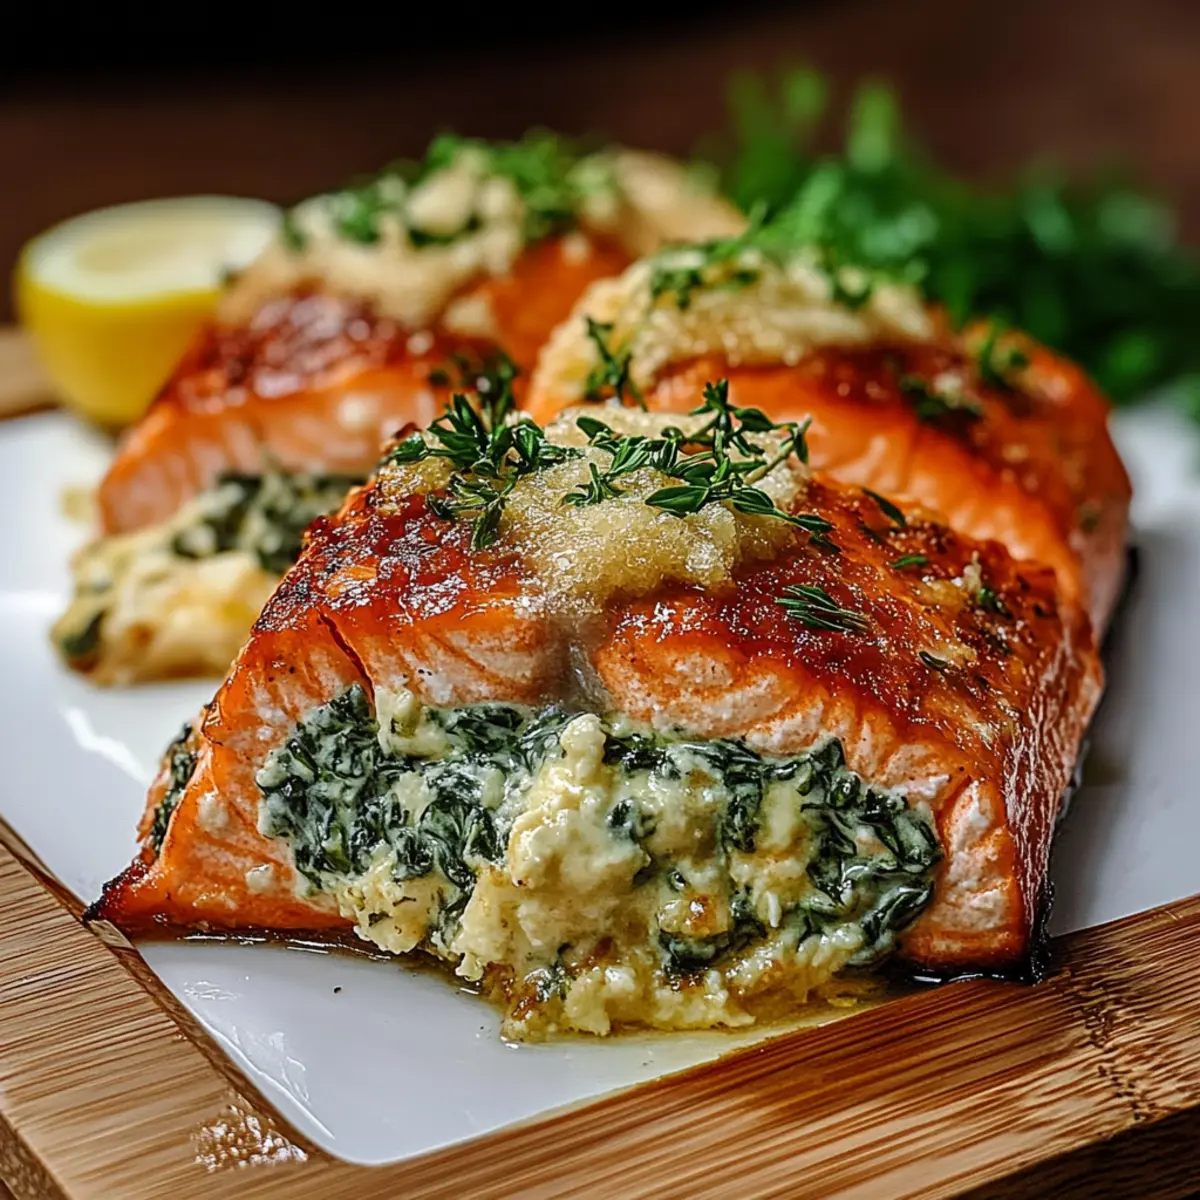
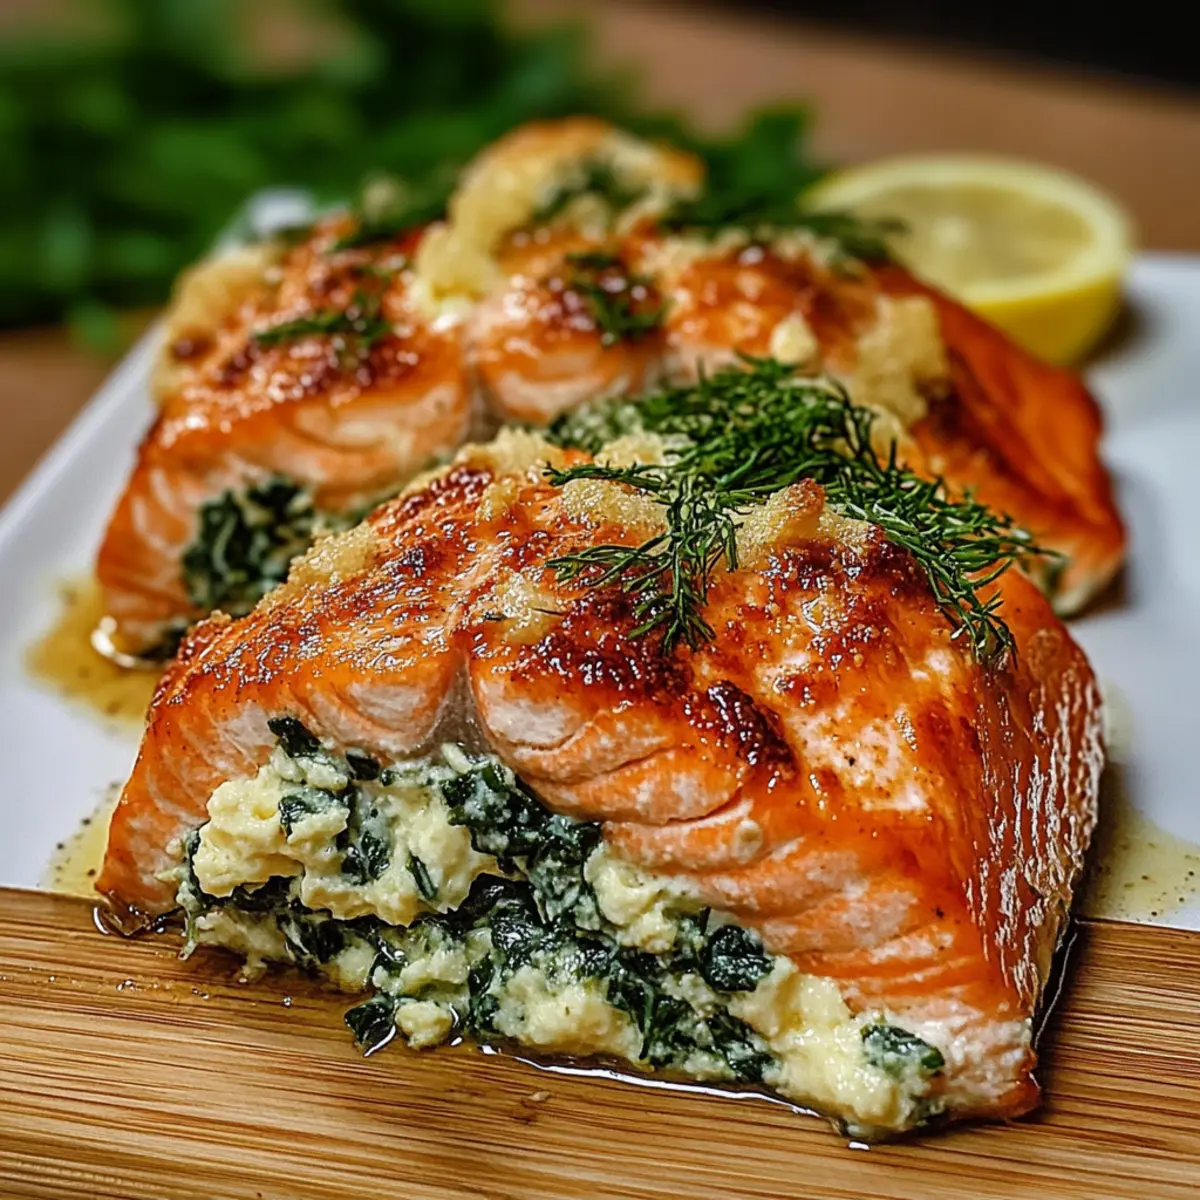
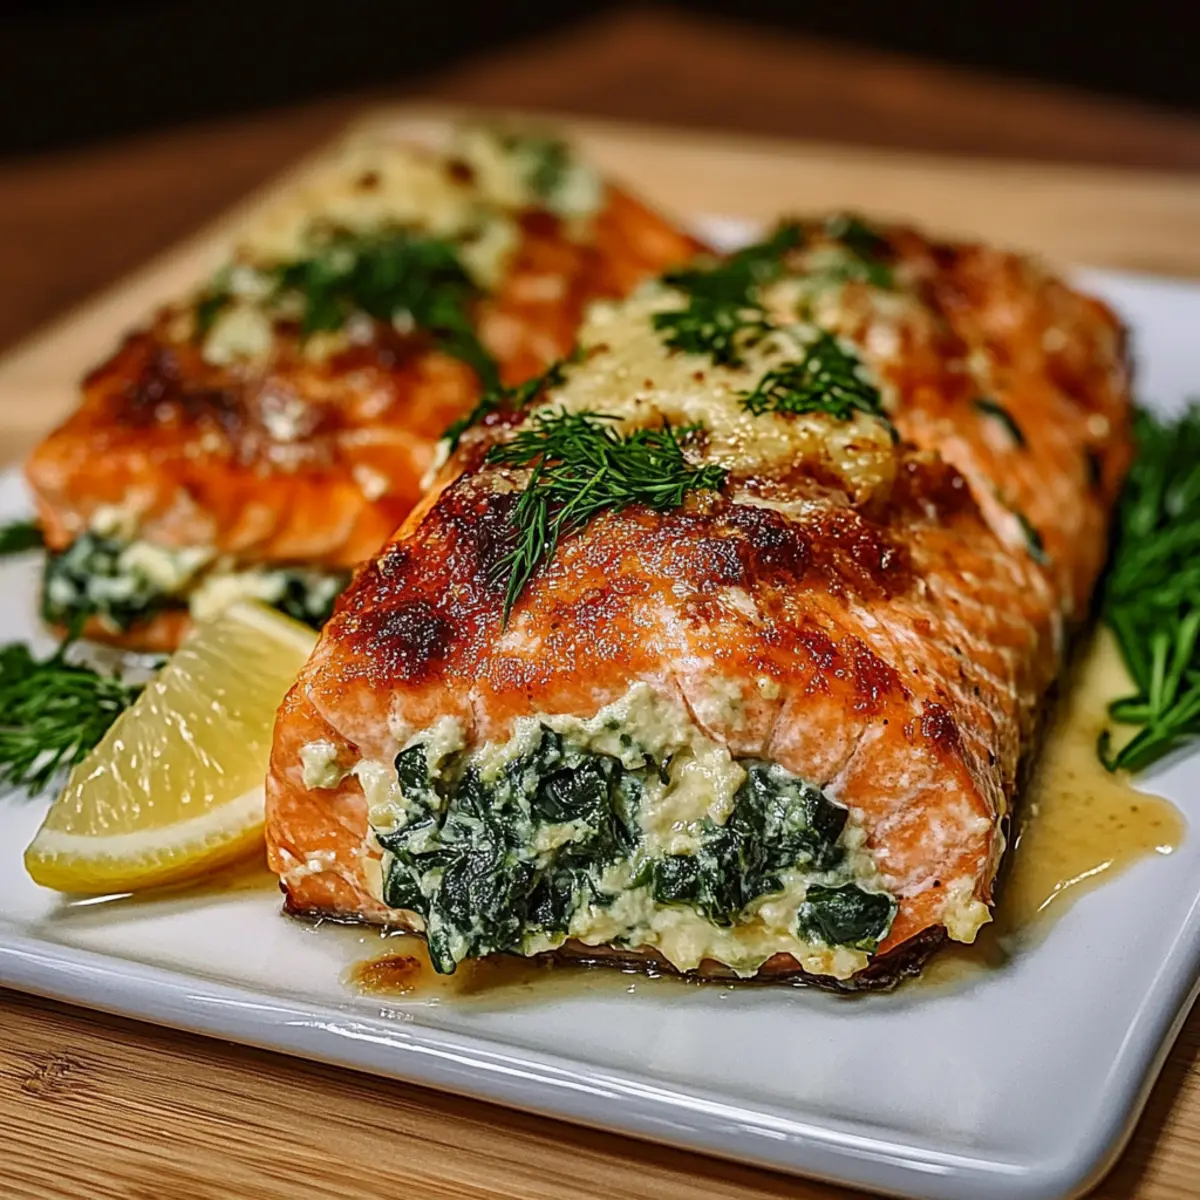
The aroma of sizzling salmon wafts through the kitchen, instantly lifting my mood and sparking my appetite. Today, I’m excited to share my go-to recipe for Stuffed Salmon—a dish that not only looks stunning but is also incredibly easy to whip up for any occasion. Imagine succulent salmon fillets filled with a creamy blend of cream cheese and fresh spinach, ready to impress your family and friends in less than 40 minutes! This recipe strikes the perfect balance between being a wholesome, family-friendly meal and a gourmet experience. Plus, it’s highly customizable; you can easily switch up the filling to keep things fresh and fun. So, are you ready to elevate your dinner game with this delicious stuffed salmon creation?

Why is Stuffed Salmon a Must-Try?
Simplicity: This dish is a breeze to prepare, making it perfect for novice cooks and seasoned chefs alike.
Fresh Ingredients: Utilizing vibrant spinach and creamy cheese ensures each bite bursts with flavor, supporting a healthy, wholesome meal.
Quick Dinner Option: Ready in under 40 minutes, it’s your go-to for impressing guests or satisfying a family craving without spending hours in the kitchen.
Customizable: Get creative with fillings! Add sundried tomatoes or swap in feta for a tangy twist, as seen in my recipe for Garlic Salmon Decadent.
Crowd-Pleaser: Whether it’s a cozy family dinner or a gathering with friends, this Stuffed Salmon will surely be the highlight of the evening.
Stuffed Salmon Ingredients
For the Salmon
• Salmon Fillets – Fresh fillets are preferred for a buttery texture; defrost frozen ones thoroughly for the best results.
• Olive Oil – Brush it on to keep the salmon from sticking and to add flavor.
For the Filling
• Fresh Spinach – Use vibrant spinach for added nutrients and color; both fresh and frozen options work beautifully.
• Cream Cheese – Soften it at room temperature for a creamy and smooth filling that binds well with the other ingredients.
• Fresh Dill – A sprinkle of this herb elevates the dish with its fresh, aromatic flavor; dried dill can work in a pinch.
• Lemon Juice – Infuse brightness into your filling with fresh lemon juice, bringing a zesty contrast to the richness.
Seasoning
• Salt and Black Pepper – Essential to enhance all the flavors; adjust to your personal taste preferences.
This Stuffed Salmon recipe not only celebrates fresh ingredients but also stands out as a family-friendly quick dinner option that everyone will love!
Step‑by‑Step Instructions for Stuffed Salmon
Step 1: Preheat the Oven
Begin by preheating your oven to 375°F (190°C). This temperature is perfect for allowing the Stuffed Salmon to bake evenly and achieve that flaky texture everyone loves. While the oven heats, prepare your salmon fillets to ensure a smooth and efficient cooking process.
Step 2: Prepare the Salmon Fillets
Carefully pat the salmon fillets dry using paper towels to remove excess moisture, which helps prevent steaming instead of baking. Next, take a sharp knife and slice a pocket down the middle of each fillet, ensuring you don’t cut all the way through. This creates the perfect space to fill with our delicious stuffing.
Step 3: Make the Filling
In a mixing bowl, combine softened cream cheese, fresh spinach, chopped dill, and a squeeze of lemon juice. Mix thoroughly until the ingredients are well blended and creamy. The filling should be smooth and vibrant, ready to bring life to your Stuffed Salmon.
Step 4: Stuff the Salmon
Carefully spoon the prepared filling into the pocket of each salmon fillet, pressing gently to make sure it holds together. Avoid overstuffing each pocket to allow for any expansion during baking. Your filled salmon should look inviting, with the cream cheese spilling joyfully from the sides.
Step 5: Season the Fillets
Lightly brush the outsides of each salmon fillet with olive oil to add flavor and prevent sticking. Then, season generously with salt and black pepper to enhance the overall flavor profile of the Stuffed Salmon. This step is crucial for elevating your dish from good to unforgettable.
Step 6: Bake the Salmon
Place the stuffed salmon fillets on a lined baking sheet, ensuring they are spaced evenly apart. Bake in the preheated oven for 25 minutes, or until the salmon flakes easily with a fork and the filling is hot. The outside should appear golden and slightly crisped, while the inside remains moist.
Step 7: Let it Rest
Once baked, carefully remove the Stuffed Salmon from the oven and let it rest for about 5 minutes. This resting period helps to lock in the juices and makes it easier to handle when serving. The aroma will fill your kitchen, teasing your taste buds for what’s to come!
Make Ahead Options
These Stuffed Salmon fillets are perfect for meal prep enthusiasts! You can prepare the filling made from cream cheese, spinach, dill, and lemon juice up to 24 hours in advance, storing it in an airtight container in the refrigerator to maintain freshness. Additionally, you can stuff the salmon and refrigerate it for up to 3 days before cooking. To keep the salmon quality high, be sure to pat the fillets dry and brush them with olive oil right before baking. When you’re ready to serve, simply pop them in the oven as instructed—this way, you’ll have restaurant-quality Stuffed Salmon with minimal effort during your busy weeknights!
Stuffed Salmon Variations & Substitutions
Feel free to put your own spin on this Stuffed Salmon and turn it into a family favorite!
-
Dairy-Free: Substitute cream cheese with cashew cream or a dairy-free cream cheese alternative for a silky filling without the dairy.
-
Cheesy Delight: Crumbled feta cheese can replace cream cheese for a tangy kick. This brightens up the dish with added flavor and richness.
-
Veggie Boost: Add chopped sundried tomatoes or artichokes to the filling for a burst of Mediterranean flavor. Each piece will carry a delightful surprise!
-
Herb Expansion: Try mixing in fresh herbs like basil or parsley instead of dill for a different aromatic profile. Fresh herbs can elevate the dish and add a personal touch.
-
Spicy Twist: Mix in red pepper flakes or diced jalapeños for a bit of heat. Spice lovers will enjoy the added warmth that complements the rich salmon beautifully.
-
Grain-Builder: Introduce cooked quinoa or rice to the stuffing for added texture. This change contributes both heartiness and balance, making the dish even more satisfying.
-
Zesty Infusion: A splash of hot sauce or lemon zest can enhance the filling’s brightness. Just a little can transform the profile and add an engaging zing.
-
Alternative Greens: Try using kale or Swiss chard instead of spinach; this brings a different texture and flavor without sacrificing nutrition. You may find a new favorite variation!
These variations ensure your Stuffed Salmon feels fresh every time you make it. For more delightful recipes, consider giving my Cheesecake Stuffed Chocolate Chip Cookies or Healthy Creamytuscan Salmon Pasta a try!
What to Serve with Flavor-Packed Stuffed Salmon?
The perfect sides can elevate your meal from simple to spectacular, turning dinner into an unforgettable experience.
-
Garlic Mashed Potatoes: Creamy, buttery, and garlicky, these mashed potatoes provide a comforting contrast to the flaky salmon, enhancing the flavor profile beautifully.
-
Steamed Asparagus: Bright green asparagus drizzled with a hint of lemon offers a refreshing crunch that balances the richness of the stuffing.
-
Quinoa Salad: A light quinoa salad mixed with cherry tomatoes and cucumbers adds a pop of color and texture, making it a nutritious pairing that complements the salmon.
-
Roasted Brussels Sprouts: Caramelized and slightly crispy Brussels sprouts bring a nutty flavor that pairs wonderfully with the herbaceous notes of the stuffed salmon.
-
Lemon-Dill Rice: Zesty lemon and fresh dill-infused rice provide a harmonious flavor that echoes the salmon’s filling, creating a cohesive meal experience.
-
Wine Pairing – Chardonnay: A chilled glass of Chardonnay enhances the meal with its crisp acidity, creating an inviting ambiance for your dinner.
Imagine indulging in this delightful trio of flavors on your plate, creating a feast that will have everyone coming back for more!
Expert Tips for Stuffed Salmon
-
Pat it Dry: Always pat your salmon fillets dry before cooking to avoid a soggy bottom and achieve a nice crust.
-
Soften Cream Cheese: Let your cream cheese sit at room temperature beforehand. This will ensure a smooth and creamy filling, avoiding lumps.
-
Mind the Stuffing: Don’t overstuff your salmon pockets! Leave a slight gap to allow the filling to expand while baking, ensuring even cooking throughout.
-
Use Fresh Ingredients: Whenever possible, opt for fresh spinach and herbs to maximize flavor in your stuffed salmon and create a delightful culinary experience.
-
Check for Doneness: Salmon is perfectly cooked when it flakes easily with a fork. Keep an eye on your fillets to prevent them from drying out.
These helpful tips will guide you in preparing the most scrumptious stuffed salmon, making it a standout dish for any dinner table!
How to Store and Freeze Stuffed Salmon
Fridge: Store leftover Stuffed Salmon in an airtight container for up to 3 days. This keeps the flavors fresh while allowing you to enjoy it cold or reheated.
Freezer: Wrap each stuffed fillet tightly in plastic wrap and then foil, freezing for up to 2 months. Thaw in the fridge overnight before reheating.
Reheating: Reheat stuffed salmon in the oven at 350°F (175°C) for about 15-20 minutes, ensuring it’s heated through without drying out.
Make-Ahead Tips: Prepare the stuffing in advance and store it separately. Stuff the salmon just before baking to keep it fresh and flavorful.
Stuffed Salmon Recipe FAQs
What types of salmon should I use for this recipe?
Fresh salmon fillets are ideal for that melt-in-your-mouth texture, but if you’re working with frozen salmon, just make sure to thaw it thoroughly before use. Look for fillets with a vibrant color and no dark spots, as that’s a sign of freshness.
How should I store leftover stuffed salmon?
Store any leftover Stuffed Salmon in an airtight container in the refrigerator for up to 3 days. This keeps the flavors intact while allowing you to enjoy your creation cold or gently reheated. If you decide to reheat, it’s best to do so in the oven to maintain its crispy exterior.
Can I freeze stuffed salmon?
Absolutely! Wrap each stuffed fillet tightly in plastic wrap and then in aluminum foil before freezing. This method will help protect against freezer burn, allowing it to last up to 2 months. When you’re ready to enjoy it, thaw the salmon in the fridge overnight for a safe, never-soggy meal.
What if my salmon fillets fall apart during stuffing?
If that happens, it’s usually due to overstuffing. Ensure you cut a pocket that deep enough for the filling, but don’t overfill; leave a little space, as the filling will expand while baking. A gentle touch is key—press the filling in softly to avoid separating the fillet.
Are there any dietary considerations I should take into account?
Definitely! If preparing for those with dietary restrictions, consider that some may be allergic to fish or dairy. In this case, you could substitute the cream cheese with a dairy-free alternative and try tofu as a stuffing option for a plant-based, allergen-friendly dish. Always check with your guests ahead of serving!
Can I prep the stuffing in advance?
Yes, preparing your stuffing ahead of time is a great idea! You can make the filling a day in advance and keep it in the refrigerator. Stuff the salmon just before baking to preserve freshness and flavor. This makes for a quick weeknight meal that still feels indulgent!
Irresistibly Creamy Stuffed Salmon for Your Dinner Table
Ingredients
Equipment
Method
- Preheat your oven to 375°F (190°C).
- Pat the salmon fillets dry using paper towels.
- Slice a pocket down the middle of each fillet.
- In a mixing bowl, combine softened cream cheese, fresh spinach, chopped dill, and lemon juice. Mix until creamy.
- Stuff the filling into the pocket of each salmon fillet.
- Brush the outsides of each fillet with olive oil, then season with salt and black pepper.
- Bake in the preheated oven for 25 minutes.
- Let it rest for about 5 minutes before serving.
Leave a Reply