
On a sweltering summer afternoon, the only thing sweeter than the sunshine streaming through my kitchen window was the thought of indulging in a Hula Pie. This No-Churn Macadamia Nut Ice Cream Pie is a heavenly delight that combines the classic flavors of creamy ice cream and crunchy caramelized nuts, all nestled in a chocolatey Oreo crust. The best part? You can whip it up in no time without an ice cream maker! Perfect for cooling off and impressing your guests, this dessert elevates any gathering with its tropical vibes and decadent layers. Whether you’re hosting a backyard barbecue or simply treating yourself after a long week, this pie guarantees smiles and satisfied taste buds. How about we dive into this tropical treat and create a flavor-packed masterpiece together?
Why will you crave Hula Pie?
Sumptuous Flavor Experience: This No-Churn Hula Pie combines creamy macadamia nut ice cream with a sweet Oreo crust for an irresistible taste.
Quick and Easy: With no ice cream maker needed, this recipe is perfect for home cooks of any skill level.
Versatile Treat: Customize with your favorite nuts or extracts – the options are endless!
Perfect for Summer: Celebrate warmer days with a refreshing dessert that’s bound to impress at any gathering.
If you enjoy easy, delightful desserts, check out our Pumpkin Pie Energy bites or these fun Marshmallow Rice Krispies for more sweet inspiration!
Hula Pie Ingredients
• Note: Gather these simple ingredients to whip up your delightful Hula Pie without any hassle!
For the Crust
- Oreo Cookies – Provides a sweet and chocolaty crust. Can substitute with any chocolate cookie for a similar effect.
- Melted Butter – Binds the cookie crumbs for crust cohesion. Non-dairy alternatives can be used for a dairy-free option.
For the Ice Cream Base
- Heavy Cream – Used for whipping into a fluffy base for ice cream. Light cream may alter texture but can serve as a lower-fat substitute.
- Sweetened Condensed Milk – Adds sweetness and creaminess. For dairy-free, opt for coconut or almond-based condensed milk.
- Vanilla Extract – Enhances overall flavor. Substitute with additional nut extract if desired.
- Macadamia Nut Extract – Imparts a distinct flavor rooted in tradition. Use almond extract as a substitute for a similar nuttiness.
- Chopped Roasted Macadamia Nuts – Adds texture and crunch. Can be replaced with toasted pecans or walnuts for a different nut flavor.
For the Fudge Topping
- Thick Hot Fudge Sauce – A rich topping for decadence. Chocolate sauce can substitute but is recommended to thicken by simmering or reducing.
- Whipped Cream (Canned or Homemade) – Serves as a garnish adding lightness and sweetness. Whipped coconut cream can be a dairy-free alternative.
Now you’re ready to create this fabulous Hula Pie, an indulgent dessert that’s sure to impress!
Step‑by‑Step Instructions for Hula Pie
Step 1: Prepare the Oreo Crust
Start by preheating your oven to 350°F (175°C). In a food processor, pulse 24 Oreo cookies into fine crumbs. Mix these crumbs with ½ cup melted butter until fully combined. Press the mixture firmly into the bottom and up the sides of a 9-inch pie pan. Bake for 8-10 minutes, then remove from oven and allow to cool completely.
Step 2: Make the Ice Cream Base
In a mixing bowl, pour 2 cups of very cold heavy cream and whip it using an electric mixer on medium speed until stiff peaks form, which takes about 3-5 minutes. Then, gently fold in a 14-ounce can of sweetened condensed milk, 1 teaspoon of vanilla extract, and ½ teaspoon of macadamia nut extract until well blended. Add in 1 cup of coarsely chopped roasted macadamia nuts for added crunch.
Step 3: Assemble the Hula Pie
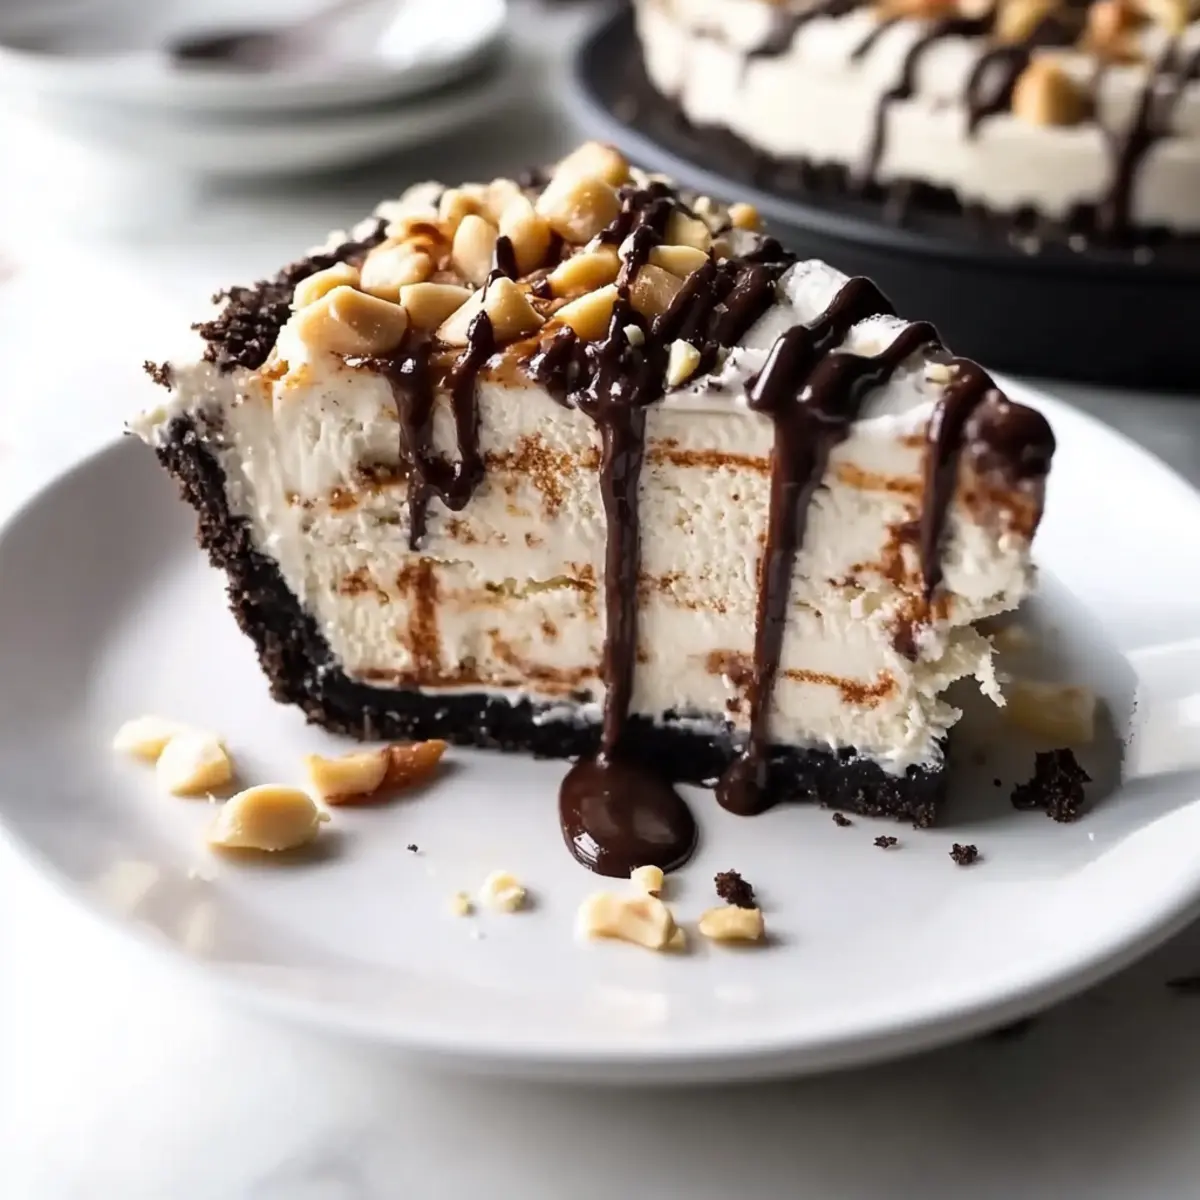
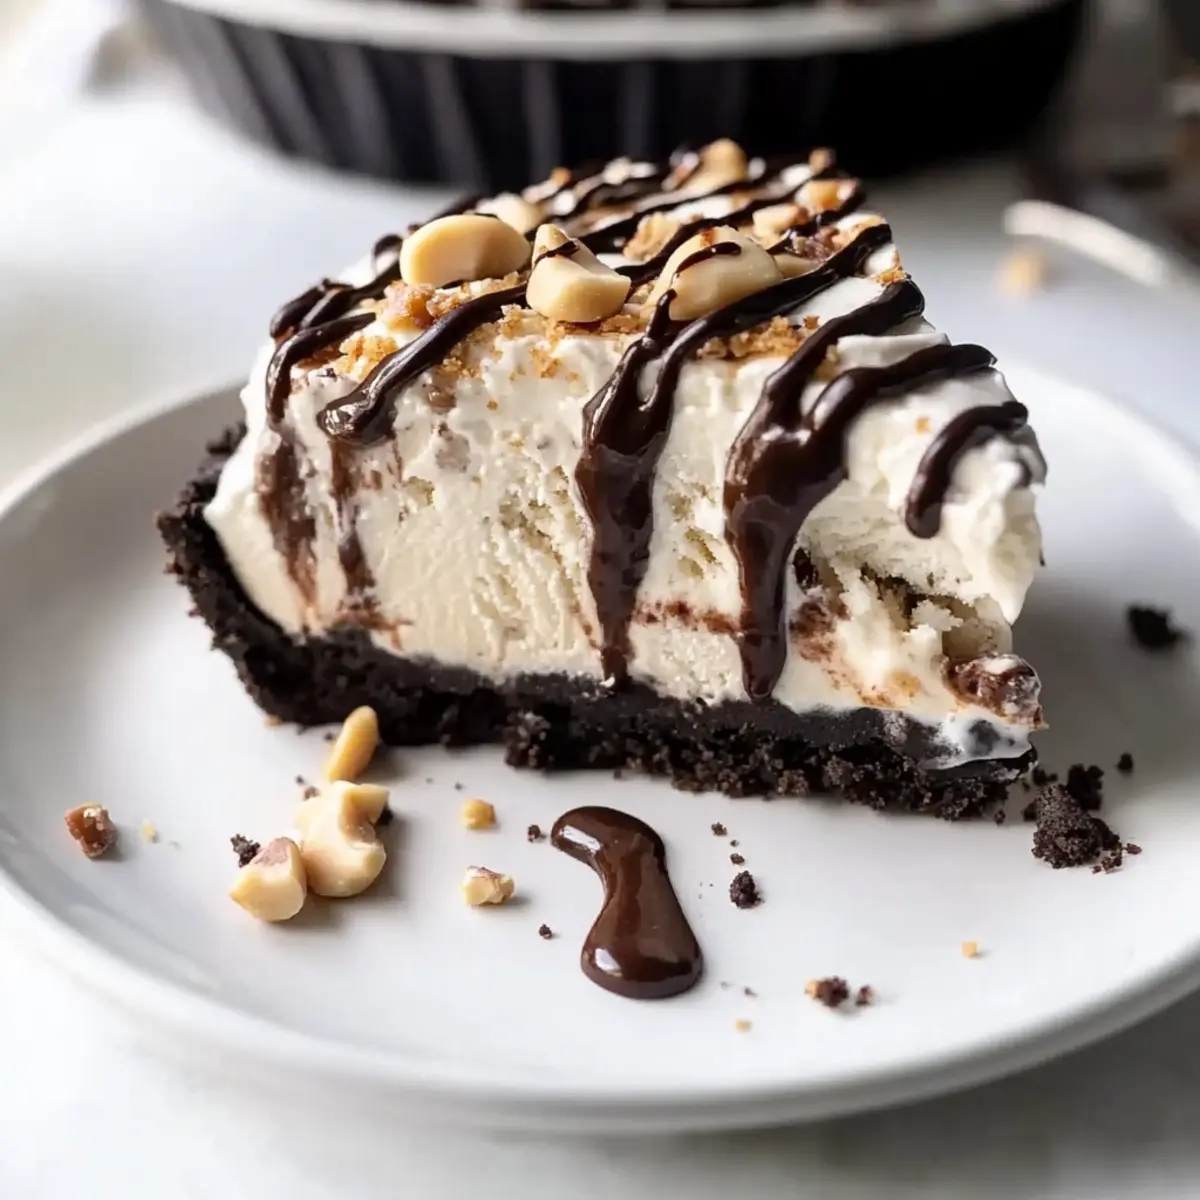
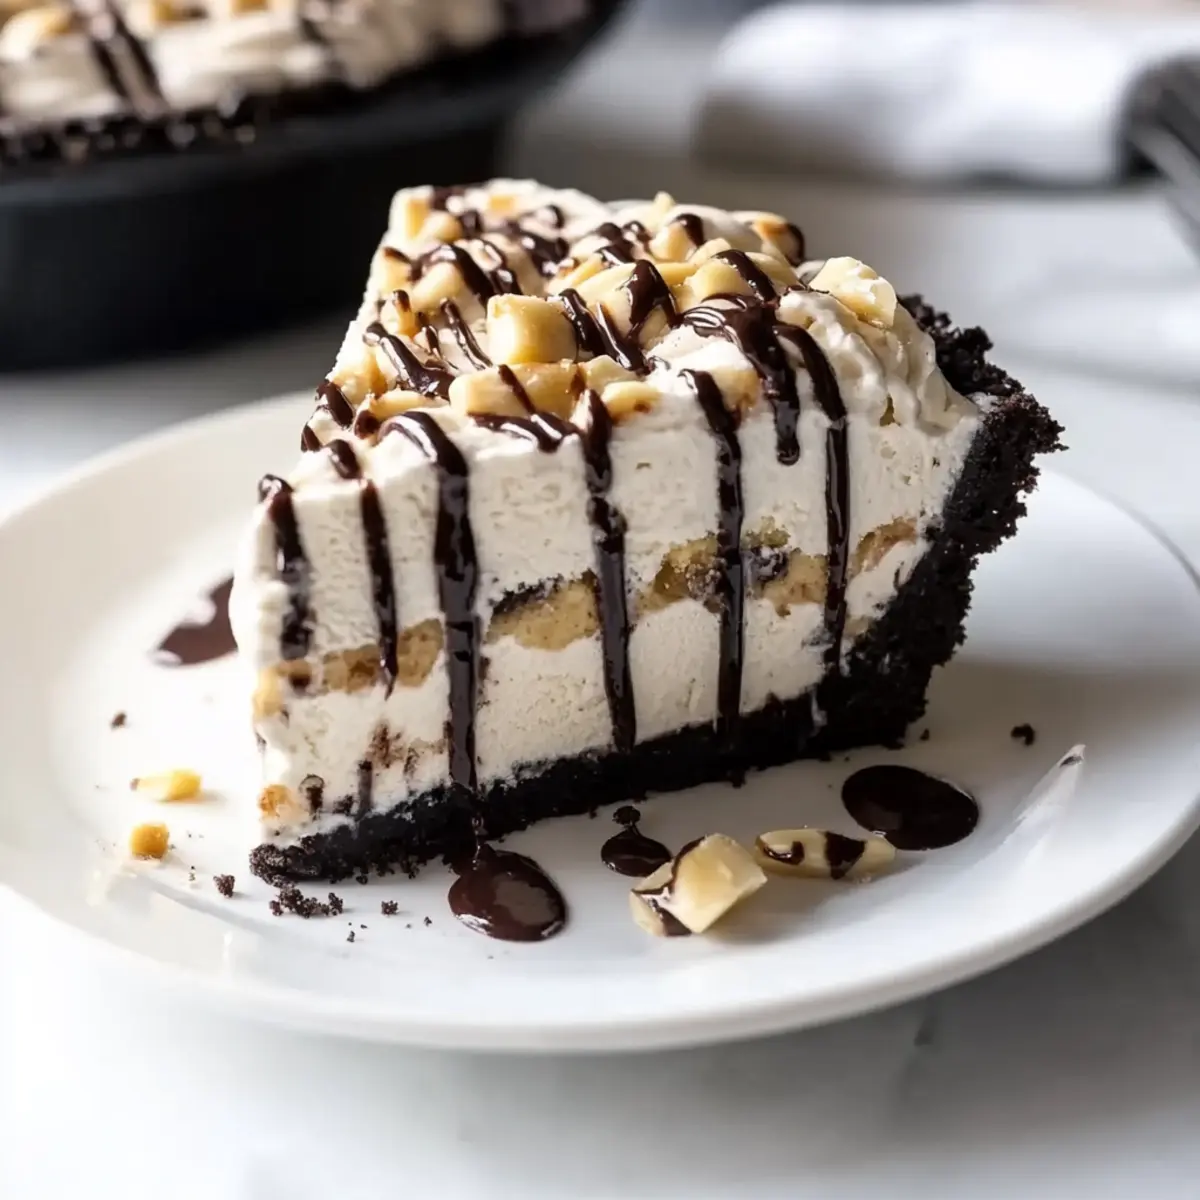
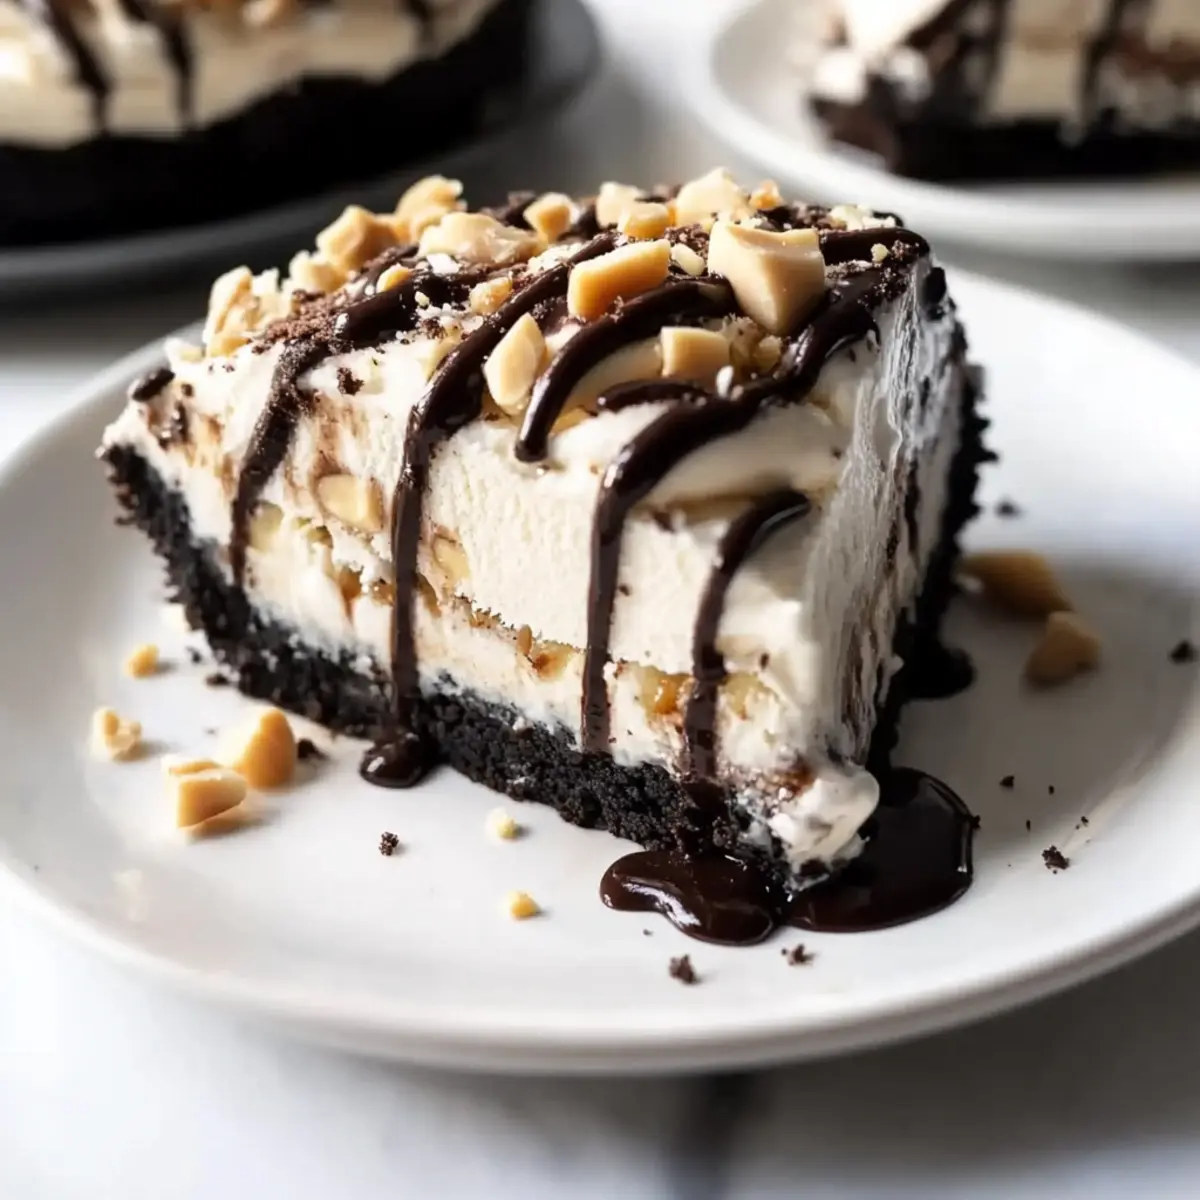
Spoon the creamy ice cream mixture into the cooled Oreo crust, spreading it into an even layer. Mound the ice cream slightly higher in the center for a beautiful finish. Cover the pie with plastic wrap and place it in the freezer for 2-3 hours or until the ice cream is firm enough to slice.
Step 4: Top with Fudge Sauce
Once frozen solid, remove the pie from the freezer. Warm your thick hot fudge sauce by microwaving it for about 20-30 seconds until it’s pourable but not boiling. Drizzle this fudge generously over the top of the Hula Pie, making sure to cover the surface evenly. Sprinkle any remaining chopped macadamia nuts on top for an extra crunch and visual appeal.
Step 5: Serve the Hula Pie
Remove the pie from the freezer once more, let it sit at room temperature for about 5 minutes to soften slightly, then garnish the edges with whipped cream. Cut into wedges and drizzle with additional warm fudge sauce if desired. Serve immediately for a delightful treat that captures the essence of the classic Hula Pie.
Hula Pie Variations & Substitutions
Feel free to explore delightful alterations that can elevate your Hula Pie experience, tailoring it to your preferences!
- Nut-Free: Swap macadamia nuts for sunflower seeds for a nut-free alternative that still adds crunch. Perfect for school lunches!
- Sugar-Free: Use sugar-free sweetened condensed milk and a low-carb chocolate cookie crust for a guilt-free indulgence. Enjoy the flavors without the added sugar.
- Chocolate Lovers: Add cocoa powder to the ice cream mixture for a chocolatey twist. Just one tablespoon can take your Hula Pie to new decadence!
- Tropical Vibes: Mix in shredded coconut for an extra tropical flavor that complements the creamy macadamia nut ice cream. It’s like a vacation in a slice!
- Dairy-Free Delight: Use whipped coconut cream and a dairy-free condensed milk for a fully dairy-free Hula Pie. Enjoy the same deliciousness without the dairy!
- Flavor Burst: Incorporate a tablespoon of espresso powder to enhance the flavor profile of your ice cream. This adds a depth you won’t want to miss!
- Layered Options: Create layers of different flavored ice cream, such as vanilla and coconut or chocolate and peanut butter, for a fun twist on the classic recipe.
- Heat Things Up: For a spicy kick, add a pinch of cayenne pepper to the hot fudge sauce. It will surprise your taste buds with an exciting blend of sweet and spicy!
If you’re looking for more creative inspiration, try whipping up Pumpkin Pie Energy bites or get festive with our delicious Marshmallow Rice Krispies. Enjoy experimenting!
Make Ahead Options
These No-Churn Hula Pies are a fantastic treat for busy home cooks looking to save time during hectic weeks! You can prepare the Oreo crust and freeze it up to 24 hours in advance. Simply process the cookies, mix with melted butter, and chill until firm. Additionally, the ice cream base can be whipped and stored in the freezer for up to 3 days; just make sure to keep it covered tightly to prevent ice crystals. When you’re ready to serve, fill the crust with the ice cream, freeze until solid (about 2–3 hours), then add the warm fudge sauce and garnish with whipped cream. This method allows you to enjoy a delicious dessert without the last-minute scramble!
How to Store and Freeze Hula Pie
Room Temperature: Keep the pie at room temperature for up to 30 minutes before serving to let it soften slightly, ensuring easier slicing.
Fridge: Store any leftover Hula Pie in the refrigerator for up to 3 days, wrapped tightly with plastic wrap to maintain freshness.
Freezer: Wrap the entire pie in plastic wrap followed by aluminum foil and freeze for up to 2 months. This helps protect the pie from freezer burn while maintaining its indulgent flavor.
Reheating: If you wish to serve the pie warm, allow it to sit at room temperature for 10-15 minutes before drizzling with hot fudge. Enjoy your Hula Pie at its best!
Expert Tips for Hula Pie
• Chill the Cream: Ensure your heavy cream is very cold before whipping to achieve perfect, fluffy peaks for your ice cream base.
• Perfect Crust Texture: Don’t skip the baking step for the Oreo crust; it helps to set the crust and increases that satisfying crunch.
• Substitutions Made Easy: If you’re out of macadamia nuts, feel free to swap for pecans or walnuts. The Hula Pie will still shine!
• Hot Fudge Success: Warm the fudge sauce gently before drizzling; this ensures it flows smoothly over the pie without freezing immediately.
• Patience is Key: Allow the pie to freeze adequately for at least 2-3 hours. Proper freezing produces a sliceable, creamy texture that’s pure bliss.
What to Serve with No-Churn Hula Pie?
As you prepare to slice into this tropical delight, consider pairing it with these delicious accompaniments to elevate your dessert experience.
- Fresh Pineapple Slices: Juicy and vibrant, fresh pineapple adds a sweet and tangy contrast to the rich flavors of the pie.
- Coconut Whipped Cream: Light and airy, this coconut-infused topping echoes the tropical theme while providing a creamy touch to each bite.
To create a refreshing ensemble, serve the pie alongside a crisp fruit salad. Toss together seasonal fruits like strawberries, mangoes, and kiwis, and let their natural sweetness complement the pie’s decadent layers.
- Chocolate Drizzled Bananas: The familiar flavor of bananas dipped in chocolate is a delightful pairing that adds a fun twist to the dessert table.
- Mint Iced Tea: This cool, refreshing drink serves as a perfect palate cleanser while enhancing the tropical vibe of your gathering.
- Macadamia Nut Cookie Bites: For an extra indulgent touch, these chewy cookies echo the pie’s flavors and add a lovely textural contrast.
Each pairing shines in its own right, bringing brightness and balance to the table while blending beautifully with the Hula Pie’s luscious allure.
Hula Pie Recipe FAQs
What type of Oreo cookies should I use for the crust?
Absolutely! For the crust, I recommend using classic Oreo cookies for their perfect sweetness and chocolatey flavor. However, you can switch things up by using any chocolate cookie you have on hand for a similar taste.
How long can I store leftover Hula Pie in the fridge?
Very! You can keep any leftover Hula Pie in the refrigerator for up to 3 days. Make sure it’s tightly wrapped in plastic wrap to maintain its freshness and creamy texture.
Can I freeze Hula Pie, and for how long?
Absolutely! You can freeze the entire Hula Pie for up to 2 months. Just wrap it carefully in plastic wrap followed by aluminum foil to prevent freezer burn. It’ll stay delicious and ready to serve whenever a craving strikes!
What do I do if my heavy cream doesn’t whip up properly?
If your heavy cream isn’t whipping, it might be because it wasn’t cold enough. Ensure that your heavy cream is very cold before whipping, and try using a chilled bowl. Whip on medium speed for about 3-5 minutes until stiff peaks form. Patience is key!
Are there any nut allergies to consider when making Hula Pie?
Absolutely! Since this recipe includes macadamia nuts, ensure to inform guests of the ingredients, particularly if they have nut allergies. You can easily replace macadamia nuts with toasted pecans or walnuts if you’re looking for an alternative that’s equally delicious but nut-free.
How can I tell when the ice cream pie is ready to serve?
Your Hula Pie will be perfectly ready when it has been frozen solid for 2-3 hours. It should feel firm to the touch, and slicing into it reveals a creamy texture inside. A quick tip: let it sit at room temperature for about 5 minutes before slicing to ensure perfect, beautiful pieces!
No-Churn Hula Pie: Creamy Macadamia Nut Bliss Awaits
Ingredients
Equipment
Method
- Preheat your oven to 350°F (175°C).
- Pulse 24 Oreo cookies into fine crumbs and mix with ½ cup melted butter.
- Press the mixture into the bottom and sides of a 9-inch pie pan.
- Bake for 8-10 minutes, then cool completely.
- Whip 2 cups of very cold heavy cream until stiff peaks form.
- Fold in 14 ounces of sweetened condensed milk, 1 teaspoon of vanilla extract, and ½ teaspoon of macadamia nut extract.
- Add 1 cup of chopped roasted macadamia nuts.
- Spoon the ice cream mixture into the cooled Oreo crust and spread evenly.
- Cover with plastic wrap and freeze for 2-3 hours until firm.
- Warm thick hot fudge sauce in the microwave for 20-30 seconds until pourable.
- Drizzle fudge over the pie and sprinkle remaining macadamia nuts.
- Let the pie sit at room temperature for 5 minutes before slicing.
- Garnish edges with whipped cream and serve immediately.
Leave a Reply