
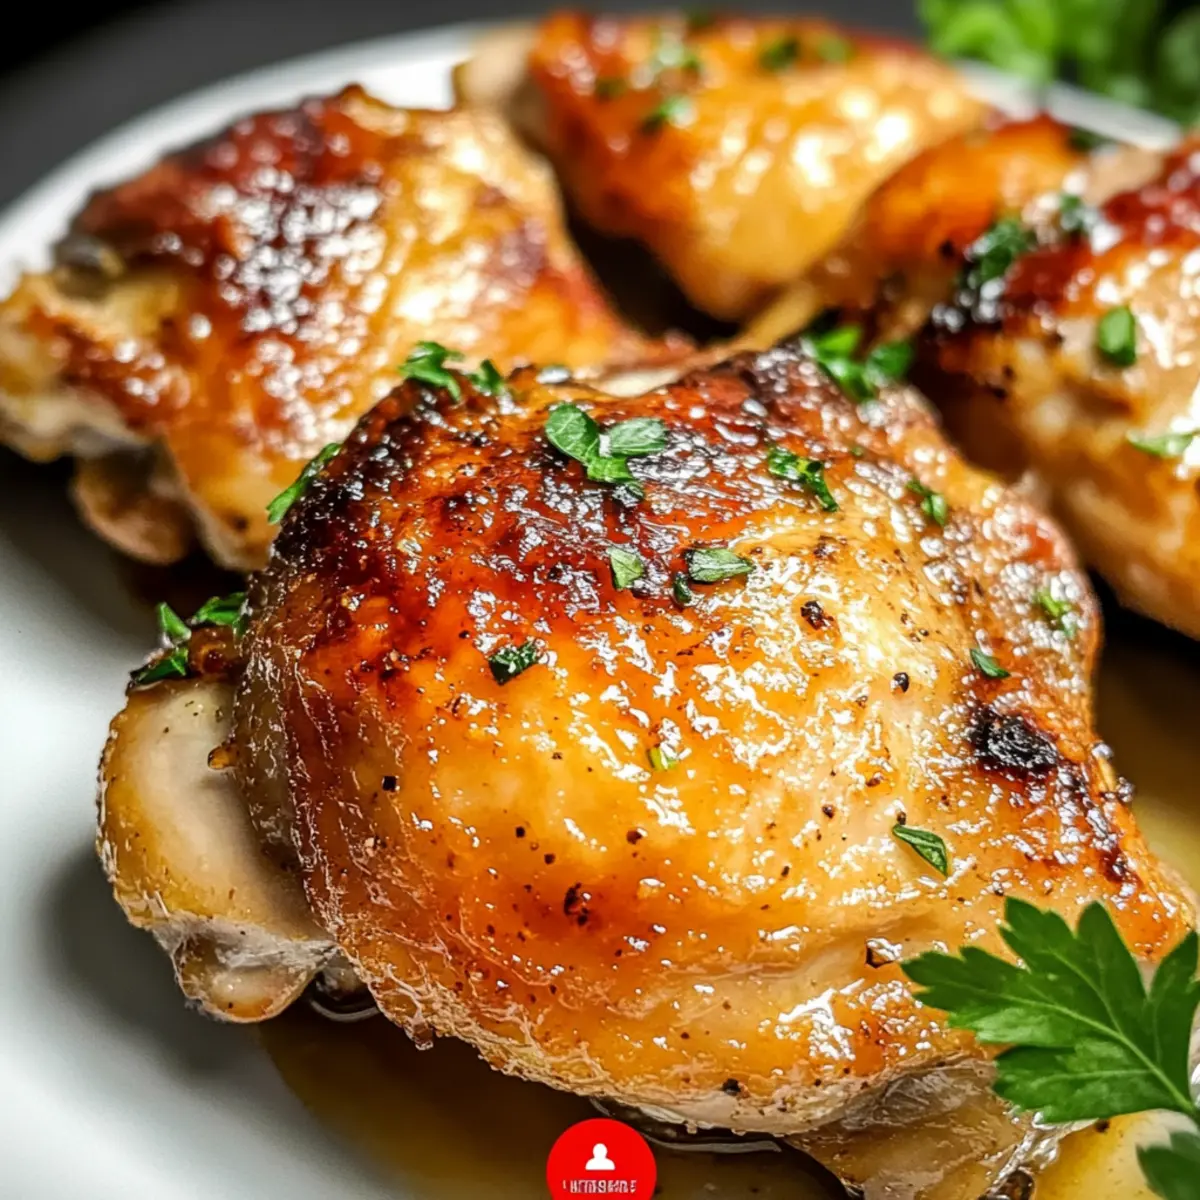
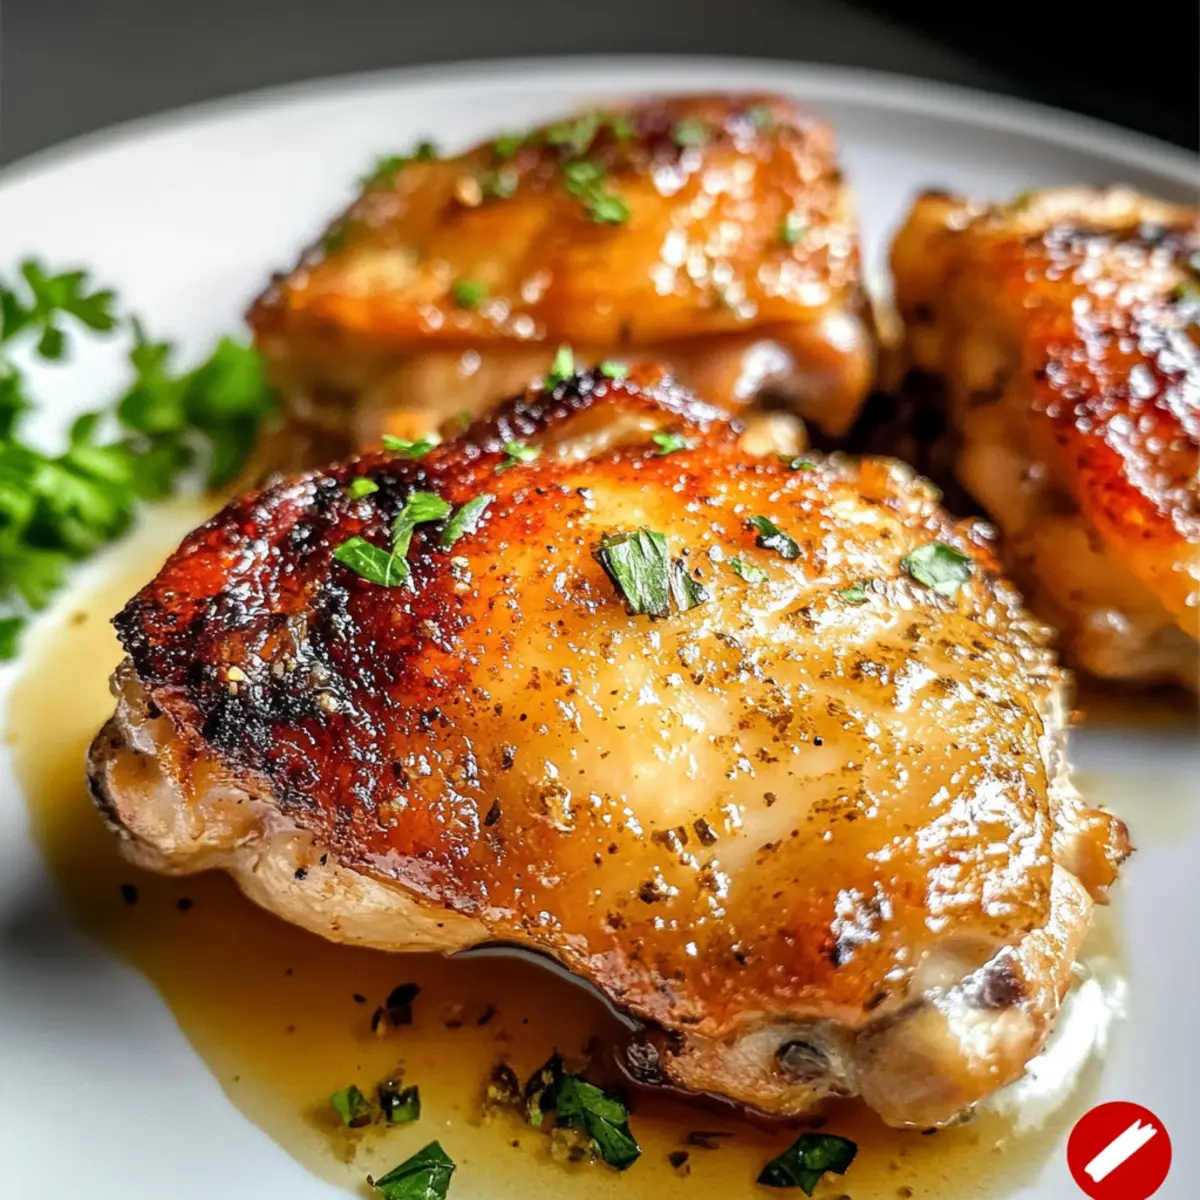
As I pulled the chicken thighs from the oven, the tantalizing aroma of buttery ranch filled the kitchen, instantly sparking joy. Baked Ranch Chicken Thighs are not just dinner; they’re a soul-soothing experience, perfect for easy weeknight meals or meal prepping for busy days ahead. You’ll absolutely love how simple it is to create this juicy, savory delight—each bite promises comfort that’s both satisfying and fuss-free. Plus, the versatility of this recipe allows for five delightful variations, ensuring everyone at the table finds a favorite twist. How do you like your chicken thighs seasoned? Let’s dive into this delicious adventure together!

Why are Baked Ranch Chicken Thighs a Must-Try?
Flavor-Packed: Each bite bursts with a buttery ranch flavor, leaving everyone wanting more.
Unmatched Ease: The straightforward preparation means you can have a delicious dinner on the table in no time, perfect for busy nights.
Versatile Variations: With five different ways to customize, this dish appeals to all taste preferences—whether you love a spicy kick or a cheesy twist.
Comfort in Every Bite: Juicy and tender chicken thighs combine with a crispy skin, creating a comforting meal that’s sure to please your family.
Meal Prep Friendly: These thighs are perfect for make-ahead meals, ensuring you have satisfying lunches or quick dinners ready to go. Pair with a side of roasted asparagus or even a fresh salad to create a well-rounded meal! Enjoy more ideas like Garlic Parmesan Chicken for delightful weeknight options!
Baked Ranch Chicken Thighs Ingredients
For the Chicken
- Chicken Thighs – The heart of this dish; juicy and flavorful, boneless thighs can be used for quicker cooking.
- Olive Oil – Helps achieve that perfect golden-brown crust; for richer flavor, feel free to substitute with melted butter.
For the Seasoning
- Ranch Dressing Mix – The signature flavor booster; consider using homemade ranch seasoning for a healthier twist.
- Garlic Powder – Elevates the overall flavor profile; switch to fresh minced garlic for a more robust taste.
- Salt and Pepper – Essential for seasoning; adjust to your taste for the perfect balance.
Optional Toppings
- Parmesan Cheese – A sprinkle before baking adds a delightful cheesy crust; try it on those flavor-packed Baked Ranch Chicken Thighs!
- Fresh Herbs (Thyme or Rosemary) – Enhance the freshness; simply mix into the seasoning for a herby lift.
Step‑by‑Step Instructions for Baked Ranch Chicken Thighs
Step 1: Preheat the Oven
Begin by preheating your oven to 400°F (200°C). This temperature is key for achieving that crispy, golden-brown crust on your Baked Ranch Chicken Thighs. While the oven heats, gather all your ingredients and equipment, such as a mixing bowl and a baking sheet, to make the cooking process smooth and efficient.
Step 2: Prepare the Seasoning
In a mixing bowl, combine the ranch dressing mix, garlic powder, salt, and pepper. Whisk these dry ingredients together until they’re well blended, creating a flavorful seasoning mix that will coat the chicken. This step packs the chicken thighs with savory flavor, ensuring that every bite of your dish bursts with the classic ranch taste.
Step 3: Coat the Chicken Thighs
Next, place your chicken thighs in a large bowl and drizzle them with olive oil. Gently toss the thighs until they are thoroughly coated with the oil, which helps the seasoning adhere and enhances browning. Then, generously sprinkle the prepared ranch seasoning mix over the thighs, evenly coating them to ensure a flavor-packed experience in every bite.
Step 4: Arrange on Baking Sheet
Once seasoned, transfer the chicken thighs to a baking sheet lined with parchment paper or lightly greased to prevent sticking. Arrange them skin side up to showcase that beautiful skin that will crisp up in the oven. Make sure to space them out enough to promote even cooking and maximum crunchiness on all sides.
Step 5: Bake to Perfection
Place the baking sheet in the preheated oven and bake the chicken thighs for 35-40 minutes. Keep an eye on them as they cook; you’re looking for the skin to become golden brown and the internal temperature to reach 165°F (74°C). A meat thermometer will help you achieve the perfect doneness, ensuring each thigh is juicy and delicious.
Step 6: Rest Before Serving
After baking, remove the chicken thighs from the oven and let them rest for about 5 minutes. This resting period allows the juices to redistribute throughout the meat, guaranteeing that your Baked Ranch Chicken Thighs are tender and succulent. As the dish rests, prepare your favorite sides for a comforting meal that the whole family will enjoy.
How to Store and Freeze Baked Ranch Chicken Thighs
Fridge: Store leftover Baked Ranch Chicken Thighs in an airtight container for up to 3 days. This will keep them juicy and flavorful for later meals.
Freezer: If you want to save some for a future date, freeze the chicken thighs in a freezer-safe container for up to 3 months. Allow to cool completely before freezing for best results.
Reheating: To maintain the crispy skin, reheat in the oven at 350°F (175°C) for about 15-20 minutes. This will help restore that delicious crunch while warming the chicken through.
Meal Prep Tip: Feel free to portion out servings into individual containers before refrigerating or freezing, making it easy to grab a satisfying meal on busy days!
Expert Tips for Baked Ranch Chicken Thighs
-
Pat Dry: Ensure chicken thighs are completely dry before seasoning. This helps achieve maximum crispiness on that golden-brown skin.
-
Avoid Overcrowding: Spread chicken thighs out on the baking sheet. Overcrowding can trap steam, preventing the skin from getting crispy and golden.
-
Use a Meat Thermometer: Check the internal temperature to guarantee doneness. Removing the chicken at precisely 165°F (74°C) ensures juicy Baked Ranch Chicken Thighs.
-
Let it Rest: Don’t skip the resting time after baking. Allowing the thighs to rest for 5 minutes helps retain all those delicious juices, making each bite succulent.
-
Experiment with Flavors: Don’t hesitate to try different variations! Adding spices, herbs, or cheese opens up a world of savories to elevate your Baked Ranch Chicken Thighs.
What to Serve with Juicy Baked Ranch Chicken Thighs
Create a delightful spread that enhances the comforting flavors of your chicken with these delicious pairings.
-
Creamy Mashed Potatoes: Perfectly buttery potatoes that soak up savory drippings from the chicken, elevating every bite.
-
Roasted Asparagus: Crisp-tender asparagus adds a fresh crunch, providing a vibrant contrast to the chicken’s richness.
-
Garlic Bread: Crispy, buttery, and loaded with garlic; this classic side complements the ranch flavor beautifully.
-
Mixed Green Salad: A refreshing salad with a tangy dressing offers brightness and balance against the savory chicken.
-
Corn on the Cob: Sweet, juicy corn brings a pop of flavor and sweetness, rounding out the comfort of the meal.
-
Coleslaw: Creamy and crunchy, coleslaw adds a delightful texture that contrasts nicely with the tender chicken.
For a truly rewarding meal, consider serving a tall glass of iced tea or a light white wine to tie all the flavors together. Enjoy the harmony of this comforting dinner experience!
Baked Ranch Chicken Thighs Variations
Get ready to let your creativity shine! With these easy twists, you can make Baked Ranch Chicken Thighs uniquely yours.
-
Spicy Ranch: Swap regular ranch seasoning for spicy ranch mix to add a fiery kick. Perfect for those who love a little heat in their meals!
-
Cheesy Crust: Sprinkle grated Parmesan cheese over the thighs before baking. This adds a delightful cheesy layer that will have everyone coming back for seconds.
-
Herb Infusion: Mix in fresh herbs like thyme or rosemary with the seasoning. These fragrant additions can lift the flavor profile to new heights—so bright and refreshing!
-
Skinless Option: Use skinless chicken thighs for a leaner take on this dish. They still pack a punch of flavor while being lighter and healthier.
-
Vegetable Medley: Roast seasonal vegetables alongside the chicken on the baking sheet. This creates a colorful, balanced meal that adds extra nutrients and flavor—think roasted carrots, zucchini, and bell peppers!
-
Crispy Skin Lovers: For a double crunch, broil the chicken thighs for the last 2-3 minutes after baking. This enhanced crispiness will elevate your dish to gourmet status!
-
Lemon Zest: Add a touch of brightness with lemon zest in the seasoning mix. It adds a refreshing zing that pairs beautifully with the rich ranch flavor.
-
Asian-Inspired: Replace ranch with Asian seasoning and a dash of soy sauce. Serve these flavorful thighs over rice or add to a stir-fry for a unique fusion twist!
Feeling inspired? Why not try pairing these flavorful chicken thighs with a crunchy side salad or some heartwarming mashed potatoes? Don’t forget to check out my other recipes like the delightful Garlic Parmesan Chicken or a comforting Butter Chicken Easily for more delicious dinner ideas!
Make Ahead Options
Baked Ranch Chicken Thighs are fantastic for meal prep, saving you time during busy weeknights! You can season the chicken thighs up to 24 hours in advance by coating them with olive oil and the ranch seasoning mix, then refrigerating them in an airtight container. This allows the flavors to deepen and ensures they remain just as juicy and delicious. Alternatively, you can bake them and store the leftovers in the fridge for up to 3 days—just reheat in the oven to restore that crispy skin before serving. This way, you’ll have flavorful, comforting meals ready at a moment’s notice, making dinner planning a breeze!

Baked Ranch Chicken Thighs Recipe FAQs
What type of chicken thighs should I use?
Absolutely! You can use both bone-in or boneless chicken thighs for this recipe. Bone-in thighs tend to have more flavor and juiciness, while boneless thighs cook faster and are easier to slice. If you’re in a hurry, I recommend using boneless thighs for quicker preparation.
How should I store leftovers?
Store leftover Baked Ranch Chicken Thighs in an airtight container in the fridge for up to 3 days. Make sure to let them cool down to room temperature before sealing. This helps maintain their juiciness and flavor for your next meal!
Can I freeze Baked Ranch Chicken Thighs?
Yes! To freeze, allow the Baked Ranch Chicken Thighs to cool completely. Place them in a freezer-safe container or a resealable freezer bag, making sure to remove as much excess air as possible. They can be frozen for up to 3 months. When you’re ready to enjoy them, thaw in the fridge overnight and reheat in the oven to keep that crispy skin intact!
What if my chicken thighs are not crispy?
Very! If your chicken thighs turn out soggy, it could be due to excess moisture. Make sure to pat them dry with paper towels before seasoning. Additionally, avoid overcrowding the baking sheet, as this can trap steam and prevent crispness. For an extra crispy finish, broil for the last 2-3 minutes of baking.
Can I use homemade ranch seasoning instead?
Definitely! If you prefer homemade ranch seasoning, simply mix equal parts dried dill, garlic powder, onion powder, and parsley, along with salt and pepper to taste. This allows you to control the flavor and ingredients, giving your Baked Ranch Chicken Thighs a personalized touch!
Are Baked Ranch Chicken Thighs safe for pets?
While plain, cooked chicken can be safe for pets, be cautious of any seasonings. Avoid feeding them any seasoned or spicy portions, as certain spices, like garlic and onion, can be harmful to dogs and cats. If you want to share a treat with your furry friend, serve a small piece of unseasoned chicken thigh.
Savory Baked Ranch Chicken Thighs for Effortless Weeknight Joy
Ingredients
Equipment
Method
- Preheat the oven to 400°F (200°C).
- In a mixing bowl, combine the ranch dressing mix, garlic powder, salt, and pepper.
- Coat the chicken thighs with olive oil, then sprinkle the seasoning mix over them.
- Arrange the seasoned chicken thighs skin side up on a baking sheet.
- Bake for 35-40 minutes, checking for a golden brown skin and an internal temperature of 165°F (74°C).
- Let the chicken rest for about 5 minutes before serving.
Leave a Reply