
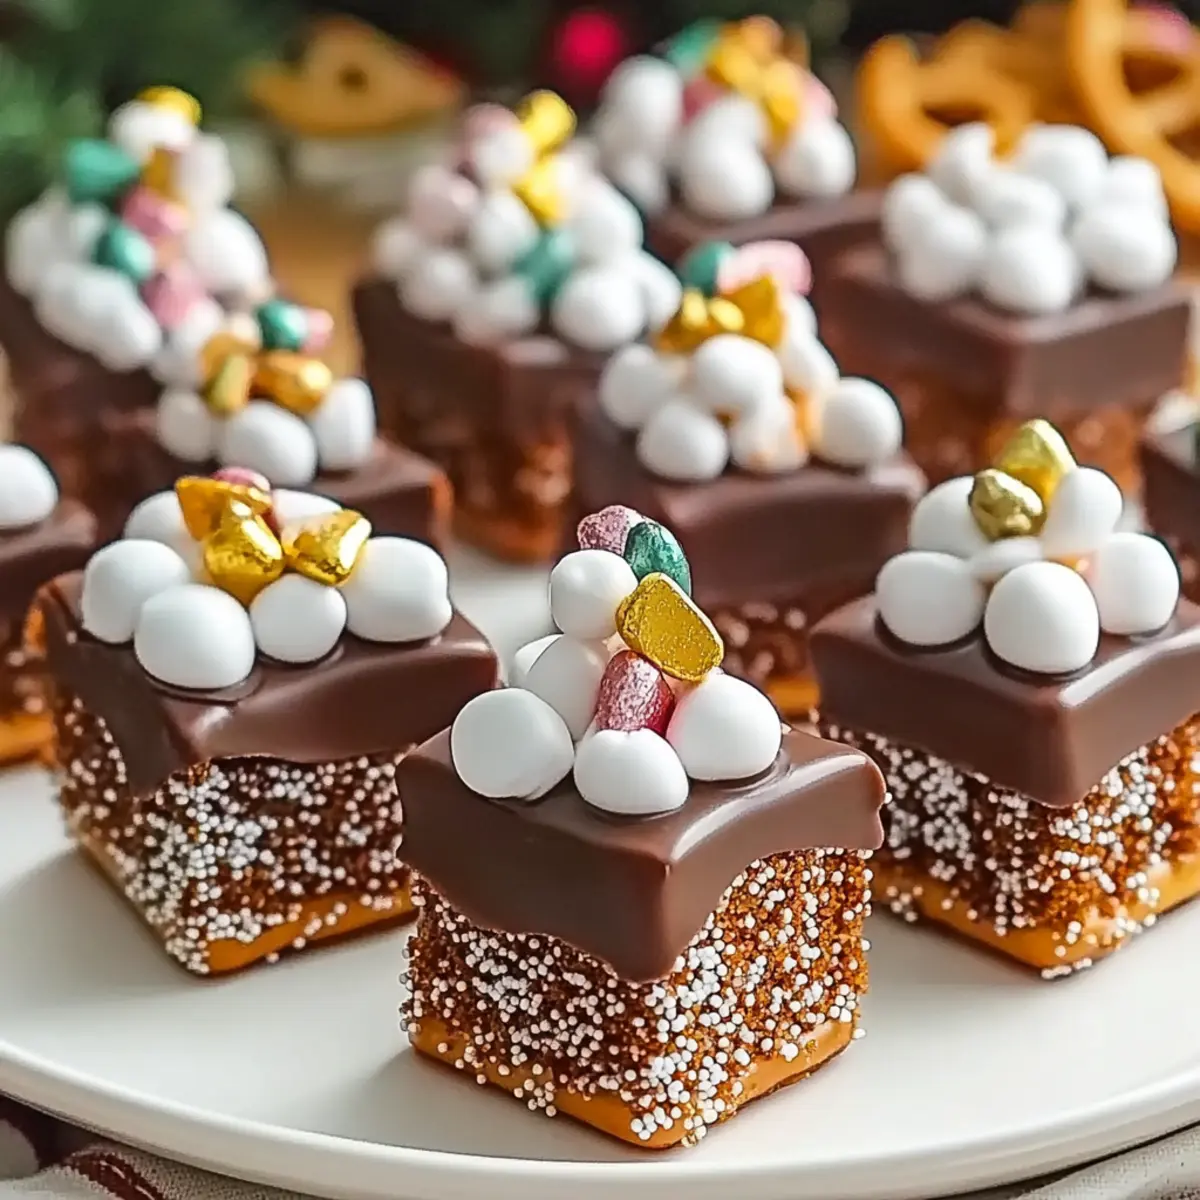
As I stood in my kitchen, the scent of melting chocolate wafted through the air, instantly lifting my spirits. There’s something magical about making No-Bake Pretzel and Candy Melt Christmas Trees that always brings a smile to my face. These festive treats combine the satisfying crunch of pretzels with colorful candy melts, creating a delightful interactive dessert that is as fun to make as it is to eat. Best of all, they’re kid-friendly and customizable, allowing everyone to showcase their creativity without the hassle of baking! Picture an afternoon spent crafting these whimsical trees with loved ones, turning a simple snack into a cherished holiday tradition. Ready to spread some festive cheer? Let’s dive into this easy, no-bake recipe that promises to be a hit at your next gathering!

Why make Candy Melt Christmas Trees?
Simplicity at Its Best: This no-bake recipe is easy enough for kids and fun for adults, making it a perfect family activity.
Endless Creativity: With colorful candy melts and decorative sprinkles, every tree can be uniquely crafted to reflect your holiday spirit.
Festive Delight: The crunchy pretzels provide an irresistible texture, while the candy adds a sweet, delightful flair that’s hard to resist.
Quick to Assemble: Whip up these treats in less than 30 minutes, giving you more time to enjoy the festive season with loved ones—like pairing them with a warm cup of hot cocoa!
Perfect for Gifting: Beautifully arranged, these Candy Melt Christmas Trees double as charming gifts or holiday party favors, spreading cheer wherever they go.
Candy Melt Christmas Trees Ingredients
For the Base
- Mini Pretzels – Crisp and sturdy, they form the trunk of your festive trees. Substitute with gluten-free pretzels if needed.
For the Tree Coating
- Candy Melts – These colorful delights create the vibrant exterior; pick a variety of colors to enhance your creations.
For the Decoration
- Decorative Sprinkles – Use holiday-themed or colorful sprinkles to add texture and festive flair.
- Edible Glitter – Optional, but a sprinkle of this enhances the magical look of your trees.
- White Chocolate Chips – Perfect for drizzling, lending extra sweetness; feel free to swap with milk or dark chocolate for a different twist.
These Candy Melt Christmas Trees are not only visually stunning but also a delightful way to engage the entire family in a holiday tradition!
Step‑by‑Step Instructions for Candy Melt Christmas Trees
Step 1: Prepare Work Surface
Begin by lining a baking sheet with parchment paper to prevent sticking and simplify cleanup. This will serve as the base for assembling your Candy Melt Christmas Trees. Ensure the surface is flat and clean, so your trees can stand upright easily without tipping over during the process.
Step 2: Melt Candy
In separate microwave-safe bowls, add your colorful candy melts, dividing them by color if using multiple shades. Heat them in the microwave at medium power for 30 seconds, then stir vigorously. Repeat this process until the melts are smooth and glossy, roughly 1-2 minutes. Avoid overheating to maintain their vibrant colors.
Step 3: Build Trees
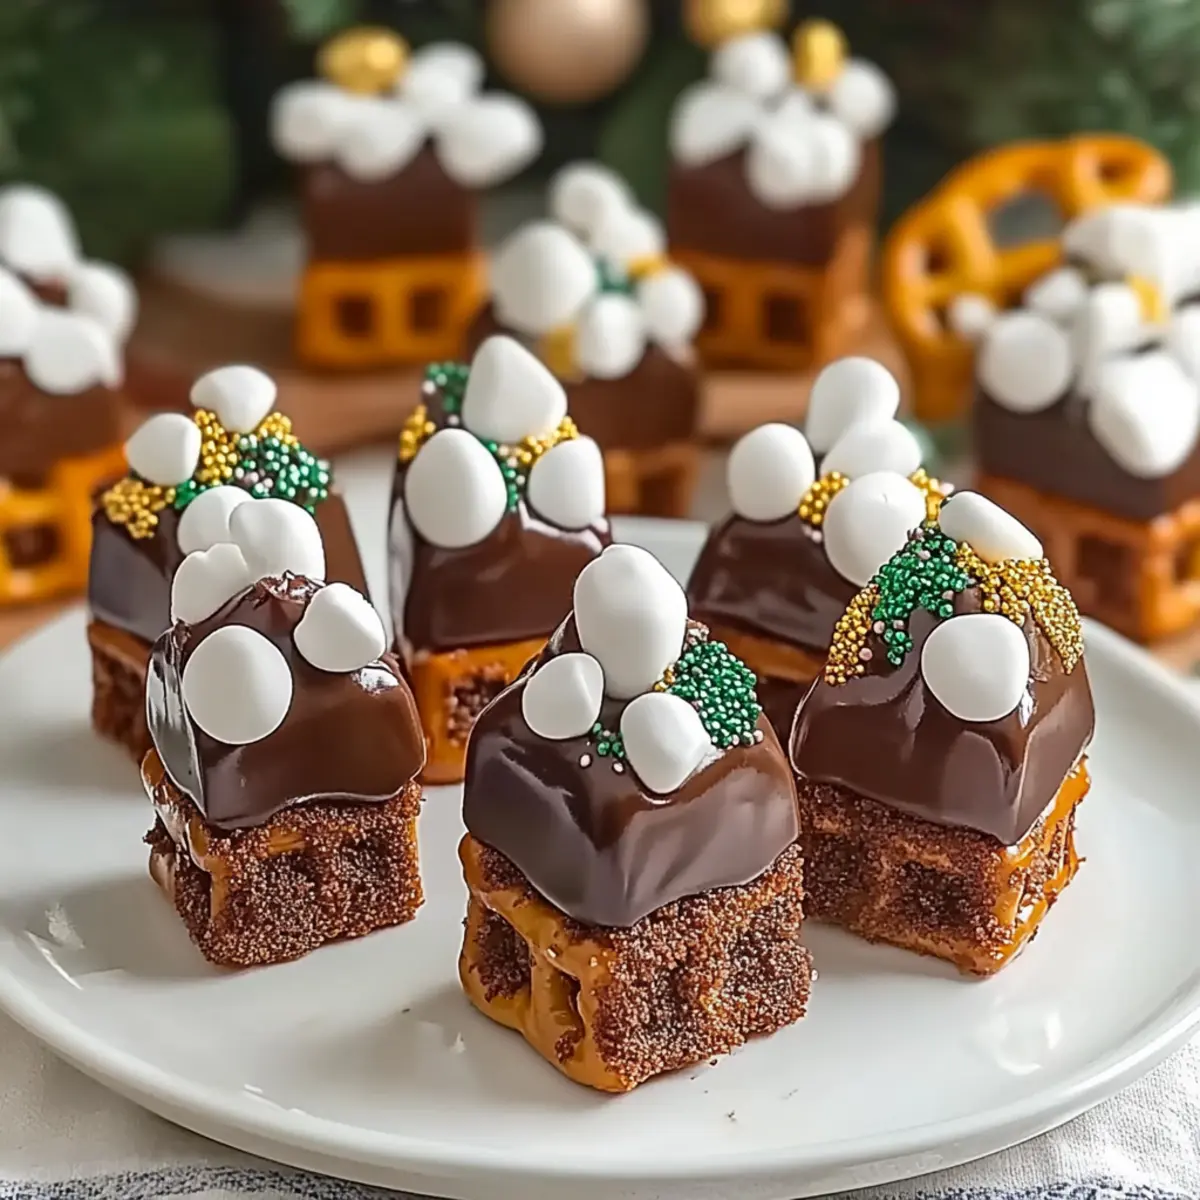
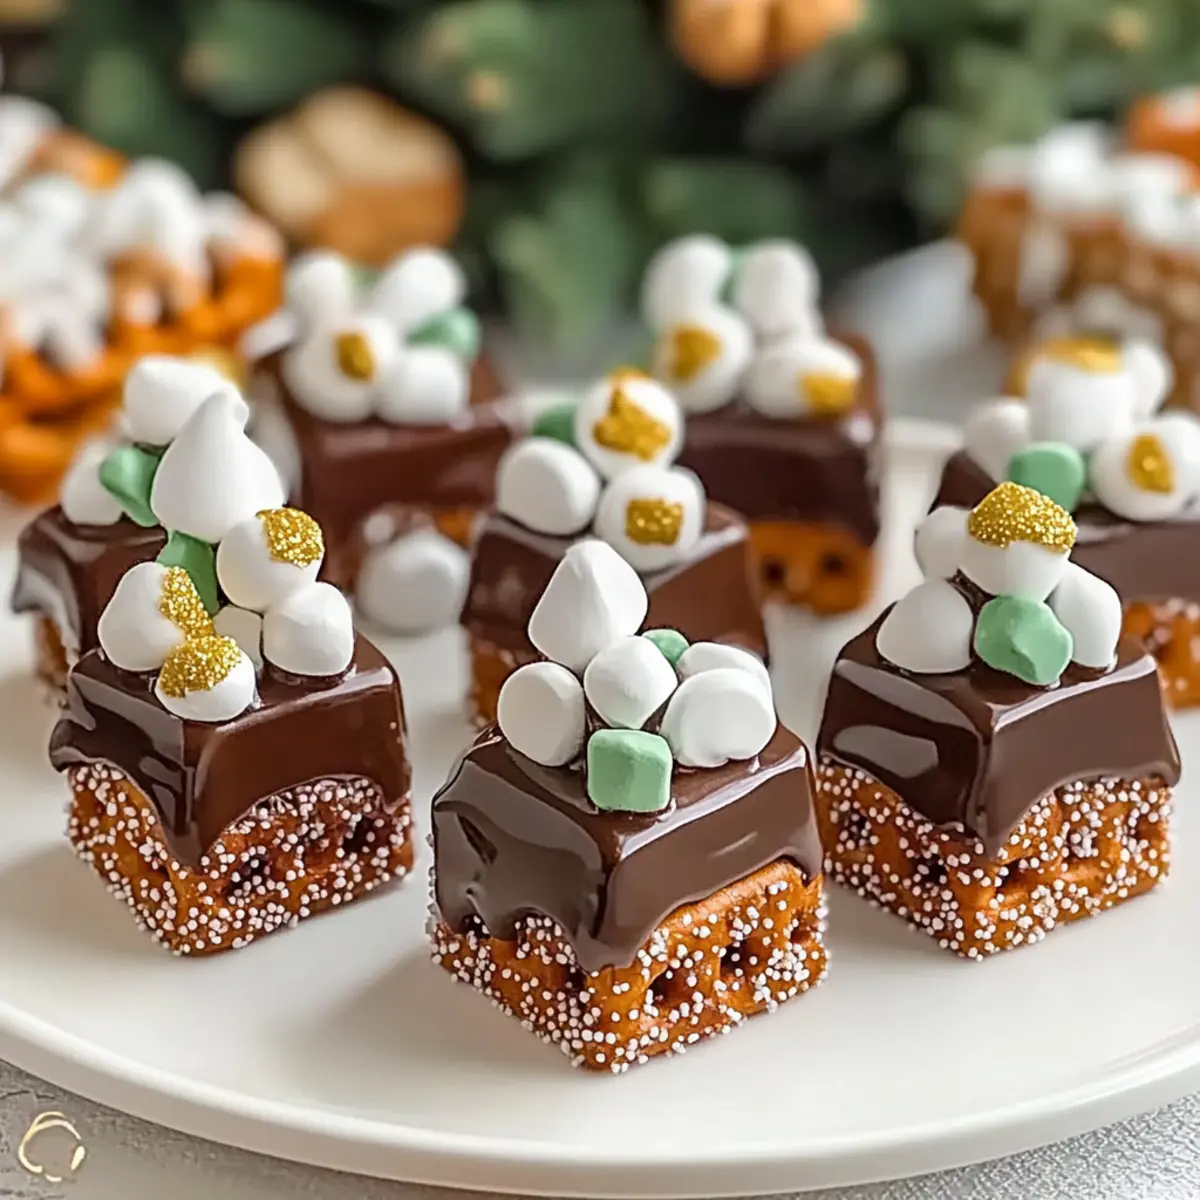
Take a mini pretzel and dip it halfway into the melted candy, ensuring to coat it thoroughly. Stand the pretzel upright on the prepared parchment paper, forming the base of your Candy Melt Christmas Tree. Repeat this for the remaining pretzels, arranging them in various positions to create whimsical tree shapes as desired.
Step 4: Add Chocolate Drizzle
Next, melt the white chocolate chips in a microwave-safe bowl using the same 30-second intervals, stirring until completely smooth. Once melted, drizzle the white chocolate over the pretzel trees in zigzag patterns. This adds not just sweetness, but also a lovely visual dimension to your festive creations.
Step 5: Decorate
While the drizzle is still warm, sprinkle your favorite decorative toppings and festive edible glitter over the pretzel trees. Get creative! Use holiday-themed sprinkles for a joyful touch or colorful varieties to make each tree unique. The warmth of the chocolate helps the sprinkles adhere beautifully.
Step 6: Cool and Serve
Allow your Candy Melt Christmas Trees to cool at room temperature for about 15 minutes. This cooling period will allow the chocolate to set firmly. Once they are stable and secure, gently remove the trees from the parchment paper and arrange them colorfully on a platter for all to admire and enjoy.
Candy Melt Christmas Trees Variations
Feel free to customize your Candy Melt Christmas Trees and make them uniquely yours with these delightful twists!
-
Gluten-Free: Use gluten-free pretzels to make these trees suitable for everyone at your holiday gathering. Everyone can enjoy the festive fun!
-
Dark Chocolate: Swap the candy melts for dark chocolate for a rich twist that adds a gourmet touch. This version is perfect for chocolate lovers.
-
Textural Twist: Add mini dried fruits or chopped nuts for an extra crunch and chewy texture, elevating your trees further from simple sweets.
-
Themed Colors: Change up the color scheme based on different holidays or occasions, like pastels for Easter or vibrant colors for birthday parties. Be creative!
-
Marshmallow Snow: Use mini marshmallows to top off your trees, giving it a snowy look. It adds both a charming visual and delightful chewiness.
-
Peanut Butter Drizzle: Drizzle some creamy or crunchy peanut butter instead of white chocolate for an adventurous flavor twist that kids will adore.
-
Coconut Flakes: Sprinkle coconut flakes on top of your trees for a snowy effect and chewy tropical flavor—an unexpected delight!
Want to pair your creations with something festive? Consider serving them alongside a cup of hot cocoa for a magical holiday experience. And if you’re feeling adventurous, why not try making these with some Christmas Salad Honey or present them as party favors with a side of Christmas Cranberry Pinwheels? Enjoy every bite of your creativity!
Make Ahead Options
These Candy Melt Christmas Trees are perfect for busy home cooks looking to save time during the festive season! You can prepare the mini pretzels and melt the candy up to 24 hours in advance. Simply store the prepped pretzels in an airtight container at room temperature, and the melted candy can be kept in separate bowls covered with plastic wrap to preserve its smoothness. When you’re ready to assemble, simply reheat the candy melts for a few seconds in the microwave until smooth. Then, dip the pretzels and drizzle with white chocolate, add your decorative sprinkles, and let them cool. You’ll have beautiful, festive treats ready to impress with minimal last-minute effort!
How to Store and Freeze Candy Melt Christmas Trees
-
Room Temperature: Keep your Candy Melt Christmas Trees in an airtight container at room temperature for up to 5 days. This will maintain their delightful crunch and vibrant colors.
-
Fridge: Avoid refrigeration, as it can soften the candy melts and ruin the trees’ texture. Instead, enjoy them fresh at room temperature for the best experience.
-
Make-Ahead: Prepare the mini pretzels and melted candy in advance, storing them separately in airtight containers. Assemble the trees the day before your celebration to save time!
-
Reheating: If the chocolate drizzle becomes too hard, gently warm it in the microwave for a few seconds to restore a smooth finish. Enjoy crafting these festive treats with loved ones!
Expert Tips for Candy Melt Christmas Trees
-
Melting Consistency: Ensure your candy melts are melted properly. If they’re too thick, mix in a teaspoon of vegetable oil for a smoother texture when dipping pretzels.
-
Watch the Drizzle: When drizzling white chocolate, allow it to cool slightly before using. This way, you’ll achieve a more controlled drizzle and avoid pooling.
-
Storage Smart: Store your finished Candy Melt Christmas Trees in an airtight container at room temperature. Refrigeration can cause the candy melts to lose their delightful crunch.
-
Creative Toppings: Experiment with different toppings! Use festive sprinkles, mini marshmallows, or even crushed nuts for extra texture and holiday spirit.
-
Allergy Awareness: Always check labels for allergens, especially if making gifts. Using gluten-free pretzels is a great way to cater to those with dietary restrictions.
What to Serve with Candy Melt Christmas Trees?
These delightful, colorful treats are perfect for enhancing your holiday spread and making every gathering more festive.
-
Hot Cocoa: A cozy pairing, the warmth and sweetness of hot cocoa beautifully complements the crunchy, sweet trees. Enjoy sipping alongside while admiring your creations!
-
Christmas Cookies: Offer a classic selection of sugar or gingerbread cookies to create a whimsical dessert table; the variety in textures and flavors engages everyone’s palate.
-
Fruit Platter: Fresh fruits like strawberries, grapes, and apple slices provide a refreshing contrast, balancing the sweetness of the candy melts with their natural tartness.
-
Cheese and Charcuterie Board: Introduce savory elements with creamy cheeses and cured meats, offering a sophisticated contrast to the festive sweetness of your pretzel trees.
-
Sparkling Cider: A sparkling cider or festive punch brings a fun effervescence that enhances the celebration’s spirit, delighting both adults and kids alike.
-
Mini Cupcakes: Colorful, frosted mini cupcakes can add an extra touch of sweetness and variety, easily drawing everyone’s attention and excitement.
-
Chocolate Fondue: A fun interactive dessert where guests can dip fruits and pretzels into warm chocolate adds another layer of sweetness and texture.
-
Milkshake: Creamy, thick milkshakes, whether chocolate or vanilla, are a treat loved by kids, making for a delightful round-off to the sweet delights.
These pairings ensure your gathering feels festive and scrumptious, adding layers of enjoyment to your Candy Melt Christmas Trees!
Candy Melt Christmas Trees Recipe FAQs
What should I look for when selecting mini pretzels?
Look for mini pretzels that are crisp and sturdy, as they form the trunk for your Candy Melt Christmas Trees. I recommend choosing pretzels that are free of any dark spots or signs of staleness, ensuring a satisfying crunch. If gluten is a concern, gluten-free pretzels are a great alternative!
How should I store my completed Candy Melt Christmas Trees?
Store your Christmas trees in an airtight container at room temperature for up to 5 days. Keeping them in a cool, dry place helps maintain their crunch and vibrant colors. Avoid refrigeration, as it can soften the candy melts and affect their delightful texture.
Can I freeze the Candy Melt Christmas Trees?
While it’s generally not recommended to freeze these trees due to the texture of the candy melts, you can prepare components in advance. Store the melted candy, separately from the pretzels, in airtight containers in the fridge for up to a week. On the day of assembly, just reheat the candy melts and dip your pretzels!
What should I do if my candy melts are too thick?
Absolutely! If your candy melts are thicker than you’d like, simply mix in a teaspoon of vegetable oil or coconut oil to achieve a smoother consistency. Heat the mixture gently for a few seconds in the microwave, stirring well until it’s glossy and ready for dipping.
Are there any allergy considerations for this recipe?
Yes! Always check ingredient labels for potential allergens, especially if you’re making these Candy Melt Christmas Trees as gifts. To cater to those with dietary restrictions, use gluten-free pretzels and ensure that your candy melts and chocolate chips are free from any allergens.
Candy Melt Christmas Trees: Fun No-Bake Festive Treats
Ingredients
Equipment
Method
- Prepare Work Surface: Line a baking sheet with parchment paper to prevent sticking.
- Melt Candy: Heat candy melts in microwave for 30 seconds, stir, repeat until smooth.
- Build Trees: Dip a pretzel into melted candy, stand upright on parchment.
- Add Chocolate Drizzle: Melt white chocolate chips and drizzle over pretzel trees.
- Decorate: Sprinkle decorative toppings and edible glitter while the drizzle is warm.
- Cool and Serve: Let cool for 15 minutes before serving.
Leave a Reply