
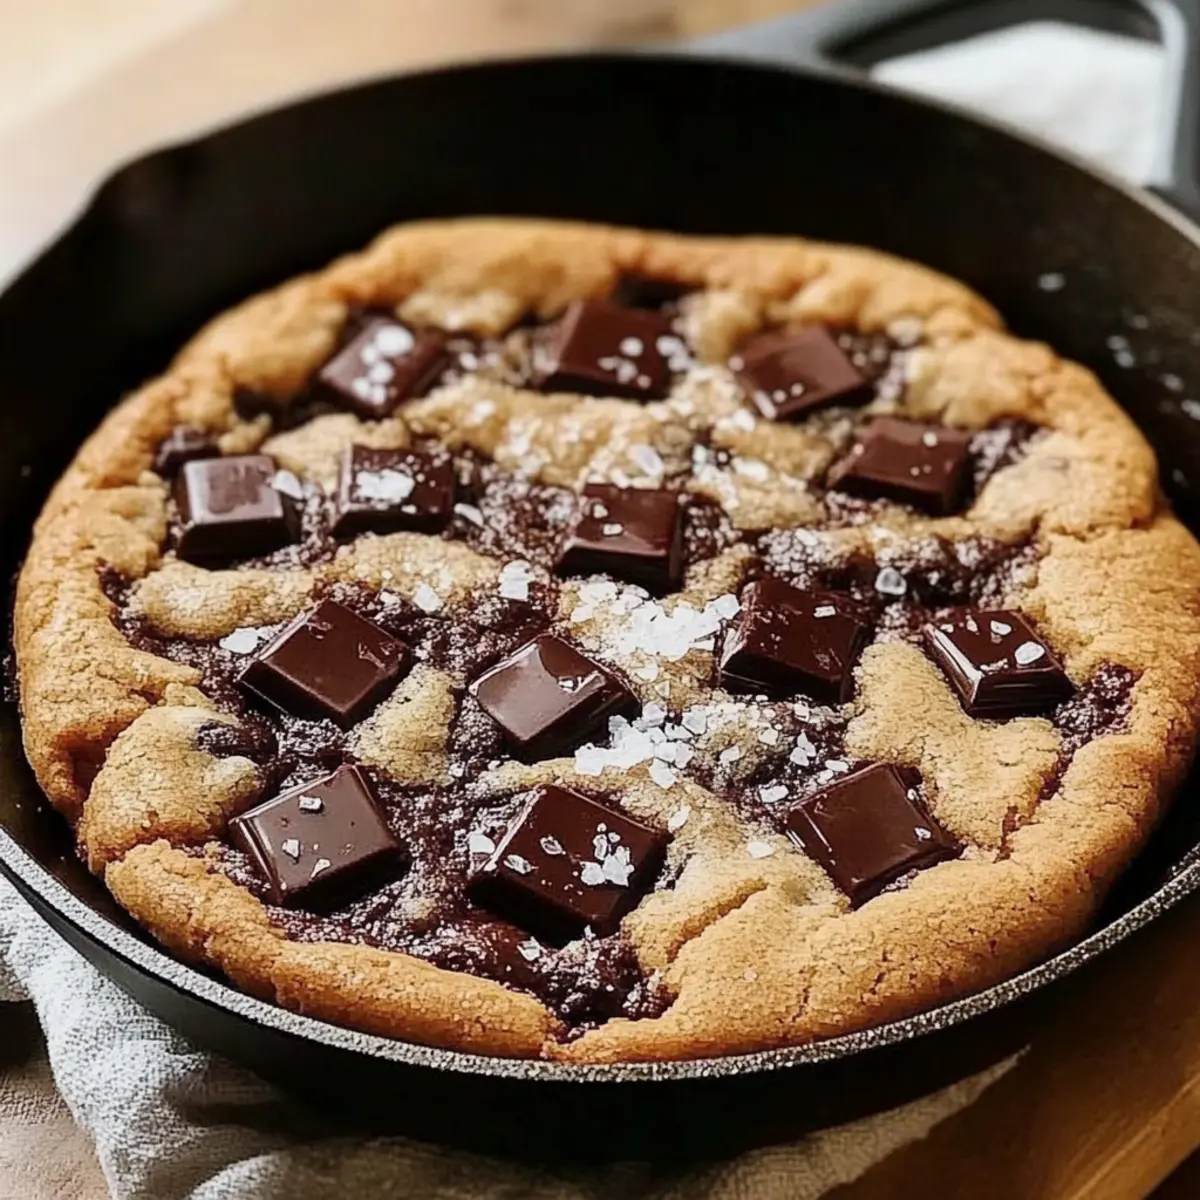
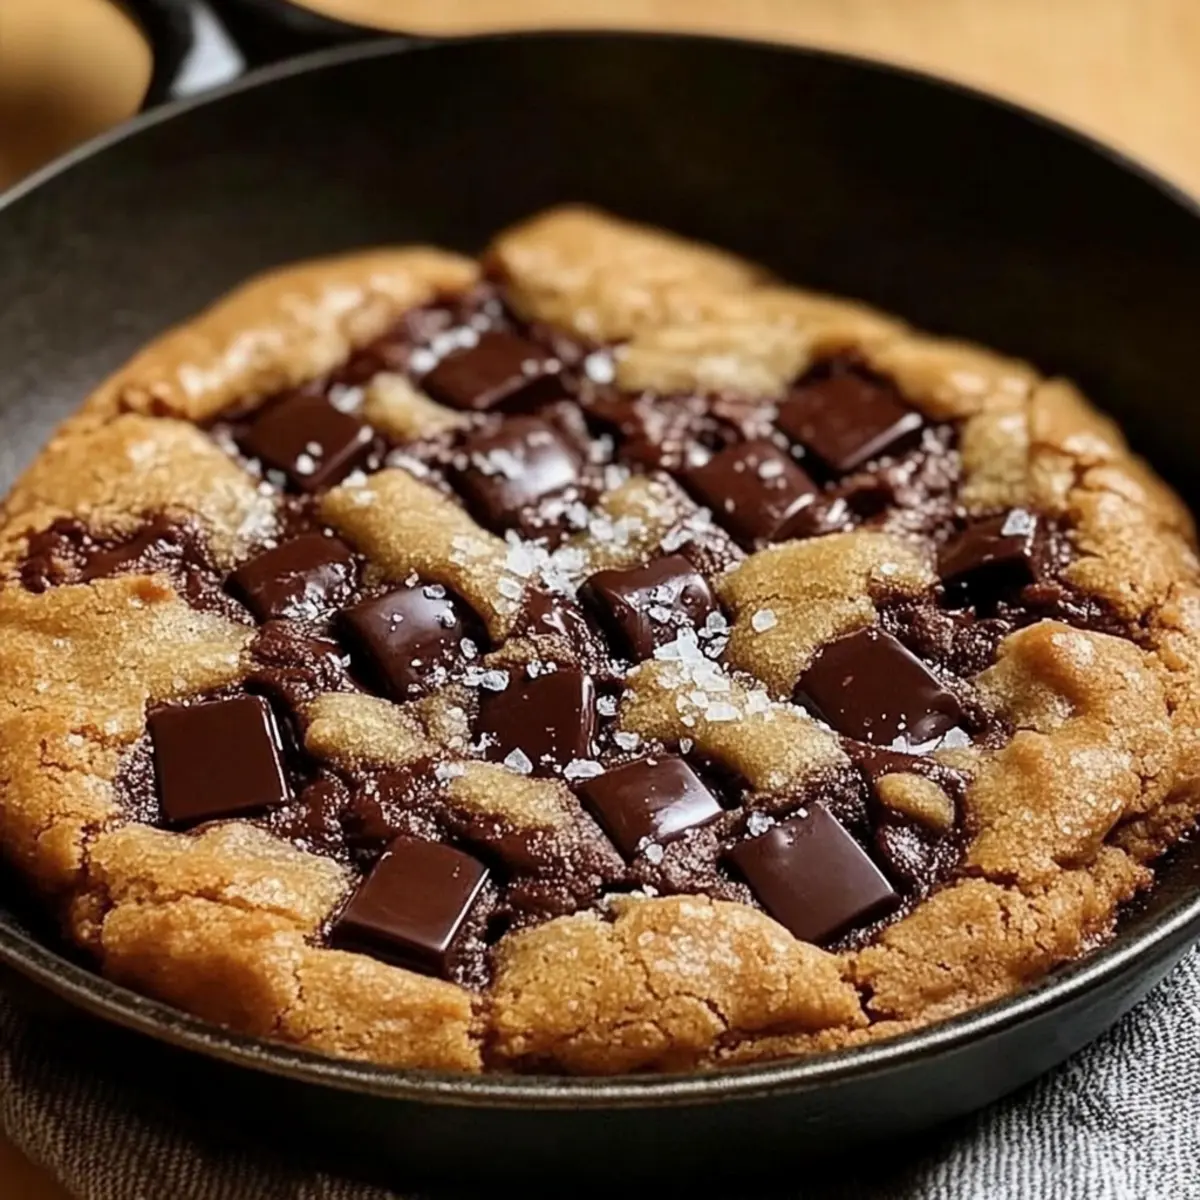
As the sweet scent of baking cookies wafts through my kitchen, I can’t help but feel a warming nostalgia. Today, I’m sharing my Ultimate Chocolate Chip Skillet Cookie recipe, a delightful comfort dessert that transforms the classic into an unforgettable experience. One-pan baking not only simplifies cleanup, but the gooey, chewy center paired with golden, crispy edges will make your heart skip a beat. Whether you’re winding down after a long day or hosting a cozy gathering, this skillet cookie is a guaranteed crowd-pleaser, especially when served warm with a scoop of ice cream. What could be more inviting than pulling out a perfectly baked cookie from the oven, ready to be enjoyed straight from the skillet? Let’s dive into this blissfully simple recipe that will turn any moment into a special occasion! Are you ready to create some delicious memories?
Why is this skillet cookie so special?
Gooey Delight: The combination of a soft, chewy center and crispy edges creates a texture that’s impossible to resist. One-Pan Wonder: Enjoy effortless cleanup with this one-pan baking masterpiece, giving you more time to savor every bite. Warm & Inviting: Serve it straight from the skillet, topped with a scoop of ice cream for an indulgent treat. Customizable Flavors: Feel free to experiment with different types of chocolate or nuts to make it your own. Whether you’re sharing with friends or indulging solo, this Chocolate Chip Skillet Cookie will transform any gathering into a memorable occasion! For more chocolatey inspiration, check out my Chocolate Cherry Cookies or the classic Chocolate Chip Cookies.
Chocolate Chip Skillet Cookie Ingredients
For the Cookie Base
• All-Purpose Flour – Forms the cookie’s structure, providing a chewy texture essential for that gooey center.
• Baking Soda – Adds a slight rise and helps balance the density of this divine treat.
• Salt – Enhances sweetness and deepens the rich chocolate flavors that make this cookie irresistible.
• Unsalted Butter – Contributes a rich flavor; browning it first adds a delightful nuttiness.
• Brown Sugar – Adds moisture and caramel-like sweetness for that perfect chewy bite.
• Granulated Sugar – Provides crisp edges and balances the sweetness of the cookie.
• Vanilla Extract – Infuses warmth and complexity, enhancing the overall flavor profile.
• Egg + Egg Yolk – Binds ingredients together and imparts richness, creating a sumptuous texture.
• Chocolate Chunks or Chips – The star of the show, providing melty pockets of chocolate in every bite.
• Flaky Sea Salt (optional) – A finishing touch that elevates all flavors and adds a gourmet feel.
These ingredients come together perfectly to create the ultimate Chocolate Chip Skillet Cookie that you and your loved ones will adore!
Step‑by‑Step Instructions for Chocolate Chip Skillet Cookie
Step 1: Preheat and Brown the Butter
Begin by preheating your oven to 350°F (175°C) to ensure an even bake for your Chocolate Chip Skillet Cookie. In a 10-inch cast-iron skillet, melt ½ cup unsalted butter over medium heat, watching closely as it turns golden brown and develops a nutty aroma—this should take about 5-7 minutes. Once browned, remove from heat and allow it to cool slightly.
Step 2: Mix the Sugars and Wet Ingredients
In a large mixing bowl, combine the browned butter with ¾ cup brown sugar and ¼ cup granulated sugar. Whisk together until the mixture becomes smooth and glossy, approximately 2 minutes. Next, stir in 1 tablespoon of vanilla extract, along with one whole egg and an extra egg yolk, blending until fully incorporated and the batter is shiny.
Step 3: Combine Dry Ingredients
In a separate bowl, whisk together 1 ½ cups all-purpose flour, ½ teaspoon baking soda, and ½ teaspoon salt. Gradually add this dry mixture into the wet ingredients, mixing gently until just combined. Be careful not to over-mix; the dough should remain soft and slightly sticky, ideal for a gooey Chocolate Chip Skillet Cookie.
Step 4: Fold in the Chocolate
Gently fold in 1 cup of chocolate chunks or chips, reserving a handful for the top. This ensures pockets of melty chocolate throughout your cookie, making each bite irresistible. Make sure the chocolate is evenly distributed without overworking the dough, preserving that delightful texture.
Step 5: Press the Dough into the Skillet
Transfer the cookie dough into your pre-prepared cast-iron skillet, pressing it evenly into the bottom and up the sides. This allows for that perfect cookie shape. Sprinkle the reserved chocolate chunks on top, ensuring they’re visible and ready to melt as the cookie bakes, creating a stunning finish.
Step 6: Bake to Perfection
Place the skillet in the preheated oven and bake for 20-25 minutes. Keep an eye on the cookie; it’s done when the edges are golden brown and the center is set but still slightly soft. A toothpick inserted into the center should come out with a few moist crumbs, signaling a gooey center just waiting to be devoured.
Step 7: Cool and Serve
Once baked, remove the skillet from the oven and allow it to cool for 5-10 minutes. This cooling time helps the cookie set while remaining warm and deliciously gooey. Serve it directly from the skillet, perhaps with a scoop of vanilla ice cream on top or a sprinkle of flaky sea salt for an extra treat.
Chocolate Chip Skillet Cookie Customizations
Feel free to indulge your culinary creativity with these fun variations to make the Chocolate Chip Skillet Cookie uniquely yours!
-
Nutty Delight: Add chopped walnuts or pecans for a crunchy texture that beautifully complements the gooey chocolate. The nuttiness enhances the overall flavor profile, making every bite more enjoyable.
-
Dark Chocolate Twist: Swap in dark chocolate chunks for a more sophisticated flavor. The bitterness of dark chocolate plays wonderfully against the sweetness, creating a delightful contrast.
-
Espresso Infusion: Mix in a teaspoon of espresso powder to deepen the flavor profile and add a mocha twist. This tiny addition makes a remarkable difference, enhancing the chocolate richness in every bite!
-
Gluten-Free Option: Substitute all-purpose flour with a gluten-free flour blend for a deliciously inclusive treat. Just be sure to check that your other ingredients are gluten-free as well!
-
Sea Salt Finish: Sprinkling flaky sea salt on top before baking intensifies the chocolate flavor and gives a gourmet touch. It’s a simple yet effective way to elevate the dessert experience!
-
Tropical Twist: Incorporate shredded coconut into the dough for hints of tropical flavor. Paired with chocolate, it transports you to a favorite beach destination, making every bite a little getaway.
-
Heat It Up: Add a pinch of cayenne pepper or a few diced jalapeños for a surprising spicy kick. Pairing heat with sweet chocolate creates an unexpected flavor explosion that adventurous taste buds will love!
For more delicious chocolate recipes, check out my Stuffed Chocolate Chip and Chocolate Oat Cookies. Let your imagination run wild in the kitchen!
How to Store and Freeze Chocolate Chip Skillet Cookie
Room Temperature: Store leftover slices in an airtight container at room temperature for up to 3 days to maintain that soft, chewy texture.
Fridge: If you prefer, you can refrigerate slices for up to 5 days. Just be sure to wrap them tightly to prevent drying out.
Freezer: For longer storage, wrap individual slices well in plastic wrap, then place them in a freezer-safe bag or container. They can be frozen for up to 2 months.
Reheating: When ready to enjoy, thaw at room temperature, then warm in a preheated oven at 350°F (175°C) for about 10 minutes to regain that delightful gooeyness of the Chocolate Chip Skillet Cookie.
Expert Tips for Chocolate Chip Skillet Cookie
• Preheat the Pan: Ensure your cast-iron skillet is preheated before adding the dough. This helps achieve those crispy edges everyone loves.
• Choose Quality Chocolate: Use high-quality chopped chocolate bars instead of chips for richer melting pools, elevating your Chocolate Chip Skillet Cookie experience.
• Watch the Timer: Don’t overbake! Remove the cookie from the oven when the edges are golden and the center looks slightly underbaked, as it continues to cook outside the oven.
• Store Smartly: Wrap leftover slices tightly to freeze for up to 2 months. When you’re ready to indulge again, thaw and warm for the best taste.
• Customize Flavors: Feel free to experiment with different chocolate types or mix in nuts for added texture, making each Chocolate Chip Skillet Cookie uniquely yours.
What to Serve with Chocolate Chip Skillet Cookie
Craving cozy flavors to complement your warm, gooey dessert? Let’s elevate your experience with these delicious pairings.
-
Vanilla Ice Cream: The classic pairing adds a creamy contrast to the warm cookie, making every bite a delicious adventure. Just imagine that first scoop melting into the chocolatey goodness!
-
Whipped Cream: A dollop of lightly sweetened whipped cream adds airy lightness and balances the richness of the cookie. It creates a beautiful presentation that’s just as delightful to the eyes as it is to the taste buds.
-
Salted Caramel Sauce: Drizzling this luscious sauce over your slice enhances the sweetness and brings a salty kick. The combination of flavors will keep you coming back for more!
-
Fresh Berries: Strawberries or raspberries provide a refreshing burst of acidity and brightness, cutting through the sweetness of the cookie while adding a pop of color to your dessert table.
-
Espresso or Coffee: A warm cup pairs perfectly with this decadent treat, enhancing the chocolate flavors and making for an intimate, cozy moment. The rich, bold notes of coffee complement the sweetness beautifully!
-
Chocolate Chips Topping: For the ultimate chocolate lover, sprinkle extra chocolate chips on top right before serving. It’s an indulgent finishing touch that heightens the chocolate experience, bringing it to a whole new level!
-
Milkshake: A rich chocolate or vanilla milkshake is a fun, nostalgic twist that children and adults alike will love. The creamy texture and sweet flavor meld perfectly with the skillet cookie delight!
Let these pairings spark your culinary creativity and take your Chocolate Chip Skillet Cookie experience to new heights!
Make Ahead Options
These Chocolate Chip Skillet Cookies are perfect for meal prep, allowing you to enjoy their gooey goodness with minimal last-minute fuss! You can prepare the dough up to 2 days in advance by mixing all the ingredients and storing it in an airtight container in the fridge. When you’re ready to bake, simply let the dough sit at room temperature for about 15-20 minutes to soften before pressing it into the skillet and baking. Alternatively, if you have leftovers, they can be stored in an airtight container at room temperature for up to 3 days without losing their delightful texture. This makes for easy snacking on busy weeknights, serving up fresh, warm Chocolate Chip Skillet Cookies with just a bit of reheating!
Chocolate Chip Skillet Cookie Recipe FAQs
What type of chocolate is best for this recipe?
Absolutely! For a richer taste, I recommend using high-quality chopped chocolate bars instead of standard chocolate chips. The bar breaks into larger chunks as it melts, creating luscious pools of chocolate within the cookie. You could use bittersweet or dark chocolate for a deep flavor, or mix it up with milk chocolate for a classic sweetness.
How should I store leftovers?
For the best freshness, store leftover slices in an airtight container at room temperature for up to 3 days. If you plan to keep them longer, consider refrigerating them for up to 5 days. Just ensure to wrap them tightly to avoid any drying out. When you’re ready to indulge again, they’ll taste delightful warmed!
Can I freeze this Chocolate Chip Skillet Cookie?
Yes, you can! To freeze, wrap individual slices tightly in plastic wrap and then place them in a freezer-safe bag or container. They can be stored for up to 2 months. When you’re ready to enjoy, thaw at room temperature and warm them in a preheated oven at 350°F (175°C) for about 10 minutes, bringing back that gooey texture.
What do I do if my cookie doesn’t set?
If your cookie appears undercooked after the recommended baking time, don’t worry! It’s normal for it to remain soft in the center. Just return it to the oven and bake for an additional 2-5 minutes, keeping a close eye on those golden edges. Also, remember that it continues to cook slightly after being removed from the oven, so short bursts in the oven can help.
Can I modify this recipe for allergies?
Certainly! If you have a dairy allergy, consider using plant-based butter or coconut oil as a substitute. For egg replacements, you can use a flax egg (1 tablespoon ground flaxseed mixed with 2.5 tablespoons water), which works wonderfully to bind the ingredients together. As for chocolate, opt for dairy-free chocolate chunks to keep it allergen-friendly!
Irresistible Chocolate Chip Skillet Cookie: Warm, Gooey Bliss
Ingredients
Equipment
Method
- Preheat your oven to 350°F (175°C). Melt ½ cup unsalted butter in a cast-iron skillet over medium heat until golden brown, about 5-7 minutes.
- In a mixing bowl, combine browned butter with ¾ cup brown sugar and ¼ cup granulated sugar, whisking until smooth. Stir in 1 tablespoon vanilla extract, 1 egg, and 1 egg yolk.
- In another bowl, whisk together 1.5 cups all-purpose flour, 0.5 teaspoon baking soda, and 0.5 teaspoon salt. Gradually combine with wet ingredients.
- Gently fold in 1 cup chocolate chunks or chips, reserving some for the top.
- Press the cookie dough into the skillet, sprinkle reserved chocolate on top, and ensure an even shape.
- Bake in the preheated oven for 20-25 minutes until edges are golden and center is slightly soft.
- Allow to cool for 5-10 minutes before serving directly from the skillet.
Leave a Reply