
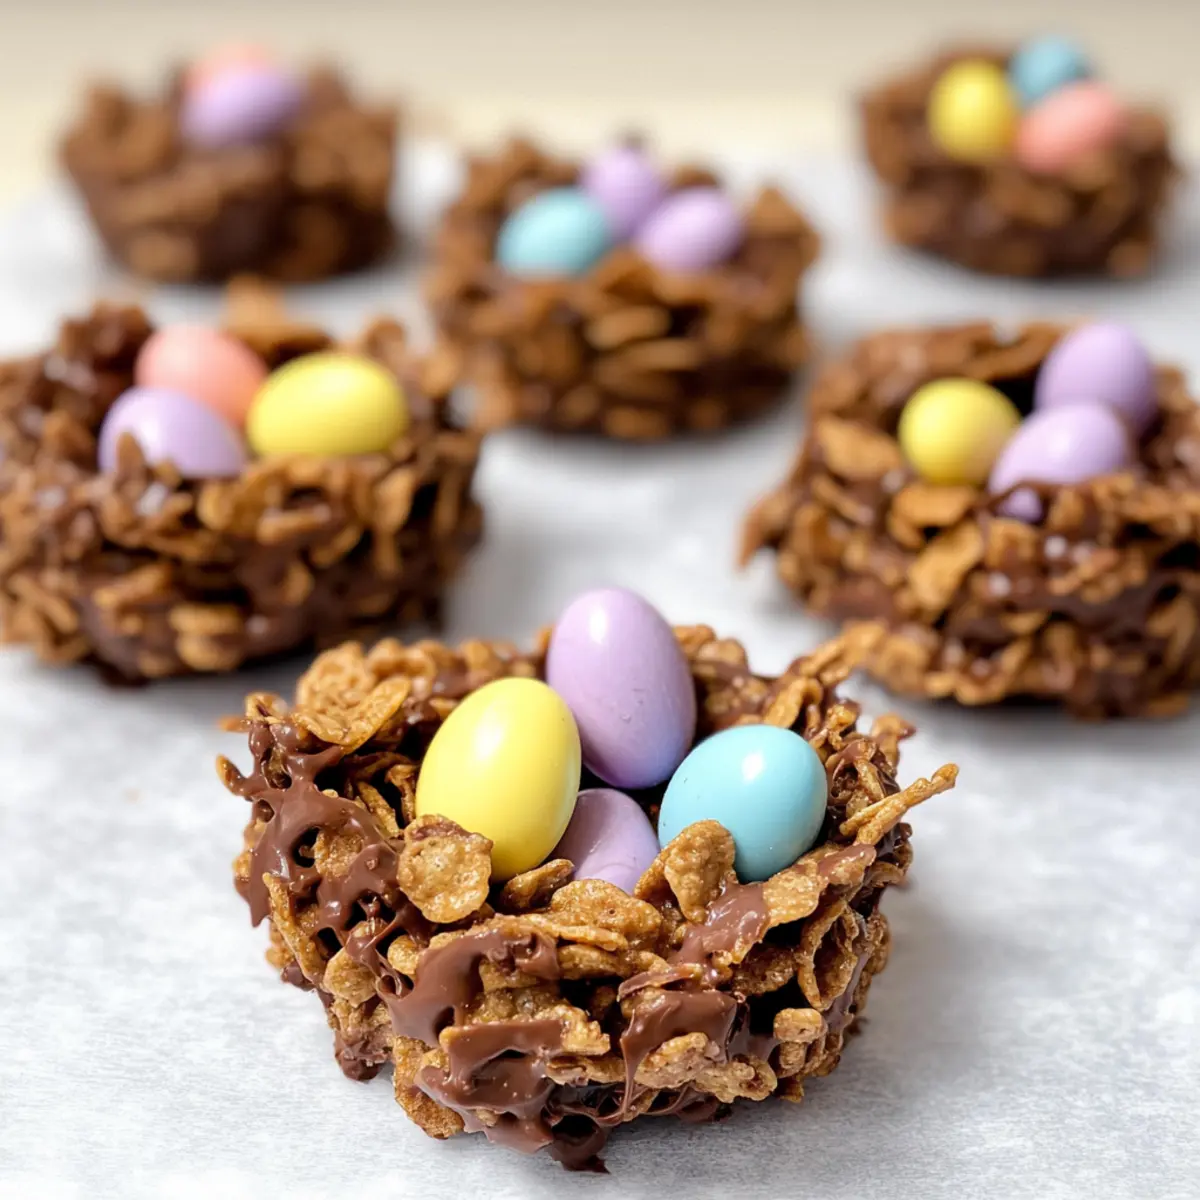
As I rummaged through my pantry, the colorful wrappers of chocolate mini eggs caught my eye, instantly transporting me back to joyful Easter mornings filled with laughter and creativity. This inspired me to whip up a batch of delightful Chocolate Easter Nests, a fun no-bake treat that combines the crunchy goodness of cornflakes with the sweetness of chocolate. These nests are not only a breeze to make, but they also allow everyone—kids and adults alike—to dive into the creative process, making them perfect for family festivities. Plus, with gluten-free and dairy-free options, these treats cater to different dietary needs, ensuring that everyone can join the celebration. Ready to embark on a chocolatey adventure and impress your loved ones this Easter? Let’s hop into this easy recipe!

Why are Chocolate Easter Nests a must-try?
Simplicity: These no-bake Chocolate Easter Nests are incredibly easy, requiring just a few simple steps and minimal kitchen skills.
Customizable Ingredients: Feel free to swap cornflakes with your favorite cereal for a unique twist, or choose gluten-free cornflakes for dietary needs!
Fun for All Ages: Kids will love helping out in the kitchen, creating their tasty nests and adding mini eggs. It’s a delightful bonding experience that adds joy to any family gathering.
Crowd-Pleasing Treat: These nests not only look festive but also taste divine, combining the crunch of cornflakes with rich chocolate. They’re perfect for Easter celebrations or just as an everyday indulgence.
Quick Refrigeration: The chilling time is minimal, letting you whip up a batch and serve them fresh without waiting around. Serve them at your spring celebrations or pack in decorative boxes for sweet gifts!
Chocolate Easter Nests Ingredients
For the Nests
• Cornflakes – Provides structure and crunch; substitute with Rice Krispies or Shredded Wheat if desired.
• Milk Chocolate – Offers sweetness and rich flavor; dark chocolate can give a deeper taste; consider using half and half for a balanced option.
• Butter or Margarine – Helps coat the cornflakes smoothly; use block margarine for best results, avoiding soft-spread varieties.
• Golden Syrup – Adds sweetness and thins the chocolate mixture for even coating; maple syrup works well as an alternative if golden syrup is unavailable.
For the Topping
• Chocolate Mini Eggs – Perfect for topping the nests; feel free to use any small chocolate eggs for added variety or flavor.
These Chocolate Easter Nests make for a festive and delightful treat that everyone can enjoy—whether it’s for Easter celebrations or a sweet everyday indulgence!
Step‑by‑Step Instructions for Chocolate Easter Nests
Step 1: Prepare the Tray
Begin by lightly greasing a 12-hole bun tray with butter or cooking spray to prevent sticking. Make sure to cover each hole evenly; this will ensure your Chocolate Easter Nests release easily once set. Set the tray aside while you prepare your chocolate mixture, as this will only take a few minutes.
Step 2: Melt the Chocolate Mixture
In a small saucepan, combine milk chocolate, butter or margarine, and golden syrup. Place the pan over low heat, stirring continuously until everything smoothly melts together, which should take about 5-7 minutes. Be mindful not to overheat the chocolate; it should be glossy and gooey but not bubbling. Remove it from the heat as soon as it’s uniformly melted.
Step 3: Combine with Cornflakes
In a large mixing bowl, pour in your cornflakes, ensuring they are crisp and unbroken. Once your chocolate mixture is smooth, pour it over the cornflakes. Gently fold the chocolate through the cornflakes, ensuring every flake gets a delicious coating. Aim for an even distribution without crushing the flakes, which keeps your nests’ crunchy texture intact.
Step 4: Form the Nests
Spoon generous amounts of the chocolate-coated cornflake mixture into the prepared bun tray, filling each hole about two-thirds full. As you spoon the mixture, gently press down in the center to create a small hollow that resembles a nest. This step is essential for holding the mini chocolate eggs later and forms the iconic look of the Chocolate Easter Nests.
Step 5: Add the Mini Eggs
While the chocolate mixture is still soft, place a few chocolate mini eggs into each nest, gently pressing them down so they hold in place. This vibrant addition will not only enhance the appearance but also bring sweetness to every bite. Arrange them playfully for a whimsical Easter look, ensuring they are centered within the nests.
Step 6: Chill to Set
Transfer the tray to the refrigerator and allow the Chocolate Easter Nests to chill for 1-2 hours. This will help them firm up and retain their shape. Once the nests are firm to the touch, you can remove them from the fridge. For best texture, serve them shortly after taking them out, as they may soften slightly at room temperature.
Step 7: Serve and Enjoy
Carefully remove the nests from the bun tray by gently squeezing the sides and lifting them out. Arrange your delightful Chocolate Easter Nests on a serving platter or in gift boxes. These treats are perfect for sharing at spring celebrations or as delightful homemade gifts, radiating both festive charm and deliciousness!
Make Ahead Options
These delightful Chocolate Easter Nests are perfect for meal prep enthusiasts looking to save time during the busy Easter season! You can prepare the chocolate-coated cornflake mixture up to 24 hours in advance; simply store it in an airtight container in the refrigerator. Before serving, just fill the bun tray and insert the mini eggs after chilling for 1-2 hours to set. This ensures they are just as fresh and delicious when it’s time to enjoy them. By keeping the nests in a cool place, you can maintain their crispiness, making them a stress-free treat that’s ready to impress during your family gatherings!
How to Store and Freeze Chocolate Easter Nests
Room Temperature: Store your Chocolate Easter Nests in an airtight container at room temperature for up to 5 days for optimal freshness.
Fridge: If you’re in a warmer environment, it’s best to refrigerate the nests to maintain their shape. Store in an airtight container for up to 7 days.
Freezer: For longer storage, you can freeze the nests for up to 3 months. Use wax paper between layers to prevent sticking, and wrap them tightly in plastic wrap.
Reheating: No reheating is necessary, but if you prefer them soft, allow them to sit at room temperature for about 10 minutes before enjoying!
Expert Tips for Chocolate Easter Nests
-
Gentle Melting: Use low heat to melt the chocolate and prevent burning. If overheated, the chocolate can seize and won’t coat the cornflakes properly.
-
Quick Assembly: Work swiftly once the chocolate mixture is ready, as it sets quickly off the heat. Have your cornflakes and tray ready to avoid rushing.
-
Texture Matters: Avoid over-mixing the cornflakes when combining them with the chocolate. Preserve their texture for that perfect crunch in your Chocolate Easter Nests.
-
Perfect Nest Shape: When forming the nests, press the mixture gently to create a defined hollow in the center. This helps hold the mini eggs securely in place.
-
Chill Time: Ensure you chill the nests long enough, but don’t keep them in the refrigerator for too long—just 1-2 hours is usually enough to set without becoming too firm.
-
Custom Toppings: Feel free to play around with different toppings like pastel colored mini eggs or even sprinkles for a fun twist on these classic Chocolate Easter Nests!
What to Serve with Chocolate Easter Nests
Elevate your festive gatherings or family get-togethers with the perfect accompaniments for these delightful treats!
-
Fresh Fruit Salad: A bright, refreshing medley of fruits will add a vibrant balance to the sweetness, complementing the chocolate beautifully. The juicy burst of berries and zesty citrus is a lovely contrast to the crunchy nests.
-
Whipped Cream: Light and airy, a dollop of whipped cream is a delightful addition. Whether flavored with vanilla or chocolate, it enhances every bite and provides a creamy texture that pairs perfectly with the crunchy nests.
-
Vanilla Ice Cream: Chocolate Easter Nests can be turned into an indulgent dessert when served alongside creamy vanilla ice cream. The cold, sweet treat melds wonderfully with the chocolatey crunch, bringing a lovely temperature contrast to the meal.
-
Chocolate Milkshake: For a fun, nostalgic pairing, serve a rich chocolate milkshake. The smooth and creamy drink accentuates the flavors of the nests while making for a sweet treat that both kids and adults will love.
-
Sparkling Lemonade: This refreshing beverage adds just the right zing to balance the sweetness of the nests. The effervescent bubbles and bright citrus notes elevate the experience, making it perfect for any festive occasion.
-
Mini Cupcakes: Add a fun touch with some colorful mini cupcakes that echo the festive theme. Choose light flavors like vanilla or lemon for a refreshing finish that complements the rich chocolate.
-
Coffee or Tea: A cup of freshly brewed coffee or flavored herbal tea makes for a sophisticated pairing. The warm, comforting notes enhance the chocolate flavors while offering a moment of cozy indulgence.
-
Decorative Gift Boxes: Consider placing the nests in pretty boxes for gifting alongside homemade treats. This touch showcases your creativity and provides a thoughtful way to share the joy of your delicious creations with friends and family.
Chocolate Easter Nests Variations & Substitutions
Let your creativity run wild as you customize these Chocolate Easter Nests to suit your personal taste and dietary needs!
-
Cereal Swap: Substitute cornflakes with Rice Krispies or shredded wheat for different textures and flavors.
-
Vegan Option: Use dairy-free margarine and vegan chocolate to create delicious vegan nests that everyone can enjoy, without compromising on taste.
-
Nut-Free Delight: For a nut-free version, ensure your chocolate and syrup are certified nut-free, making this treat safe for everyone.
-
Flavor Boost: Add a splash of vanilla extract to the chocolate mixture for an extra layer of deliciousness. It enhances the overall flavor profile beautifully!
-
Whipped Topping: Lightly drizzle some whipped coconut cream on top of your nests right before serving for a dreamy twist that’s both tropical and delightful.
-
Crunchy Add-in: Mix in some toasted coconut flakes or crushed pretzels to the chocolate mixture before forming nests for a unique crunch and flavor combination.
-
Marshmallow Surprise: Fold in some mini marshmallows with the cornflakes for a sweet, gooey surprise inside each nest. This twist will delight kids and adults alike!
-
Chocolate Variety: Experiment with using dark chocolate for a richer taste, or try white chocolate for a sweeter, creamier version, making it a fun option for any occasion.
These adaptations not only keep things exciting but allow you to cater to various dietary preferences. For more delectable inspirations, check out these Chocolate Cherry Cookies or try adding a touch of indulgence with the Cheesecake Stuffed Chocolate Chip Cookies. Happy cooking!
Chocolate Easter Nests Recipe FAQs
How do I select the best cornflakes for my Chocolate Easter Nests?
Absolutely! Look for cornflakes that are fresh and free from any dark spots or signs of staleness—they should be crispy and crunchy. If you prefer alternatives, Rice Krispies or Shredded Wheat can also work beautifully.
What’s the best way to store Chocolate Easter Nests?
For up to 5 days, keep your Chocolate Easter Nests in an airtight container at room temperature. If the weather is warm, refrigerate them in the container for up to 7 days—just remember to let them sit at room temperature for about 10 minutes before serving for that optimal texture!
Can I freeze Chocolate Easter Nests, and how do I do it?
Very! To freeze your nests, place wax paper between layers in a freezer-safe container, and wrap them tightly in plastic wrap. They can be frozen for up to 3 months. When you’re ready to enjoy them, allow them to thaw in the refrigerator for a few hours or let them sit at room temperature for about 20 minutes.
What should I do if my chocolate mixture is too thick?
If your chocolate mixture becomes too thick or looks clumpy, gently reheat it on low heat, stirring continuously until it regains a smooth consistency. You could also consider adding a little extra golden syrup or a splash of milk to help loosen it up!
Are Chocolate Easter Nests suitable for those with allergies?
Yes, they can be very accommodating! By using gluten-free cornflakes and ensuring you only use dairy-free chocolate and margarine, you can make a safe treat for those with gluten and dairy allergies. Always double-check your ingredient labels to ensure they meet your dietary needs.
Can I make Chocolate Easter Nests vegan?
Absolutely! For vegan Chocolate Easter Nests, simply use plant-based chocolate and dairy-free margarine. You could also substitute golden syrup with a vegan-friendly syrup like maple syrup. Enjoy crafting these delicious nests without compromising on dietary preferences!
Chocolate Easter Nests: Easy No-Bake Treats for Everyone
Ingredients
Equipment
Method
- Lightly grease a 12-hole bun tray with butter or cooking spray.
- Combine milk chocolate, butter or margarine, and golden syrup in a small saucepan over low heat. Stir continuously until melted, about 5-7 minutes.
- Pour cornflakes into a large mixing bowl. Once the chocolate mixture is smooth, pour it over the cornflakes and gently fold to coat.
- Spoon the mixture into the prepared bun tray, filling each hole about two-thirds full and press down in the center to create a hollow.
- While the mixture is still soft, place a few chocolate mini eggs into each nest.
- Transfer the tray to the refrigerator and chill for 1-2 hours until firm.
- Remove nests from the tray, arrange on a platter or gift boxes, and enjoy!
Leave a Reply