
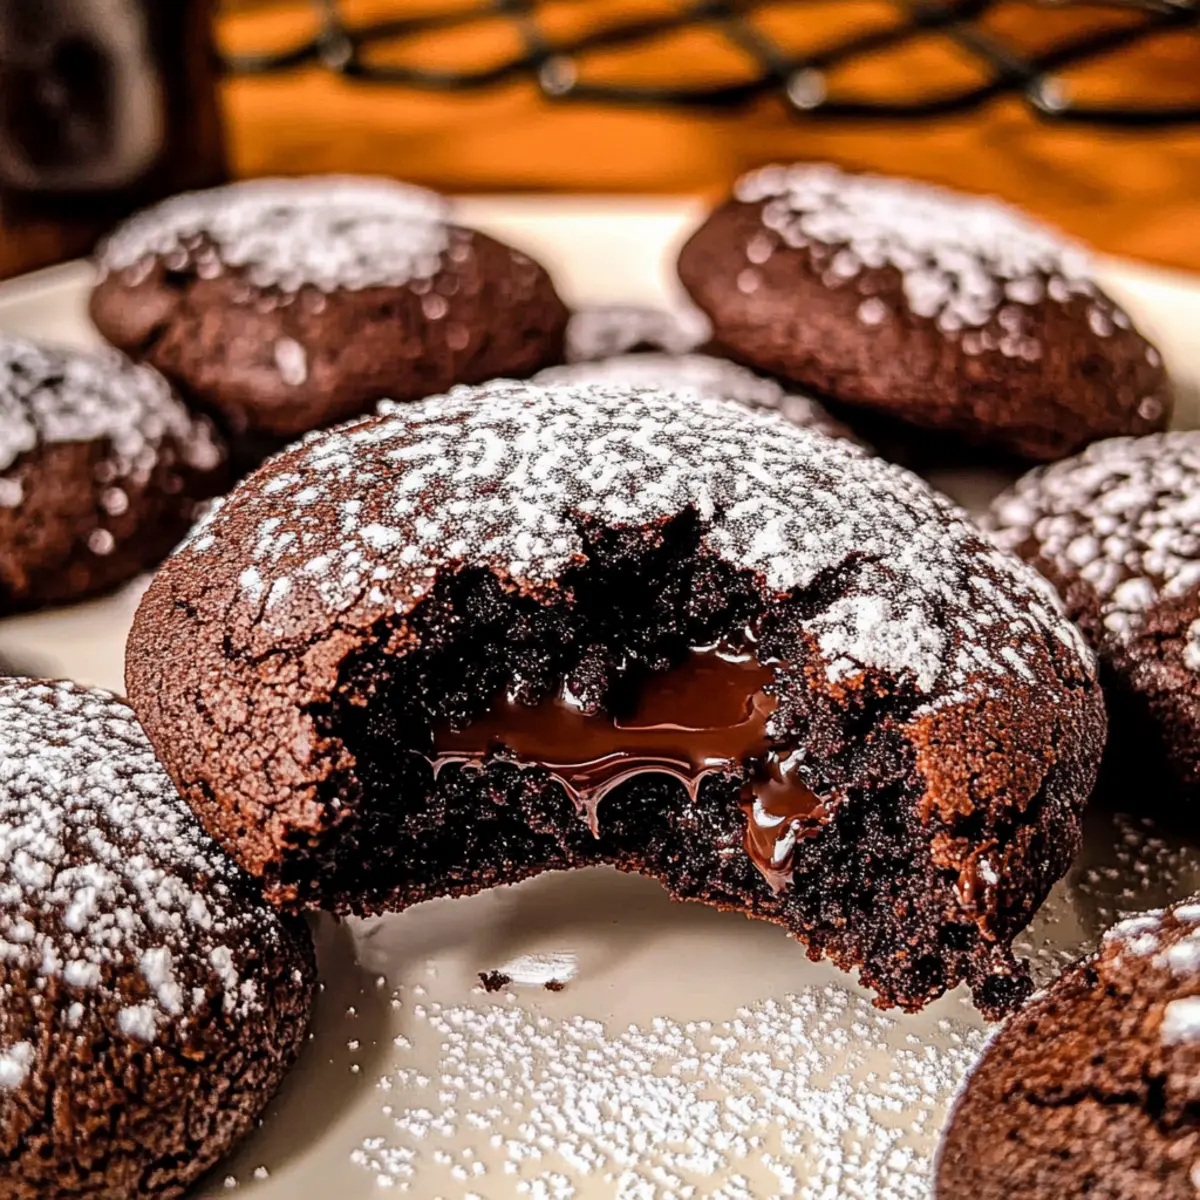
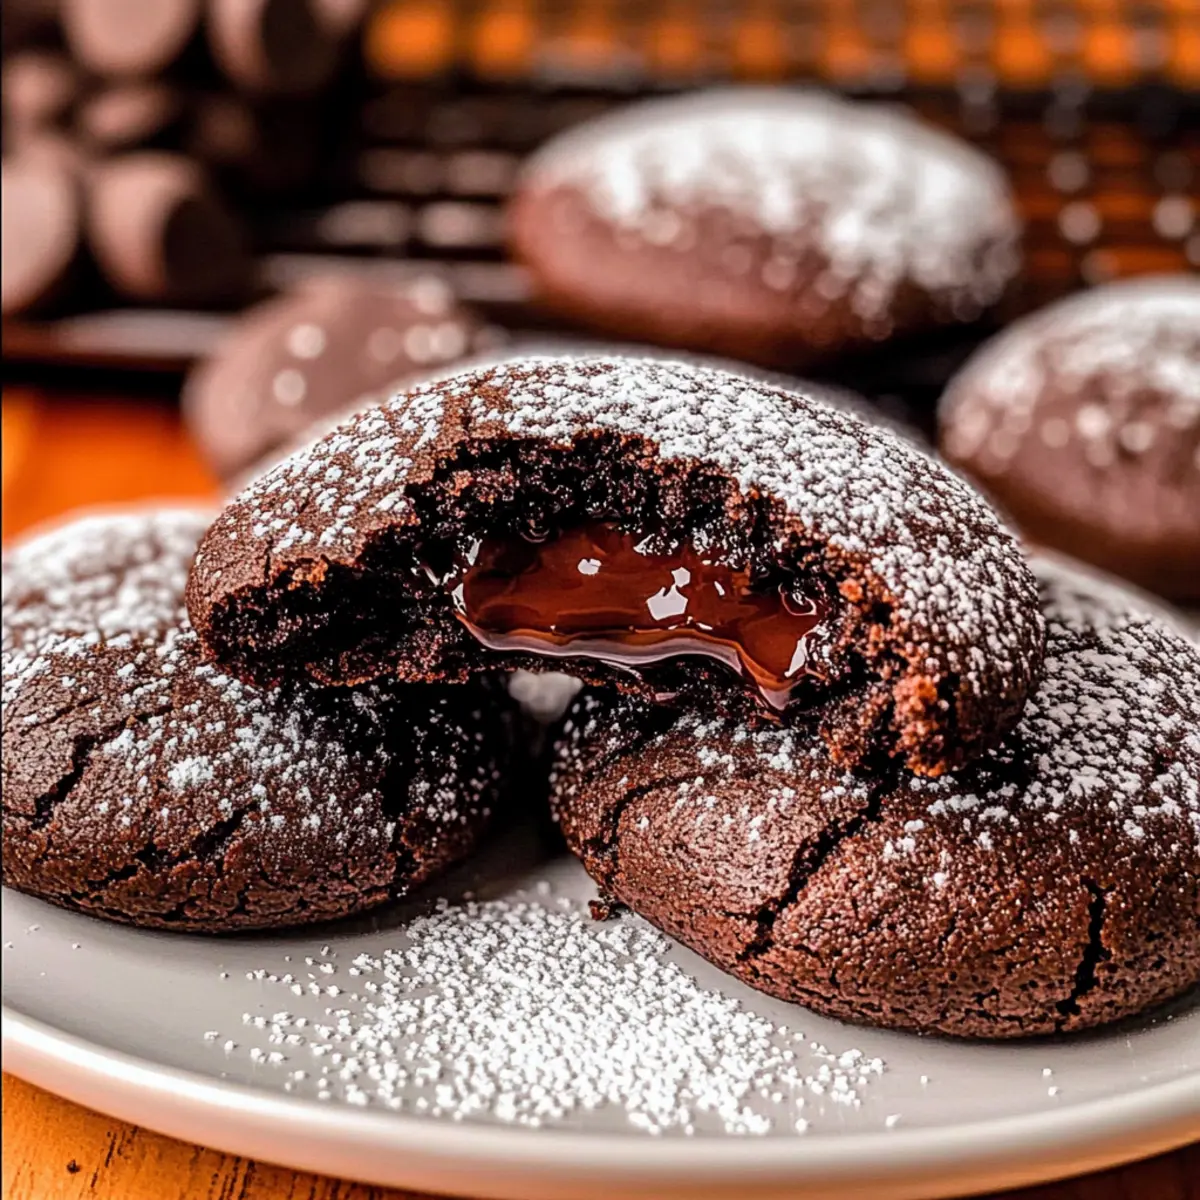
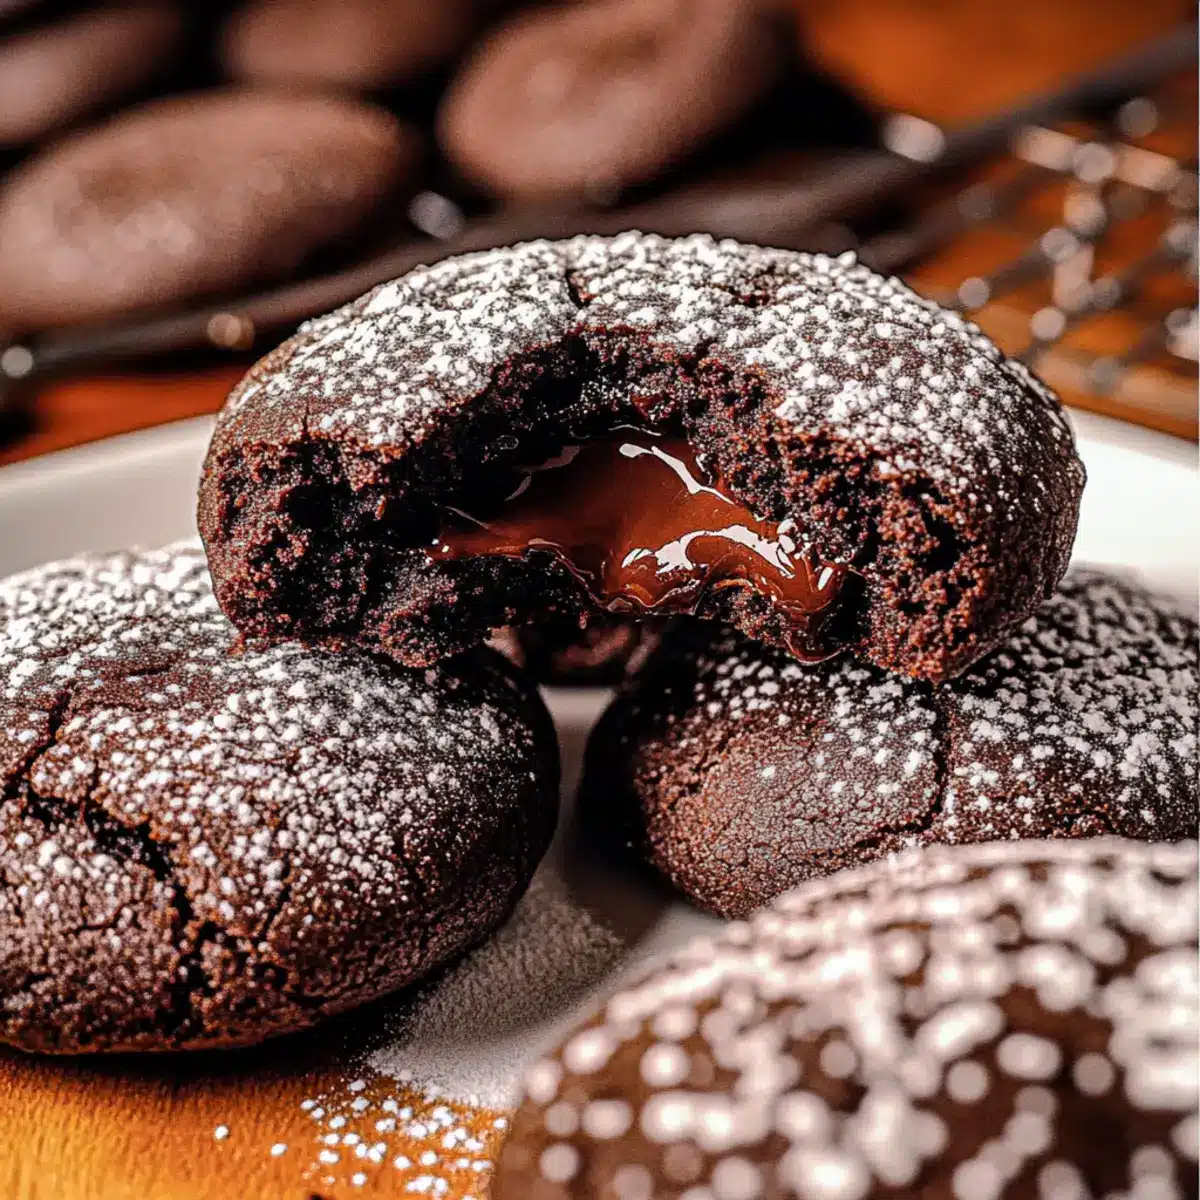
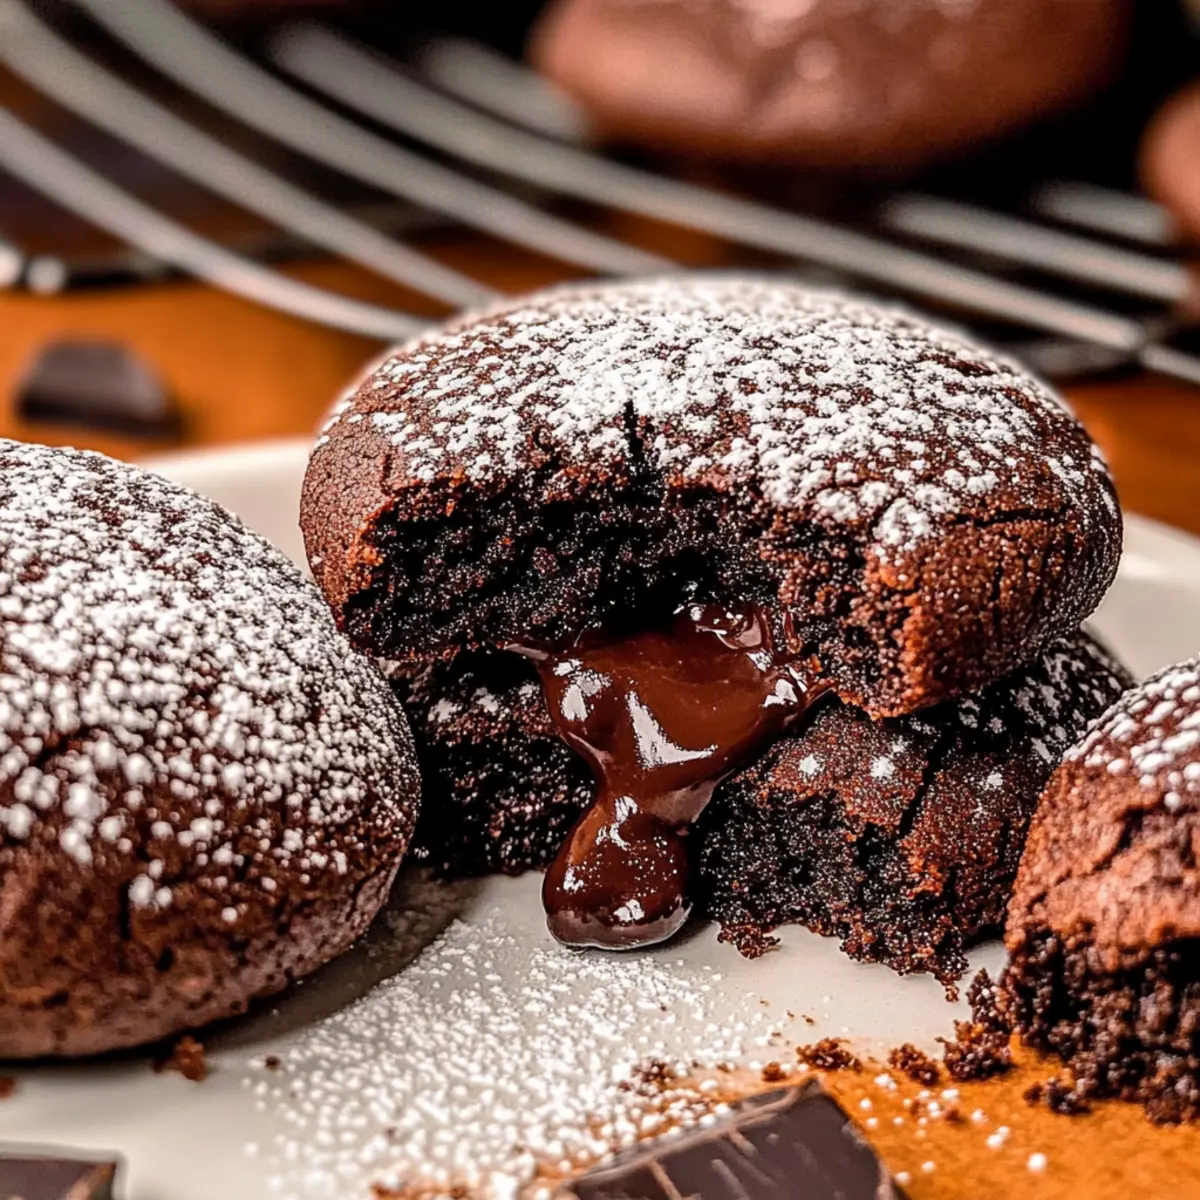
If you’re anything like me, the mere thought of warm, gooey chocolate makes your heart race. That’s why I can’t wait to share my recipe for Chocolate Lava Cookies—a delightful combination of chewy textures and a molten ganache center that oozes pure bliss. Perfect for cozy nights or to impress guests, these cookies come together in no time, making them a quick yet indulgent dessert. Plus, with their enchanting powdered sugar dusting, they’re not just delicious; they present beautifully too! Ready to elevate your dessert game? Let’s dive into this chocolatey adventure that’s sure to satisfy those sweet cravings!
Why Are Chocolate Lava Cookies So Irresistible?
Melt-in-your-mouth texture: Each cookie offers a soft, chewy outer layer that encases a decadent molten filling.
Quick and Easy: This recipe is super simple, allowing you to whip up gourmet cookies in no time—great for last-minute gatherings or cozy nights in.
Impress Your Guests: Serve warm and dusted with powdered sugar, these cookies are bound to wow anyone with their gourmet vibe.
Versatile Indulgence: Swap out the chocolate ganache for caramel, or try different chocolate chips to find your perfect flavor combination!
Perfect Pairing: Enjoy these Lava Cookies with a scoop of vanilla ice cream or alongside a glass of milk for an ultimate treat, reminiscent of other delightful desserts like Chocolate Cherry Cookies or Gluten Free Chocolate.
Chocolate Lava Cookies Ingredients
For the Ganache
• Semi-Sweet Chocolate Chips – Provides the molten ganache filling; consider dark chocolate chips for a richer flavor.
• Heavy Whipping Cream – Combines with chocolate chips to create ganache; half-and-half can be substituted for a lighter texture.
For the Cookie Dough
• All-Purpose Flour – Offers structure and texture; gluten-free flour is a great option for a gluten-free version.
• Dutch Process Cocoa Powder – Enriches the cookies with deep chocolate flavor; can be replaced with natural cocoa powder, keeping in mind the taste difference.
• Baking Powder – Aids the cookies in rising; baking soda may work as a substitute, but adjustments may be necessary.
• Salt – Balances sweetness and enhances flavor; switch to sea salt for a unique taste.
• Unsalted Butter – Adds richness and essential fat; margarine or coconut oil can be used for a dairy-free alternative.
• Light Brown Sugar – Imparts moisture and depth of flavor; a bit of granulated sugar can create a crisper texture.
• Granulated White Sugar – Sweetens the cookie; lessen the amount for a less sweet treat.
• Egg Yolks – Introduces moisture and richness; whole eggs can be used, though the texture may differ.
• Vanilla Extract – Elevates the overall flavor profile; consider vanilla bean paste for a deeper taste.
For Serving
• Powdered Sugar – Perfect for dusting the cookies before serving; optional but adds a lovely presentation touch.
Dive into these delightful Chocolate Lava Cookies, and get ready for a taste of indulgence!
Step‑by‑Step Instructions for Chocolate Lava Cookies
Step 1: Prepare Ganache
Begin by heating ½ cup of heavy whipping cream in a small saucepan over medium heat until just about to boil, watching closely. Pour the hot cream over 1 cup of semi-sweet chocolate chips in a mixing bowl and let it sit for 5 minutes. Stir until smooth and glossy, then refrigerate until firm enough to scoop, about 1 hour. Once set, form 17 small balls of ganache and place them in the freezer.
Step 2: Mix Dry Ingredients
In a separate mixing bowl, whisk together 1 cup of all-purpose flour, ¼ cup of Dutch process cocoa powder, ½ teaspoon of baking powder, and ¼ teaspoon of salt. This blend creates the foundation for your Chocolate Lava Cookies, enhancing their rich flavor and texture. Ensure the ingredients are evenly distributed, and set this bowl aside for the next step.
Step 3: Cream Butter and Sugars
In a large mixing bowl, use an electric mixer to beat ½ cup of softened unsalted butter with ½ cup of light brown sugar and ¼ cup of granulated sugar until the mixture is light and fluffy, approximately 2-3 minutes. The butter and sugars should be well combined and creamy, creating a rich base for your cookie dough.
Step 4: Add Egg Yolks and Vanilla
Next, add 2 large egg yolks and 1 teaspoon of vanilla extract to the butter-sugar mixture. Mix on medium speed for another 1-2 minutes until the egg yolks are fully incorporated and the mixture becomes pale and fluffy. This step is crucial for achieving that rich, chewy texture in your Chocolate Lava Cookies.
Step 5: Incorporate Dry Ingredients
Gradually add the flour mixture to the wet ingredients, mixing gently on low speed until just combined, which should take about 30 seconds. Avoid overmixing, as you want to keep the dough light and airy. Once incorporated, the dough will be thick and slightly sticky, perfect for forming into cookies.
Step 6: Shape Cookies
Using a cookie scoop, portion out the dough and flatten each piece slightly in your hand. Place a frozen ganache ball in the center, then fold the dough around it to enclose the ganache completely. Roll it into a ball and repeat until all the dough and ganache is used. This step is essential to create the gooey center your Chocolate Lava Cookies are known for.
Step 7: Bake
Preheat your oven to 350°F (175°C) and line a baking sheet with parchment paper. Arrange the cookie balls on the prepared sheet, leaving space between them. Bake for 10-11 minutes, or until the edges are firm but the centers still look slightly soft. This ensures that the cookies maintain their delicious molten center.
Step 8: Cool and Serve
Allow the cookies to cool on the baking sheet for 10 minutes after baking to firm up. Then carefully transfer them to a wire rack to cool completely. For a delightful finishing touch, dust the warm cookies with powdered sugar before serving. Enjoy these amazing Chocolate Lava Cookies with a scoop of ice cream or a glass of milk!
What to Serve with Chocolate Lava Cookies?
Create a delightful dessert spread that elevates the experience of these indulgent cookies, making your sweet moments truly special.
- Vanilla Ice Cream: A classic pairing, its creamy richness perfectly balances the warm, gooey centers of your cookies.
- Fresh Berries: Bright, tangy berries add a refreshing contrast that enhances the chocolatey flavors without overwhelming the palate.
- Espresso or Coffee: The deep, bold notes of coffee complement the chocolate and can intensify the cookie’s rich profile, perfect for adult gatherings.
- Chocolate Sauce: Drizzling some warm chocolate sauce can take these cookies over the top—double the chocolate means double the fun!
- Whipped Cream: Light and airy, whipped cream adds a delightful texture, making each bite incredibly indulgent.
- Mint Leaves: A touch of fresh mint provides a burst of freshness, cutting through the sweetness and adding a delightful twist to each bite.
- Cold Milk: An undeniable classic, a glass of cold milk pairs perfectly with chocolate cookies, enhancing that nostalgic childhood sweetness.
- Red Wine: For a sophisticated pairing, a glass of fruity red wine complements the chocolate flavors, making for a memorable dessert experience.
- Cheesecake Bites: The rich creaminess of mini cheesecake bites serves as a textural contrast that pairs beautifully with the soft cookie.
How to Store and Freeze Chocolate Lava Cookies
Room Temperature: Store cookies in an airtight container at room temperature for up to 3 days. This keeps them chewy and flavorful, ready for a quick snack!
Fridge: If you prefer, you can refrigerate the cookies to extend their freshness, which will last up to a week. Allow them to come to room temperature before serving.
Freezer: For longer storage, wrap each cookie individually in plastic wrap and place them in a freezer-safe bag. They can be frozen for up to 3 months—perfect for when you crave a quick chocolate fix!
Reheating: To enjoy the molten center, reheat the cookies in the microwave for about 10-15 seconds. This restores their gooey goodness, making them just as delightful as when fresh!
Expert Tips for Chocolate Lava Cookies
• Frozen Ganache Balls: Ensure the ganache balls are completely frozen before encasing them in dough, preventing any leaks during baking.
• Flour Measurement: Always measure flour by spooning and leveling, not scooping. This small step avoids overly dense chocolate lava cookies.
• Reshape Cookies: For a perfect presentation, gently reshape cookies with a cookie cutter right after baking; this helps to maintain a uniform appearance.
• Don’t Overbake: Keep an eye on the cookies as they bake; they should be just set around the edges with gooey centers for the best chocolate lava effect.
• Variations: Experiment with different chocolate chips or add espresso powder to enhance the deep chocolate flavor in your cookies!
Chocolate Lava Cookies Variations
Feel free to adapt these chocolate lava cookies to suit your taste buds and dietary needs!
-
Dairy-Free: Use coconut oil instead of butter and almond milk in your ganache for a rich flavor without the dairy.
Experimenting with dairy substitutes can lead to exciting new flavors while keeping the gooey center intact. -
Gluten-Free: Substitute all-purpose flour with a 1:1 gluten-free flour blend.
Your cookies will still be deliciously chewy without sacrificing texture, making them friendly for gluten-sensitive guests. -
Caramel Surprise: Swap out the ganache filling for homemade or store-bought caramel for an indulgent twist.
Imagine biting into a warm cookie filled with sweet, gooey caramel—truly heavenly! -
Espresso Boost: Add a tablespoon of espresso powder into your cookie dough for an enriched chocolate flavor.
The coffee enhances the sweetness and brings a deeper taste without being overly bitter. -
Nutty Addition: Stir in 1/2 cup of chopped nuts—like walnuts or pecans—for a delightful crunch.
This will add a lovely texture contrast to the rich, molten core of your cookies. -
Different Chocolate: Try using a mix of chocolate chips (milk, dark, or even white) for varied sweetness and flavors.
By experimenting with chocolate types, you’ll discover exciting new flavor profiles with each batch! -
Minty Fresh: Add a few drops of peppermint extract to the dough for a refreshing minty chocolate cookie.
This twist creates a delightful holiday treat that’s sure to impress your family and friends. -
More Moisture: Incorporate 1/4 cup of applesauce into the dough for extra moisture and reduced fat.
You’ll achieve luscious cookies while making them a touch more health-conscious without sacrificing taste.
Explore these variations and serve your chocolate lava cookies with something delightful like a scoop of ice cream, or enjoy them alongside a glass of milk for the perfect treat. For a similar chocolatey experience, check out Chocolate Cherry Cookies or whip up some Chocolate Oat Cookies for a change of pace!
Make Ahead Options
These Chocolate Lava Cookies are perfect for busy home cooks looking to save time during the week! You can prepare the ganache filling up to 24 hours ahead by following the steps to heat the cream and mix with chocolate chips, then form and freeze the ganache balls. Additionally, you can mix the dry ingredients and refrigerate the cookie dough for up to 3 days. When you’re ready to bake, simply scoop out the dough, encase the frozen ganache balls, and bake as instructed. This make-ahead approach ensures each cookie remains just as delicious and gooey, allowing you to enjoy warm, indulgent treats with minimal last-minute effort!
Chocolate Lava Cookies Recipe FAQs
How do I select the right chocolate chips for my cookies?
Absolutely! For the best results, I recommend using semi-sweet chocolate chips for a perfect balance of sweetness and chocolate richness. If you’re a dark chocolate lover, feel free to substitute with dark chocolate chips for a richer flavor. Just keep in mind that the cookies might be less sweet.
How should I store my leftover cookies?
Very simple! You can store your Chocolate Lava Cookies in an airtight container at room temperature for up to 3 days. If you’d like to keep them longer, refrigerate them for up to a week, but remember to allow them to come to room temperature before serving for optimum texture and taste.
Can I freeze Chocolate Lava Cookies?
Absolutely! I love this part! To freeze your cookies, wrap each one individually in plastic wrap before placing them in a freezer-safe bag or container. They can be kept in the freezer for up to 3 months. When you’re ready to indulge, just reheat them in the microwave for about 10-15 seconds to bring back that gooey deliciousness.
What if my ganache is too runny to scoop?
Don’t worry! If your ganache is too soft, simply chill it in the refrigerator for a bit longer until it firms up enough to scoop into balls. This step is crucial for avoiding any leaks during baking, ensuring your cookies have that delightful molten center when you bite into them.
Are there any dietary considerations I should keep in mind?
Yes, absolutely! If you have any allergies, you can easily modify this recipe. For a gluten-free version, substitute all-purpose flour with a gluten-free flour blend. For a dairy-free option, use coconut oil in place of unsalted butter and half-and-half or a dairy-free cream alternative for the ganache. Always double-check ingredient labels to avoid potential allergens.
Melt-in-Your-Mouth Chocolate Lava Cookies Everyone Will Love
Ingredients
Equipment
Method
- Begin by heating ½ cup of heavy whipping cream in a small saucepan over medium heat until just about to boil. Pour the hot cream over 1 cup of semi-sweet chocolate chips in a mixing bowl and let it sit for 5 minutes. Stir until smooth and glossy, then refrigerate until firm enough to scoop, about 1 hour.
- In a separate mixing bowl, whisk together 1 cup of all-purpose flour, ¼ cup of Dutch process cocoa powder, ½ teaspoon of baking powder, and ¼ teaspoon of salt. Set this bowl aside for the next step.
- In a large mixing bowl, use an electric mixer to beat ½ cup of softened unsalted butter with ½ cup of light brown sugar and ¼ cup of granulated sugar until the mixture is light and fluffy, approximately 2-3 minutes.
- Next, add 2 large egg yolks and 1 teaspoon of vanilla extract to the butter-sugar mixture. Mix on medium speed for another 1-2 minutes until fully incorporated.
- Gradually add the flour mixture to the wet ingredients, mixing gently on low speed until just combined, about 30 seconds.
- Using a cookie scoop, portion out the dough and flatten each piece slightly. Place a frozen ganache ball in the center, fold the dough around it, and roll it into a ball.
- Preheat your oven to 350°F (175°C) and line a baking sheet with parchment paper. Arrange the cookie balls on the prepared sheet, leaving space between them. Bake for 10-11 minutes.
- Allow the cookies to cool on the baking sheet for 10 minutes after baking, then transfer them to a wire rack to cool completely. Dust with powdered sugar before serving.
Leave a Reply