
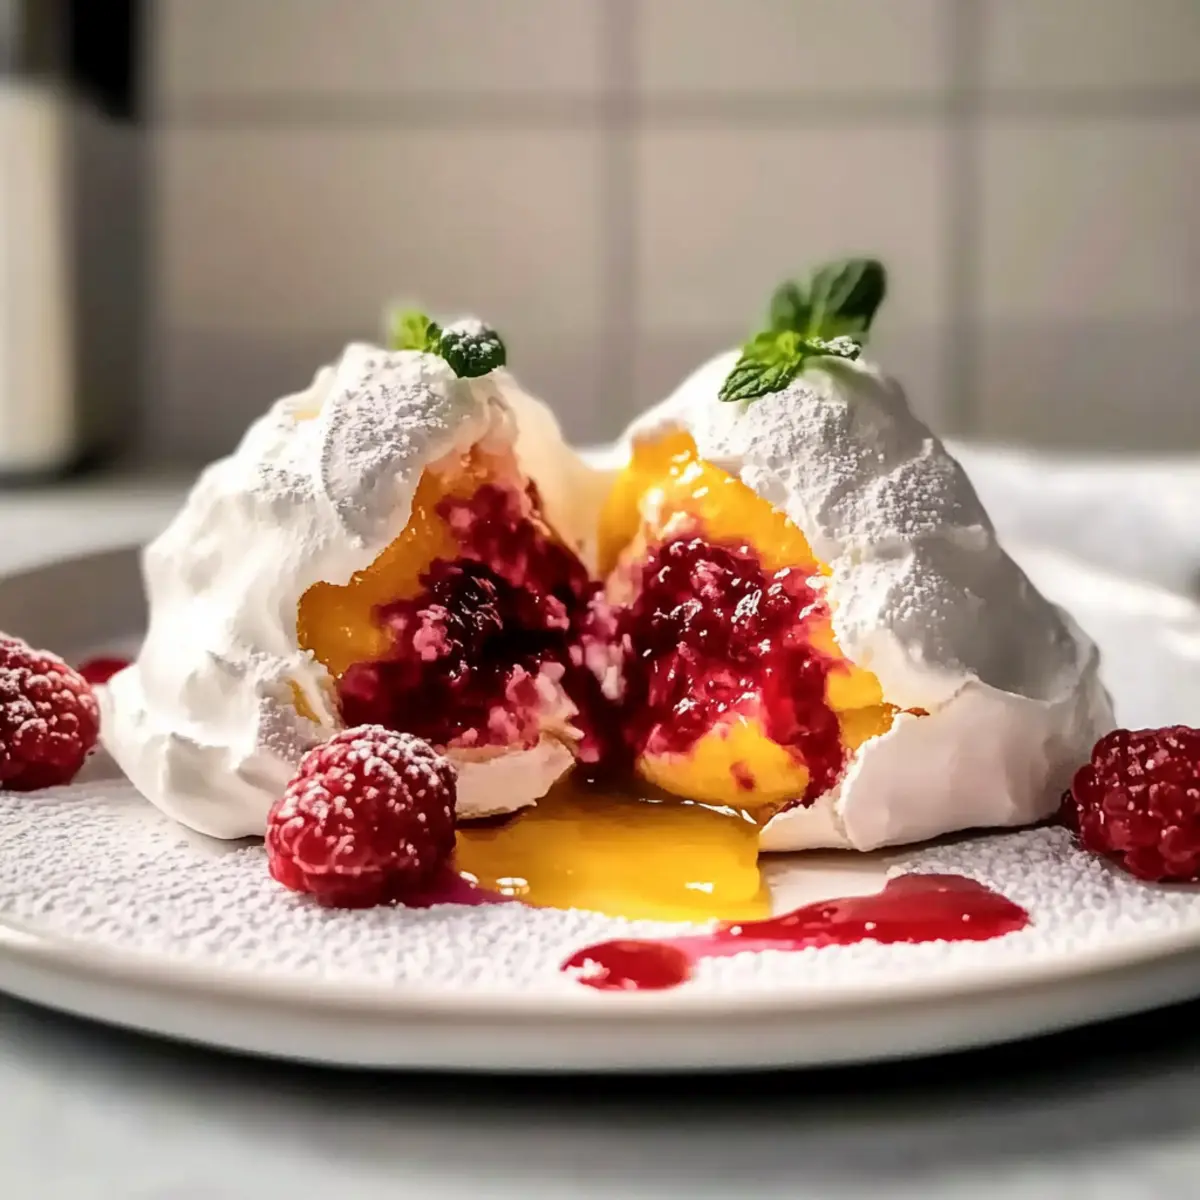
As I whipped those egg whites into a frothy cloud, I couldn’t help but feel a wave of excitement wash over me. There’s something truly magical about creating bite-sized wonders that look as good as they taste—like these Crispy Pavlova Bombs. Not only do they boast a delightful contrast of textures with their shatteringly crisp shells enveloping a luscious filling, but they’re also gluten-free and incredibly easy to prepare in advance. Perfect for impressing guests or enjoying a sweet treat after dinner, these mini meringue domes with vibrant lemon curd and raspberry coulis are destined to become a favorite in your dessert repertoire. Curious about how to make these beautiful bombs? Let’s dive into this delightful recipe together!
Why Should You Try Pavlova Bombs?
Pure Delight: These Crispy Pavlova Bombs are a feast for the eyes and palate, showcasing vibrant colors and luxurious textures that wow guests at any event.
Gluten-Free Goodness: Enjoy a guilt-free dessert that caters to dietary needs without compromising on taste.
Endless Variations: Personalize with your favorite fillings! Try using other fruit curds like passionfruit or mango for a unique twist.
Make-Ahead Magic: Prepare the meringue shells in advance and fill them just before serving for ultimate freshness.
Crowd-Pleasing Treat: Perfect for any gathering—wedding receptions or dinner parties, these bite-sized wonders are sure to impress. Need something to pair them with? Check out my Crispy Beef Rice Bowl or Buttermilk Fried Chicken for an amazing meal to accompany your dessert!
Dive into your next baking adventure with these mouthwatering meringue masterpieces!
Crispy Pavlova Bomb Ingredients
For the Meringue
• Egg Whites – Ensure they are at room temperature for optimal whipping.
• Caster Sugar – Adds sweetness and enhances the meringue’s texture; regular sugar can be used but may take longer to dissolve.
• Cornstarch – Stabilizes the meringue and adds a slight chewiness to the texture.
• White Vinegar – Improves stability and prevents crystallization, resulting in perfect Crispy Pavlova Bombs.
For the Filling
• Lemon Curd – Provides a tangy, creamy contrast; store-bought can save time.
• Raspberry Coulis – Delivers a fruity burst; feel free to substitute with other fruit purees like passionfruit or strawberry!
For the Topping
• Heavy Whipping Cream – Creates an airy topping that adds richness to seal in the delicious fillings.
Step‑by‑Step Instructions for Crispy Pavlova Bombs
Step 1: Preheat the Oven
Begin by preheating your oven to 300°F (150°C). This initial high temperature ensures that the outside of your Crispy Pavlova Bombs forms a perfect crust. Line a baking tray with parchment paper, creating a non-stick surface for the meringue to rest on as it bakes to a delightful crisp.
Step 2: Whip the Egg Whites
In the bowl of a stand mixer, combine room temperature egg whites and beat on medium speed until soft peaks form, about 3-4 minutes. When lifted, the egg whites should form gentle peaks that barely hold their shape. This crucial step allows for maximum volume, ensuring your pavlova has that airy texture that everyone loves.
Step 3: Add Sugar Gradually
Once soft peaks are achieved, gradually add caster sugar to the egg whites, one tablespoon at a time. Continue beating on high speed until the mixture becomes thick and glossy, about 5-7 minutes. The sugar should be fully dissolved, and if you rub a small amount between your fingers, it should feel smooth—this indicates your meringue is ready for the next step.
Step 4: Incorporate Stabilizers
Carefully fold in cornstarch and white vinegar using a spatula until just combined. This gentle folding technique is essential to retain the airiness in your meringue while adding stability. The cornstarch will help create that perfect chewy texture inside the Crispy Pavlova Bombs, while the vinegar elevates the meringue’s overall structure.
Step 5: Shape the Meringues
Using a piping bag fitted with a large round tip, pipe the meringue into 5-6 tall dome shapes on the prepared parchment-lined tray. Aim for about 3-4 inches in height, as this will create beautiful meringue shells once baked. If you don’t have a piping bag, you can also spoon the meringue, but ensure the domes are even and well-formed to achieve the desired crispiness.
Step 6: Bake the Meringues
Reduce the oven temperature to 225°F (110°C) and carefully place the tray in the oven. Bake the meringues for 1 hour and 30 minutes, ensuring they dry out thoroughly. They should turn a lovely pale color without browning, and you’ll know they’re ready when they feel firm to the touch and lift easily off the parchment.
Step 7: Cool the Meringues
Once your baking time is up, turn off the oven, leaving the meringues inside to cool slowly for at least 3 hours or even overnight. This gradual cooling process prevents cracks and ensures that your Crispy Pavlova Bombs maintain their shape and airy texture while developing a slight chewiness inside.
Step 8: Hollow the Meringues
When the meringues are completely cooled, carefully create a small hole at the base of each pavlova using a pairing knife or teaspoon, hollowing out a bit to make space for the delightful filling. Be gentle to avoid breaking the fragile shell. This will prepare your pavlovas for a delicious surprise inside!
Step 9: Fill with Fruit Purees
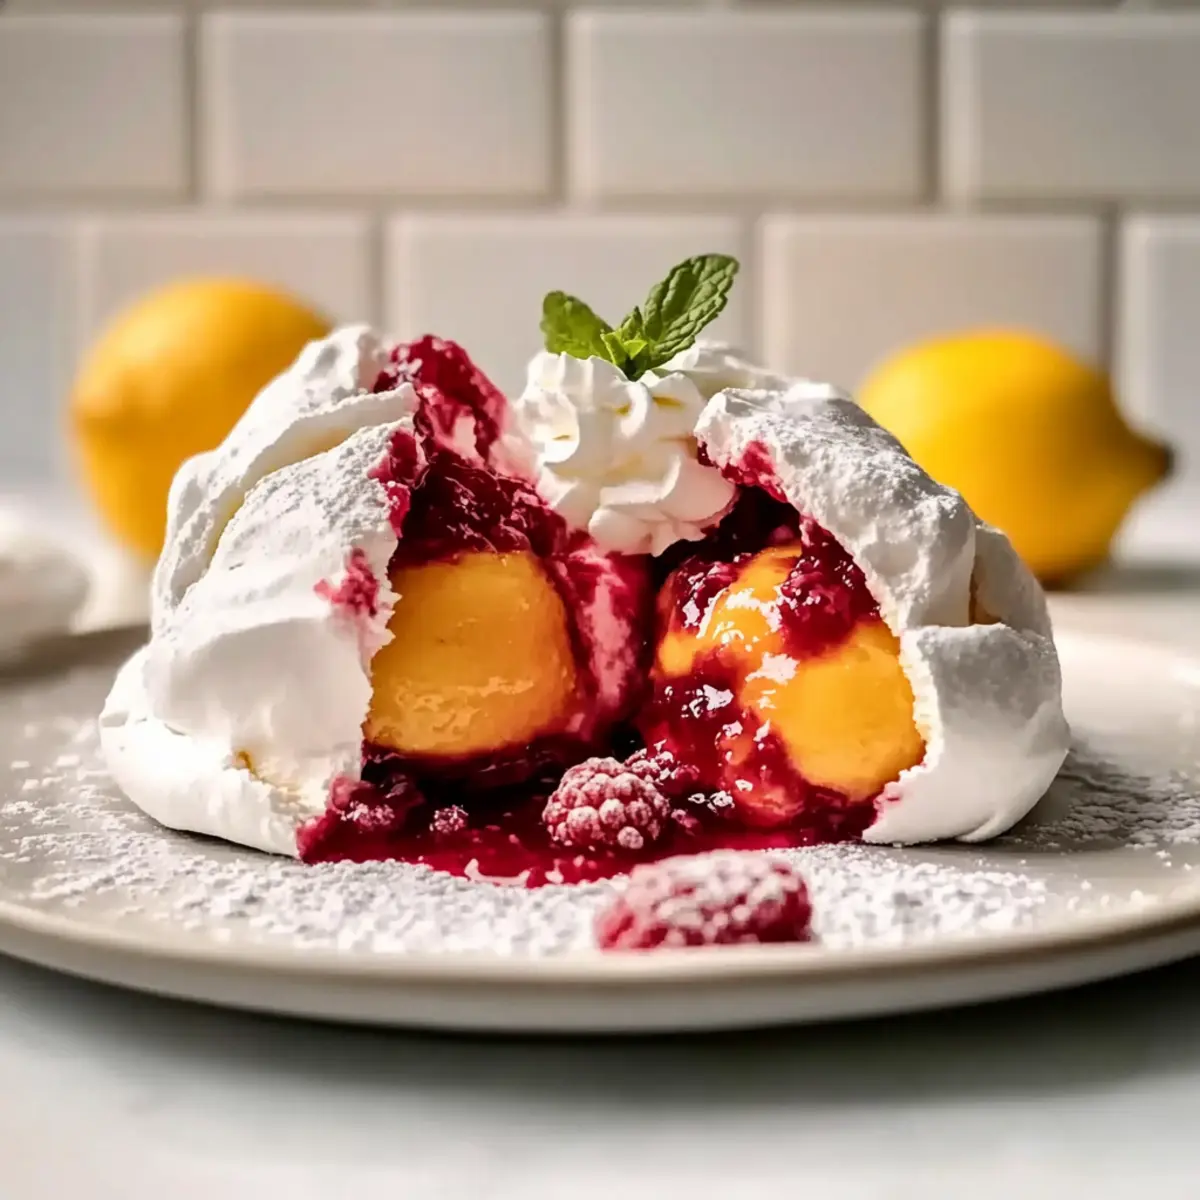
Begin filling each meringue with a spoonful of raspberry coulis, allowing it to settle into the hollowed base. Follow this with a generous dollop of lemon curd, filling each pavlova completely. The vibrant flavors of the fillings will harmonize beautifully with the crispy meringue, creating an exciting taste experience with every bite of your Crispy Pavlova Bombs.
Step 10: Top with Whipped Cream
Finally, whip the heavy cream until soft peaks form and use it to seal the top of each filled pavlova, creating a beautiful finish. Ensure the whipped cream is fluffy but not over-beaten. This airy topping will add richness and complete your delightful dessert, ready to impress anyone who takes a bite.
Step 11: Serve the Pavlova Bombs
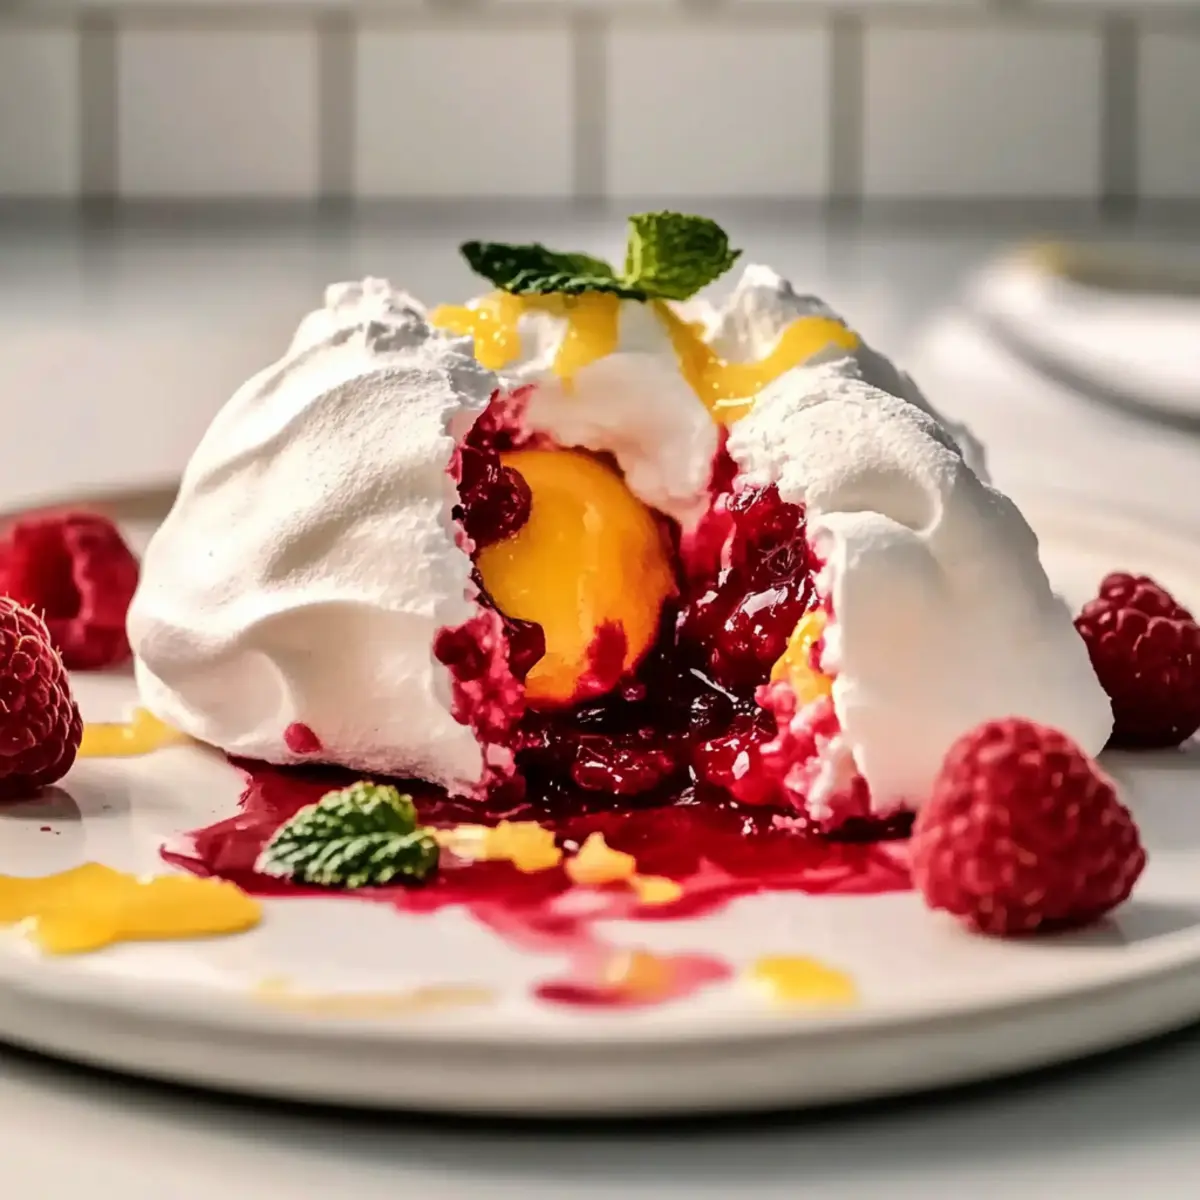
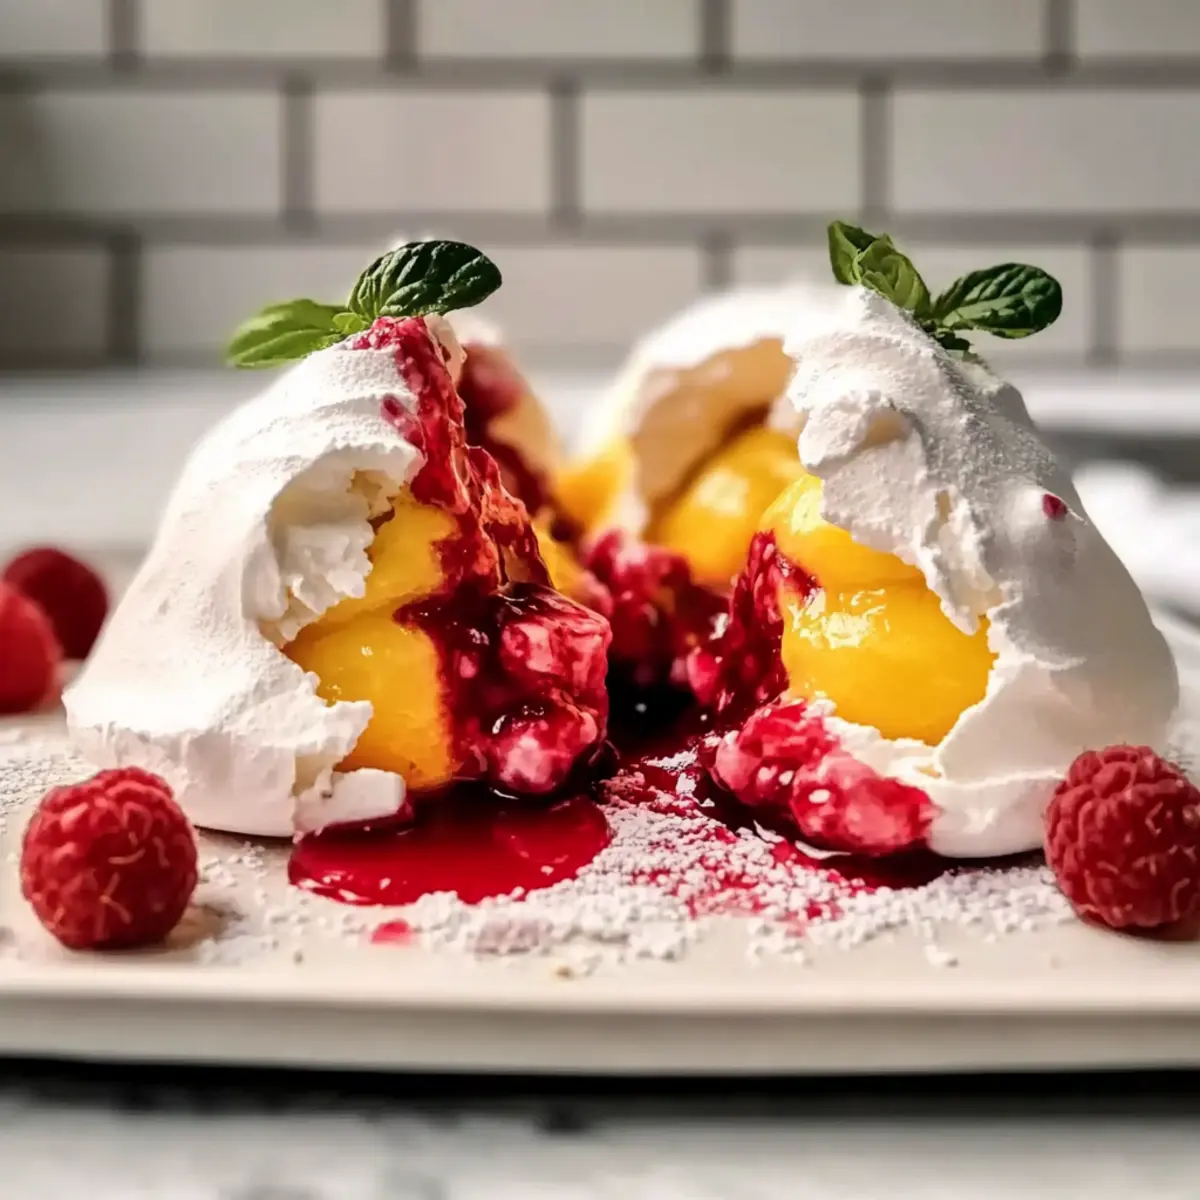
Carefully invert the filled pavlova onto serving plates, garnishing with additional fruit or mint leaves if desired. When serving, give guests instructions to smash into these delightful bombs to reveal the delightful combination of textures and flavors that await inside. Enjoy this impressive treat at your next gathering!
How to Store and Freeze Crispy Pavlova Bombs
Room Temperature: Keep unfilled pavlova shells in an airtight container at room temperature for up to 3 days to maintain their crispiness. Avoid humidity to prevent stickiness.
Fridge: Filled pavlova bombs are best enjoyed fresh but can be stored in the fridge for up to 1 day. Cover gently with plastic wrap to avoid moisture.
Freezer: For longer storage, freeze unfilled meringue shells in an airtight container for up to 1 month. Allow them to thaw at room temperature before filling.
Reheating: If desired, you can bake warm filled pavlova briefly in a low oven (200°F / 93°C) for 5-10 minutes, but this is not recommended; they are best enjoyed fresh!
Expert Tips for Crispy Pavlova Bombs
Perfect Egg Whites: Ensure your egg whites are at room temperature and free from any yolk. This maximizes volume and results in perfectly airy meringue.
Watch the Weather: Avoid making meringue on humid days. Moisture can lead to sticky pavlovas, so check conditions before you start.
Slow Baking: Bake at a low temperature to prevent browning. A sudden rise in heat can ruin the delicate texture of your Crispy Pavlova Bombs.
Storage Advice: Prepare the meringue shells in advance and store them airtight. Fill just before serving to maintain that delightful crispness.
Don’t Skimp on Care: Gently handle meringue shells when hollowing out to avoid any breakage, ensuring your pavlova bombs stay intact for the big reveal!
What to Serve with Crispy Pavlova Bombs
Transform your dessert into an unforgettable meal by pairing these delightful bites with complementary flavors and textures.
-
Fresh Berries: The brightness from assorted berries adds a refreshing element that balances the sweetness of the pavlova.
-
Creamy Chocolate Mousse: Rich, velvety chocolate mousse contrasts beautifully with the airy texture of the pavlova.
-
Mint-Infused Iced Tea: A cool, herbal beverage complements the bright flavors of lemon and raspberry, making for a delightful sip alongside each bite.
-
Vanilla Coffee: A smooth cup of vanilla-infused coffee enhances the sweet experience, perfect for any dessert indulgence.
-
Zesty Lemon Sorbet: This icy treat brings a tangy, cooling element that can serve as a palate cleanser between bites of the pavlova.
-
Almond Biscotti: Crunchy and slightly sweet, these cookies make a delightful accompaniment for dipping into coffee or tea.
Elevate your dessert experience by mixing and matching these pairings for an enchanting finale to your meal!
Make Ahead Options
These Crispy Pavlova Bombs are a game-changer for busy home cooks looking to save time without sacrificing flavor! You can prepare the meringue shells up to 3 days in advance; simply store them in an airtight container at room temperature to maintain their delightful crispiness. For the best results, fill the meringues with raspberry coulis and lemon curd just before serving, as this keeps the shells from becoming soggy. If you’re using store-bought lemon curd, you can have your fillings ready up to 24 hours ahead—just refrigerate them in separate containers. When it’s time to serve, top with freshly whipped cream and enjoy a stunning dessert that’s just as delicious as if made fresh!
Crispy Pavlova Bombs: Delicious Variations!
Feel free to mix things up and let your creativity run wild with these delightful transformations!
-
Seasonal Fruits: Swap in fresh seasonal fruits like strawberries or peaches for a delightful taste twist. Each change brings a unique flavor profile that will brighten your pavlovas in delightful ways.
-
Chocolate Delight: Add cocoa powder to your meringue for a chocolate twist. Pair with a rich chocolate ganache filling for an indulgent treat that chocolate lovers will adore.
-
Nutty Crunch: Incorporate crushed nuts like pistachios or almonds on top for added texture. The crunchiness complements the soft meringue beautifully, making every bite an adventure.
-
Minty Fresh: Infuse your whipped cream with fresh mint or peppermint extract for a refreshing take. This addition will uplift your pavlovas, especially during those warm summer gatherings!
-
Citrus Zing: Mix lemon or orange zest into your filling for a burst of citrus flavor. The bright notes will complement the sweet meringue and invigorate your taste buds.
-
Spicy Heat: For an unconventional twist, consider adding a hint of chili powder to your fruit coulis. Just a pinch can elevate the flavor profile, creating a sweet-heat experience!
-
Caramel Swirl: Drizzle caramel sauce inside your pavlova shells for an indulgent filling. This syrupy goodness will meld perfectly with the tart lemon curd for a decadent flavor combination.
These variations not only allow you to play with flavors but can also impress your friends and family at any gathering! And don’t forget to pair these with some savory delights like my Crispy Chilli Beef for the perfect dining experience!
Crispy Pavlova Bombs Recipe FAQs
How do I know if my egg whites are ripe for making meringue?
Absolutely! For the best results, ensure your egg whites are at room temperature, as this allows for better whipping. They should be free from any yolk, which can hinder the whipping process. Whip until soft peaks form; this means they should hold a gentle shape but still be slightly floppy.
What’s the best way to store unfilled Crispy Pavlova Bombs?
Store the unfilled meringue shells in an airtight container at room temperature for up to 3 days. Just be sure to keep them in a dry area since humidity can make them sticky. If it’s a particularly humid day, you might want to save the meringue-making for another time to ensure that perfect crispiness!
Can I freeze filled Pavlova Bombs?
While it’s best to enjoy filled pavlova bombs fresh, unfilled meringue shells can be frozen for up to 3 months. To do this, simply place the shells in an airtight container. When you’re ready to enjoy them, let them thaw at room temperature, and then fill them right before serving! This process keeps your bomb delightfully crispy.
What should I do if my meringue is sticky and won’t hold its shape?
Very! If your meringue becomes sticky, it’s likely due to humidity or under-whipping. Ensure your egg whites are fully whipped to stiff peaks, where the mixture is glossy and holds firm, without any grit from the sugar. If humidity is a problem, try making the meringue on a drier day or in a deeply air-conditioned space.
Are Crispy Pavlova Bombs suitable for people with dietary restrictions?
Certainly! These pavlova bombs are gluten-free, making them a wonderful dessert option for those avoiding gluten. However, if you’re serving guests with egg allergies, you may explore aquafaba (chickpea brine) as an alternative to egg whites, but results may vary. Always inform your guests about the ingredients, especially the fillings, to ensure everyone can enjoy this delightful treat!
Crispy Pavlova Bombs: Tangy Joy in Every Bite!
Ingredients
Equipment
Method
- Preheat your oven to 300°F (150°C) and line a baking tray with parchment paper.
- In a stand mixer, beat room temperature egg whites on medium speed until soft peaks form, about 3-4 minutes.
- Gradually add caster sugar to the egg whites, beating on high until thick and glossy, about 5-7 minutes.
- Fold in cornstarch and white vinegar until just combined.
- Pipe the meringue into 5-6 tall dome shapes on the tray.
- Reduce oven temperature to 225°F (110°C) and bake for 1 hour and 30 minutes.
- Turn off the oven and leave the meringues to cool inside for at least 3 hours or overnight.
- Hollow out a small hole at the base of each meringue to make space for the filling.
- Fill each meringue with raspberry coulis and lemon curd.
- Whip the heavy cream to soft peaks and seal the top of each filled pavlova.
- Invert the filled pavlova onto serving plates and serve.
Leave a Reply