
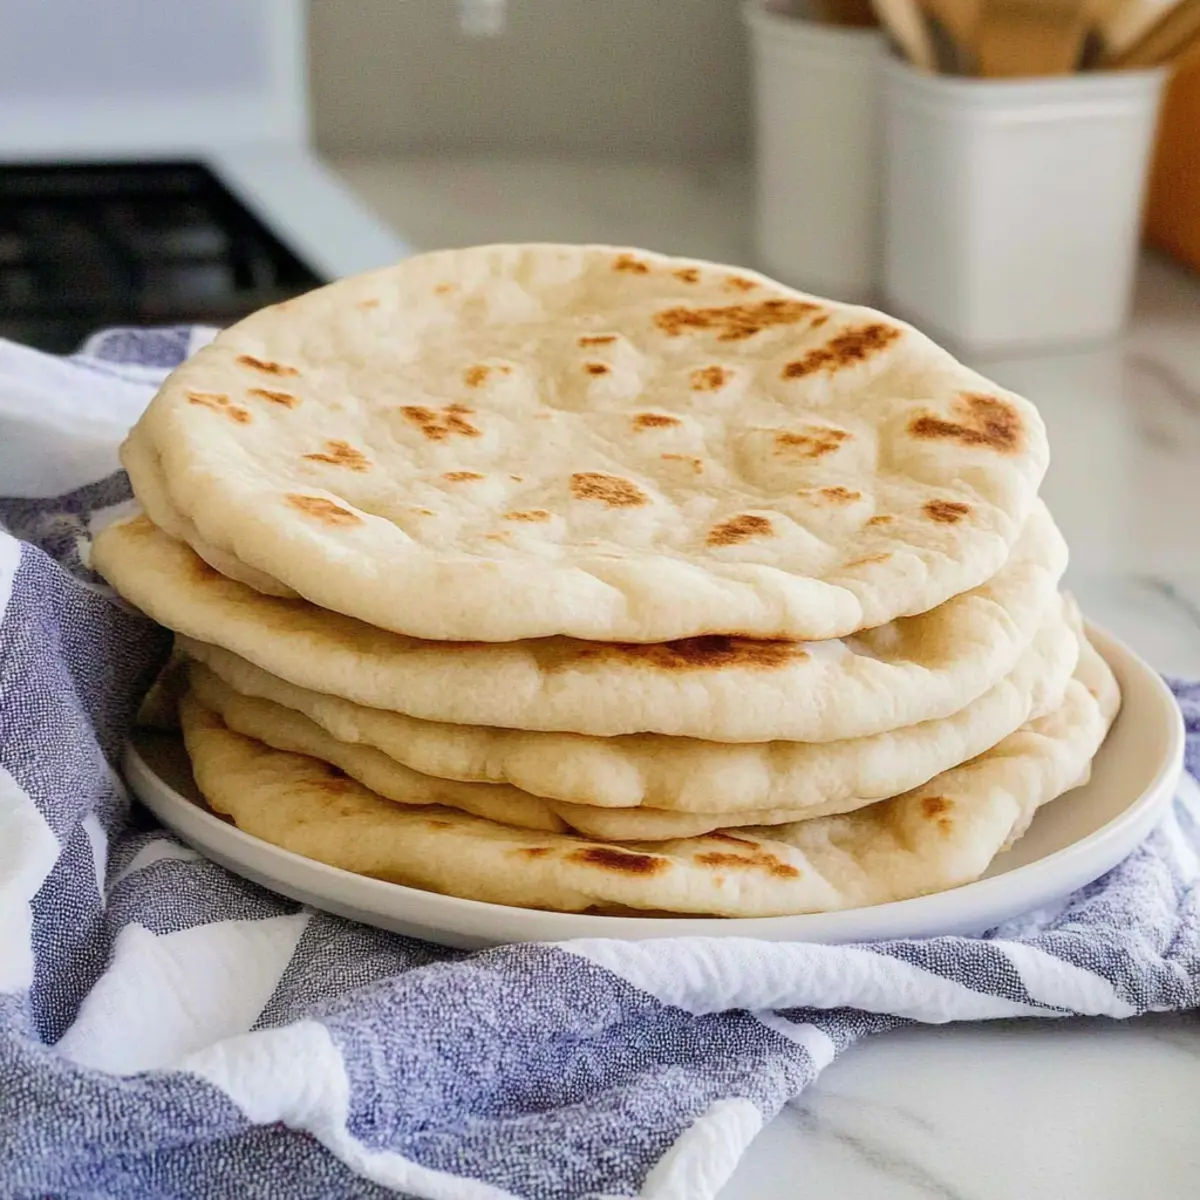
As I stood in my kitchen, the aroma of warm, freshly baked bread wafted through the air, instantly transporting me to a bustling street market in Greece. Today, I’m excited to share my recipe for Gyro Bread, a delightful flatbread that’s perfect for wrapping around your favorite fillings, whether that’s succulent rotisserie meat or a medley of vibrant veggies. This homemade gyro bread is not just a versatile option for any meal; it’s also quick to prepare and freezer-friendly—ideal for meal prep during those busy weeks. With its fluffy, slightly crispy exterior, you’ll never want to reach for store-bought flatbreads again. Ready to elevate your culinary game? Let’s dive into the world of gyro bread and discover just how easy and delicious homemade cooking can be!
Why is Homemade Gyro Bread a Must-Try?
Fluffiness: This gyro bread is soft and fluffy, creating the perfect texture to cradle your favorite fillings without tearing.
Versatile: Whether you prefer traditional meats like lamb or more plant-based options such as falafel, this bread adapts beautifully to any filling you choose.
Quick and Easy: In just one hour, you can whip up fresh, delectable pitas that impress friends and family, with minimal kitchen fuss!
Meal Prep Friendly: Make a batch and freeze for quick dinners; simply thaw and reheat for a homemade meal on busy nights.
Cultural Journey: Each bite takes you on a flavor journey to Greece, connecting you to the delightful street food culture. For more tasty ideas, check out my Banana Chocolate Bread, which also pairs well with a healthy Mediterranean salad!
Gyro Bread Ingredients
• Discover the magic of homemade gyro bread with these simple ingredients.
For the Dough
- Warm Water – Activates yeast for a lovely rise; aim for about 105°F to ensure optimal activation.
- Sugar – Feeds the yeast, enhancing flavor; feel free to adjust it according to your taste preferences.
- Active Dry Yeast – Leavens the bread, making it fluffy; ensure it’s fresh for best results.
- All-Purpose Flour – Provides structure and texture; substitute with gluten-free flour for a fantastic variant suitable for different diets.
- Salt – Enhances flavor and strengthens the dough; a key ingredient that no bread should be without.
- Olive Oil – Adds moisture and flavor; a little extra for brushing gives a delightful golden finish.
Step‑by‑Step Instructions for Gyro Bread
Step 1: Dough Preparation
In a large mixing bowl, combine 1 cup of warm water (about 105°F), 1 tablespoon of sugar, and 2 teaspoons of active dry yeast. Allow the mixture to sit for about 5 minutes until it becomes frothy, indicating that the yeast is activated. This crucial step lays the foundation for your fluffy gyro bread.
Step 2: Combine Ingredients
Once the yeast mixture is frothy, add 3 cups of all-purpose flour, 1 teaspoon of salt, and 2 tablespoons of olive oil into the bowl. Mix the ingredients until a shaggy dough forms, ensuring all the flour is hydrated. This will be the base for your delicious gyro bread.
Step 3: Kneading
Transfer the shaggy dough onto a floured surface and knead it for 3-4 minutes until it becomes smooth and elastic. You’re looking for a soft, slightly tacky texture that springs back when pressed. This vital step develops the gluten and gives your gyro bread its characteristic fluffiness.
Step 4: First Rise
Place the kneaded dough in an oiled bowl, turning it to coat all sides. Cover the bowl with a clean kitchen towel and set it in a warm area for about 30 minutes, or until the dough doubles in size. This rising phase is key to achieving soft and airy gyro bread.
Step 5: Shape
After the dough has risen, gently punch it down to release the air. Divide the dough into 6 equal pieces and shape each into a ball by tucking the edges under. This step will prepare the dough for flattening into pitas.
Step 6: Form Pitas
Using your hands or a rolling pin, flatten each ball into a circle roughly 6 inches in diameter. Aim for uniform thickness to ensure even cooking. Your freshly shaped gyro pita rounds should be soft and round, ready to be cooked.
Step 7: Cooking
Heat a cast iron skillet over medium heat and lightly brush it with olive oil. Cook each pita for 2-3 minutes on one side until golden brown, then flip and cook the other side for another 2-3 minutes. Watch for small bubbles and a beautiful golden hue as signs of readiness for your gyro bread.
Step 8: Serve
Once cooked, keep the pitas warm by wrapping them in a clean kitchen towel. Serve immediately, filling them with your favorite meats, veggies, or sauces for a delightful meal. Enjoy the soft, fluffy texture and perfect flavor of your homemade gyro bread!
Gyro Bread Variations & Substitutions
Customize your gyro bread experience with these fun twists and substitutions that awaken your culinary creativity!
- Gluten-Free: Substitute all-purpose flour with a gluten-free flour blend, ensuring it contains xanthan gum for proper binding.
- Herb-Infused: Add 1-2 teaspoons of dried herbs, such as oregano or basil, directly into the dough for an aromatic flavor boost.
- Spicy Kick: Incorporate a pinch of cayenne pepper or chili flakes to the dough for a subtle heat that’ll elevate your wraps.
- Sweet Version: Transform leftover pitas into a dessert by spreading cream cheese and fresh fruits for an indulgent treat, inspired by my Banana Chocolate Bread.
- Extra Crunch: For a delightful texture twist, sprinkle sesame seeds or poppy seeds on the dough before cooking for added flavor and crunch.
- Coconut Oil: Swap olive oil for melted coconut oil in the dough for a tropical flavor that pairs wonderfully with savory fillings.
- Garlic Lovers: Mix in 1-2 teaspoons of garlic powder into the dough for a fragrant and flavorful bread—perfect with Mediterranean fillings.
- Veggie-Packed: Incorporate finely chopped spinach or fresh herbs to the dough for a healthy, vibrant spin on your gyro bread.
With these variations, you can create a gyro bread that perfectly matches your taste, adding joy to every bite! Explore flavors and fillings, and don’t forget to check out my recipe for a delicious fruit spread that pairs wonderfully with these pitas!
Make Ahead Options
These Homemade Gyro Bread pitas are perfect for time-strapped cooks who love to meal prep! You can prepare the dough up to 24 hours in advance; simply follow the first five steps, then place the shaped dough balls in an oiled container with a lid and refrigerate them. This keeps the gluten relaxed and prevents any browning or over-proofing. When you’re ready to serve, just roll out the dough and cook them as directed. If you’d like to further extend your prep, cooked gyro bread can be stored in the fridge for up to 3 days or frozen for up to 3 months; just reheat them in a skillet or the oven for soft, delightful results, ensuring your meals remain flavorful and fresh!
Expert Tips for Gyro Bread
-
Fresh Yeast Check: Ensure your active dry yeast is fresh and bubbling before mixing; stale yeast will lead to flat bread.
-
Perfect Dough Texture: Knead until the dough is smooth and elastic, which develops gluten for that fluffy gyro bread you crave.
-
Watch the Heat: Adjust cooking times depending on skillet heat; be attentive to avoid burning while achieving that golden-brown finish.
-
Use a Pizza Stone: If you have one, cook your gyro pitas on a preheated pizza stone for even heat distribution and delightful puffing.
-
Cool Before Storing: Allow cooled pitas to sit briefly before wrapping them to avoid creating moisture that can make them soggy.
How to Store and Freeze Gyro Bread
Fridge: Store cooled gyro bread in plastic wrap or an airtight container for up to 3-5 days. This keeps them fresh and ready for your next meal.
Freezer: For longer storage, freeze the gyro bread in a freezer-safe container for up to 3 months. Ensure they are well-wrapped to prevent freezer burn.
Thawing: Thaw frozen gyro bread overnight in the fridge before reheating. Reheat on a skillet or in the oven for a warm, fluffy texture that revives that homemade goodness.
Reheating: Gently warm the bread on a skillet over low heat for 1-2 minutes on each side to restore softness before serving with your fillings.
What to Serve with Gyro Bread
Elevate your mealtime experience with these delightful pairings that complement the fluffy, homemade gyro bread beautifully.
-
Succulent Rotisserie Chicken: Marinated chicken adds savory depth, creating a classic gyro that’s deliciously satisfying. The juicy meat pairs wonderfully with the warm bread.
-
Crispy Greek Fries: Seasoned with herbs and served with a sprinkle of feta, these fries bring a joyful contrast to your homemade gyro. A perfect crunch to balance your meal!
-
Mediterranean Salad: Fresh cucumbers, tomatoes, and olives light up the plate, adding a refreshing element that cuts through rich flavors. Here, the vibrant colors tease your palate!
-
Tzatziki Sauce: This creamy yogurt dip infused with garlic and cucumber is a must-have alongside gyro bread. It cools down the meat and adds a zesty punch.
-
Falafel: For a vegetarian twist, crispy falafels lend a rich texture and savory flavor that pairs exceptionally well with the soft bread. Stuff them inside for a delightful treat!
-
Grilled Veggies: Charred bell peppers and zucchini amplify the flavors with smoke and sweetness, creating a delightful veggie-filled wrap option. Perfect for lightening up the meal!
-
Feta Cheese Crumbles: A sprinkle of feta brings a salty kick that complements the homemade gyro bread, intensifying the Mediterranean experience with every bite.
-
Sparkling Lemonade: The bright citrus notes awaken your senses and cleanse your palate, making it the perfect refreshing drink to accompany your meal.
-
Baklava: For a sweet finish, the flaky layers and honeyed nuts of baklava provide a decadent contrast to the savory gyro. A delightful way to end your culinary journey!
Gyro Bread Recipe FAQs
How do I select the perfect ingredients for gyro bread?
Absolutely! For the best gyro bread, fresh ingredients are key. Use warm water at about 105°F to activate the yeast effectively. Check the expiration date on your active dry yeast to ensure it’s fresh; stale yeast won’t rise. When choosing flour, if you’re going gluten-free, opt for a blend that contains xanthan gum for the right texture.
How should I store gyro bread, and how long does it last?
Very! To store gyro bread, wrap it tightly in plastic wrap or place it in an airtight container, keeping it in the fridge where it will stay fresh for 3-5 days. If you have leftovers, you can freeze them in a freezer-safe container for up to 3 months, perfect for a quick meal later on!
Can I freeze gyro bread, and what’s the best way to do it?
Absolutely! To freeze gyro bread, let the pitas cool completely before wrapping each one tightly in plastic wrap, followed by aluminum foil to prevent freezer burn. Store them in a labeled freezer bag or container for up to 3 months. When you’re ready to enjoy, simply thaw them in the fridge overnight and rewarm on a skillet or in the oven!
What should I do if my gyro bread doesn’t puff up while cooking?
Not to worry! If your gyro bread isn’t puffing up, this could be due to a few factors. Ensure your skillet is hot enough—medium heat should do the trick. If the dough is too thick or unevenly rolled, it won’t puff correctly. Make sure you’ve also let the dough rise adequately; it should double in size. Kneading well and keeping an eye on cooking times will help achieve that perfect fluffiness!
Can I make substitutions for dietary restrictions?
Absolutely! For those with gluten sensitivities, substitute all-purpose flour with a gluten-free flour blend that contains xanthan gum for proper binding. You can also tailor the flavor by adding herbs like oregano or garlic powder into the dough for a tasty twist. Always check for allergies, especially if serving to others, ensuring all ingredients are suitable.
What are some tasty filling ideas for gyro bread?
The more the merrier! Fill your homemade gyro bread with anything from marinated grilled lamb or chicken, fresh veggies like cucumbers and tomatoes, to a delightful falafel mix for plant-based options. Don’t forget a generous dollop of tzatziki sauce or hummus for an extra layer of flavor that complements the soft, warm bread beautifully!
Easy Gyro Bread Recipe for Fluffy Homemade Pitas
Ingredients
Equipment
Method
- In a large mixing bowl, combine warm water, sugar, and active dry yeast. Allow the mixture to sit for about 5 minutes until it becomes frothy.
- Once the yeast mixture is frothy, add all-purpose flour, salt, and olive oil. Mix until a shaggy dough forms.
- Transfer the dough onto a floured surface and knead for 3-4 minutes until smooth and elastic.
- Place the kneaded dough in an oiled bowl, cover it, and let it rise in a warm area for about 30 minutes or until doubled in size.
- Gently punch down the dough, divide it into 6 equal pieces, and shape each into a ball.
- Flatten each ball into a circle roughly 6 inches in diameter.
- Heat a cast iron skillet over medium heat, brush lightly with olive oil, and cook each pita for 2-3 minutes on each side until golden brown.
- Keep pitas warm in a clean kitchen towel and serve immediately filled with your favorite fillings.
Leave a Reply