
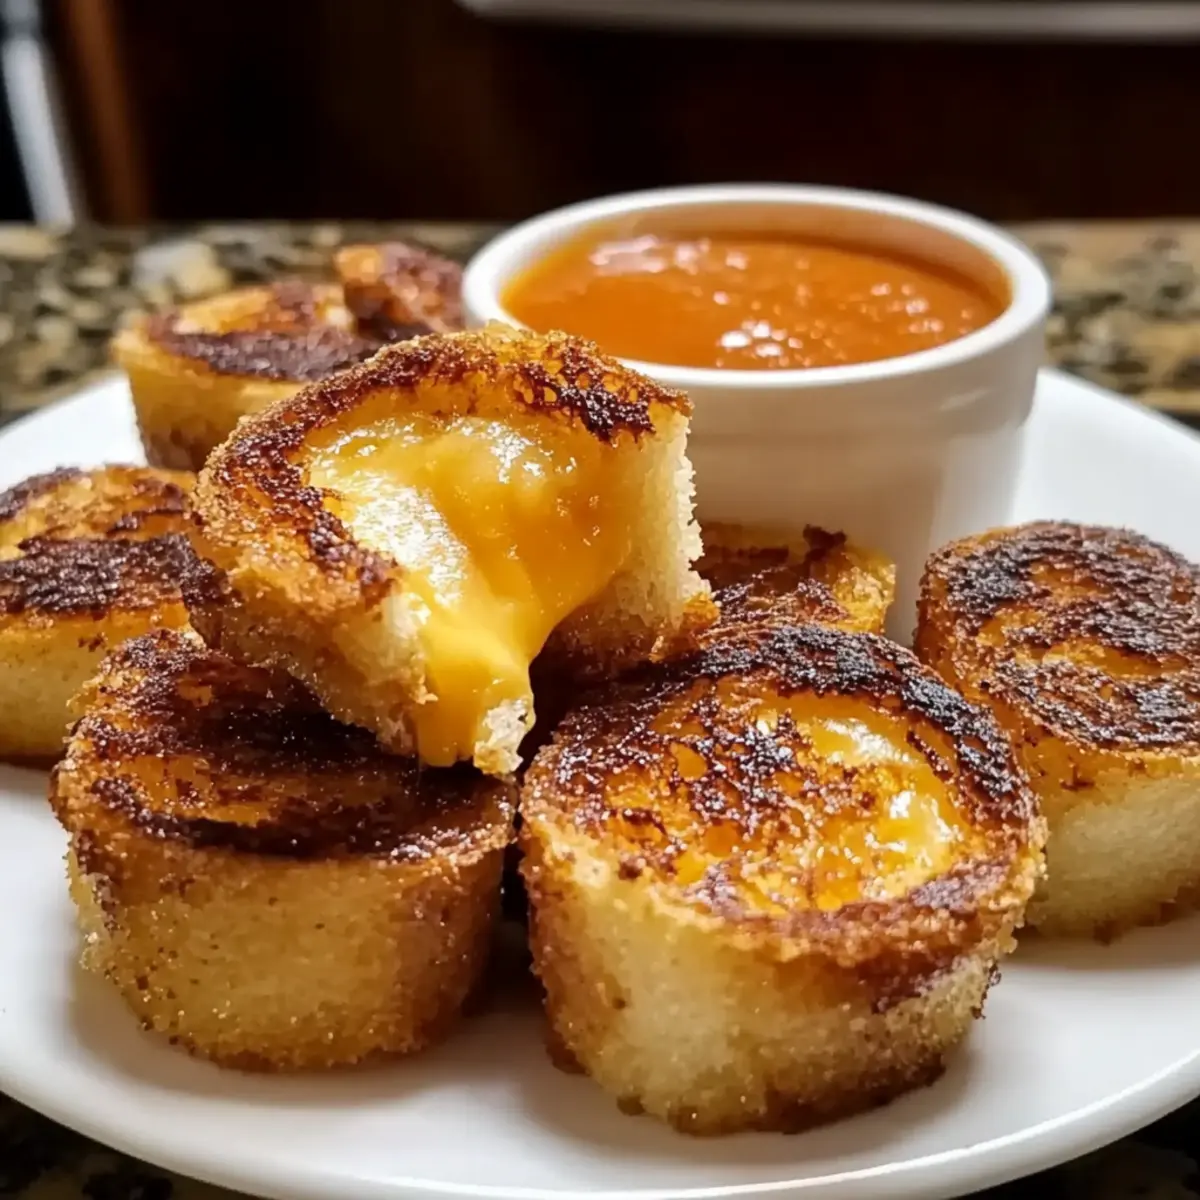
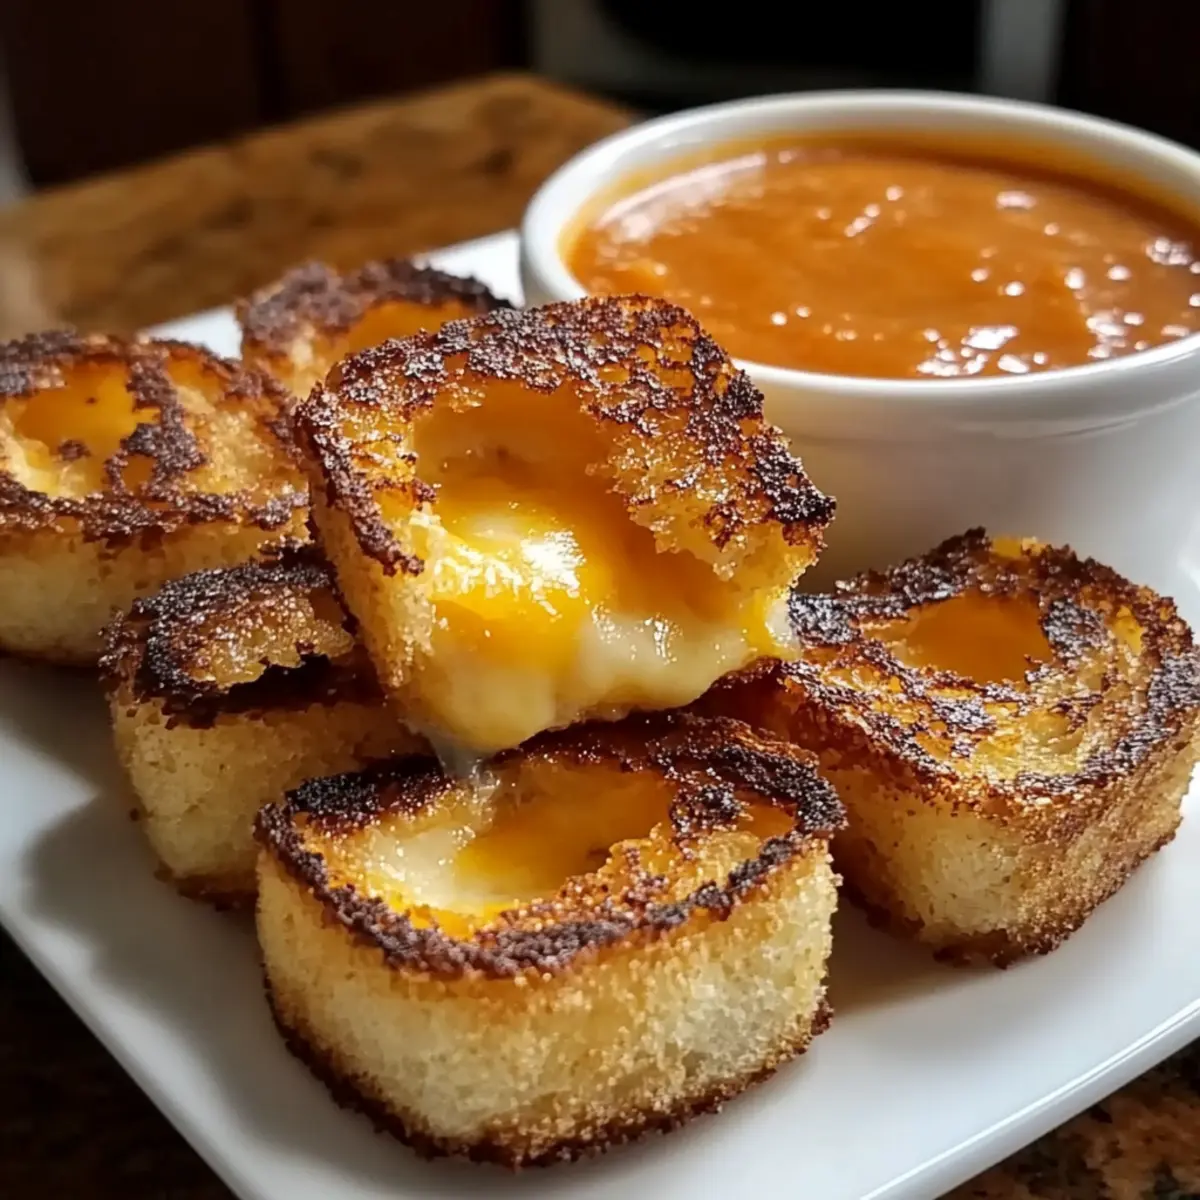
As I was flipping through an old cookbook, a wave of nostalgia washed over me—a time when lazy afternoons were spent savoring gooey grilled cheese sandwiches with tomato soup. Today, I’m excited to reignite that cherished experience with a fresh twist: Mini Grilled Cheese Dippers! These delightful bites are not only crispy and cheesy but also perfect for parties or a cozy snack at home. Quick to whip up and easily customizable, they invite you to play with flavors by using different cheeses or even adding some veggies or meats. Plus, there’s a gluten-free option, making this recipe accessible for everyone. Are you ready to create a fun appetizer that brings smiles and warmth to any gathering? Let’s dive into these irresistible dippers!
Why Are Mini Grilled Cheese Dippers So Perfect?
Universal Appeal: Everyone loves a classic grilled cheese, and these mini dippers take that beloved comfort food to the next level, making them a hit with both kids and adults.
Customizable Delight: With options to choose your favorite cheeses or even incorporate veggies and meats, you can create a unique flavor profile that suits any palate.
Quick and Easy: This recipe requires minimal prep and can be grilled up in a flash, making it the ideal solution for unexpected guests or busy weeknights.
Gluten-Free Flexibility: Catering to dietary needs, you can easily substitute gluten-free bread, ensuring everyone can enjoy this tasty treat!
Perfect for Sharing: Serve them on a stylish platter alongside a dipping cup of tomato soup, and you’ll have an irresistible appetizer that’s perfect for parties and gatherings.
Want to try something different with the cheese? Check out these Mini Pumpkin Cheese or add a twist with Pumpkin Mac Cheese!
Mini Grilled Cheese Dipper Ingredients
For the Dippers
- Bread – Choose a sturdy bread to prevent sogginess; gluten-free bread works beautifully too!
- Sharp Cheddar – Provides a rich flavor that elevates these Mini Grilled Cheese Dippers.
- Monterey Jack or Provolone – These cheeses melt perfectly, creating that gooey center we crave.
- Butter or Mayonnaise – Adds a delicious golden crispiness to the outside of the dippers.
For the Dipping Soup
- Tomato Soup – Opt for a high-quality smooth soup to complement the cheesy dippers perfectly!
Feel free to mix and match these ingredients based on your preferences for a delightful twist on this nostalgic treat!
Step‑by‑Step Instructions for Mini Grilled Cheese Dippers
Step 1: Prepare the Bread
Start by slicing your chosen bread into small, uniform squares, about 2 inches each. This ensures even cooking and makes for perfect dipping. A sturdy bread works best to avoid sogginess; if you’re opting for a gluten-free version, ensure it’s conditioned accordingly. Set the slices aside while you gather your cheese and other ingredients.
Step 2: Assemble the Sandwiches
Next, layer your delicious cheeses between two pieces of bread to create the mini sandwiches. Use a combination of sharp cheddar for flavor and either Monterey Jack or provolone for that gooey melt. Press down gently to help the cheese adhere to the bread, ensuring an even filling for each Mini Grilled Cheese Dipper.
Step 3: Top the Sandwiches
Spread a generous layer of butter or mayonnaise on the outer sides of each mini sandwich. This fat will ensure a beautifully golden and crispy exterior as they grill. Don’t shy away from covering the bread well; this is what gives your Mini Grilled Cheese Dippers that irresistible crunch.
Step 4: Grill the Sandwiches
Preheat a non-stick skillet over medium heat. Once hot, carefully place your assembled sandwiches in the skillet in batches, making sure not to overcrowd. Grill each side for about 3-4 minutes, or until they are golden brown and crispy. You’ll know they’re ready to flip when they easily release from the pan and showcase a lovely color.
Step 5: Rest and Slice
Once all the sandwiches are grilled to perfection, remove them from the skillet and let them rest on a cutting board for a minute. This allows the cheese to set slightly, making it easier to slice. With a sharp knife, cut each sandwich into dippers; aim for 2-3 strips per sandwich for the best dipping experience.
Step 6: Create the Dippers
Finally, serve your warm Mini Grilled Cheese Dippers on a stylish platter alongside a cup of smooth, high-quality tomato soup for dipping. This warm, comforting pairing is not only visually appealing but also captures the nostalgic essence of your childhood favorite. Enjoy this delightful snack that offers both crunch and comfort!

Make Ahead Options
These Mini Grilled Cheese Dippers are perfect for meal prep, saving you time on busy weeknights! You can slice the bread and assemble the sandwiches up to 24 hours in advance; just be sure to store them in an airtight container in the refrigerator to prevent drying out. Additionally, you can prepare the tomato soup and store it in the fridge for up to 3 days. When you’re ready to serve, simply grill the assembled sandwiches for 3-4 minutes on each side until golden brown. This way, you can enjoy perfectly crispy dippers with minimal effort, allowing you to spend more time with family and friends!
How to Store and Freeze Mini Grilled Cheese Dippers
Fridge: Store cooled Mini Grilled Cheese Dippers in an airtight container for up to 2 days. Layer them with parchment paper to maintain crispiness and prevent sticking.
Freezer: For longer storage, freeze assembled but uncooked dippers on a baking sheet until solid. Transfer to a freezer bag for up to 3 months; they’re ready for a quick fry later!
Reheating: Avoid the microwave! To reheat, place dippers in a skillet over medium heat for a few minutes on each side until golden and warm. Or, pop them in an air fryer at 370°F for about 4-5 minutes.
Make-Ahead Tips: Prepare sandwiches, then wrap tightly in plastic wrap before refrigerating. Grill them fresh when you’re ready to serve, ensuring that lovely crunchy texture is preserved!
What to Serve with Mini Grilled Cheese Dippers
Bring a cozy, comforting flair to your gathering with delightful accompaniments that balance flavors and textures beautifully.
-
Tomato Soup: The classic choice that enhances cheesy goodness; opt for a smooth, rich soup for easy dipping.
-
Crispy Kale Chips: These add a crunchy, healthy contrast, and the slight bitterness complements the richness of the dippers perfectly. Pairing a crunch with your warmth creates an inviting snack time.
-
Garlic Butter Pasta: A warm, buttery pasta dish brings an indulgent touch that complements the savory dippers while still being easy to make.
-
Pickle Platter: A tangy assortment of pickles adds brightness to the meal. Their bite cuts through the richness of the cheese, providing a refreshing palate cleanser.
-
Fruit Salad: Bright, fresh fruits like apples or grapes bring a sweet balance to the savory dippers, offering a delightful texture contrast that appeals to everyone.
-
Sweet Potato Fries: Crispy, slightly sweet fries add a fun twist; they create a hearty experience alongside the dippers, making for a delightful bite.
Whether you’re whipping up a snack for game day or entertaining friends, these pairings will elevate your culinary experience!
Mini Grilled Cheese Dippers Variations
Feel free to customize your Mini Grilled Cheese Dippers for a truly personalized experience that tantalizes your taste buds!
-
Dairy-Free: Use vegan cheese alternatives and a plant-based spread for a creamy, dairy-free option. Enjoy the classic flavors without the dairy!
-
Spicy Kick: Add sliced jalapeños or sprinkle red pepper flakes inside for a delightful heat. It’s a fantastic twist that elevates the overall flavor profile.
-
Herbed Delight: Mix in fresh herbs like basil or dill into your cheese blend for added freshness and a burst of flavor. This simple change creates a gourmet touch.
-
Bacon Lovers: Layer in crispy bacon bits or prosciutto between the cheese for a savory, smoky flavor. Each bite becomes a delightful experience of crunchy and cheesy goodness.
-
Veggie-Boosted: Incorporate thinly sliced tomatoes or spinach for a nutritious twist. Not only does it taste great, but it also adds a splash of color to your dish!
-
Nutty Alternative: Switch in Gruyère or fontina cheese for a nuttier flavor and exceptional meltiness. This variation is simply divine and will impress your guests!
-
Sweet & Savory: Experiment with a touch of apple slices or fig jam alongside your cheese for a sweet contrast that brings fresh excitement to your palate. Who knew sweet could pair so beautifully with cheesy?
Looking for more exciting cheese ideas? Check out these delicious Mini Pumpkin Cheese or explore a creamy twist with Pumpkin Mac Cheese!
Expert Tips for Mini Grilled Cheese Dippers
Choose the Right Bread: Use a sturdy bread like sourdough or whole wheat; this will prevent sogginess and keep your Mini Grilled Cheese Dippers crispy.
Mix Your Cheeses: Experiment with a blend of cheeses for added flavor. Combining sharp cheddar with gooey provolone enhances both taste and texture.
Monitor the Heat: Keep your skillet on medium heat to ensure even cooking. Too high a temperature can burn the bread before the cheese melts completely.
Crispiness Matters: Generously spread butter or mayonnaise on the outside of the bread; this creates that delicious golden crust when grilling.
Avoid the Microwave: To reheat leftovers, skip the microwave. Instead, use a skillet or air fryer to preserve that delightful crispiness of your Mini Grilled Cheese Dippers.
Mini Grilled Cheese Dippers Recipe FAQs
Which type of bread is best for Mini Grilled Cheese Dippers?
For optimal crunchiness and to avoid sogginess, I recommend using a sturdy bread like sourdough or whole wheat. If you’re looking for a gluten-free option, gluten-free bread is a great choice and works beautifully in this recipe!
How should I store Mini Grilled Cheese Dippers?
Store your cooled Mini Grilled Cheese Dippers in an airtight container for up to 2 days. To keep them crispy, layer them with parchment paper, which helps prevent sticking. Ensure they are completely cooled before storing!
Can I freeze Mini Grilled Cheese Dippers?
Absolutely! You can freeze assembled but uncooked dippers. Just place them on a baking sheet in a single layer until solid, then transfer them to a freezer bag for storage up to 3 months. This way, you’ll have a quick and easy snack ready to fry whenever the craving hits!
What should I do if my dippers are soggy after cooking?
To prevent sogginess, ensure you use a sturdy bread and maintain a medium heat while grilling to give them adequate time to crisp up. If you do end up with soggy dippers, a quick reheat in a skillet over medium heat should help restore some of that delightful crunch!
Are Mini Grilled Cheese Dippers suitable for those with dietary restrictions?
Yes! This recipe is flexible—using gluten-free bread caters to those with gluten sensitivities. Just make sure all ingredients, like cheese and condiments, are gluten-free. Additionally, you can customize the filling to avoid any allergens by choosing cheeses and spreads based on personal needs.
How can I enhance the flavor of my Mini Grilled Cheese Dippers?
Mixing different types of cheese is a fantastic way to amp up flavor! Combining sharp cheddar with a gooey cheese like provolone or Gruyère allows you to achieve an irresistible texture and taste. You can also consider adding thinly sliced vegetables or deli meats inside the sandwiches for a unique twist!

Mini Grilled Cheese Dippers That Will Elevate Snack Time
Ingredients
Equipment
Method
- Prepare the Bread: Slice your chosen bread into small, uniform squares, about 2 inches each.
- Assemble the Sandwiches: Layer cheeses between two pieces of bread to create mini sandwiches.
- Top the Sandwiches: Spread butter or mayonnaise on outer sides of each sandwich.
- Grill the Sandwiches: Preheat a skillet over medium heat and grill each side for about 3-4 minutes.
- Rest and Slice: Remove from skillet, rest for a minute, then slice each sandwich into dippers.
- Create the Dippers: Serve warm dippers on a platter alongside a cup of tomato soup.
Leave a Reply