
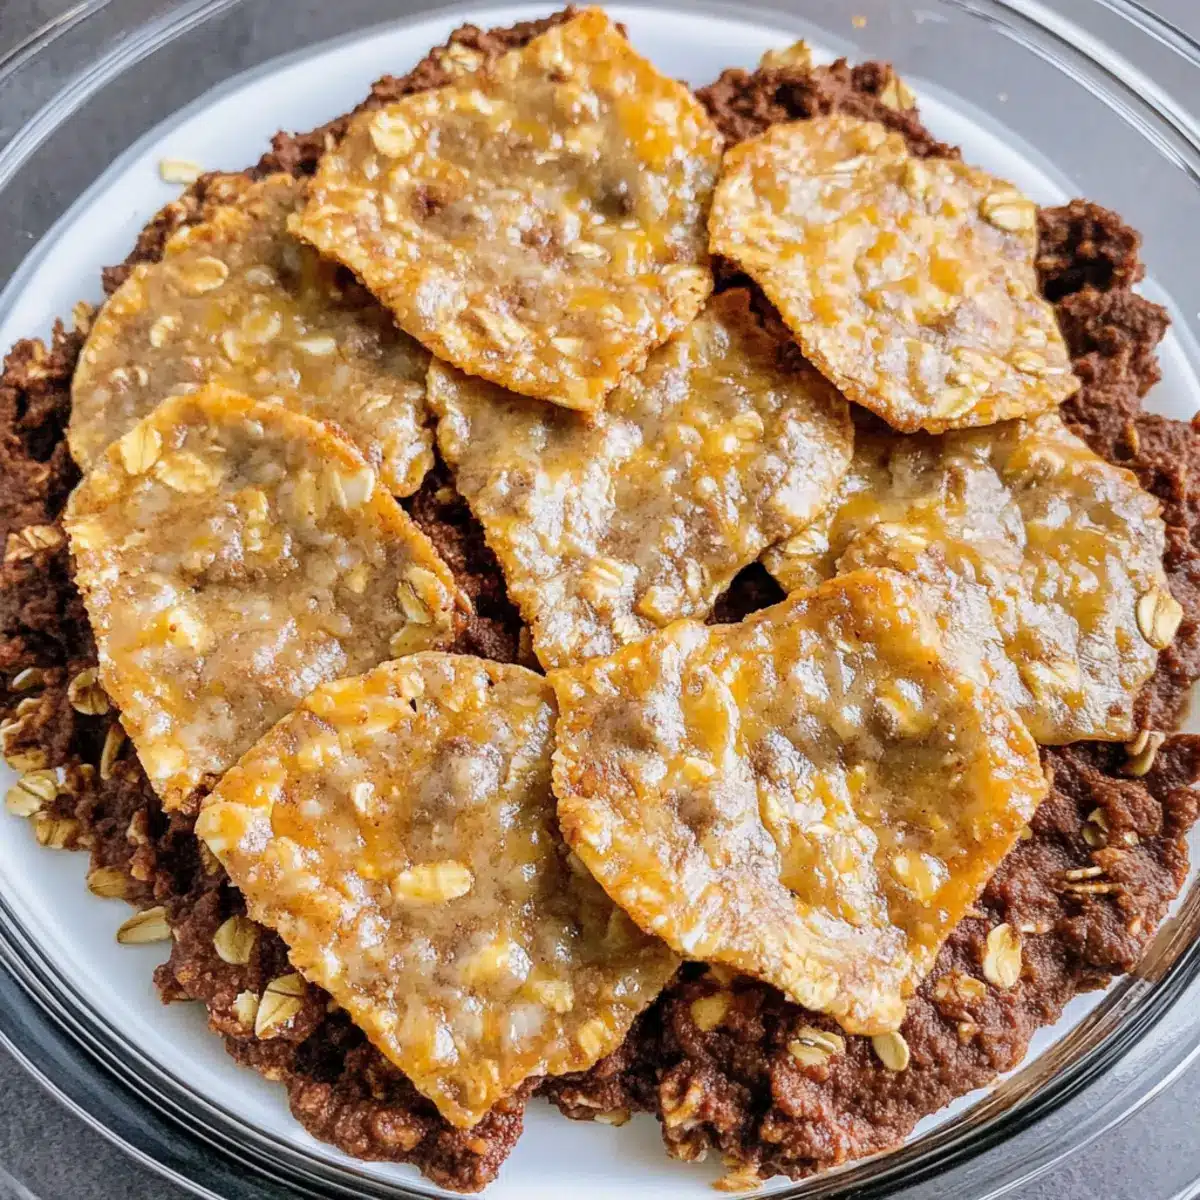
As I sifted through my pantry one evening, I stumbled upon a few humble ingredients that sparked a creative moment. Yes, I was about to whip up something wonderful with just four items! Enter my 4-Ingredient Gluten-Free Chocolate Oat Cookies, the simplest yet most satisfying treat you can make. These chewy delights come together in mere minutes, making them perfect for those late-night cravings or a sweet afternoon snack. Not only are they gluten-free, but they also offer a healthy twist on your traditional cookie, satisfying your chocolate tooth without guilt. Can a dessert get any easier or more delicious? Trust me, once you experience the warm aroma filling your kitchen, you’ll be eager to take a bite. Ready to create something magical? Let’s dive into this uncomplicated yet rewarding baking adventure!

Why are these cookies a game changer?
Simplicity: With just four ingredients, making these cookies is a breeze—perfect for busy days or spontaneous cravings!
Healthy Indulgence: They satisfy your sweet tooth without the guilt, using wholesome oats and nut butter for a nutritious twist.
Quick Bake: In less than 15 minutes, you can have a delicious batch fresh from the oven, ideal for rewarding yourself after a long day.
Versatility: Feel free to mix in your favorite extras like nuts or dried fruits; each batch can be a delightful surprise!
Crowd-Pleaser: Whether for kids’ snacks or a dinner party dessert, these cookies are sure to impress everyone. Pair them with a glass of milk or coffee for an unforgettable treat!
4-Ingredient Gluten-Free Chocolate Oat Cookies Ingredients
For the Cookies
- Oats – Use rolled or quick oats to provide the chewy texture that makes these cookies irresistible.
- Nut Butter (e.g., peanut or almond) – This adds moisture and richness; sunflower seed butter works well for a nut-free version.
- Sweetener (e.g., honey or maple syrup) – A key binding agent; feel free to reduce for less sweetness or choose a sugar alternative for a healthier option.
- Cocoa Powder – Unsweetened cocoa brings a deep chocolate flavor that’s essential to these delightful cookies.
Optional Additions
- Chocolate Chips – Add a handful for extra chocolate goodness if you’re craving a more decadent treat!
- Vanilla Extract – A splash can elevate the flavor profile and add warmth to the cookies.
- Dried Fruits or Nuts – Fold these in for added texture and nutrition, making each batch uniquely yours!
These 4-ingredient gluten-free chocolate oat cookies are not only simple to whip up but they’re sure to become your go-to for a quick dessert or an energizing snack!
Step‑by‑Step Instructions for 4-Ingredient Gluten-Free Chocolate Oat Cookies
Step 1: Preheat the Oven
Begin by preheating your oven to 350°F (175°C). This step is essential as it ensures your cookies will bake evenly and achieve that perfect golden hue. While the oven warms up, gather your baking sheet and line it with parchment paper for easy cleanup and to prevent sticking.
Step 2: Mix the Ingredients
In a large mixing bowl, combine 1 cup of rolled oats, ½ cup of nut butter, ⅓ cup of your chosen sweetener, and ¼ cup of unsweetened cocoa powder. Use a spatula to thoroughly mix the ingredients until a well-blended, dough-like consistency forms. The mixture should be sticky yet hold together, making it perfect for shaping your cookies.
Step 3: Shape the Cookies
Using a tablespoon, scoop out portions of the dough and place them onto the prepared baking sheet, ensuring you leave space between each cookie. Gently press down on each dough ball to flatten it slightly, as they won’t spread much during baking. This step is crucial to ensure that your 4-ingredient chocolate oat cookies cook evenly.
Step 4: Bake the Cookies
Slide the baking sheet into the preheated oven and bake for about 10-12 minutes. You’ll know they are ready when the edges appear set while the centers remain soft. Keep an eye on them, as baking time may vary slightly depending on your oven, and it’s better to underbake than overbake these delightful treats.
Step 5: Cool the Cookies
Once baked, remove the cookies from the oven and let them cool on the baking sheet for about 5 minutes. This resting time allows them to firm up before transferring. Afterward, gently move the cookies to a wire rack to cool completely, enhancing their chewy texture and chocolate flavor with every bite.
How to Store and Freeze Chocolate Oat Cookies
Room Temperature: Store your chocolate oat cookies in an airtight container at room temperature for up to 7 days to maintain their chewy texture.
Fridge: For longer freshness, keep the cookies in the fridge where they will stay good for up to 2 weeks, but remember they may firm up slightly.
Freezer: To extend their shelf life, freeze the cookies in a single layer, then transfer to an airtight bag or container. They’ll stay delicious for up to 1 month!
Reheating: When you’re ready to enjoy, simply warm them in the microwave for a few seconds or let them thaw at room temperature for a few minutes. These chocolate oat cookies will delight your taste buds every time!
Make Ahead Options
These 4-Ingredient Gluten-Free Chocolate Oat Cookies are fantastic for meal prep! You can prepare the cookie dough up to 24 hours in advance by mixing all the ingredients and storing the mixture in an airtight container in the refrigerator. This helps maintain the cookies’ chewy texture and ensures freshness. When you’re ready to bake, simply scoop and shape the dough, bake as instructed for 10-12 minutes, and enjoy delicious cookies that taste just as good as freshly made! For longer storage, freeze the shaped cookie dough balls for up to 3 months; just add a few extra minutes to the baking time when you take them out. These make-ahead tips will make your busy weekdays a breeze!
4-Ingredient Chocolate Oat Cookies Variations
Feel free to let your creativity shine with these tempting twists on your chocolate oat cookies!
- Nut-Free: Swap out the nut butter for sunflower seed butter to accommodate allergies and keep the same creamy texture.
- Sweetener Swap: Try using agave syrup or coconut nectar for a different sweetness profile, delighting your palate with a new layer of flavor. A quick switch can change the mood of your cookies entirely!
- Add Texture: Incorporate chopped nuts or seeds into the dough for an extra crunch, giving your cookies a satisfying bite that’s sure to impress. It’s like finding a treasure in every morsel!
- Chocolate Lovers: Mix in dark chocolate chips or chunks for an indulgent upgrade that will have chocolate enthusiasts raving. Trust me, doubling the chocolate is always a hit!
- Fruity Twist: Toss in some dried fruits like cranberries or raisins to balance the rich chocolate with a touch of natural sweetness and chewiness, making each bite more adventurous!
- Spicy Kick: Add a dash of cinnamon or even a hint of cayenne for a surprising and flavorful heat that pairs wonderfully with chocolate. It’s a fantastic way to awaken your taste buds!
- Cacao Nib Power: For a unique crunch and additional chocolate flavor, fold in cacao nibs before baking; their bold taste adds depth and intensity to every cookie.
- Flavor Infusion: A splash of vanilla extract or instant coffee granules can elevate the flavor profile, creating a warm, inviting aroma that fills your kitchen and captivates your senses.
If you’re looking for more simple and satisfying recipes, why not try my Beef Pasta Protein or indulge in a comforting Crock Pot Beef dish? Each offers delicious flavors and wholesome ingredients, perfect for sharing with friends and family!
Expert Tips for 4-Ingredient Gluten-Free Chocolate Oat Cookies
-
Smooth Nut Butter: Ensure your nut butter is perfectly smooth to avoid stubborn clumps in your cookie dough that could affect the texture.
-
Mind the Bake Time: Be attentive while baking; remove the cookies when they’re soft in the center to achieve the chewy texture you desire.
-
Flavor Enhancements: Add a pinch of salt or a splash of vanilla extract to boost the flavor profile of your 4-ingredient chocolate oat cookies for an extra layer of delight.
-
Dough Consistency: If your mixture feels too dry, a teaspoon of water or extra nut butter can help bind the ingredients better, preventing crumbly cookies.
-
Experiment with Add-ins: Consider mixing in chopped nuts, dried fruits, or even chocolate chips for a delicious twist that personalizes your cookies and enhances their nutrition.
What to Serve with 4-Ingredient Gluten-Free Chocolate Oat Cookies
Imagine the delightful contrast of flavors and textures that can elevate your cookie experience to new heights; let’s build the perfect pairing!
-
Creamy Greek Yogurt: The tanginess beautifully complements the rich chocolate flavor, while the creaminess adds a luxurious element.
-
Fresh Berries: Juicy strawberries or raspberries add a burst of freshness and natural sweetness, balancing the chewy cookie perfectly.
-
Nutty Granola: The crunchy texture of granola adds an exciting contrast, providing an enjoyable crunch with each bite.
-
Melted Dark Chocolate: Drizzling warm melted dark chocolate over the cookies creates an extra indulgent treat for hardcore chocolate lovers.
Pairing these cookies with a beverage can also enhance the experience.
-
Iced Coffee: The bold flavors of coffee mesh wonderfully with the chocolatey goodness, making for a delightful afternoon treat.
-
Milk Shake: A thick, creamy milkshake adds a nostalgic touch that pairs wonderfully with the chewy texture of your cookies.
-
Herbal Tea: A warm cup of chamomile or peppermint tea can create a soothing experience that balances the sweetness.
-
Chocolate Ice Cream: For a decadent dessert, serve a scoop of chocolate ice cream alongside the cookies for the ultimate treat!

4-Ingredient Gluten-Free Chocolate Oat Cookies Recipe FAQs
How do I know if my ingredients are ripe or fresh?
Absolutely! When selecting oats, ensure they are in a sealed bag and free of moisture. For nut butter, check that it’s creamy and smooth, with no dry clumps or separation. The sweetener should be in a liquid state, while cocoa powder should be dry and dark without any clumps, indicating freshness.
What is the best way to store leftover cookies?
Very! Store your 4-Ingredient Gluten-Free Chocolate Oat Cookies in an airtight container at room temperature for up to 7 days. Alternatively, if you’re looking for extended freshness, refrigerate them for up to 2 weeks. They may firm up a bit, but a few seconds in the microwave can restore their delightful chewiness!
Can I freeze the cookies? If so, how?
Certainly! To freeze your cookies, place them in a single layer on a baking sheet until they are completely frozen. Then, transfer them to an airtight container or a freezer-safe bag. This method prevents them from sticking together. They will maintain their deliciousness for up to 1 month. When you’re ready to devour them, simply thaw at room temperature or pop them in the microwave for a few seconds!
How can I prevent the cookies from turning out too dry or crumbly?
Absolutely! The key is to ensure your mixture is sticky. If the dough feels too dry when mixing, try adding a teaspoon of water or an extra spoonful of nut butter to achieve a better consistency. This will help keep the cookies soft and chewy! Also, remember not to overbake—taking them out when they’re slightly undercooked aids in achieving that perfect texture.
Are there any dietary considerations I should keep in mind?
Very much so! For nut allergies, you can easily substitute the nut butter with sunflower seed butter, making these cookies nut-free while still delicious. If you’re watching your sugar intake, opt for a sugar alternative like stevia or agave syrup. Always check your cocoa powder and other add-ins for allergens if you’re catering to specific dietary needs!
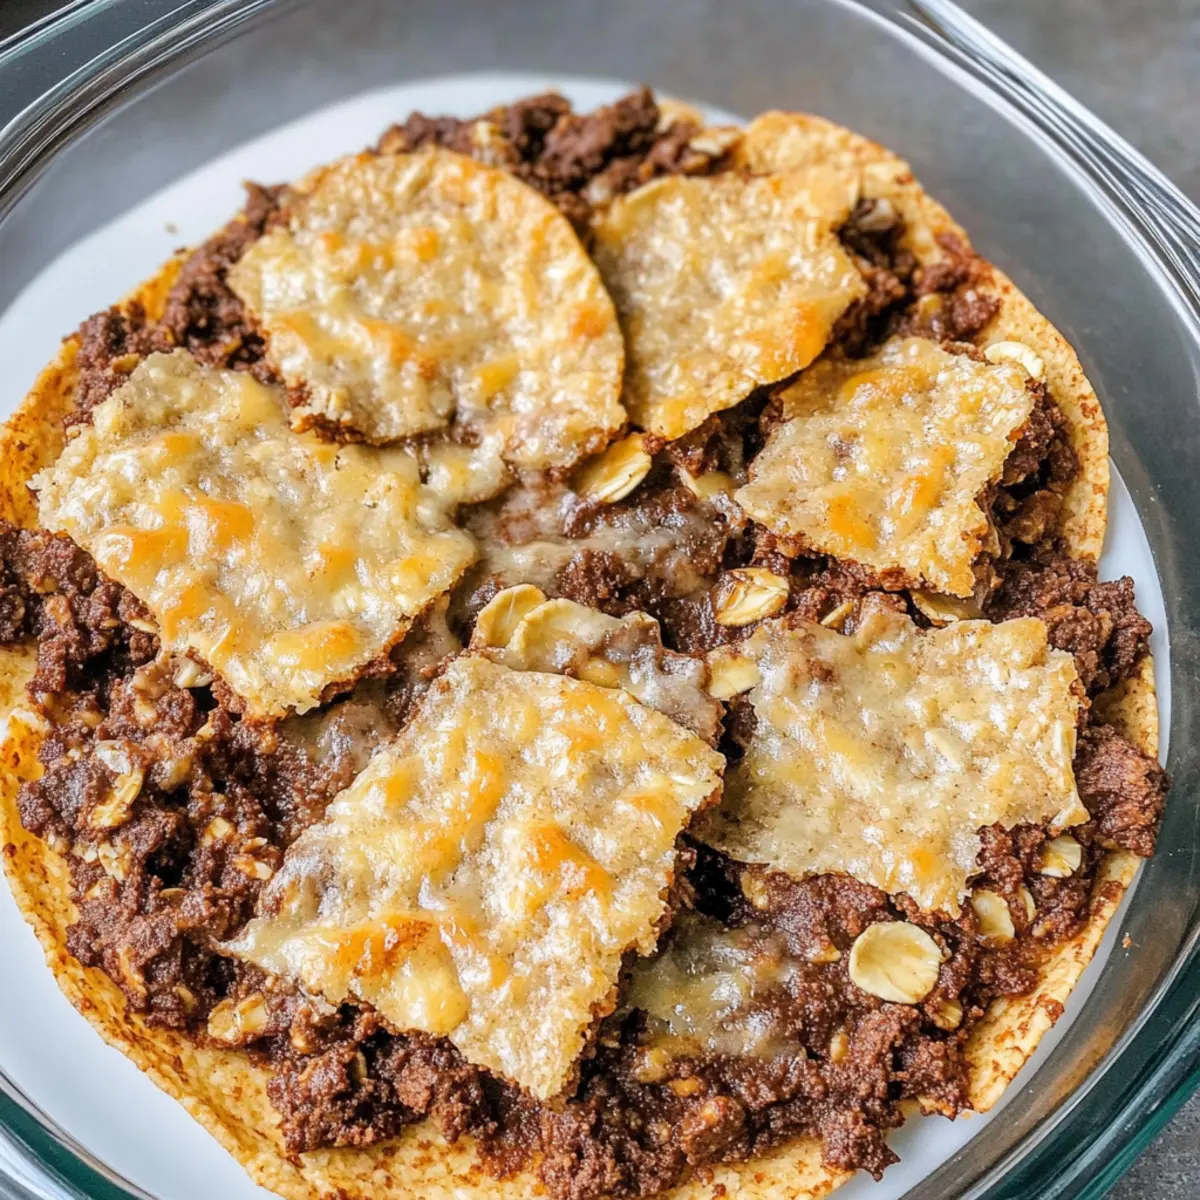
Quick and Cheesy 4-Ingredient Beef Quesadilla Bake Delight
Ingredients
Equipment
Method
- Preheat your oven to 350°F (175°C).
- In a mixing bowl, combine the cooked ground beef and salsa.
- Layer half of the tortillas at the bottom of a baking sheet.
- Spread the beef and salsa mixture over the tortillas.
- Top with shredded cheese and then layer the remaining tortillas on top.
- Bake in the preheated oven for 15 minutes or until cheese is melted.
- Remove from the oven and let cool for 5 minutes before slicing.
Leave a Reply