
The sound of crackling campfires and laughter hangs in the air, mixing with the mouthwatering scent of melting chocolate and toasted marshmallows. There’s something magical about those camping nights when a simple s’more would ignite joy and spark childhood memories. Now, I’m thrilled to share a playful twist on that classic treat with my Easy No-Bake S’mores Marshmallow Pops! These delightful pops are not only a breeze to whip up—perfect for those busy afternoons—but they also bring a touch of nostalgia, making them an instant hit with kids and adults alike. Ideal for any celebration or as a sweet indulgence after a long day, these pops will have your loved ones reaching for more. Are you ready to dive into this easy and fun recipe? Let’s get started!
Why Are S’mores Marshmallow Pops Irresistible?
Nostalgia, these S’mores Marshmallow Pops transport you back to carefree campfire nights filled with laughter and sweetness. Quick & Easy, they require no baking, making them perfect for any busy home cook. Versatile Toppings allow you to get creative: try nuts, sprinkles, or different chocolates! Crowd Pleaser, both kids and adults can’t resist their charm. Plus, they’re simple enough to whip up for any occasion—like a birthday party or a fun family treat. Looking for more no-bake ideas? Check out these delicious Marshmallow Rice Krispies for another easy dessert!
S’mores Marshmallow Pops Ingredients
For the Marshmallows
• Marshmallows – They provide ultimate chewiness; use regular or jumbo for variation.
For the Chocolate Coating
• White Chocolate Morsels/Almond Bark – This adds a sweet, creamy coating; can be substituted with any favorite melting chocolate.
• Milk Chocolate Morsels – Enhances rich chocolate flavor; try dark chocolate for a deeper taste.
• Vegetable Shortening – Used to adjust consistency when melting chocolate; optional if melting goes smoothly.
For the Coating and Texture
• Graham Crackers – Offers that iconic crunchy texture and authentic S’mores flavor; swap with crushed digestive biscuits for a twist.
Feel free to sprinkle your creativity on these S’mores Marshmallow Pops by adding your favorite toppings!
Step‑by‑Step Instructions for S’mores Marshmallow Pops
Step 1: Prep the Sticks
Begin by inserting four marshmallows onto each skewer or straw, spacing them evenly. Lay these prepared marshmallow sticks on a piece of wax paper. This setup will make it easy to coat them later and keeps your workspace tidy while you work on the S’mores Marshmallow Pops.
Step 2: Melt the White Chocolate
In a microwave-safe bowl, add your white chocolate morsels. Microwave them in 30-second intervals, stirring in between until smooth and fully melted—this should take about 1-2 minutes total. If using, stir in a small amount of vegetable shortening to achieve a silky consistency, making it easier to coat your marshmallows evenly.
Step 3: Coat the Marshmallows
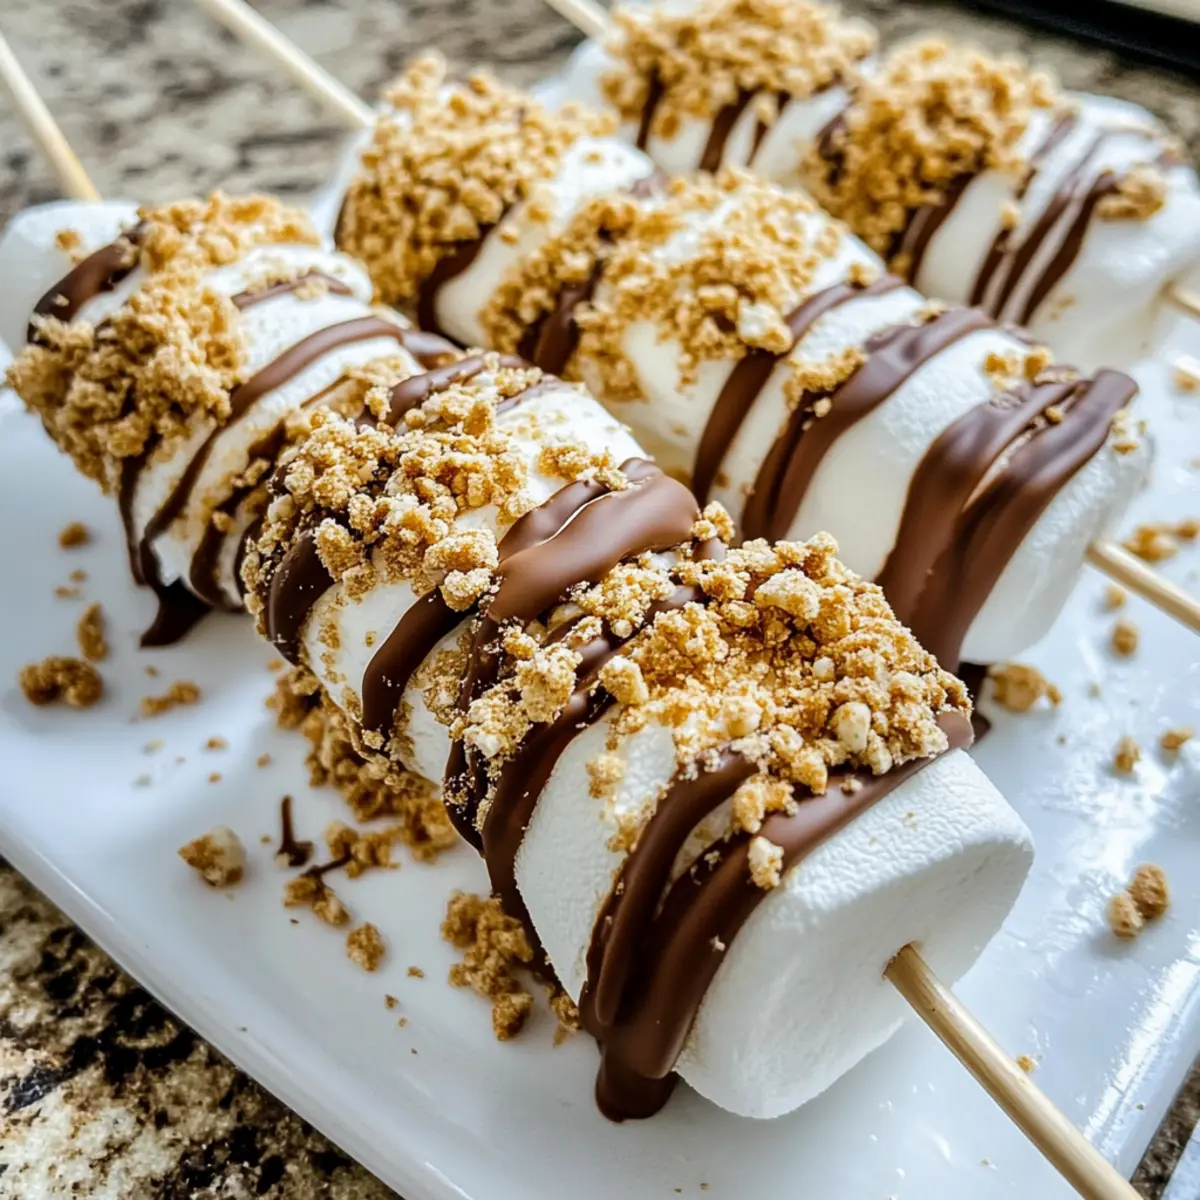
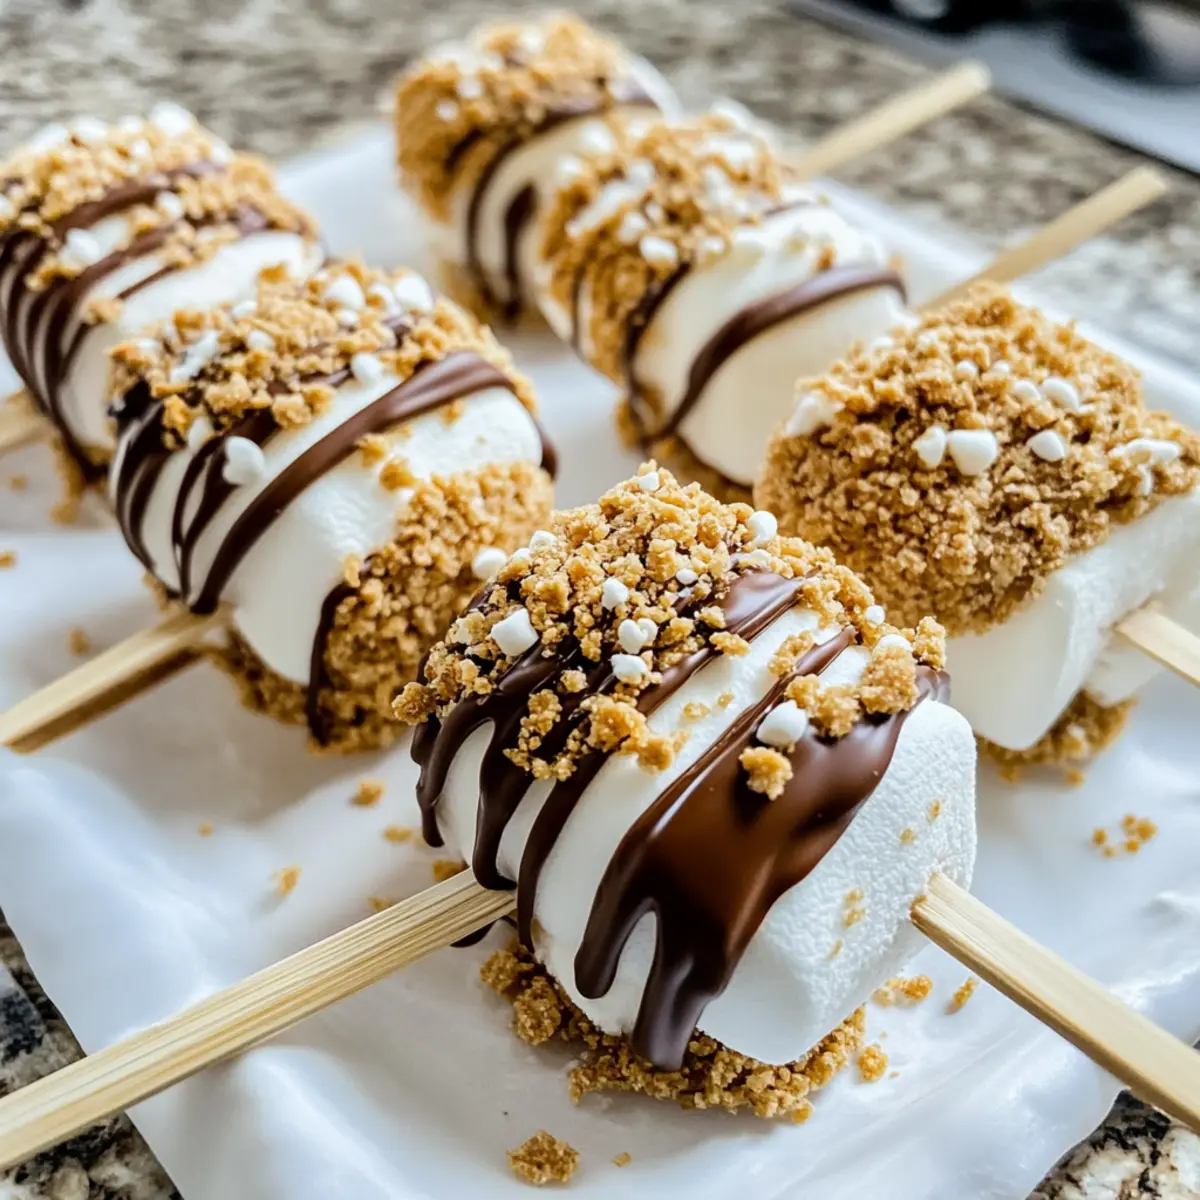
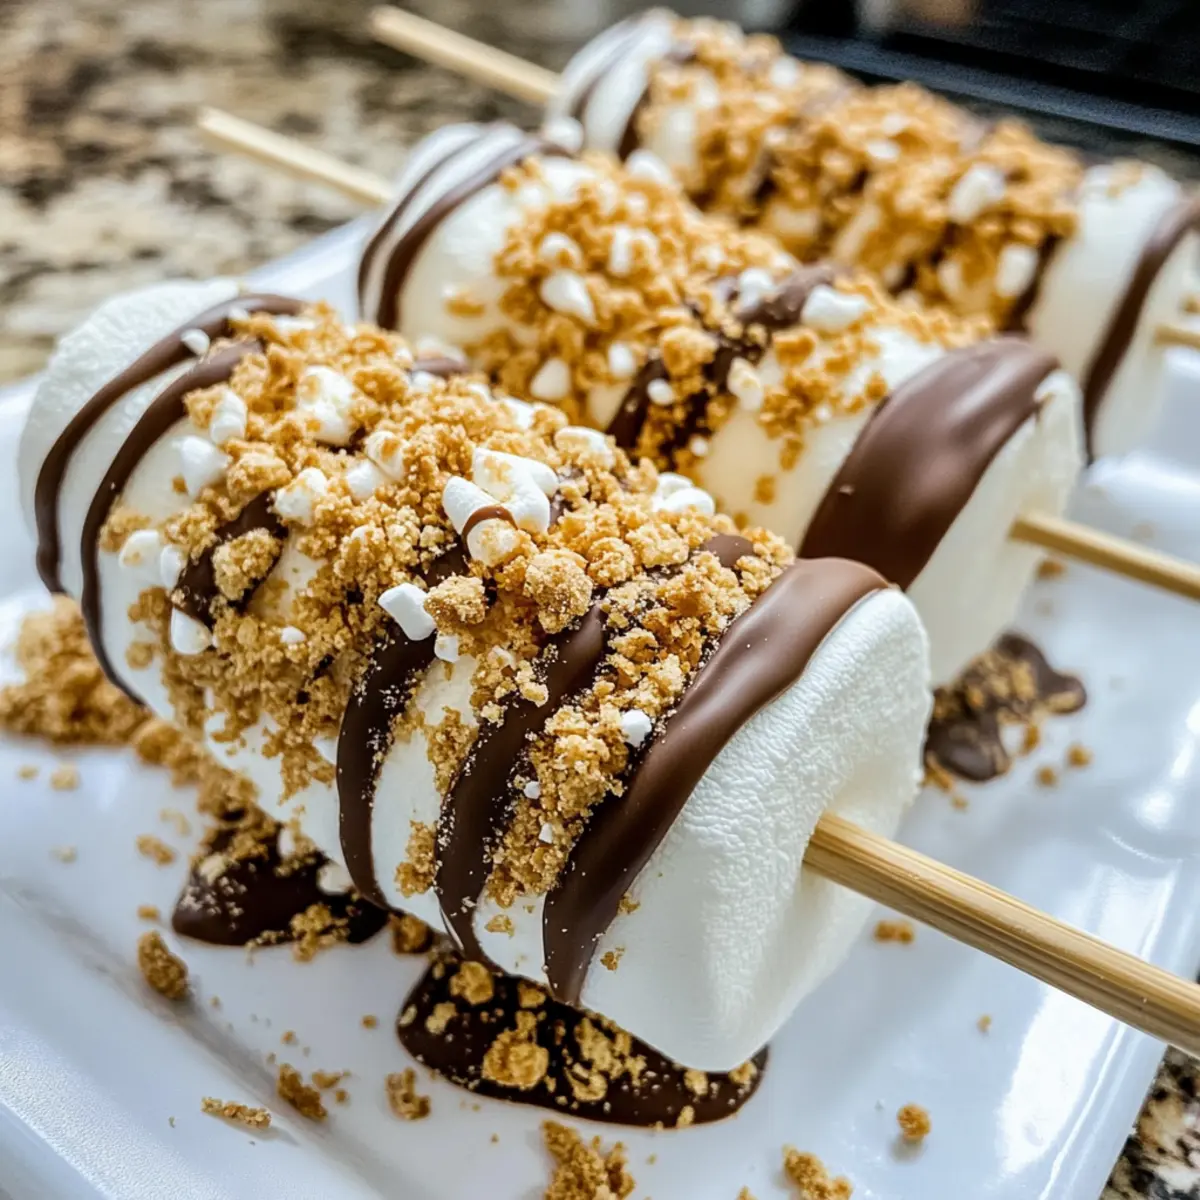
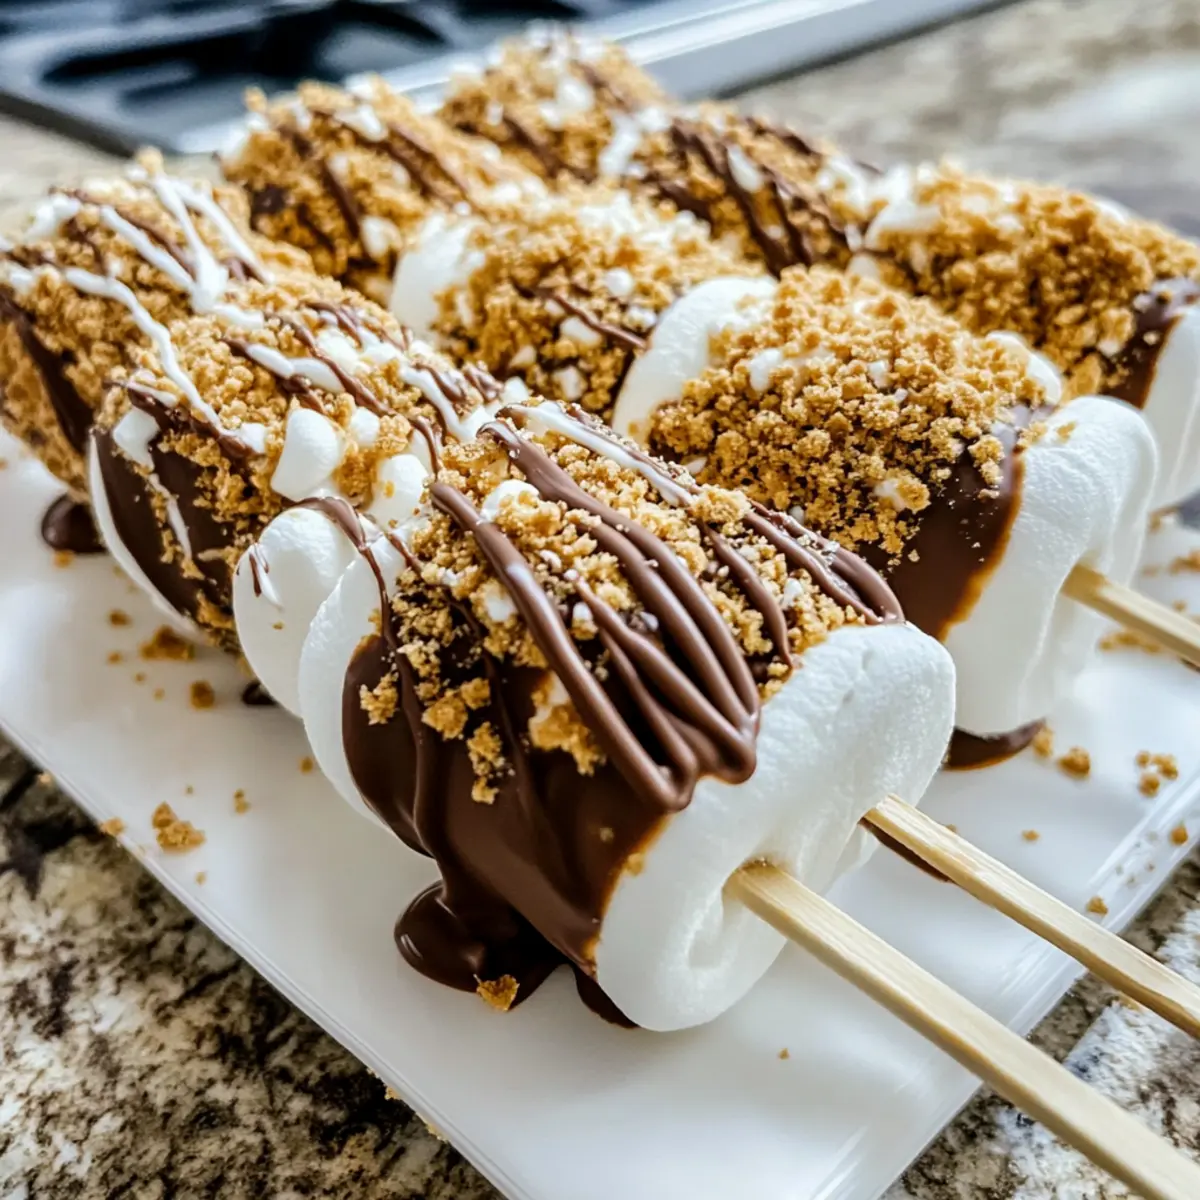
Once the chocolate is melted, take each marshmallow stick and dip it into the white chocolate, allowing excess to drip back into the bowl. Immediately roll the coated marshmallows in the crushed graham crackers until thoroughly covered. Place the coated pops back onto the wax paper to set and cool slightly while you move on to the next step.
Step 4: Drizzle Remaining White Chocolate
Transfer any leftover melted white chocolate into a piping bag or a zip-top bag with a corner cut off. Drizzle this over the graham cracker-coated marshmallow pops for an elegant finish. Allow the drizzle to set at room temperature, which should take about 15-20 minutes.
Step 5: Melt the Milk Chocolate
Now, repeat the melting process using milk chocolate morsels—microwave in 30-second intervals, stirring until smooth. This rich chocolate will add depth to your S’mores Marshmallow Pops. Once melted, it’s ready for drizzling; just like before, be careful not to burn it!
Step 6: Decorate with Milk Chocolate
Using a piping bag or the zip-top bag, drizzle the melted milk chocolate over your already prepared S’mores Marshmallow Pops. To enhance the visual appeal, sprinkle mini marshmallow bits or additional crushed graham crackers on top. Let these pops sit at room temperature for another 15-20 minutes, allowing everything to harden beautifully.
Step 7: Serve and Enjoy
Once the chocolate has completely set, your S’mores Marshmallow Pops are ready to be enjoyed! You can serve them directly from the wax paper or place them in a decorative container for fun gatherings. Store any leftovers in an airtight container to keep them fresh for up to a week.
What to Serve with Easy No-Bake S’mores Marshmallow Pops
These delightful treats are the perfect canvas for creating a fun-filled dessert table that everyone will love.
-
Graham Cracker Crust Cheesecake: A creamy cheesecake on a graham cracker base mirrors the S’mores flavor profile, adding a rich contrast. Pairing these two desserts brings a nostalgic balance to the table.
-
Fruit Skewers: Bright, fresh fruit skewers can elevate your sweet spread with their juicy textures. Strawberries and pineapple make a refreshing contrast to the rich chocolate.
-
Chocolate Milkshakes: Indulge in ice-cold chocolate milkshakes that complement the sweetness of the pops and offer a creamy, dreamy pairing for a nostalgic experience.
-
Campfire Hot Dogs: For a delicious twist, serve these alongside classic campfire hot dogs to round out the outdoor vibe, echoing the fun of campfire nights.
-
Ice Cream Sundae Bar: Create a build-your-own sundae station. The pops are perfect for topping off sundaes with their delightful crunch and sweetness.
-
S’mores Dip: A warm S’mores dip served with marshmallows and crispy graham crackers gives a fun interactive element. Guests can dip their pops for extra gooey goodness.
-
Sparkling Water: To keep things refreshing and light, serve with lemon or lime-infused sparkling water, adding a fizzy touch to your dessert party.
-
Mini Cupcakes: Light and fluffy mini cupcakes can add a lovely variety to your dessert table, allowing guests to indulge in an array of flavors alongside the S’mores Marshmallow Pops.
Make Ahead Options
These S’mores Marshmallow Pops are perfect for meal prep enthusiasts looking to save time on busy days! You can prepare the marshmallow sticks and coat them in white chocolate and graham cracker crumbs up to 24 hours in advance. To maintain their delightful texture, refrigerate the coated pops in an airtight container; this will keep them fresh and delicious. When you’re ready to serve, simply melt the milk chocolate (within 1 hour before serving), drizzle over the pops, and let it set at room temperature for about 15-20 minutes. This way, you’ll have an easy, fun dessert ready to impress whenever you need it!
Expert Tips for S’mores Marshmallow Pops
• Chocolate Melting: Always melt chocolate in short bursts to prevent burning, stirring between intervals for an even consistency.
• Stay Fresh: To keep your S’mores Marshmallow Pops deliciously fresh, store them in an airtight container at room temperature for up to a week.
• Experiment with Toppings: Don’t hesitate to get creative! Try adding various toppings like nuts, sprinkles, or flavored chocolates for a personal touch.
• Using Shortening: If your melted chocolate thickens, add a small amount of vegetable shortening to smooth it out and ease the coating process.
• Choosing Marshmallows: For an extra chewy treat, go for jumbo marshmallows. If using regular ones, you can sandwich two together for additional fluffiness.
S’mores Marshmallow Pops Variations
Feel free to unleash your creativity and personalize these delightful treats to your taste and dietary needs!
-
Gluten-Free: Substitute graham crackers with gluten-free cookies for all the flavor without the gluten.
-
Dairy-Free: Use dairy-free chocolate and almond-based marshmallows for a totally inclusive treat that everyone can enjoy!
-
Nutty Twist: Add crushed nuts like almonds or pecans into the graham cracker coating for an extra crunch and richness.
-
Spicy Kick: Drizzle with a bit of spicy chocolate sauce or sprinkle cayenne pepper over the chocolate for a surprising hint of heat.
-
Fruit Fusion: Top with diced strawberries or banana slices before drizzling the chocolate—fruity freshness complements the sweetness beautifully.
-
Fruity Flavor: Fold in some fruit-flavored chocolate melts or drizzle with berry sauce for a refreshing twist—an excellent way to mix flavors and colors!
-
Mix-and-Match: Combine white, dark, and milk chocolate for a visually stunning and flavorful coating—perfect for parties!
-
Fun Sprinkles: Decorate with colorful sprinkles for festive occasions—it adds a splash of joy and excitement, just like these Marshmallow Rice Krispies do for any gathering!
Let your imagination take flight as you explore these options—making every batch uniquely yours!
How to Store and Freeze S’mores Marshmallow Pops
Airtight Container: Store your S’mores Marshmallow Pops in an airtight container at room temperature to keep them fresh for up to a week. This helps maintain their delightful texture and flavor.
Refrigeration: If you need to store them for longer, place the pops in the fridge. They can last up to 2 weeks, but make sure to seal them well to prevent absorbing any fridge odors.
Freezing: For even longer storage, freeze your pops. Wrap each pop individually in plastic wrap and place them in a freezer-safe container. They can be frozen for up to 2 months.
Reheating Tips: When ready to enjoy, simply let frozen S’mores Marshmallow Pops thaw at room temperature for about 30 minutes before serving. Avoid microwaving as it might melt the chocolate coating.
S’mores Marshmallow Pops Recipe FAQs
How do I choose the best marshmallows for my S’mores Marshmallow Pops?
Absolutely! For the ultimate chewiness and flavor, go for regular or jumbo marshmallows. Jumbo marshmallows add a delightful fluffiness and ensure that each pop is filled with that classic marshmallow goodness. If you’re looking for something fun, consider using colored or flavored marshmallows to surprise the kids!
How do I store S’mores Marshmallow Pops to keep them fresh?
Very! Store your S’mores Marshmallow Pops in an airtight container at room temperature for up to a week. This method preserves their delightful chewy texture and prevents them from getting sticky. If you want to keep them longer, you can refrigerate them for up to 2 weeks, but ensure they’re sealed tightly.
Can I freeze S’mores Marshmallow Pops, and if so, how?
Yes, you can! To freeze, wrap each pop individually in plastic wrap and then place them in a freezer-safe container or a zip-top bag. They will maintain their quality for up to 2 months in the freezer. When you’re ready to enjoy them, simply let them thaw at room temperature for about 30 minutes. Avoid microwaving, as this may cause the chocolate coating to melt unevenly.
What should I do if my chocolate is too thick to coat the marshmallows?
No worries! If you find that your melted chocolate is thick, simply stir in a small amount of vegetable shortening to loosen it up. Heat the chocolate in short 30-second intervals in the microwave, stirring in between until you reach a smooth and pourable consistency. This will make it so much easier to coat your S’mores Marshmallow Pops.
Are S’mores Marshmallow Pops suitable for people with allergies?
It depends! The base ingredients are generally vegetarian, but if you’re catering to specific dietary needs, be mindful of any allergies, especially to chocolate or nuts. For a gluten-free option, swap the graham crackers for gluten-free cookies. Always check the labels for potential allergens in your chocolate and toppings to ensure everyone can enjoy these delightful treats!
S'mores Marshmallow Pops: A Fun Twist on Classic Treats
Ingredients
Equipment
Method
- Begin by inserting four marshmallows onto each skewer or straw, spacing them evenly. Lay these prepared marshmallow sticks on a piece of wax paper.
- In a microwave-safe bowl, add your white chocolate morsels. Microwave them in 30-second intervals, stirring in between until smooth and fully melted—this should take about 1-2 minutes total.
- Once the chocolate is melted, take each marshmallow stick and dip it into the white chocolate, allowing excess to drip back into the bowl. Immediately roll the coated marshmallows in the crushed graham crackers until thoroughly covered.
- Transfer any leftover melted white chocolate into a piping bag or a zip-top bag with a corner cut off. Drizzle this over the graham cracker-coated marshmallow pops for an elegant finish. Allow the drizzle to set at room temperature for about 15-20 minutes.
- Now, repeat the melting process using milk chocolate morsels—microwave in 30-second intervals, stirring until smooth.
- Using a piping bag or the zip-top bag, drizzle the melted milk chocolate over your already prepared S’mores Marshmallow Pops. Sprinkle mini marshmallow bits or additional crushed graham crackers on top.
- Once the chocolate has completely set, serve the S’mores Marshmallow Pops directly from the wax paper or place them in a decorative container.
Leave a Reply