
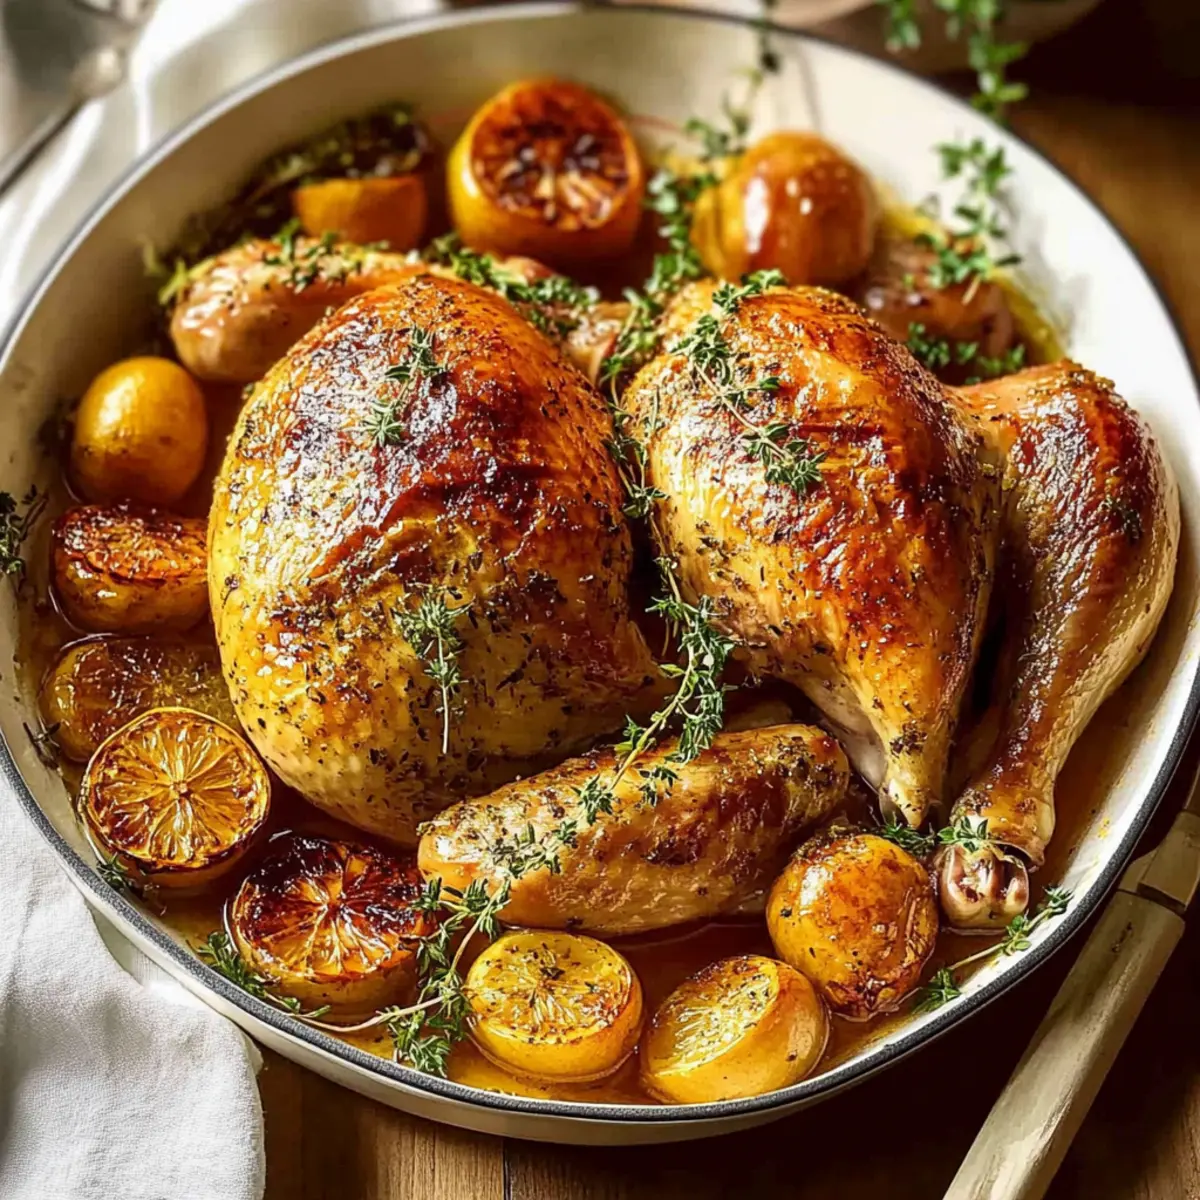
Standing in the kitchen, the enticing aroma of herbs and roasting turkey brings me right back to my childhood holiday feasts. This year, I’m thrilled to share my go-to recipe for a Succulent Dry Brined Turkey, a foolproof method that guarantees juicy, flavorful meat and perfectly crispy skin. What I love about dry brining is how it deeply enhances the turkey’s natural flavors while cutting down on prep time—no more fussing with messy wet brines! With just a handful of simple ingredients like kosher salt and fresh herbs, your holiday centerpiece will not only impress your guests but also keep them coming back for seconds. So, are you ready to elevate your Thanksgiving table and make this turkey the talk of the season? Let’s dive in!

Why is Dry Brining the Best Method?
Ultimate Flavor Boost: Dry brining allows the turkey to soak in herbs and spices, ensuring robust flavor in every bite.
Less Mess: Skip the complicated wet brining process—no more bags spilling in your fridge!
Crispy Perfection: Achieve that golden, crispy skin everyone craves without excessive effort.
Time-Saving Technique: Prep ahead and spend more time with loved ones while your turkey cooks!
After savoring this succulent dry brined turkey, you might also fall in love with recipes like my Italian Ground Turkey or the spicy kick of Sweet and Spicy Ground Turkey Broccoli Bowls.
Succulent Dry Brined Turkey Ingredients
• Prepare to create a mouthwatering turkey that’s moist and flavorful with these essential ingredients.
For the Turkey
- Whole Turkey (12-16 lb) – Choose a fresh turkey, ideally not pre-injected with sodium for the best results.
- Kosher Salt (2-3 tablespoons) – Essential for the dry brining process, use about 1 tablespoon per 5 pounds of turkey to enhance flavor.
For the Aromatics
- Lemon (1, quartered) – Adds bright, citrusy notes to the turkey; you can use orange for a sweeter twist.
- Celery Rib (1, halved) – Contributes aromatic depth, bringing a wonderful flavor to the dish.
- Carrot (1, halved) – Adds subtle sweetness and earthiness to balance the savory notes.
- Onion (1, quartered) – Provides a savory base note that enhances the overall flavor profile.
- Rosemary, Sage, Thyme Sprigs (1 each) – Fresh herbs infuse delightful aroma; feel free to swap with other herbs.
- Parsley (3 cups) – Use fresh parsley to stuff inside the cavity, enhancing flavor and freshness throughout the meat.
Get ready to impress with your succulent dry brined turkey, a dish that embodies the spirit of the holidays!
Step‑by‑Step Instructions for Succulent Dry Brined Turkey
Step 1: Preparation
Begin by thoroughly washing and patting your whole turkey dry with paper towels, ensuring there’s no excess moisture. This crucial step helps the dry brine adhere effectively. Preheat your fridge to a cool temperature around 38°F (3°C) if you can, as this will keep your turkey fresh while brining.
Step 2: Brining
Measure out kosher salt, using about 1 tablespoon per 5 pounds of turkey, and sprinkle it generously inside the cavity. Then, rub the remaining salt evenly over the breast, thighs, and sides. This method enhances moisture retention and flavor, ensuring you have a succulent dry brined turkey.
Step 3: Bagging
Once seasoned, carefully place the brined turkey inside a 2½-gallon sealable plastic bag. Remove as much air as possible before sealing. This will create a close environment for the salt to penetrate thoroughly. Make sure the bag is well-secured to prevent any leakage in your refrigerator.
Step 4: Resting
Refrigerate the turkey for 24 to 48 hours. This resting period allows the kosher salt to dissolve and deeply flavor the meat. Remember to flip the turkey occasionally to ensure even brining, so every part receives the benefits of the dry brining technique.
Step 5: Aromatics
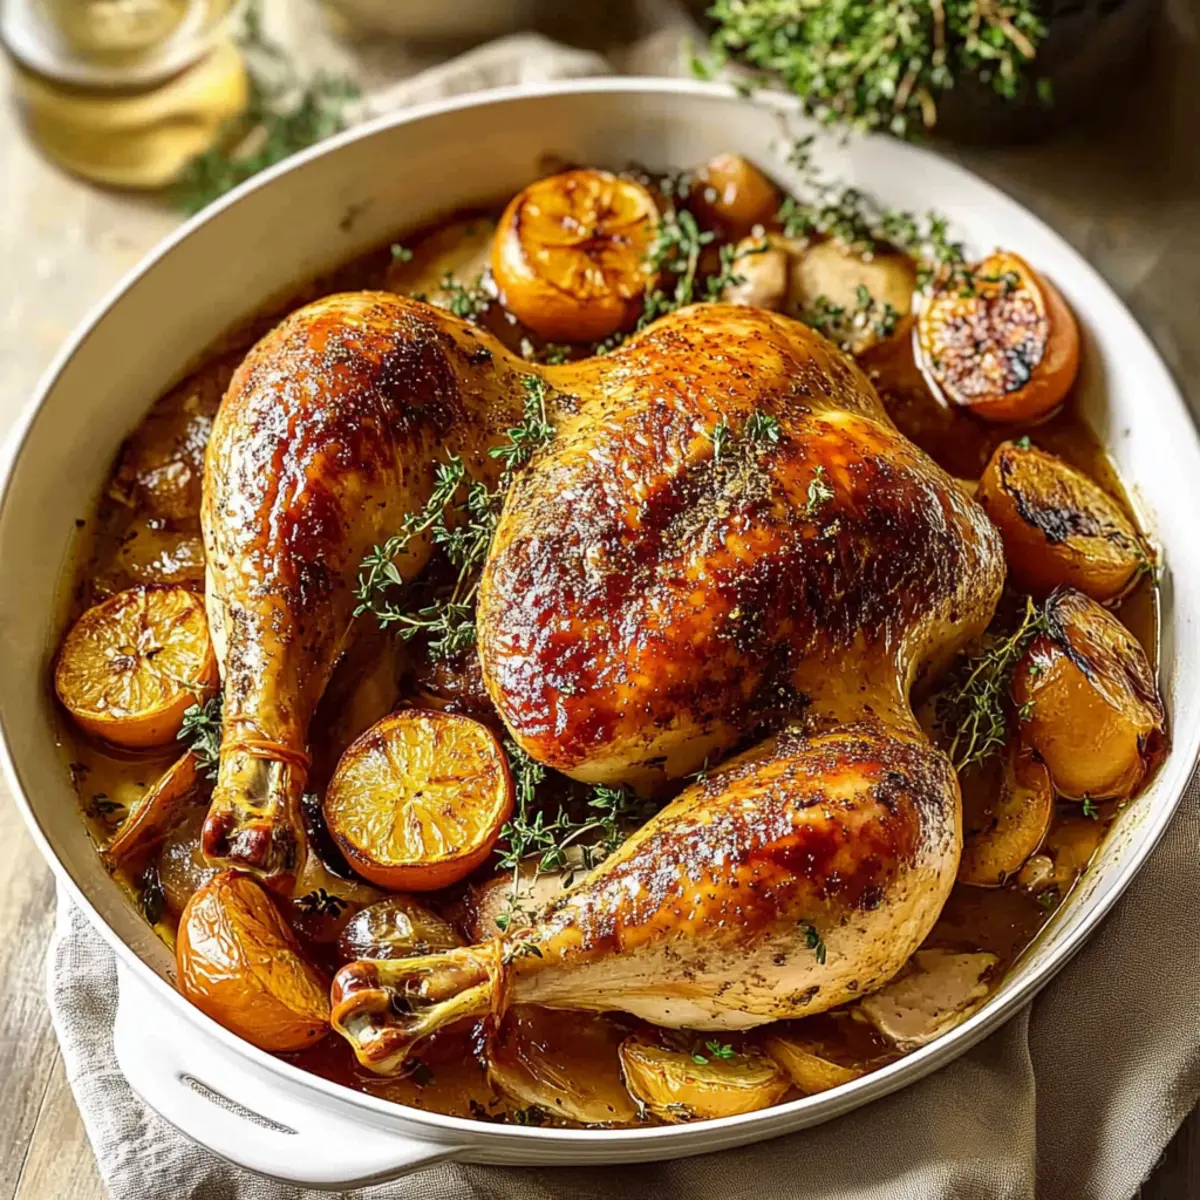
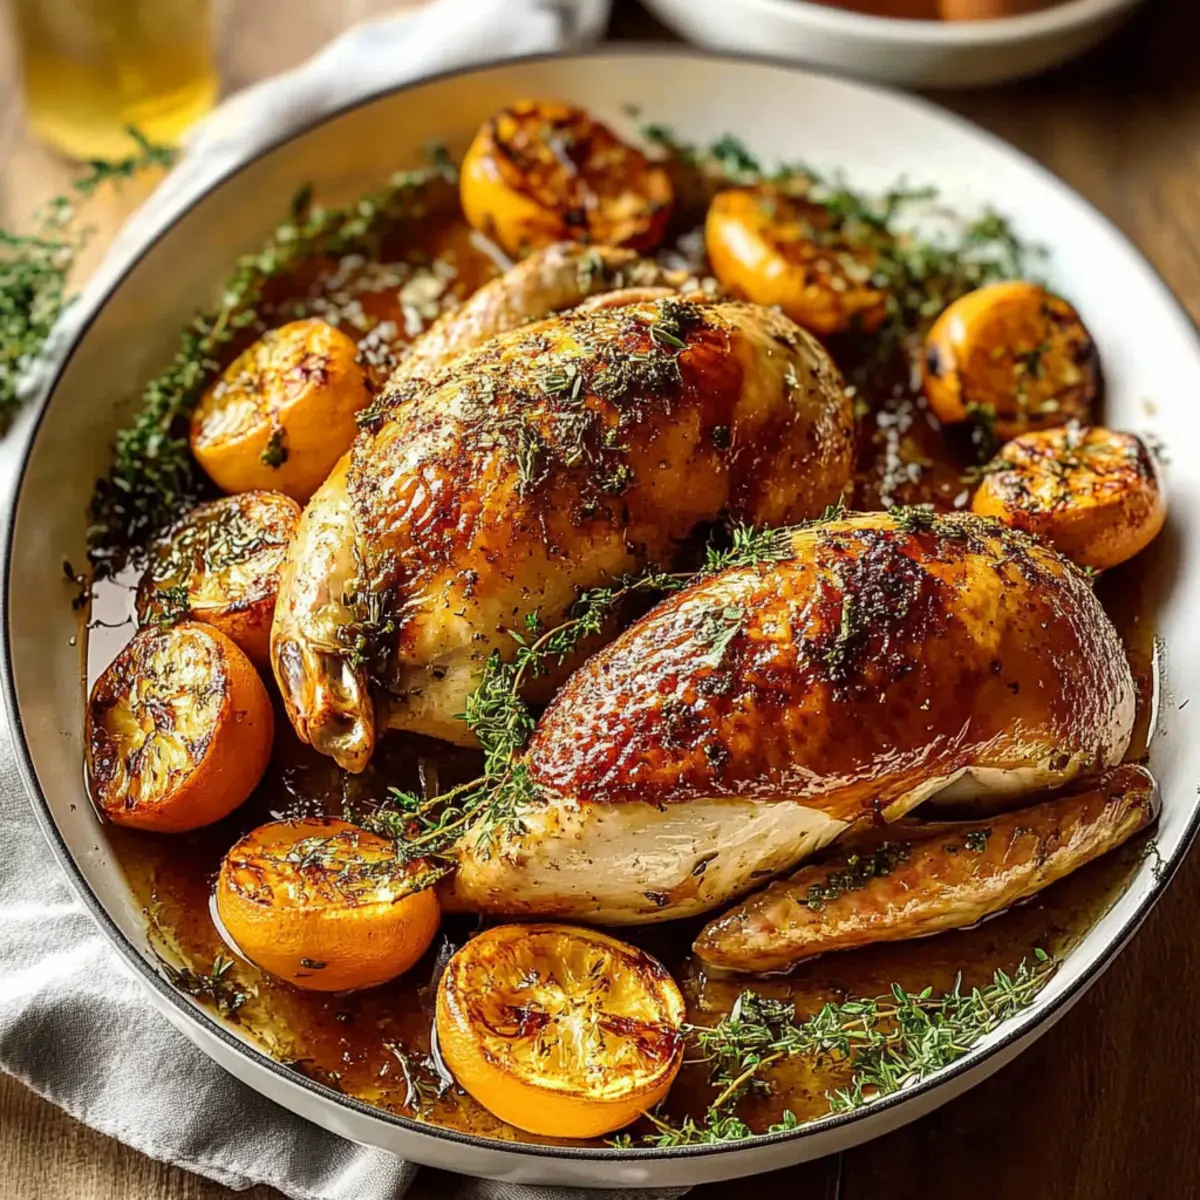
Before you roast, remove the turkey from the bag and stuff its cavity with quartered lemon, halved celery, carrot, onion, and fresh herbs like rosemary, sage, and thyme. This aromatic medley will infuse delicious flavors, enhancing your succulent dry brined turkey while roasting.
Step 6: Roasting
Preheat your oven to 325°F (163°C) and place the turkey in a roasting pan. Roast until the internal temperature of the thickest part of the breast reaches at least 165°F (74°C). This usually takes around 13-15 minutes per pound, but always use a meat thermometer for precision.
Step 7: Resting
Once roasted to juicy perfection, allow your turkey to rest for about 15 minutes before carving. This resting period helps retain its juices, ensuring every slice of your succulent dry brined turkey is tender and scrumptious. Enjoy sharing your holiday delight!
Make Ahead Options
Preparing your Succulent Dry Brined Turkey ahead of time is a game-changer for busy cooks, allowing you to enjoy more time with family while creating a memorable meal. You can dry brine your turkey up to 48 hours in advance, seasoning it with kosher salt and placing it in a sealable bag to refrigerate. Additionally, you can chop your aromatics—lemon, celery, carrot, onion, and herbs—up to 3 days ahead, storing them in an airtight container in the fridge for maximum freshness. When it’s time to roast, simply stuff the cavity with the prepared aromatics and follow the roasting instructions. Your turkey will be just as delicious, saving you valuable time on the big day!
What to Serve with Succulent Dry Brined Turkey
The aroma of a perfectly roasted turkey invites a multitude of delightful sides to create an unforgettable holiday feast.
-
Creamy Garlic Mashed Potatoes: Fluffy and buttery, these potatoes provide a comforting backdrop to the turkey’s savory flavors. Their creamy texture balances the juiciness of the meat wonderfully.
-
Caramelized Brussels Sprouts: Drizzled with maple syrup and sprinkled with crispy bacon, these sweet-and-savory sprouts add a delightful crunch and earthy depth to each bite.
-
Tart Cranberry Sauce: This zesty sauce cuts through the richness of the turkey, offering a refreshing contrast that cleanses the palate and enhances every mouthful.
-
Savory Stuffing: Packed with herbs, vegetables, and just the right amount of seasoning, stuffing captures the essence of the season and is the perfect cozy companion for your succulent dry brined turkey.
-
Roasted Garlic Green Beans: Tender green beans tossed in roasted garlic provide a vibrant pop of color and fresh flavor, adding a delightful crunch to your plate.
-
Autumn Harvest Salad: A mix of peppery arugula, sliced apples, candied walnuts, and a light vinaigrette brings both freshness and sweetness to the table, complementing the rich taste of your turkey.
-
Warm Dinner Rolls: Soft, pillowy rolls are perfect for mopping up juices and sauces, offering a heartwarming touch to any holiday spread.
Let these sides elevate your Christmas or Thanksgiving dinner, embracing the joy of sharing delicious homemade food with loved ones.
Expert Tips for Succulent Dry Brined Turkey
- Kosher Salt Selection: Use kosher salt for even distribution; table salt can lead to over-salting the turkey. Always measure carefully!
- Air Removal: When bagging the turkey, remove as much air as possible to prevent unwanted bacteria growth during the 24 to 48 hours of brining.
- Aromatic Customization: Feel free to get creative with your aromatics—add fennel or apple for a unique twist that complements the succulent dry brined turkey.
- Fridge Time: Don’t skip the resting time in the fridge! This allows the salt to penetrate the meat thoroughly, resulting in a juicy and flavorful centerpiece.
- Crispy Skin Tip: For a beautifully crispy skin, leave the turkey uncovered in the fridge for the last few hours of the brining process. This dries out the surface, promoting crispiness during roasting.
How to Store and Freeze Succulent Dry Brined Turkey
Fridge: Store leftover turkey in an airtight container for up to 4 days. Ensure it’s cooled before sealing to prevent condensation.
Freezer: For extended storage, slice the turkey and wrap portions tightly in plastic wrap, then place in freezer bags. It will last up to 3 months.
Reheating: When ready to enjoy, thaw the turkey overnight in the fridge. Reheat slices in a 350°F (175°C) oven, covered with foil, for about 15-20 minutes until warm and juicy.
Tips for Best Results: Remember to keep your turkey covered to maintain moisture during storage, ensuring that your succulent dry brined turkey stays delicious!
Succulent Dry Brined Turkey Variations
Feel free to unleash your creativity and personalize your turkey with these delightful twists!
-
Herb Swap: Change rosemary for thyme or sage for an entirely new aromatic profile. This simple change can refresh your flavor palette.
-
Sweet Citrus: Substitute lemon with orange for a sweeter and more fragrant experience that can brighten up your dish.
-
Spice It Up: Incorporate crushed red pepper flakes into the salt to introduce a gentle heat, giving your turkey a warm kick that guests will love.
-
Apple Twist: Add chopped apple pieces to the cavity for subtle sweetness and a lovely aroma as it roasts. The sweet notes pair perfectly with the savory meat.
-
Savory Fennel: Toss in a bulb of fennel sliced into wedges. It enhances both flavor and fragrance, bringing gourmet flair to your succulent dry brined turkey.
-
Bay Leaves Boost: Include a couple of bay leaves in the cavity. Their earthy flavor adds depth, enhancing the overall profile of your turkey.
-
Stuffing Option: Consider adding a side of savory stuffing made with herbs, breadcrumbs, and sausage alongside your turkey. It’s a classic pairing that elevates those flavors.
After enjoying your dry brined turkey, you might also like to explore more delicious dishes like my Italian Ground Turkey or the flavorful Sweet and Spicy Ground Turkey Broccoli Bowls. Customizing your feast is part of the joy—let your culinary imagination run wild!
Succulent Dry Brined Turkey Recipe FAQs
How do I select the best turkey for dry brining?
Absolutely! When choosing your turkey, look for a fresh one without added sodium or self-basting claims, as these can affect the brining process. Opt for a size between 12 to 16 pounds for the best results. Rinse it well and make sure it’s entirely dry before starting the brining process!
How should I store leftover dry brined turkey?
Very! Leftover turkey can be stored in an airtight container in the fridge for up to 4 days. Allow it to cool down before sealing to prevent condensation and keep it juicy. Alternatively, place slices in vacuum-sealed bags to maximize freshness.
Can I freeze the meat from a dry brined turkey?
Absolutely! For freezing, slice your turkey into portions and tightly wrap each piece with plastic wrap. Then, place the wrapped meat into freezer bags or containers to protect it from freezer burn. This way, your succulent dry brined turkey can last up to 3 months in the freezer.
What are common problems when dry brining turkey, and how can I avoid them?
No worries! A common issue is over-salting; make sure to use kosher salt for better control. Another pitfall is not allowing enough time for brining—24 to 48 hours is ideal for the salt to penetrate fully. Flip the turkey a couple of times during this phase for even seasoning!
Can my dog eat dry brined turkey leftovers?
Certainly, but moderation is key! Always ensure that no bones or salty skin are given to your furry friend. Plain turkey meat is safe and can be a nice treat for your dog—it’s high in protein! Just be mindful of any dietary restrictions they may have.
How can I ensure crispy skin on my turkey?
Very easily! To achieve that coveted crispy skin, after the brining period, leave the turkey uncovered in the fridge for the last few hours. This step allows the exterior to dry out, which helps in achieving golden, crunchy skin while roasting. Enjoy your festive dish!
Succulent Dry Brined Turkey for a Juicy Holiday Delight
Ingredients
Equipment
Method
- Wash and pat the whole turkey dry with paper towels.
- Preheat your fridge to a cool temperature around 38°F (3°C).
- Sprinkle kosher salt generously inside the cavity, and rub the remaining salt evenly over the turkey.
- Place the brined turkey inside a 2½-gallon sealable plastic bag, removing as much air as possible before sealing.
- Refrigerate the turkey for 24 to 48 hours, flipping occasionally.
- Remove the turkey from the bag and stuff its cavity with lemons, celery, carrots, onions, and herbs.
- Preheat your oven to 325°F (163°C) and roast the turkey until the internal temperature reaches 165°F (74°C).
- Let the turkey rest for about 15 minutes before carving.
Leave a Reply