
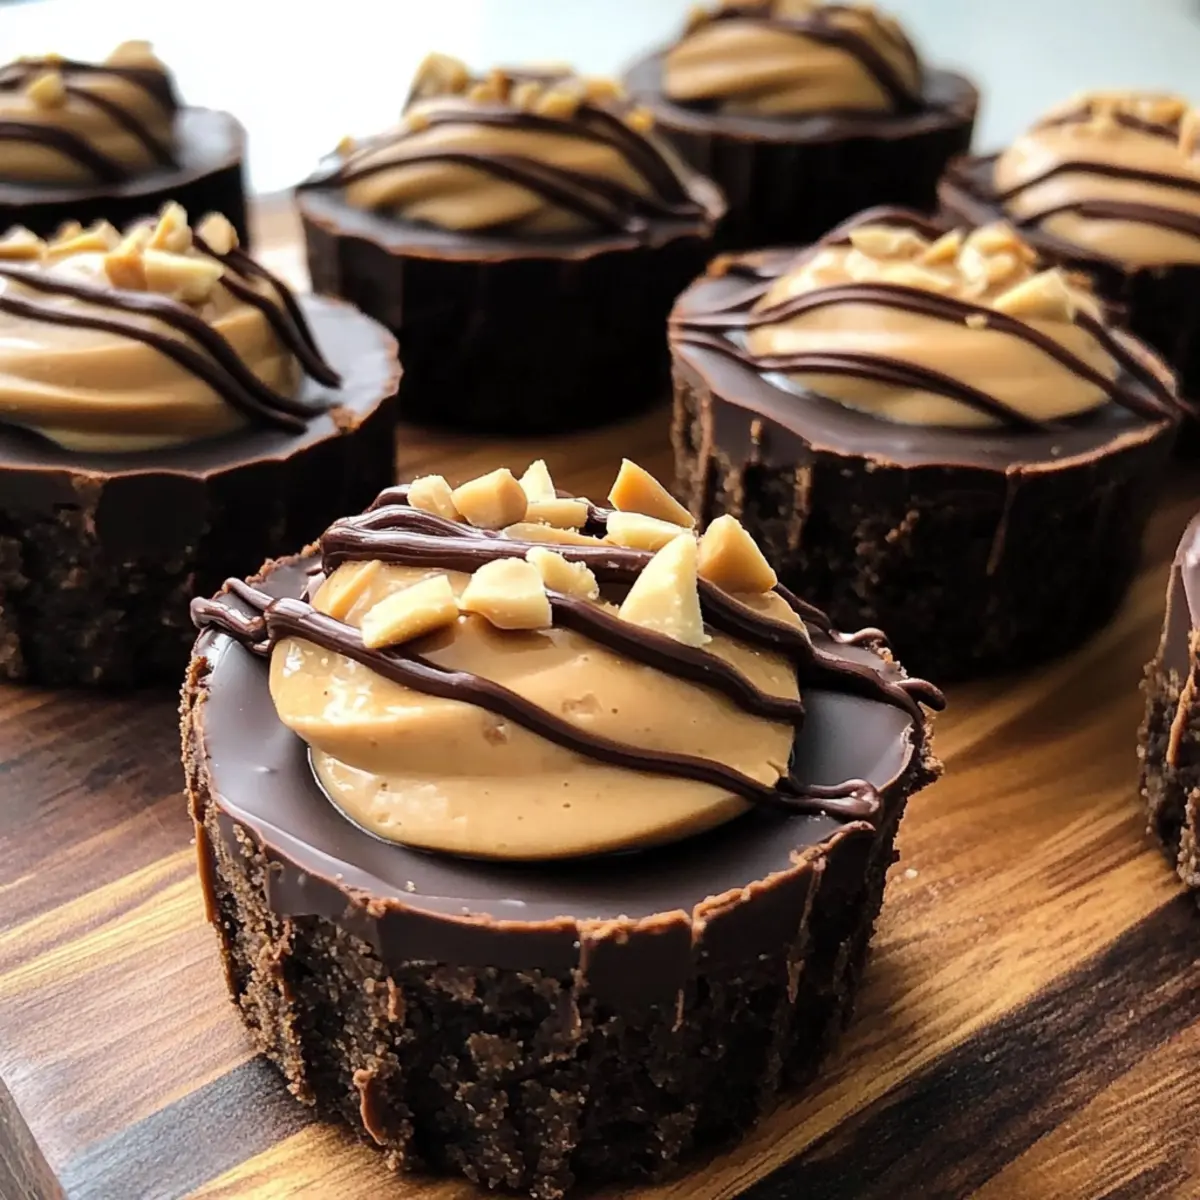
Late afternoon sun streaming through the kitchen window, I found myself in a delightful mini crisis: craving something sweet but wanting to stay on the healthier side. That’s when I decided to whip up these Easy No-Bake Chocolate Peanut Butter Protein Cups. With their creamy texture and rich chocolate flavor, they’re a perfect way to satisfy that sweet tooth without the guilt. Besides being incredibly simple to make, these protein cups are a fantastic source of energy, making them a go-to snack for busy days or an indulgent dessert when guests arrive. You’ll love how quickly they come together, with no baking required! Are you ready to dive into this delightful recipe and elevate your snack game?
Why are these protein cups a game changer?
Easy preparation: These no-bake Chocolate Peanut Butter Protein Cups come together effortlessly—no oven required! Just mix, mold, and chill.
Guilt-free indulgence: Packed with protein, they satisfy your sweet cravings without the extra calories of typical desserts, making them ideal for health-conscious snackers.
Unique flavor combination: The rich chocolate pairs perfectly with creamy peanut butter, creating a decadent treat that never compromises on taste.
Customization: With options like almond butter or maple syrup, you can make these cups your own based on dietary preferences or taste.
Versatile snack: Perfect for a quick afternoon pick-me-up or a party dessert, these protein cups are sure to impress family and friends—just like my Cheesecake Stuffed Chocolate or Easy Butter Chicken Recipe.
Stored for convenience: Make a batch in advance and keep them in the fridge for up to 5 days or freeze for up to 2 months, ensuring you always have a healthy treat on hand!
Chocolate Peanut Butter Protein Cups Ingredients
• Make these delicious cups effortlessly!
For the Batter
- Chocolate Protein Powder – Provides protein and rich chocolate flavor; opt for high-quality protein powder for best results.
- Peanut Butter – Acts as the binder and provides creaminess; avoid natural peanut butter as it may be too oily, consider almond butter as an alternative.
- Honey or Maple Syrup – Adds sweetness; choose maple syrup for a vegan option.
- Coconut Oil – Helps to solidify the mixture while adding a subtle sweetness; can be substituted with any neutral oil, but it will affect the flavor.
Optional Additions
- Chopped Nuts or Seeds – Adds texture and extra crunch; feel free to use any preferred nuts or seeds for personalization.
Step‑by‑Step Instructions for Chocolate Peanut Butter Protein Cups
Step 1: Prepare the Mixture
In a medium mixing bowl, combine 1 cup of chocolate protein powder, 1 cup of creamy peanut butter, 1/4 cup of honey or maple syrup, and 1/4 cup of melted coconut oil. Use a sturdy spatula to mix everything together until smooth and creamy, ensuring no dry powder is left. This process should take about 2-3 minutes, resulting in a rich, glossy batter.
Step 2: Add Texture (optional)
If you’re looking to add some crunch, fold in 1/4 cup of chopped nuts or seeds at this stage. Gently mix them into the batter until evenly distributed. This step not only enhances the texture but also makes your Chocolate Peanut Butter Protein Cups feel more indulgent.
Step 3: Fill Molds
Spoon the prepared mixture into silicone molds or a muffin tin lined with cupcake liners. Fill each mold about three-quarters of the way full to allow room for expansion as they chill. Use a small offset spatula or your fingers to smooth the tops if desired, ensuring a neat finish on your delicious cups.
Step 4: Chill
Place the filled molds in the refrigerator and allow them to chill for at least 1 hour. This cooling period helps the chocolate peanut butter protein cups to set firmly, creating that satisfying, fudgy texture. You’ll know they’re ready when they’re solid enough to hold their shape when removed from the molds.
Step 5: Serve
Once your Chocolate Peanut Butter Protein Cups are firm, carefully remove them from the molds by gently pulling the edges away. Enjoy them right away for the best texture or store them in an airtight container in the refrigerator for up to 5 days. For a longer storage option, freeze them for up to 2 months, taking care to thaw at room temperature for about 15 minutes before enjoying.
What to Serve with Easy No-Bake Chocolate Peanut Butter Protein Cups
Let’s transform your sweet cravings into a delightful meal experience that satisfies taste and nutrition with these delicious protein cups!
-
Fresh Fruit Salad: A vibrant mix of berries, melons, and citrus brings a refreshing contrast to the rich texture of the protein cups, balancing sweetness with acidity.
-
Yogurt Parfait: Layer creamy Greek yogurt with granola and drizzles of honey beside your chocolate peanut butter protein cups for a delightful combination of flavors and textures.
-
Nutty Granola: The crunchiness of a nutty granola complements the creamy, smooth texture of the cups, adding a satisfying bite and extra fiber to your snack.
-
Nut Milk Latte: Pairing your protein cups with a dreamy nut milk latte enhances the indulgent experience, while the nuttiness resonates beautifully with the peanut butter.
-
Celery Sticks with Peanut Butter: For a savory touch, serve crunchy celery sticks filled with peanut butter; this combo offers a fun texture variation that aligns with the flavors of your protein cups.
-
Dark Chocolate-Dipped Strawberries: Elevate your dessert experience by serving strawberries dipped in dark chocolate, creating a symphony of flavors with the rich chocolate in the protein cups.
-
Chia Seed Pudding: The creamy, pudding-like consistency of chia seeds paired with light flavor complements the richness of the protein cups, making your snack feel indulgent yet healthy.
-
Sparkling Water with Mint: Refresh yourself with a sparkling water infused with mint and a squeeze of citrus. This drink cleanses the palate and enhances the enjoyment of every bite of your chocolate peanut butter protein cups.
-
Cheese Platter: A selection of creamy cheeses, fruits, and nuts elevates the experience with savory notes, providing an interesting contrast to the sweet, rich chocolate peanut butter protein cups.
How to Store and Freeze Chocolate Peanut Butter Protein Cups
Fridge: Store your Chocolate Peanut Butter Protein Cups in an airtight container for up to 5 days. They’ll stay fresh and delicious, ready for snacking whenever that sweet craving hits.
Freezer: For longer storage, freeze the cups for up to 2 months. Place them in a single layer on a baking sheet until solid, then transfer to a freezer-safe bag or container.
Thawing: When you’re ready to indulge, simply take the desired amount out of the freezer and let them thaw at room temperature for about 15 minutes.
Reheating: There’s no need for reheating with these treats; enjoy them chilled for the best flavor and texture!
Make Ahead Options
These Easy No-Bake Chocolate Peanut Butter Protein Cups are perfect for meal prep enthusiasts! You can prepare the mixture up to 24 hours in advance; simply combine the ingredients and store them in the refrigerator until you’re ready to mold them. When you’re set to finish, spoon the mixture into molds and chill for at least 1 hour to set. Additionally, for long-term storage, these cups can be frozen for up to 2 months; just be sure to use an airtight container and thaw them at room temperature for about 15 minutes before serving. This way, they’ll remain just as delicious and satisfying, ready to satisfy those sweet cravings on busy days!
Chocolate Peanut Butter Protein Cups Variations
Customize your protein cups with delightful twists and substitutions that will elevate your snacking experience!
-
Nut-Free: Swap peanut butter for sun butter to create a delicious, allergy-friendly treat for everyone to enjoy.
-
Vegan Delight: Replace honey with maple syrup for a vegan-friendly version, ensuring no animal products in your delicious treat.
-
Flavor Burst: Add a teaspoon of vanilla extract to the mixture for an enhanced flavor profile that takes these cups to the next level.
-
Extra Crunch: Fold in a handful of your favorite granola for added texture and a deliciously satisfying crunch.
-
Decadent Chocolate: Drizzle melted dark chocolate over the tops of the cooled cups for an extra layer of richness that chocolate lovers will adore.
-
Spiced Up: Sprinkle a pinch of cinnamon or sea salt into the mixture for a hint of warmth that perfectly complements the chocolate and peanut butter.
-
Protein Boost: Boost the protein content further by mixing in chia seeds or flaxseeds, which also add a delightful crunch.
-
Different Nutty Flavors: Try almond butter or cashew butter instead of peanut butter for a whole new flavor twist that brings something fresh to the table.
No matter how you decide to customize your Chocolate Peanut Butter Protein Cups, these variations allow you to make them truly your own. Ready to explore? Just as I love mixing things up with my Dark Chocolate Nut or even my Banana Chocolate Chip, feel free to get creative and enjoy the process!
Expert Tips for Chocolate Peanut Butter Protein Cups
-
Quality Matters: Use high-quality chocolate protein powder for a richer chocolate flavor and the best texture. Cheaper powders can affect your results.
-
Peanut Butter Caution: Stick to creamy peanut butter and avoid natural varieties, which can make your mixture too oily and difficult to mold.
-
Chill Time Importance: Don’t skip the chilling step! Allow at least 1 hour for your cups to set, ensuring that they hold their shape and have the right texture.
-
Molder’s Choice: If you don’t have silicone molds, muffin tins lined with cupcake liners work beautifully too; just ensure they’re filled adequately for the perfect size.
-
Experiment with Add-ins: Feel free to customize the recipe by adding chopped nuts or seeds. This not only adds crunch but makes your Chocolate Peanut Butter Protein Cups uniquely yours!
Chocolate Peanut Butter Protein Cups Recipe FAQs
How do I choose ripe ingredients for these protein cups?
Absolutely! For the best results, make sure your peanut butter is creamy and not too oily. When selecting coconut oil, opt for refined coconut oil for a neutral flavor that doesn’t compete with the chocolate. If you’re adding nuts or seeds, look for fresh, crunchy options without dark spots or rancid odors, as freshness will enhance the overall taste.
How should I store my Chocolate Peanut Butter Protein Cups?
You can store your Chocolate Peanut Butter Protein Cups in an airtight container in the refrigerator for up to 5 days. This keeps them fresh and easy to snack on whenever cravings strike!
Can I freeze these protein cups, and if so, how?
Very! You can freeze your protein cups for up to 2 months. First, lay them in a single layer on a baking sheet until they’re solid. Once frozen, transfer them to a freezer-safe bag or container, making sure to label them with the date. When you’re ready to enjoy, simply thaw them at room temperature for about 15 minutes, and they’ll be just as delicious as when you made them!
What if my mixture is too oily or dry?
If your mixture is too oily, it’s likely due to using natural peanut butter. I recommend adding an extra tablespoon of chocolate protein powder to balance it out until you achieve a smooth consistency. Conversely, if the mixture feels too dry, try adding a splash of almond milk or a bit more honey or maple syrup—this will help bind it together and maintain that creamy texture.
Are these protein cups suitable for people with allergies?
Yes! While these cups contain peanut butter, you can easily customize them for various dietary needs. Substitute peanut butter with almond butter for nut allergies, and use maple syrup instead of honey for a vegan treat. Always check labels for potential allergens in your protein powder and other ingredients as well.
Do these protein cups work well for kids or as a pet treat?
These cups can be a great, protein-rich snack for kids, just ensure you check for allergies! However, if you’re considering them for pets, it’s always best to consult with your veterinarian. Peanut butter can be safe for dogs in moderation, but omit any added sugars or artificial sweeteners, especially xylitol, as it is toxic to pets.
Chocolate Peanut Butter Protein Cups for Guilt-Free Indulgence
Ingredients
Equipment
Method
- In a medium mixing bowl, combine chocolate protein powder, peanut butter, honey or maple syrup, and melted coconut oil. Mix until smooth and creamy without dry powder.
- If desired, fold in chopped nuts or seeds until evenly distributed for added texture.
- Spoon the mixture into silicone molds or a muffin tin filled with cupcake liners, filling each mold three-quarters full.
- Place the filled molds in the refrigerator for at least 1 hour to allow them to set firmly.
- Carefully remove from molds and enjoy immediately or store in an airtight container in the refrigerator for up to 5 days.
Leave a Reply