
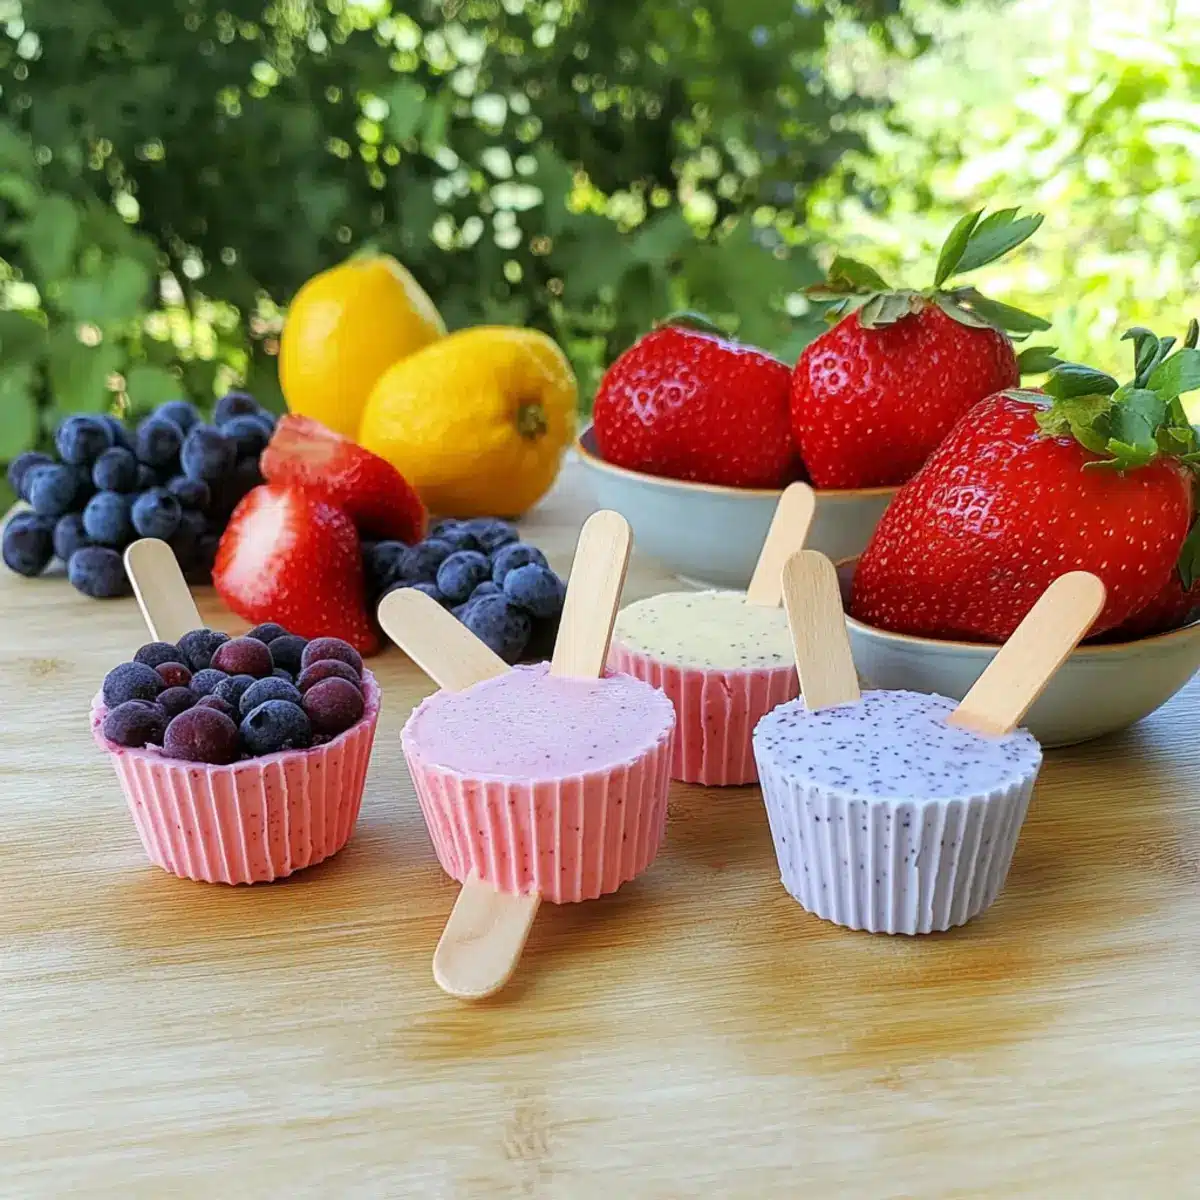
As summer sunbeams dance through my kitchen window, I can’t help but hear the cheerful laughter of children outside, begging for a sweet treat. That’s when I turn to my favorite go-to recipe: Fruity Frozen Yogurt Pops. These delightful pops are not just a hit with kids but are equally adored by adults seeking a refreshing, healthy snack. With the goodness of fresh fruit blended into creamy yogurt, you can trust that they’re as wholesome as they are delicious. The best part? They require minimal prep, making them a great option for parties or an easy afternoon indulgence. Plus, they’re vegan and gluten-free, aligning perfectly with today’s mindful eating habits. How about bringing a taste of nostalgia to your next sunny day? Let’s dive into making these fruity delights together!
Why are Fruity Yogurt Pops a Must-Try?
Refreshing and Healthy: These pops are the ultimate guilt-free treat, filled with vitamins and fresh fruit flavors.
Quick and Easy: With just a handful of ingredients and a simple blending process, you can whip these up in no time!
Versatile: Feel free to customize with your favorite seasonal fruits or yogurt flavors, ensuring there’s a combo for everyone.
Eco-Friendly: Using reusable molds not only reduces waste but adds a contemporary twist to your summer snacks.
Fun for Everyone: Perfect for kids or adults, these pops bring smiles to every gathering, whether it’s a backyard BBQ or a sunny picnic.
Try them alongside other delightful treats or make notes for your next batch to keep the summer fun going!
Fruity Yogurt Pops Ingredients
For the Pops
• Fresh Fruit – Use seasonal fruits like berries or mangoes for the best flavor and color.
• Yogurt – Opt for coconut yogurt for a vegan option, or choose your favorite dairy yogurt for creaminess.
• Agave or Liquid Sweetener – This balances the tartness of fruit; maple syrup works as a delicious substitute!
Optional Add-ins
• Vanilla Extract – A splash enhances flavor complexity and makes these fruity yogurt pops even more delightful.
• Chopped Nuts or Seeds – Add a crunchy texture for a fun twist, and a dose of healthy fats.
These fruity yogurt pops offer a refreshing escape and are perfect for those summer days. Enjoy crafting your own delicious variation!
Step‑by‑Step Instructions for Fruity Yogurt Pops
Step 1: Gather Your Supplies
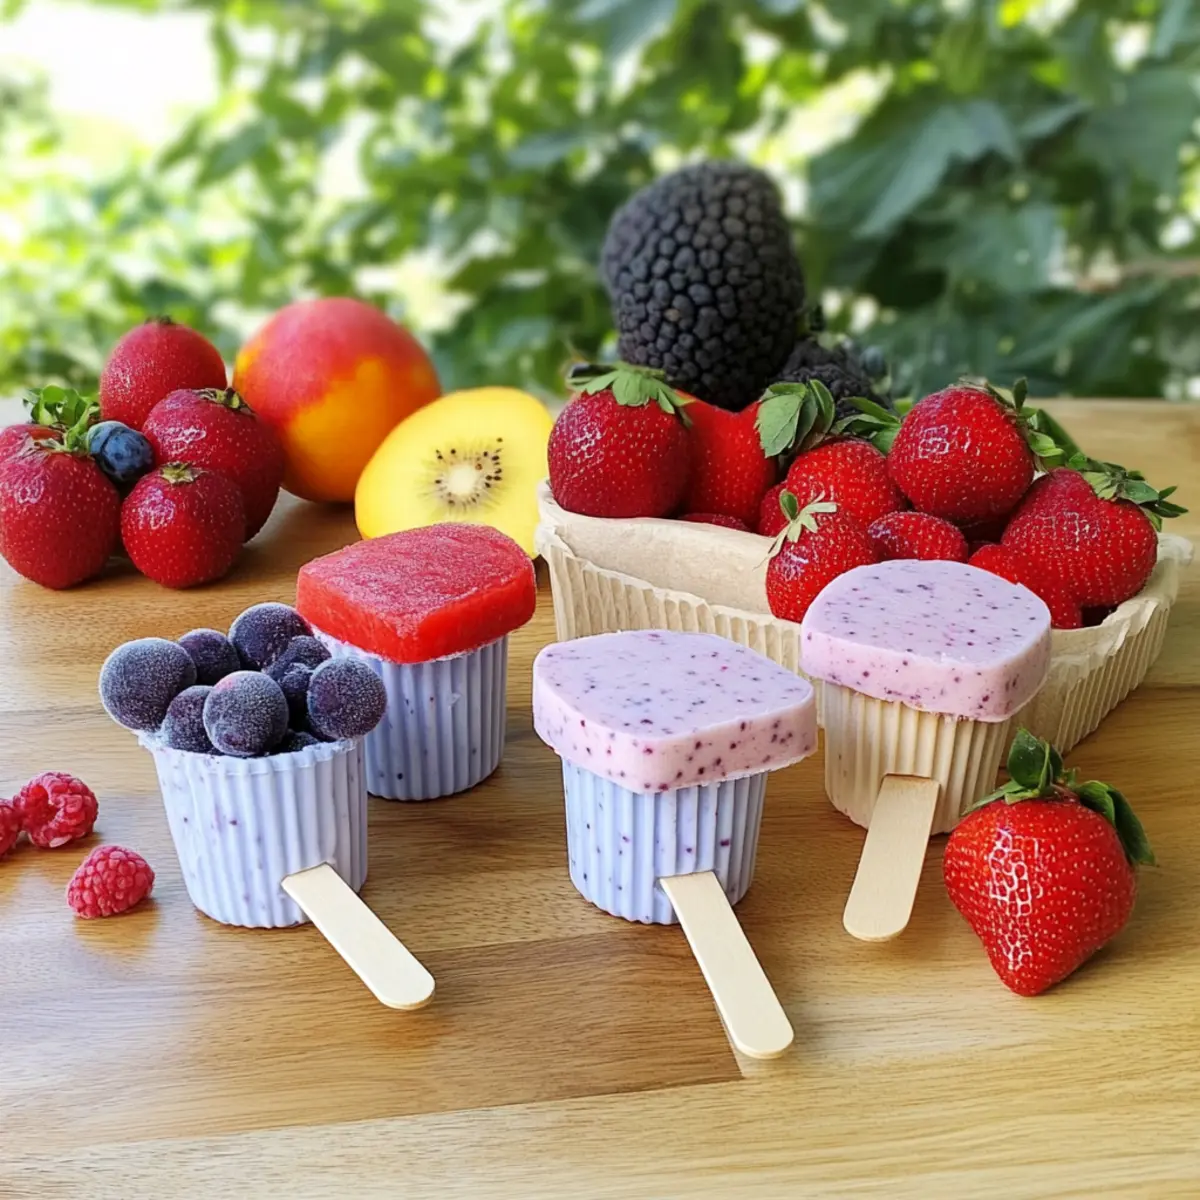
Begin by collecting all necessary equipment including reusable silicone baking cups or popsicle molds, a blender, and measuring tools. Select vibrant, ripe seasonal fruit like berries or mangoes to ensure maximum flavor and sweetness. Cut larger pieces of fruit into manageable chunks for easier blending and accurate measurement, setting the stage for your delightful fruity yogurt pops.
Step 2: Blend the Ingredients
In your blender, combine the chosen fresh fruit, yogurt, and agave or your preferred liquid sweetener. Blend the mixture on high speed until it becomes beautifully smooth and creamy, showcasing the inviting colors of the fruit. This should take about 30-60 seconds, depending on your blender’s power. Pause and scrape down the sides if necessary to ensure every morsel is incorporated into your fruity yogurt pops.
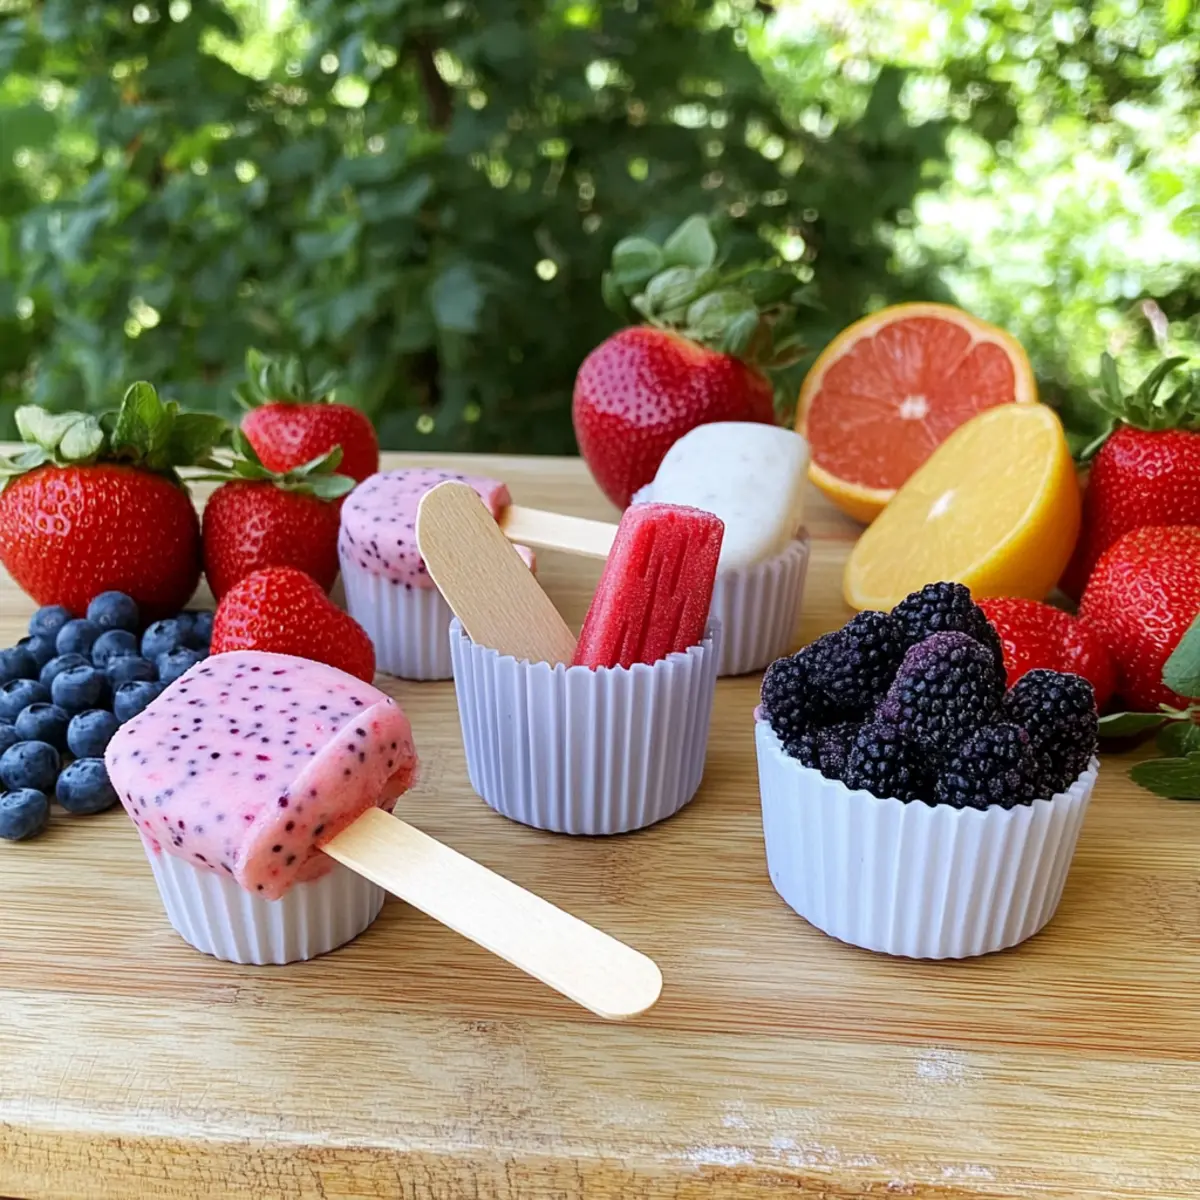
Step 3: Pour into Molds
Carefully pour the smooth fruit and yogurt mixture into the prepared baking cups or popsicle molds, distributing it evenly. Fill each mold to about ¾ full, allowing space for the mixture to expand as it freezes. Place the molds on a plate or tray for easy handling and to prevent spills while transferring them to the freezer.
Step 4: Initial Freeze and Insert Sticks
Freeze the molds for about 1 hour to allow the mixture to set just enough for inserting popsicle sticks. This slight freezing will stabilize the mixture, preventing the sticks from sinking too deep. After the hour, remove the molds from the freezer and gently place a stick in the center of each pop.
Step 5: Final Freezing
Return the molds to the freezer and let your fruity yogurt pops freeze for an additional 4-5 hours, or until they are completely solid. This extended freezing period is crucial for achieving that perfect popsicle texture reminiscent of soft-serve ice cream. Check occasionally to ensure they reach the desired firmness.
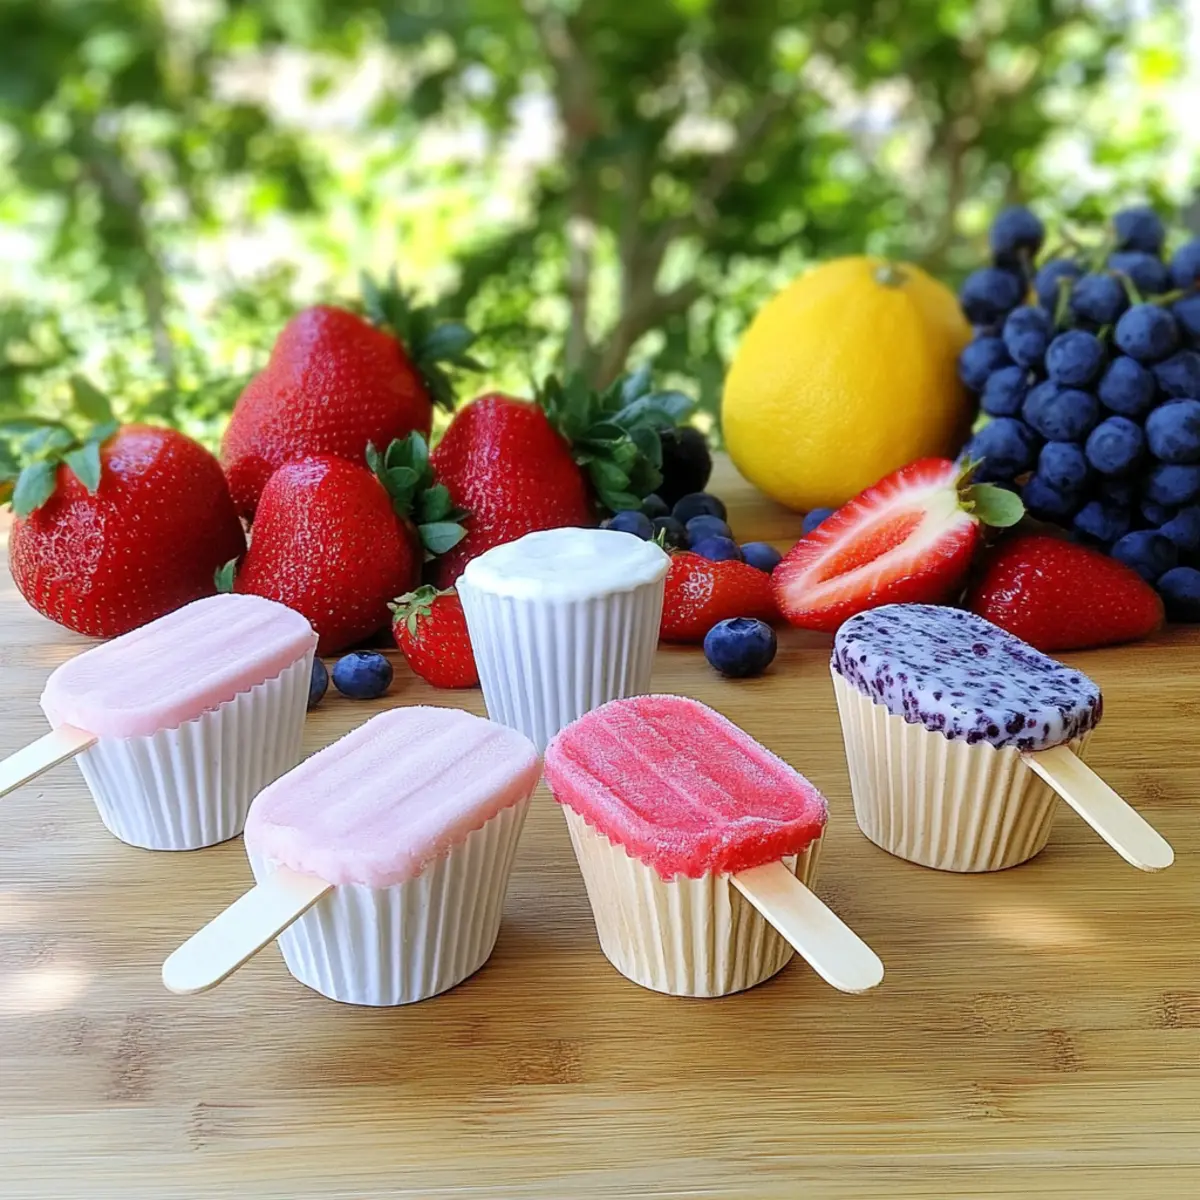
Step 6: Unmold and Serve
When ready to enjoy, remove the molds from the freezer. To easily release the pops, run warm water over the outside of the molds for a few seconds, gently pulling the pops out while they soften slightly. Serve immediately for a refreshingly cool treat, or store in airtight containers in the freezer to keep your fruity yogurt pops ready for another sunny day!
Expert Tips for Fruity Yogurt Pops
-
Choose Ripe Fruit: Ensure your fruit is perfectly ripe and sweet for the best flavor in your fruity yogurt pops. Underripe fruit can lead to a tart, less enjoyable treat.
-
Don’t Overfill Molds: Stick to filling your molds to about ¾ full. Overfilling can cause spillage during freezing, creating a messy situation when you dig into these refreshing pops.
-
Even Blending: Blend until completely smooth to avoid any chunks in your fruity yogurt pops, which can affect the texture. Scrape down the sides of the blender as necessary!
-
Use a Plate: Place the molds on a flat plate or tray for easy transfer to the freezer, reducing the risk of spills and making it simpler to maneuver.
-
Experiment with Flavors: Don’t be afraid to mix and match fruits or add a splash of vanilla extract to elevate the taste. Each combination yields a unique fruity yogurt pop experience!
Make Ahead Options
These Fruity Frozen Yogurt Pops are perfect for meal prep enthusiasts looking to save time during busy summer days! You can blend the fruit and yogurt mixture up to 24 hours in advance and store it in the refrigerator until you’re ready to pour it into molds. For best results, refrigerate any leftover blended mixture in an airtight container to maintain freshness. When you’re ready to serve, simply pour the mixture into your molds, freeze for about 1 hour, insert sticks, and allow them to freeze for an additional 4-5 hours. This way, you’ll have delicious, cold treats waiting for you with minimal effort!
Fruity Yogurt Pops Variations & Substitutions
Feel free to let your creativity shine as you make these pops your own, adding delightful twists you’ll love.
-
Seasonal Swap: Replace fruit based on what’s in season; strawberries, kiwi, or pineapple all offer unique flavors.
-
Yogurt Variety: Use flavored yogurt, such as vanilla or berry, to add extra taste without additional ingredients.
-
Nutty Crunch: Sprinkle in some chopped almonds or walnuts for a delightful texture and a healthy fat boost.
-
Sweetener Shift: Replace agave with honey or maple syrup for a different sweetness profile that complements your chosen fruits.
-
Creamy Coconut: Swap regular yogurt for coconut yogurt for a fully vegan and tropical touch!
-
Herbal Infusion: Add a few fresh mint leaves to the blender for a refreshing herbal kick that elevates the flavors beautifully.
-
Tropical Heat: For a spicy twist, blend in a dash of cayenne pepper or sliced jalapeños if you’re feeling adventurous!
-
Creamier Pops: Blend in half a banana for extra creaminess and natural sweetness, perfect for a kid-friendly treat.
Feel free to explore and adapt these variations as you create your fruity yogurt pops; it’ll be fun to discover new favorites! And if you’re looking for more tasty ideas, check out our healthy snacks or fruity desserts sections for more inspiring recipes!
How to Store and Freeze Fruity Yogurt Pops
Freezer: Store your fruity yogurt pops in an airtight container in the freezer to preserve their freshness. They can last up to 4-6 weeks, but are best enjoyed sooner for maximum flavor.
Airtight Wrapping: Wrap each pop in plastic wrap before placing them in the container if you want to prevent freezer burn and to keep them vibrant and tasty.
Serving from Freezer: When you’re ready to enjoy, remove the desired number of pops and run warm water over the outside of the molds for easier release. Don’t leave them at room temperature for too long.
Re-freezing: If you find leftovers, refer to the storage guidelines above; just remember, repeated thawing and refreezing may affect the texture of your fruity yogurt pops.
What to Serve with Fruity Frozen Yogurt Pops
As you savor the sweet tang of these delectable creations, consider these delightful pairings to round out your summer experience.
- Fresh Fruit Slices: Brighten your plate with slices of watermelon or kiwi, adding juicy textures that enhance the fruity flavors of the pops.
- Mixed Berry Salad: A vibrant medley of blueberries, strawberries, and raspberries brings extra freshness, perfect for a refreshing summer side.
- Coconut Whipped Cream: Top your pops with this creamy, dairy-free delight for a luscious twist that compliments the fruity notes beautifully.
- Homemade Granola: Add a crunchy element by serving alongside a scoop of granola. The nutty flavors create the perfect contrast to the smooth pops.
- Sparkling Water with Lime: Quench your thirst with a fizz that lifts the flavor profile of your pops, providing a refreshing counterpoint to their sweetness.
- Chocolate Drizzle: For a decadent touch, drizzle melted dark chocolate over your pops just before serving, creating an indulgent flavor experience.
Pairing these options with your fruity yogurt pops transforms a simple snack into a delightful, wholesome treat that everyone will love!
Fruity Frozen Yogurt Pops Recipe FAQs
What type of fruit is best for making fruity yogurt pops?
Absolutely! Choosing seasonal, ripe fruit is crucial for the best flavor. Sweet fruits like strawberries, mangoes, or ripe bananas lend natural sweetness and vibrant color. Avoid underripe fruit, as it can make your pops taste tart.
How long can I store fruity yogurt pops in the freezer?
You can keep your fruity yogurt pops in an airtight container in the freezer for up to 4-6 weeks. However, for the best flavor and texture, I recommend enjoying them sooner rather than later!
Can I freeze the yogurt pops in different molds?
Very much! You can use ice cube trays, silicone baking cups, or any popsicle molds you have on hand. Just make sure they’re food-safe and allow for easy removal, which helps maintain their lovely shape.
What should I do if my fruity yogurt pops are too hard to remove from the mold?
If you’re having trouble unmolding your pops, try running warm water over the outside of the molds for a few seconds. This gentle warmth helps loosen the pops while preventing them from melting too much.
Are fruity yogurt pops safe for my dog to eat?
It’s best to keep these pops away from your furry friend. The ingredients may not be suitable for dogs, especially any added sweeteners. Stick to promoting healthy treats made specifically for pets!
Can I modify the ingredients for dietary restrictions?
Absolutely! For a vegan treat, use coconut yogurt and agave as your sweetener. Additionally, you can choose allergy-friendly fruits and substitute with alternatives like maple syrup if needed. Feel free to get creative with your ingredients while keeping dietary needs in mind!
Fruity Yogurt Pops That Make Summer Delightfully Cool
Ingredients
Equipment
Method
- Gather all necessary equipment including molds, a blender, and ripe seasonal fruit.
- Blend the chosen fresh fruit, yogurt, and sweetener until smooth and creamy.
- Pour the mixture into molds, filling each to ¾ full.
- Freeze for about 1 hour, then insert popsicle sticks.
- Freeze for an additional 4-5 hours or until fully solid.
- To serve, run warm water over the molds and gently pull out the pops.
Leave a Reply