
As I sunk my spoon into a creamy layer of Oreo bliss, I was reminded of summer nights spent with friends, indulgently savoring desserts that danced on my palate. That’s the magic of this No-Bake Oreo Icebox Cake, where simplicity meets elegance in dessert form. With just a handful of ingredients and a bit of chilling time, you can create an impressive treat that brings smiles at any gathering, from casual barbecues to festive celebrations. Not only is it a breeze to whip up, but it’s also make-ahead-friendly, making your hosting duties that much easier. Plus, it’s fully customizable—try switching up Oreos for a fun twist! Can you feel that chocolatey excitement? Let’s dive into this delicious recipe together!
Why is this the best no-bake dessert?
Effortless Preparation: This No-Bake Oreo Icebox Cake requires minimal effort and skill—making it perfect for any home chef!
Delicious Layers: The soft, creamy filling pairs beautifully with crunchy Oreos, creating a dessert that’s simply irresistible.
Endless Customization: Feel free to enhance it by adding chocolate ganache or experimenting with various flavored Oreos for a fresh twist.
Perfect for Gatherings: Whether it’s a summer barbecue or holiday gathering, this cake is sure to impress your guests and become a new favorite.
Make-Ahead Marvel: Prepare it a day in advance, so you can relax and enjoy your event without last-minute stress.
Elevate your dessert game with this delightful treat, and if you’re looking for more easy ideas, check out our Caramel Brownie Cheesecake or Cheesecake Stuffed Chocolate recipes!
No-Bake Oreo Icebox Cake Ingredients
• The key to a delightful dessert.
For the Cake Layers
- Oreo Cookies – The foundation of this no-bake Oreo Icebox Cake, providing rich chocolate layers. You can substitute with gluten-free chocolate cookies for a gluten-free version.
- Cream Cheese – Offers a creamy texture, enhancing that cheesecake-like richness; opt for low-fat varieties if you’re looking for a lighter option.
For the Whipped Cream Filling
- Heavy Whipping Cream – Creates an airy filling; for best results, use whole cream or coconut cream for a non-dairy alternative.
- Powdered Sugar – Adds sweetness without graininess; no direct substitutes, but granulated sugar blended until fine can work in a pinch.
- Vanilla Extract – Amplifies the creamy flavor; for optimal taste, don’t skip this essential ingredient.
For the Extra Flavor
- Chocolate Syrup – Introduces an extra layer of chocolate delight; switch to homemade chocolate sauce for a personal touch.
- Mini Chocolate Chips – Sprinkle for added chocolatey texture; any small chocolate pieces will do if you’re in a pinch.
For the Garnish
- Crushed Oreos – Adds visual appeal and crunch; sprinkle on top for that beautiful finish—totally optional!
- Whipped Topping – Provides extra stability; go for dairy-free variants if you want a vegan adaptation.
- Chocolate Ganache (optional) – For a luxurious finish, drizzle this delicious topping made from high-quality chocolate!
With these ingredients, you’re on your way to creating a truly mesmerizing No-Bake Oreo Icebox Cake that will leave everyone craving more!
Step‑by‑Step Instructions for No-Bake Oreo Icebox Cake
Step 1: Prepare the Whipped Filling
In a chilled mixing bowl, combine 2 cups of heavy whipping cream, 1 cup of powdered sugar, and 1 teaspoon of vanilla extract. Using an electric mixer, beat on medium-high speed for about 3–5 minutes until soft peaks form. The cream should hold its shape but still be airy. This fluffy mixture will serve as the base of your No-Bake Oreo Icebox Cake.
Step 2: Mix in the Cream Cheese
In a separate bowl, beat 8 ounces of softened cream cheese until smooth. Gently fold this cream cheese into the whipped cream mixture using a spatula, being careful not to deflate the whipped cream. This creates a luscious, creamy filling that adds a delightful richness to the layers of your Oreo Icebox Cake.
Step 3: Spread the First Layer
Grab a 9×13-inch baking dish and spread a thin layer of the whipped cream mixture at the bottom, about 1 cup. This layer acts as a delicious base for your first layer of cookies, ensuring they stick and soak up some of that creamy goodness.
Step 4: Layer the Oreo Cookies
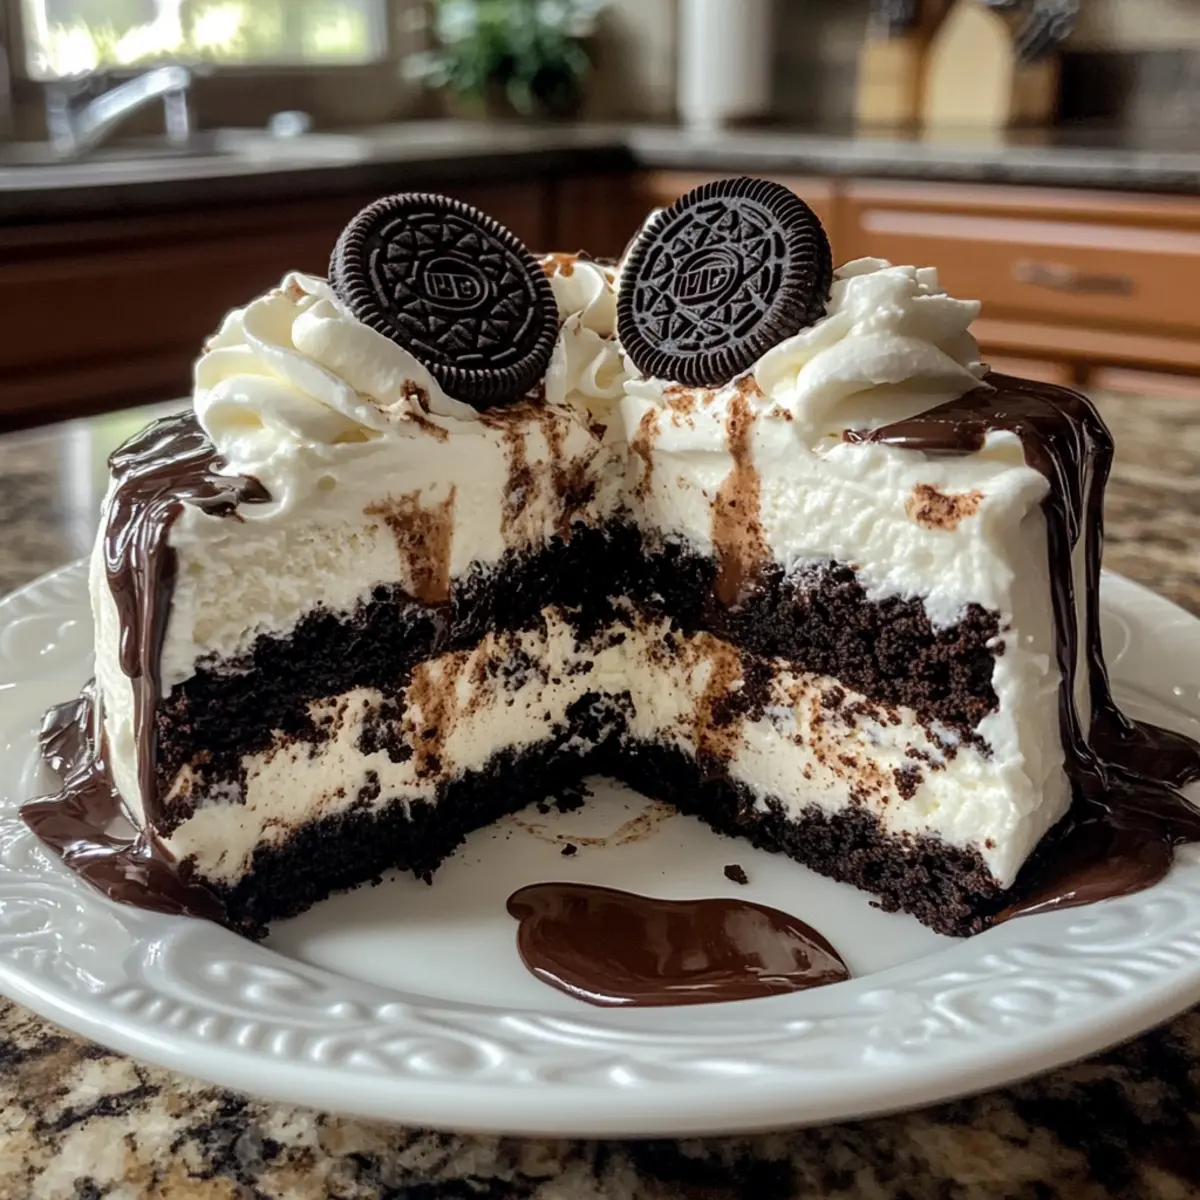
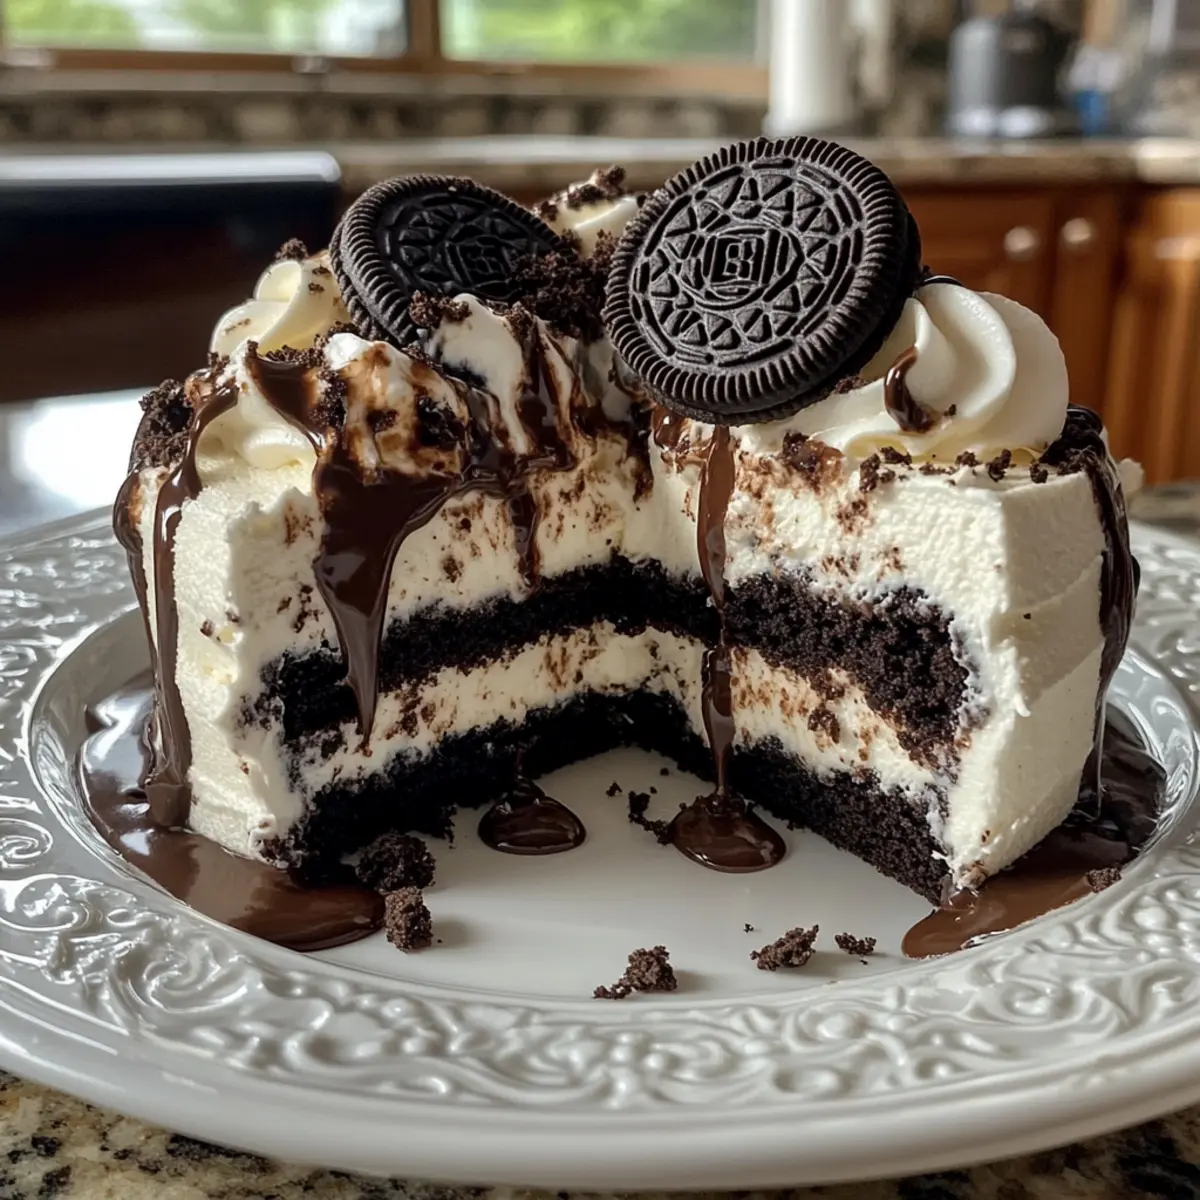
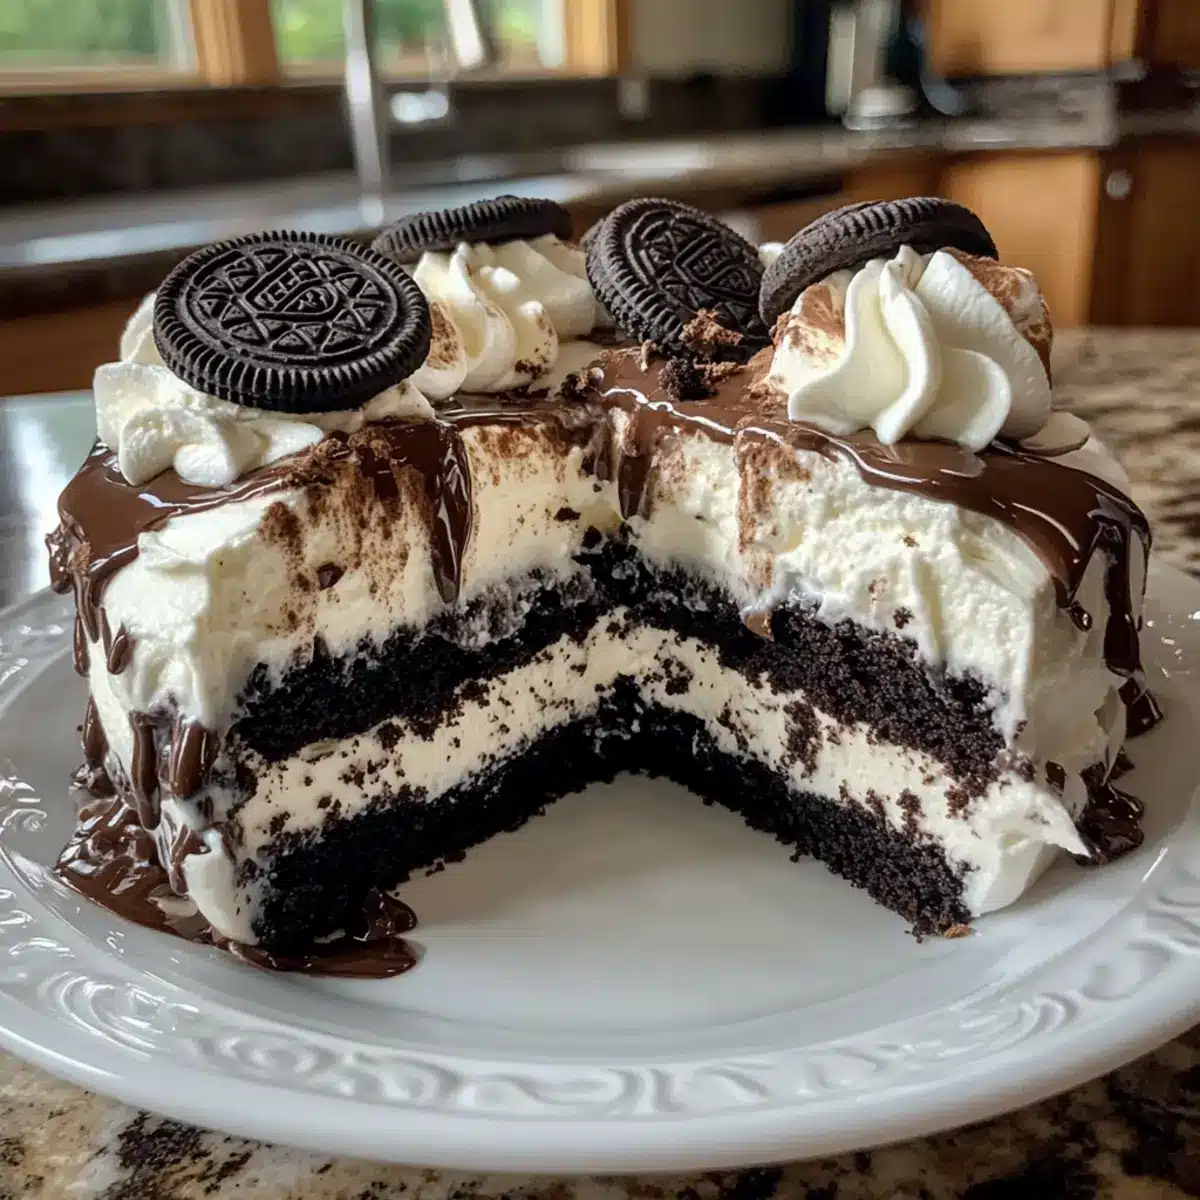
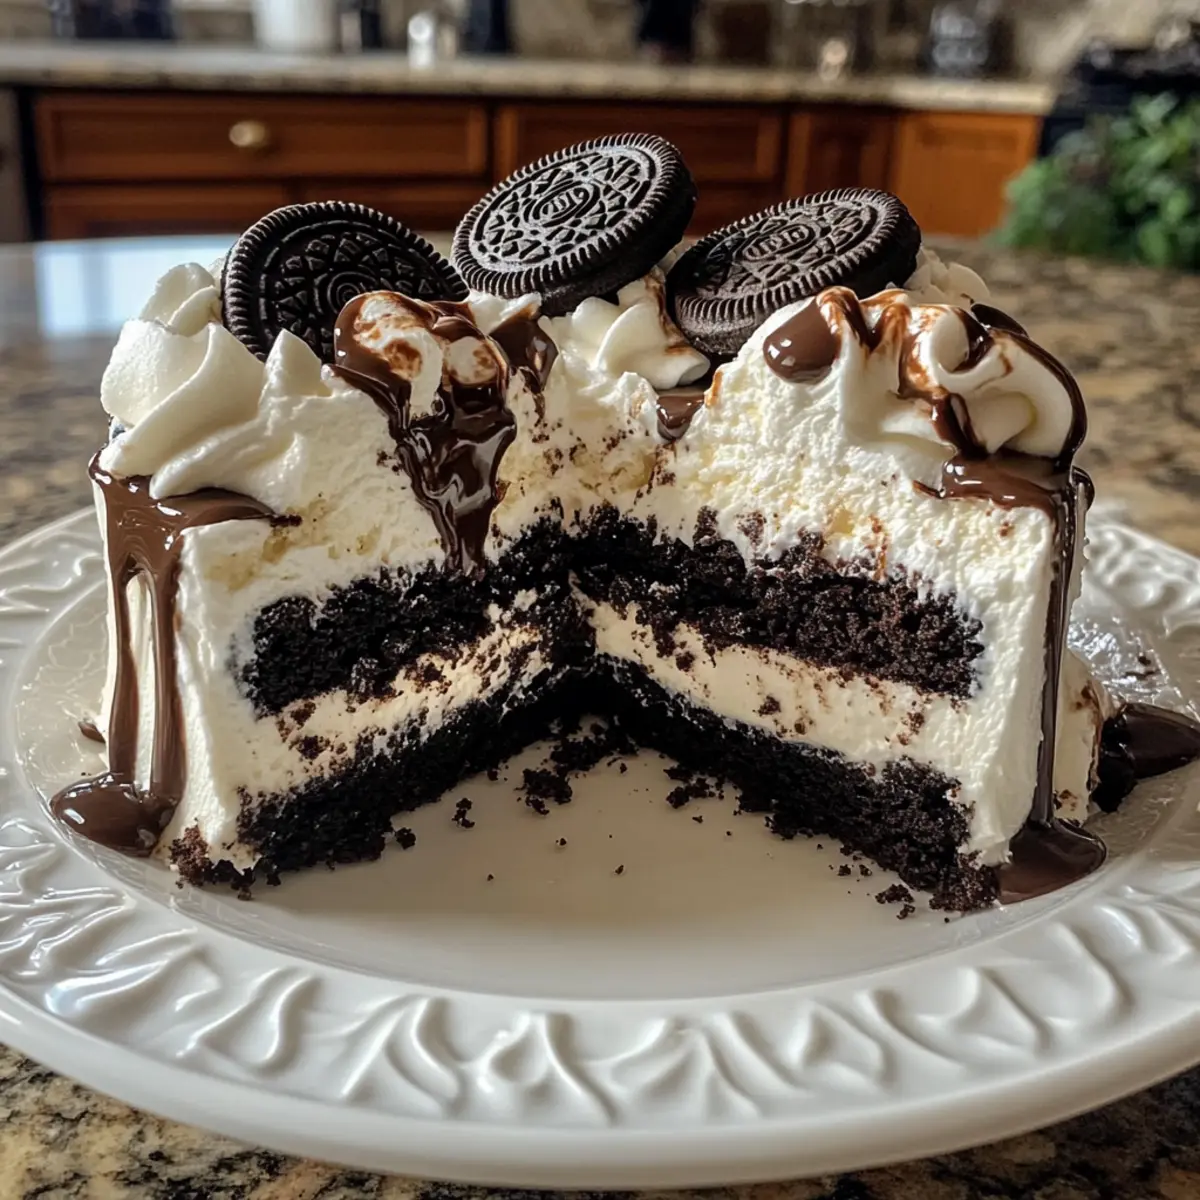
Arrange a single layer of Oreo cookies over the whipped filling, covering the base as much as possible. You can break some cookies to fill in any gaps. This forms the crunchy layer of your No-Bake Oreo Icebox Cake, providing a wonderful textural contrast with the creaminess above.
Step 5: Add the Next Layer of Filling
Spoon another cup of the whipped cream mixture over the Oreo cookies, spreading it evenly. Drizzle with chocolate syrup and sprinkle mini chocolate chips for an extra burst of flavor and texture. This step adds indulgence and enhances the overall chocolatey delight of your cake.
Step 6: Repeat the Layering Process
Repeat the layering process by adding another layer of Oreo cookies, followed by more whipped cream mixture, chocolate syrup, and mini chocolate chips. Continue this until all your ingredients are used up, finishing with a layer of whipped cream on top to create a beautiful final layer.
Step 7: Drizzle with Chocolate Ganache (optional)
For an extravagant finish, pour a cooled chocolate ganache over the top layer of whipped cream. Ensure the ganache isn’t too hot to prevent it from melting the whipped filling. This step adds an elegant touch to your No-Bake Oreo Icebox Cake, enticing everyone with its rich flavor.
Step 8: Chill to Set
Cover the dish with plastic wrap and refrigerate your cake for at least 6 hours, or preferably overnight. Chilling helps the layers meld together and the cookies soften, resulting in a slice that holds its shape and has a delightful, cake-like texture.
Step 9: Garnish Before Serving
Before you’re ready to serve, remove the cake from the fridge and decorate the top with crushed Oreos or additional chocolate chips for a gorgeous finish. This last step not only enhances the flavor but also makes your No-Bake Oreo Icebox Cake visually appealing to guests!
No-Bake Oreo Icebox Cake Variations
Feel free to switch things up with these exciting twists that will make your No-Bake Oreo Icebox Cake even more delightful!
- Chocolate Ganache: Pour a rich chocolate ganache over the top layer for a decadent touch that elevates the overall flavor.
- Peanut Butter Delight: Layer in creamy peanut butter or crushed peanut butter cups for a nutty, indulgent twist that will keep you coming back for more!
- Fruity Freshness: Add layers of fresh strawberries or bananas between the cream and cookies for a refreshing contrast that bursts with flavor.
- Flavored Oreos: Experiment with mint or birthday cake Oreos for a fun twist that brings a little excitement to this classic recipe.
- Coconut Cream: Swap the heavy cream with coconut cream for a tropical vibe that pairs beautifully with the chocolate!
- Crunchy Texture: Incorporate chopped nuts like walnuts or pecans for an added crunch that enhances both flavor and texture.
- Spicy Kick: Add a pinch of cayenne or chili powder to the cream mixture for a surprising warmth that will tantalize your taste buds.
- Milkshake Magic: Blend in some milkshake flavors like coffee or caramel for a unique combination that creates an unforgettable dessert experience.
Don’t forget to check out our delicious Apple Crumb Cake with Cinnamon Apple Drizzle for another scrumptious treat!
Make Ahead Options
These No-Bake Oreo Icebox Cake is a fantastic option for meal prep, allowing you to impress guests without last-minute stress! You can prepare the entire cake up to 24 hours in advance; simply assemble it, cover, and refrigerate. The chocolate sandwich cookies will soak up the cream, creating a deliciously soft texture. To keep everything fresh, be sure to cover the cake tightly with plastic wrap. When you’re ready to serve, just add your crushed Oreos or additional chocolate chips on top for that finishing touch. This delightful make-ahead dessert will save you precious time while ensuring every slice is just as delicious as if it were freshly made!
Storage Tips for No-Bake Oreo Icebox Cake
Refrigerator: Store the No-Bake Oreo Icebox Cake covered with plastic wrap in the fridge for up to 5 days. This keeps it fresh and delicious while allowing the flavors to meld.
Freezer: If you want to keep it longer, you can freeze the cake for up to 1 month. Ensure it’s well-wrapped to prevent freezer burn.
Thawing: To enjoy, simply transfer the frozen cake to the fridge and let it thaw gradually for a few hours or overnight before slicing.
Serving: For best taste, serve chilled and consider garnishing with extra crushed Oreos or chocolate chips right before serving!
Expert Tips for No-Bake Oreo Icebox Cake
- Chill Thoroughly: Refrigerate overnight for best results; this allows the flavors to meld and the cake layers to set perfectly.
- Watch the Whipping: Avoid overwhipping the cream; stop when soft peaks form to maintain a light and airy texture.
- Layer Evenly: Distribute the cookies and filling uniformly; this ensures your slices are neat and visually appealing.
- Customize Wisely: When adding variations like chocolate ganache, let it cool to prevent melting the creamy layers.
- Garnish Generously: Use crushed Oreos or mini chocolate chips before serving to enhance flavor and presentation of your no-bake Oreo Icebox Cake.
What to Serve with No-Bake Oreo Icebox Cake
Dive into a delightful array of pairings that perfectly complement the creamy bliss of your dessert masterpiece.
-
Fresh Berries: The tartness of strawberries or raspberries balances the rich chocolate delight, adding a refreshing burst of flavor.
-
Vanilla Ice Cream: A classic pairing, the creamy coldness of vanilla ice cream contrasts beautifully with the Oreo layers, making each bite divine.
-
Chocolate Milkshake: Rich, thick chocolate milkshakes elevate the indulgent experience and make for a nostalgic treat that echoes childhood joy.
-
Coffee: A warm, robust cup of coffee enhances the flavors in the cake while providing a comforting warmth; it’s the perfect end to a meal.
-
Homemade Whipped Cream: A dollop of extra whipped cream on the side not only looks beautiful but adds an airy lightness to each slice.
-
Peanut Butter Drizzle: For those who love a nutty twist, a drizzle of warm peanut butter adds richness that pairs wonderfully with chocolate.
Elevate your dessert experience with these complementary options, ensuring every mouthful is an unforgettable joy!
No-Bake Oreo Icebox Cake Recipe FAQs
What type of Oreo cookies can I use for this recipe?
You can use classic Oreo cookies for a traditional flavor, but feel free to explore variations like mint or peanut butter Oreos for a fun twist! Just keep in mind that flavored Oreos might change the overall taste profile.
How long can I store the No-Bake Oreo Icebox Cake?
The cake can be stored in the refrigerator covered with plastic wrap for up to 5 days, allowing the flavors to meld beautifully. If you need to keep it longer, you can freeze it for up to 1 month—just be sure it’s well-wrapped to avoid freezer burn.
Can I freeze this No-Bake Oreo Icebox Cake?
Absolutely! Freezing is a great option for longer storage. To freeze, wrap the entire cake tightly in plastic wrap, then in aluminum foil to prevent freezer burn. When ready to enjoy, transfer it to the refrigerator to thaw for several hours or overnight before slicing.
What should I do if my whipped cream doesn’t whip properly?
If your whipped cream doesn’t reach soft peaks, it might be due to the cream temperature or overwhipping. Make sure your heavy whipping cream is chilled and your mixing bowl is also cold—this helps it whip better. If it starts to turn grainy, you may have overwhipped, so go slow and stop when you see soft peaks forming to retain that lightness.
Is this dessert suitable for those with allergies or dietary restrictions?
While this No-Bake Oreo Icebox Cake is vegetarian, it may not be suitable for those with dairy allergies due to the use of cream cheese and heavy cream. For a dairy-free option, you can substitute cream cheese with a dairy-free alternative and use coconut cream instead of heavy whipping cream. Just ensure all other ingredients, like Oreos, are gluten-free if necessary!
What if I want a richer chocolate flavor in the cake?
For a deeper chocolate experience, consider adding chocolate ganache as a topping or even incorporating a chocolate syrup layer between the cookie layers. You can also experiment with using chocolate-flavored Oreos or adding cocoa powder directly into the whipped cream filling for an extra chocolatey kick!
No-Bake Oreo Icebox Cake: Your Ultimate Easy Dessert Delight
Ingredients
Equipment
Method
- In a chilled mixing bowl, combine 2 cups of heavy whipping cream, 1 cup of powdered sugar, and 1 teaspoon of vanilla extract. Beat on medium-high speed for about 3–5 minutes until soft peaks form.
- In a separate bowl, beat 8 ounces of softened cream cheese until smooth. Gently fold cream cheese into the whipped cream mixture.
- Spread a thin layer of the whipped cream mixture at the bottom of a 9x13-inch baking dish, about 1 cup.
- Layer Oreo cookies over the whipped filling, filling as much space as possible.
- Spoon another cup of whipped cream mixture over the cookies, drizzle with chocolate syrup, and sprinkle with mini chocolate chips.
- Repeat layering cookies and whipped mixture until all ingredients are used, finishing with whipped cream on top.
- Drizzle with chocolate ganache for an extravagant finish, ensuring it isn't too hot.
- Cover with plastic wrap and refrigerate for at least 6 hours, preferably overnight.
- Before serving, garnish with crushed Oreos or additional chocolate chips.
Leave a Reply