
Every now and then, a little culinary adventure leads to delightful surprises. These Zesty Key Lime Pie Mini Desserts have quickly become one of my go-to treats, bringing a refreshing burst of summer flavor straight to my kitchen. This no-bake recipe is not only a breeze to whip up, but it also caters to everyone—trust me, with gluten-free and dairy-free options, I can treat all my friends without a second thought! Light, creamy, and just the right amount of tangy, these mini desserts are perfect for both casual gatherings and elegant soirées. With such a quick prep time, you can indulge your creative side while keeping things deliciously simple. Ready to elevate your dessert game? Let’s dive into this zesty recipe!
Why Choose Zesty Key Lime Pie Mini Desserts?
Incredible Flavor: These mini desserts are bursting with zesty key lime flavor, creating a refreshing treat that transports you straight to summer.
No-Bake Convenience: Whip these up in no time without the need for an oven—perfect for busy days or spontaneous gatherings.
Accommodating Options: With gluten-free and dairy-free variations available, everyone can indulge in the delightful taste. If you’re a fan of effortless treats, you might also enjoy our Coconut Lime Fish for a complementary flavor experience!
Elegant Presentation: The layered effect and garnishes make these desserts stunning for any occasion, impressing guests without unnecessary fuss.
Versatile Treat: Customize with various fruits or yogurts for a unique twist—add fresh berries for extra charm!
Whether you’re serving them at a picnic or a dinner party, these zesty bites promise to be a crowd favorite!
Zesty Key Lime Pie Mini Desserts Ingredients
For the Crust
• Graham Cracker Crumbs – Provides the classic crumbly texture; use crushed gluten-free cookies for a gluten-free version.
• Melted Butter – Binds the crust ingredients together to ensure a sturdy base.
• White Sugar – Sweetens the crust, balancing the flavor of the pie.
For the Filling
• Reduced-fat Cream Cheese – Adds creaminess and a rich texture; full-fat can be used for indulgence.
• Low-fat Vanilla Greek Yogurt – Contributes a light tanginess to the filling mix.
• Fat-free Sweetened Condensed Milk – Enriches the filling and adds sweetness; try dairy-free options for lactose intolerance.
• Key Lime Juice – The star ingredient, offering the essential zestiness; fresh key limes yield the best results.
• Green Food Coloring (optional) – Enhances visual appeal; a few drops can make the dessert pop.
Embark on this no-bake journey of flavor with these Zesty Key Lime Pie Mini Desserts that everyone can enjoy!
Step‑by‑Step Instructions for Zesty Key Lime Pie Mini Desserts
Step 1: Prepare the Crust
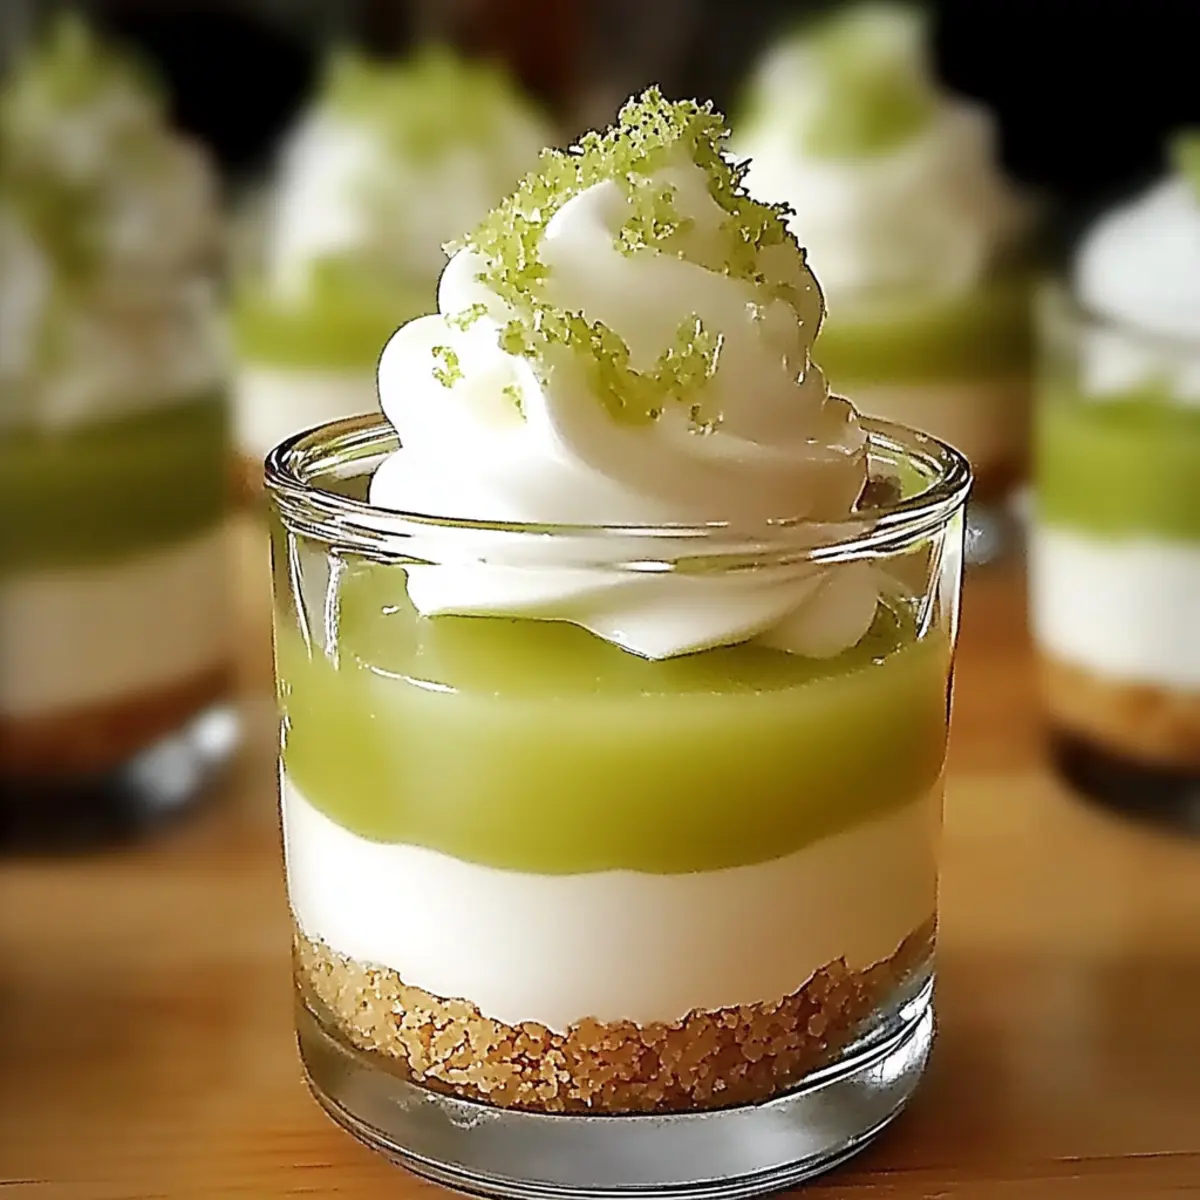
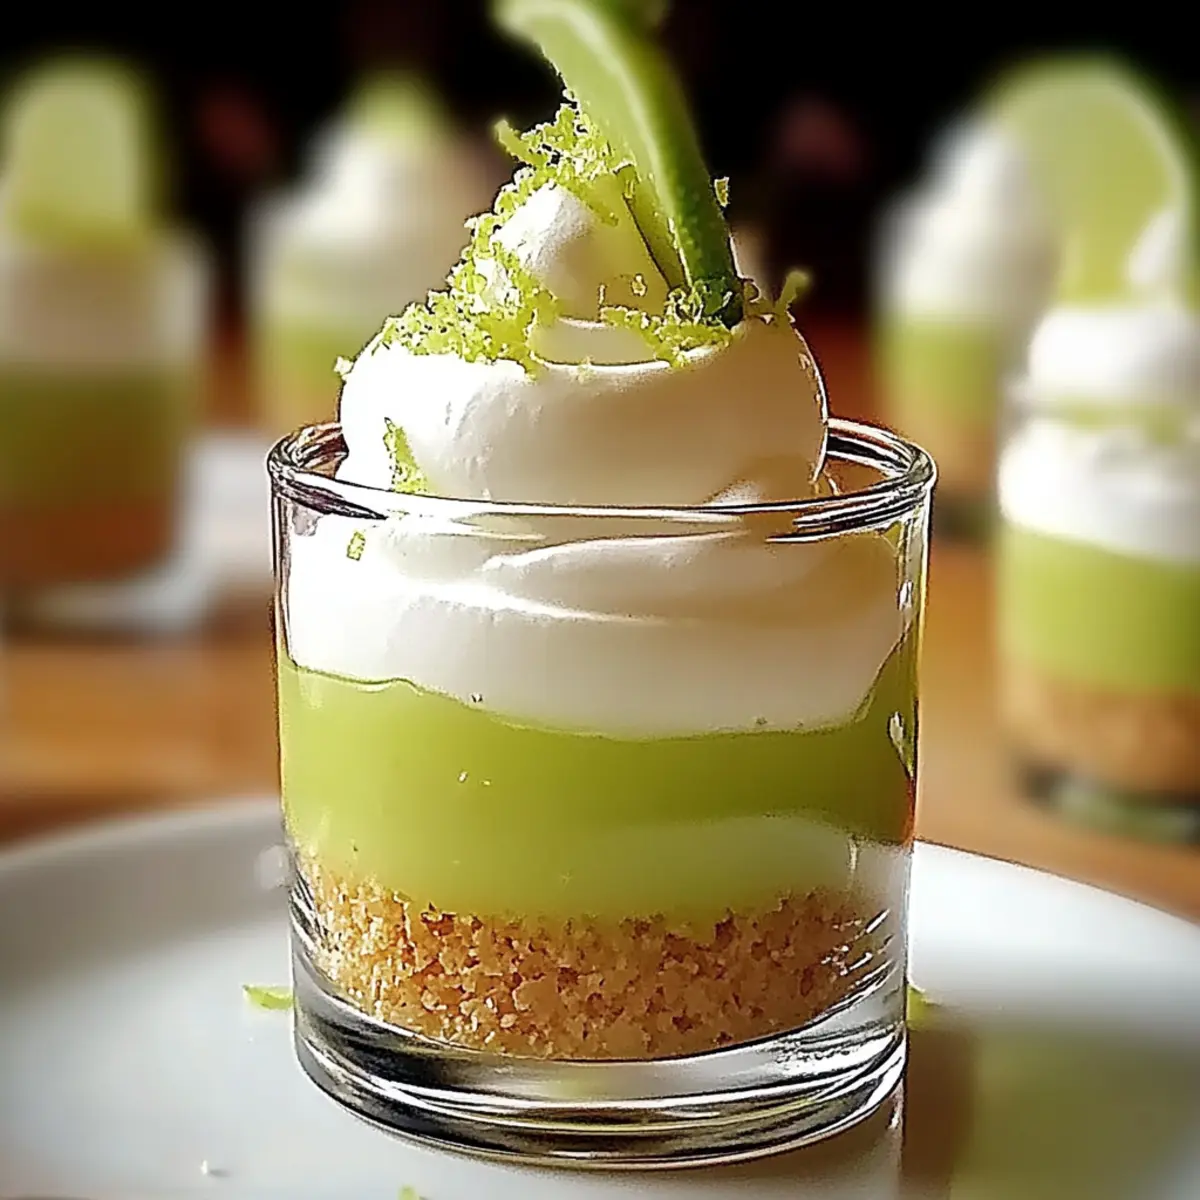
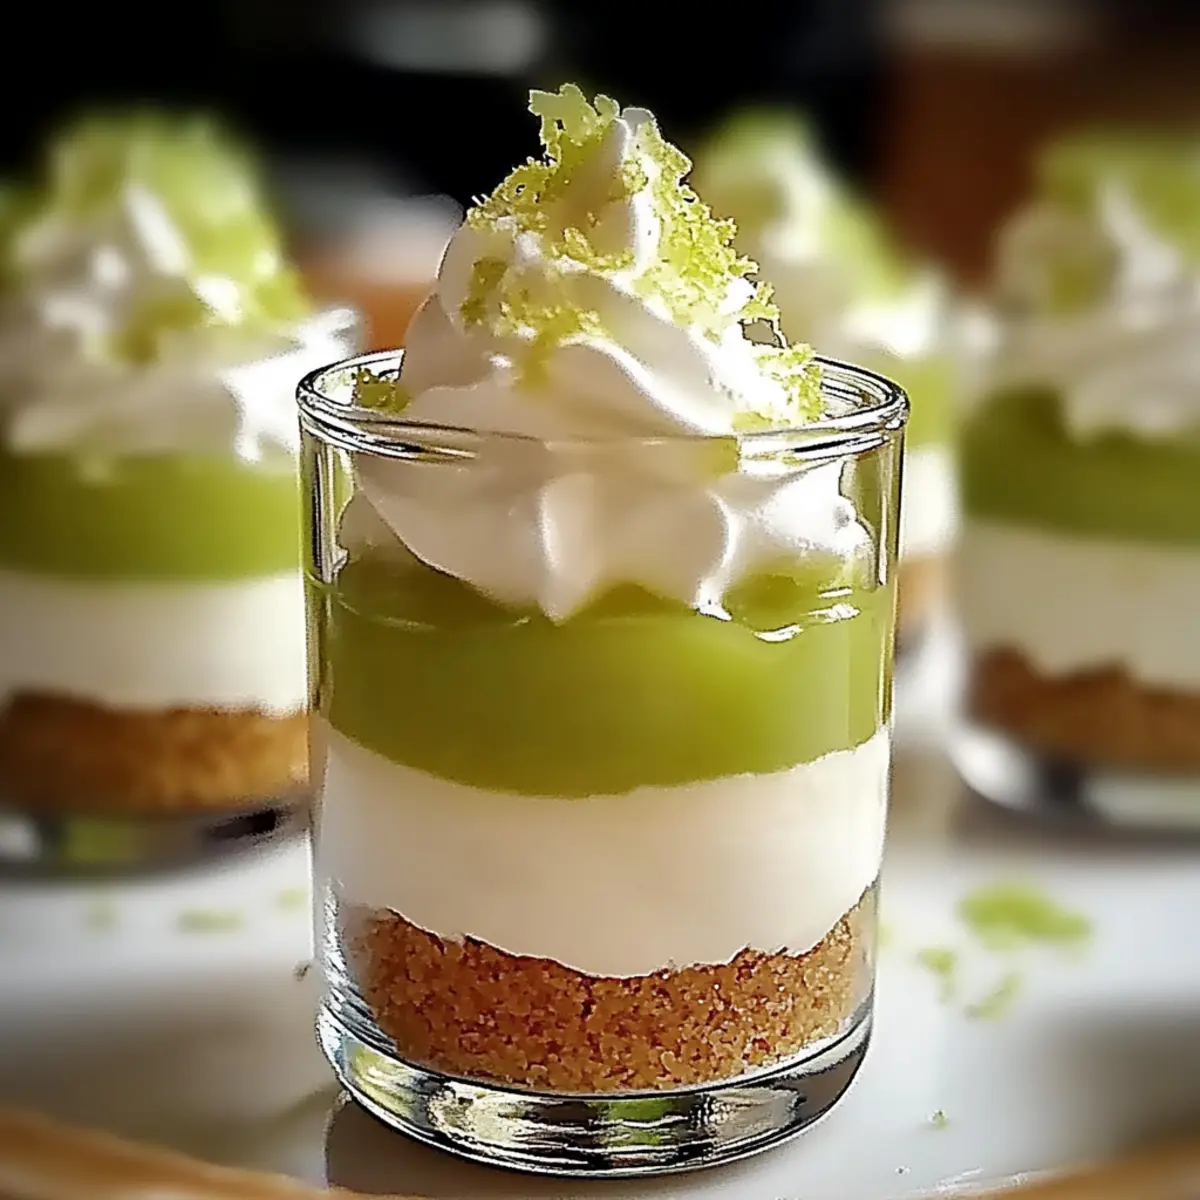
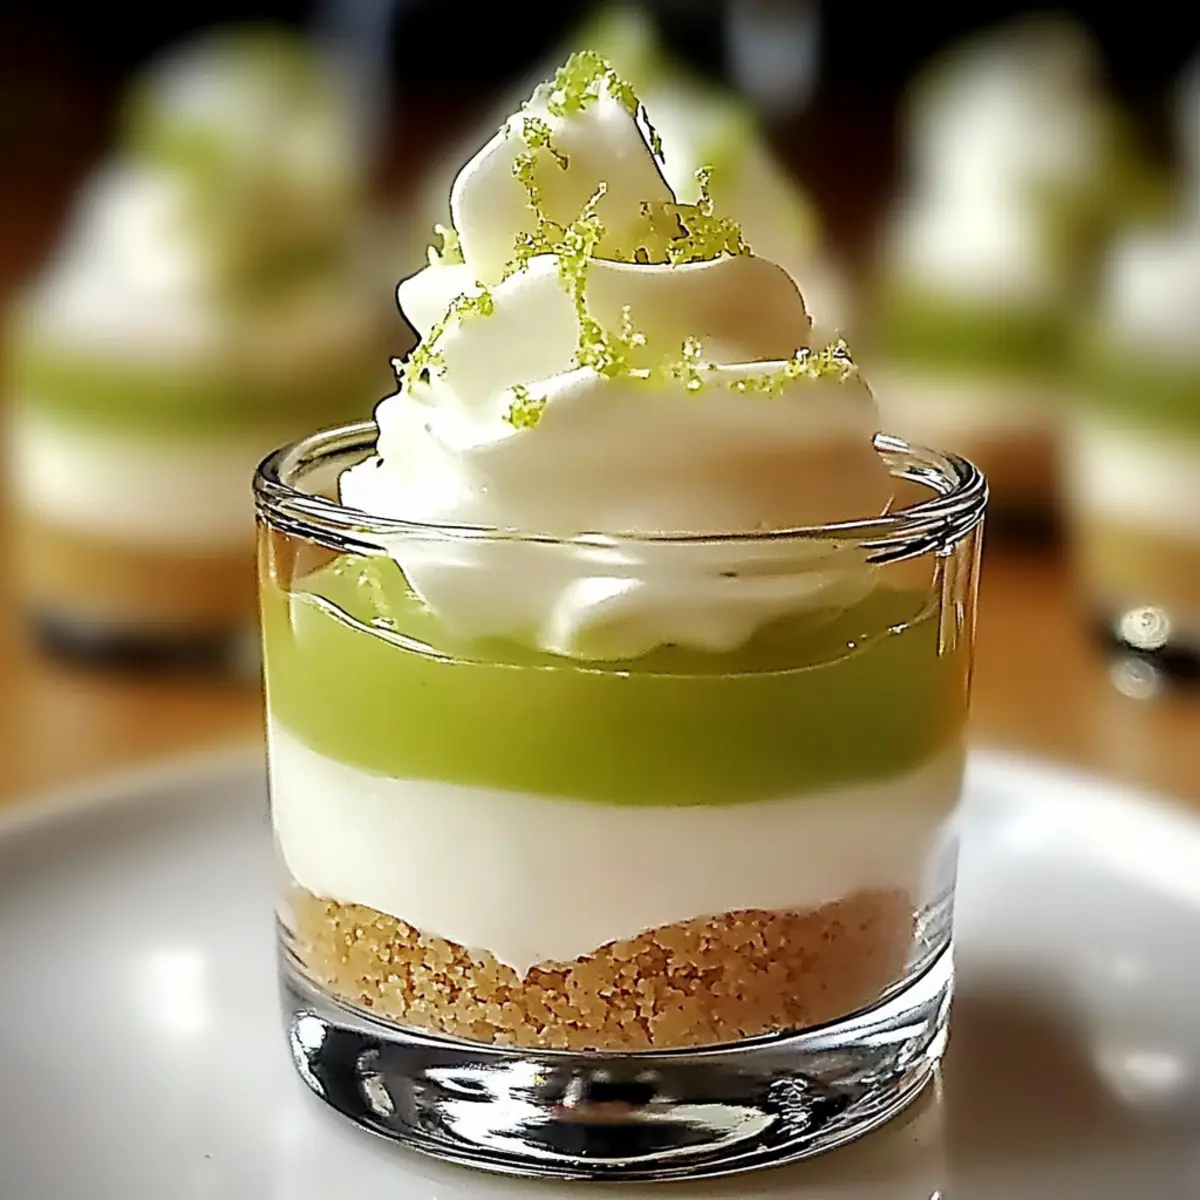
In a mixing bowl, combine graham cracker crumbs, melted butter, and white sugar until the mixture resembles wet sand. This should take about 2-3 minutes of stirring. Then, press the crumb mixture firmly into the bottom of mini dessert glasses to create an even layer. Aim for a thickness of about 1/4 inch to ensure a sturdy base.
Step 2: Make the Filling
In a separate bowl, beat softened cream cheese and low-fat vanilla Greek yogurt using a hand mixer until smooth and creamy—this should take around 2-3 minutes. In another bowl, whisk together the fat-free sweetened condensed milk and key lime juice until well combined and smooth. Gently fold this mixture into the cream cheese blend until fully incorporated, being careful not to overmix.
Step 3: Color the Filling
Divide the filling mixture evenly into two bowls. In one bowl, add a few drops of green food coloring and mix until the desired color is achieved. This adds a vibrant touch to your Zesty Key Lime Pie Mini Desserts. Keep the second bowl plain to create a lovely layered effect when assembling the desserts.
Step 4: Assemble Desserts
Using a piping bag or spoon, carefully layer the fillings into the prepared dessert glasses. Start with a layer of the plain filling, then add a layer of the colored filling on top. Repeat this process until the glasses are filled, remembering to leave a little space at the top for garnishing. Aim for a beautiful striped effect to entice the eyes!
Step 5: Chill
Cover the assembled Zesty Key Lime Pie Mini Desserts with plastic wrap and refrigerate for at least 2 hours. This chilling time allows the filling to set properly and develop its flavors. You’ll know they’re ready when the filling feels firm to the touch but still has a slight jiggle.
Step 6: Garnish
Once chilled, remove the mini desserts from the refrigerator and add your garnishes. Top each dessert with a dollop of whipped cream, a sprinkle of lime zest, and a few crushed graham crackers for extra flavor and crunch. These final touches elevate the presentation and make your Zesty Key Lime Pie Mini Desserts irresistible!
Make Ahead Options
These Zesty Key Lime Pie Mini Desserts are a fantastic choice for meal prep, allowing you to whip up a delightful treat ahead of time. You can prepare the crust and filling up to 3 days in advance. To do this, mix the crust ingredients and press them into glasses, then cover and refrigerate. For the filling, combine the cream cheese, yogurt, condensed milk, and lime juice, then store it in an airtight container in the refrigerator. When you’re ready to serve, simply layer the filling into the crust and let the desserts chill for at least 2 hours before garnishing. This way, your mini desserts will taste just as fresh and delicious, saving you time for other activities!
Zesty Key Lime Pie Mini Desserts Variations
Feel free to get creative with these delightful mini desserts and make them your own!
- Gluten-Free Version: Use gluten-free graham crackers or almond flour for the crust to accommodate dietary needs.
- Dairy-Free Option: Substitute reduced-fat cream cheese with dairy-free cream cheese for a lactose-free dessert option.
- Fruity Twist: Incorporate fresh fruit layers like strawberries or blueberries between the key lime filling for an exciting flavor contrast.
- Rich & Creamy: For an indulgent experience, opt for full-fat cream cheese, enhancing the creaminess of the filling.
- Extra Citrus Zing: Add a splash of fresh orange juice to the filling for a bright and zesty flavor boost that’ll awaken your taste buds.
- Flavored Yogurt: Experiment with coconut or lemon Greek yogurt instead of vanilla for fun variations that keep your desserts fresh.
- Spiced Kick: Add a pinch of cayenne or chili powder into the filling for a surprising tangy heat sure to spice things up!
- Layered Delight: Create alternating layers of key lime and coconut filling for a tropical twist—who wouldn’t love that?
Whether you’re preparing these for a casual get-together or an elegant evening, you can make them a true reflection of your personality! And while you’re at it, you might enjoy pairing them with our delicious Mini Pumpkin Cheese for a well-rounded treat platter!
Expert Tips for Zesty Key Lime Pie Mini Desserts
-
Soften Cream Cheese: Ensure your cream cheese is at room temperature before mixing to avoid unsightly lumps in your filling for a smooth texture.
-
Don’t Overmix: Mix the filling gently to prevent air incorporation, which could lead to a rubbery texture in your Zesty Key Lime Pie Mini Desserts.
-
Chill Thoroughly: Allow the mini desserts to chill for at least 2 hours; this ensures the filling sets properly and reaches its optimal creamy consistency.
-
Layer Neatly: Use a piping bag for layering the fillings—it helps create those beautiful stripes and adds elegance to your dessert presentation.
-
Fresh Ingredients: Always opt for fresh key lime juice for the best flavor; it truly enhances the zesty profile of your mini desserts.
-
Customize Garnishes: Experiment with various toppings like toasted coconut or berries to add more flavor and visual appeal to your delightful treats.
Storage Tips for Zesty Key Lime Pie Mini Desserts
- Refrigerator: Store mini desserts in an airtight container for up to 3 days to maintain freshness and flavor.
- Make-Ahead: Prepare the crust and filling in advance; assemble the desserts just before serving to save time and ensure optimal texture.
- Freezer: Unassembled mini desserts can be frozen for up to 1 month. Thaw in the fridge overnight before serving for the best results.
- Reheating: No reheating needed; enjoy these zesty treats cold for a refreshing experience.
What to Serve with Zesty Key Lime Pie Mini Desserts
Elevate your dessert spread with vibrant pairings that delight the senses and complement these zesty treats.
- Coconut Whipped Cream: Light and airy, this topping pairs perfectly, adding a tropical twist that enhances the key lime flavor.
- Fresh Berries: Strawberries or blueberries introduce a sweet counterbalance, creating a beautiful color contrast on the plate.
- Chilled Mint Tea: The refreshing notes of mint tea cleanse the palate, making every bite of dessert feel even more indulgent.
- Lime Sorbet: A scoop of this tangy sorbet can intensify the citrus flavor while adding a cool texture to your dessert experience.
- Mini Fruit Tarts: These delicate pastries add crunch and layers of fruity sweetness, creating a dynamic dessert table alongside the mini pies.
- Chocolate-Dipped Pretzels: The salty-sweet combination brings a delightful crunch to the mélange, offering a playful contrast to the creaminess of the desserts.
- Sparkling Water with Lime: A fruity, bubbly drink can refresh the taste buds and harmonizes with the zesty flavor of the key lime pie.
- Almond Biscotti: The crunchy texture and nutty flavor of biscotti provide a nice contrast and are perfect for those who enjoy a little dunking!
With these delightful pairings, your gathering will be both elegant and memorable, focusing on fresh flavors that dance in harmony with your Zesty Key Lime Pie Mini Desserts.
Zesty Key Lime Pie Mini Desserts Recipe FAQs
How do I select ripe key limes for the best flavor?
Absolutely! When choosing key limes, look for limes that are firm and slightly heavier for their size, indicating juiciness. Their skin should be smooth and shiny, without any dark spots. A little give when gently squeezed is a good sign that they are ripe and ready to squeeze.
What’s the best way to store leftover mini desserts?
It’s easy! Store your Zesty Key Lime Pie Mini Desserts in an airtight container in the refrigerator for up to 3 days. This helps keep them fresh and maintains their delightful flavor. Make sure they’re covered well to prevent them from absorbing any other odors in the fridge!
Can I freeze these mini desserts, and how should I do that?
Yes, you can! To freeze unassembled mini desserts, prepare the crust and filling separately and store them in airtight containers. They can be frozen for up to 1 month. When you’re ready to serve, simply refrigerate them overnight to thaw. Once thawed, assemble the desserts as per the recipe for the best results.
What should I do if my filling is too runny?
Very! If your filling ends up too runny, it might be due to overmixing or using too much liquid. To fix a runny filling, consider adding a bit more softened cream cheese and gently folding it in. Alternatively, chill the filling longer to help it set. Just remember, don’t overmix to avoid incorporating air!
Are there any allergy considerations for this recipe?
Absolutely! This recipe can cater to different dietary needs. You can make it gluten-free by using gluten-free graham cracker crumbs and dairy-free by substitute cream cheese and sweetened condensed milk with dairy-free alternatives. However, please ensure that the ingredients you choose are safe for those with specific allergies.
Can I use a different type of yogurt in the filling?
Yes, the more the merrier! While low-fat vanilla Greek yogurt works well, you can experiment with other flavors like coconut or lemon Greek yogurt for added zest. Just ensure that any replacements maintain a similar consistency to achieve that delightful creamy texture in your Zesty Key Lime Pie Mini Desserts.
Zesty Key Lime Pie Mini Desserts for Refreshing Treats
Ingredients
Equipment
Method
- In a mixing bowl, combine graham cracker crumbs, melted butter, and white sugar until the mixture resembles wet sand. Press the crumb mixture firmly into the bottom of mini dessert glasses.
- In a separate bowl, beat softened cream cheese and low-fat vanilla Greek yogurt using a hand mixer until smooth and creamy.
- In another bowl, whisk together the fat-free sweetened condensed milk and key lime juice until well combined. Gently fold this mixture into the cream cheese blend.
- Divide the filling mixture into two bowls. In one bowl, add a few drops of green food coloring and mix. Keep the second bowl plain.
- Layer the fillings into the prepared dessert glasses, starting with the plain filling and then adding the colored filling. Repeat until the glasses are filled.
- Cover with plastic wrap and refrigerate for at least 2 hours for the filling to set.
- Once chilled, add garnishes such as whipped cream, lime zest, and crushed graham crackers.
Leave a Reply